No edit summary |
|||
| Line 7: | Line 7: | ||
==Tips and tricks== |
==Tips and tricks== |
||
===Armour and Weapons=== |
===Armour and Weapons=== |
||
| − | Remember to keep your equipment up to scratch. As you train, you will start to be able to use better and more powerful combat items. Once you can use a better combat item, try to save up for it. (The ideal path to take for your choice of armour goes as: iron, steel, [[Black weapons|black]], [[Mithril equipment|mithril]], [[Adamant armour|adamant]], [[Rune armour|rune]]. The armour sets from [[Bronze armour|bronze]] to [[Steel armour|steel]] are actually fairly lack lustre and unnecessary, provided you only train on less powerful monsters like [[goblins]].) It is strongly recommended that you wield the |
+ | Remember to keep your equipment up to scratch. As you train, you will start to be able to use better and more powerful combat items. Once you can use a better combat item, try to save up for it. (The ideal path to take for your choice of armour goes as: iron, steel, [[Black weapons|black]], [[Mithril equipment|mithril]], [[Adamant armour|adamant]], [[Rune armour|rune]], and dragon. The armour sets from [[Bronze armour|bronze]] to [[Steel armour|steel]] are actually fairly lack lustre and unnecessary, provided you only train on less powerful monsters like [[goblins]].) It is strongly recommended that you wield the worst weapon and armour available to you. A better weapon means less damage and deacreased accuracy, which results in less experience gained in a greater period of time. Better armour reduces the likelihood of enemies damaging you, which allows you to stay at a training spot for a longer time with less food. A [[Scimitar]] is recommended for melee training as it has an extremely fast attacking speed and decent attack and strength bonuses. [[Two-handed swords]] are often used in PvP combat because of their ability to inflict larger amounts of damage in a single hit, but are not recommended for training due to their slow speed and incompatibility with shields. It is also advised to wear an [[Amulet of power|Amulet of Power]] , as it will give you about half as much for an [[Amulet of Strength]] (+69 in every attack style), but as well gives a better boost than the any other f2p amulet. |
===Inventory and Drops=== |
===Inventory and Drops=== |
||
Revision as of 20:00, 22 June 2011
This melee training guide will help you raise your combat level. It will explain which monsters are the best to kill at a certain level, providing the pros and cons of training on each monster. This guide is for free players.
Tips and tricks
Armour and Weapons
Remember to keep your equipment up to scratch. As you train, you will start to be able to use better and more powerful combat items. Once you can use a better combat item, try to save up for it. (The ideal path to take for your choice of armour goes as: iron, steel, black, mithril, adamant, rune, and dragon. The armour sets from bronze to steel are actually fairly lack lustre and unnecessary, provided you only train on less powerful monsters like goblins.) It is strongly recommended that you wield the worst weapon and armour available to you. A better weapon means less damage and deacreased accuracy, which results in less experience gained in a greater period of time. Better armour reduces the likelihood of enemies damaging you, which allows you to stay at a training spot for a longer time with less food. A Scimitar is recommended for melee training as it has an extremely fast attacking speed and decent attack and strength bonuses. Two-handed swords are often used in PvP combat because of their ability to inflict larger amounts of damage in a single hit, but are not recommended for training due to their slow speed and incompatibility with shields. It is also advised to wear an Amulet of Power , as it will give you about half as much for an Amulet of Strength (+69 in every attack style), but as well gives a better boost than the any other f2p amulet.
Inventory and Drops
Find a good balance of food to bring. Filling up with food may sound good for training, but inventory space may be needed for potential drops, especially against low-level monsters where food is rarely consumed. If you are looking to make money while training, remember to consider the cost of the food you bring. Salmon and tuna are two of the best foods for training, as lobsters and swordfish have high prices due to their extensive use in player-vs-player activities. Teleportation runes, an Explorer's Ring, or a Ring of Kinship are recommended for training in areas with aggressive and/or high-level monsters. If a monster gets a lucky streak and manages to hit you hard, you may find yourself with only a small amount of lifepoints, and a method of quick escape may be necessary. Since combat experience is based on damage dealt, strength potions are recommended for players who can afford them.
Remember also to collect bones! While collecting bones is tedious, they can be buried for Prayer experience, or sold for 266 coins on the Grand Exchange, for a total of 7448 coins per inventory. Big bones can be buried for even more prayer experience, or a full inventory of big bones can be sold for 5684 coins!
A suggested inventory for training on Karamja island. Lobsters as food, a few free slots and a lobster pot to catch lobsters
Attack styles
Train Attack, Strength, and Defence as you see fit – this preference is different for every player. Generally, high Attack will be vital against opponents with high defence as it increases accuracy; high Strength will be best if you want to hit harder; and high Defence will alleviate the need for food, as you will be hit less often. If you're not sure what to raise, try raising them equally. This method works extremely well in the long run. For most training methods, raising Strength, Attack, and then Defence will provide the fastest experience, although you may want to train attack to a decent level first to increase your chances of hitting the monster before you raise your strength level.
The levels below refer to individual combat stat levels, not your overall combat level. (Ex. A player training a level 25 Strength would refer to the section titled "Level 16 to 30.")
Level 1 to 15
NOTE: Due to the Quest, Blood Pact, having been released, it is advisable for players to complete the Quest as it gives 2 attack, defence, strength, magic and ranged just by killing the three Zamorakians. Players may also try out Swept Away for additional experience(Level of skill*10) in Attack, Defence or Strength.
1. Kill Goblins across the bridge near Lumbridge.
The goblin house is on the east side of the River Lum.
Combat level: 2
Advantages:
- There are many goblins wandering around.
- The fishing spots nearby are good sources of food. There are shrimp fishing spots in the Lumbridge swamp and a crayfish fishing spot as well. Additionally, there are fishing spots around the bridge.
- A General store is nearby. Selling any unwanted loot for coins there will help in earning money for weapons and armour later. Note: The general store usually pays a lower price than is found on the Grand Exchange.
- Goblins have low life points, meaning drops are more frequent.
- Drops Grapes occasionally which provides a good amount of money for new players
Disadvantages:
- The area may be crowded. Many new players prefer to train around this area, as it is very convenient at lower levels.
- Goblins are rather accurate for their level.
Tips:
- Goblins sometimes drop goblin mail. Save three of these for the Goblin Diplomacy quest.(This is not necessary, as you can get three goblin mails in Goblin Diplomacy)
- There is a broken-down shack near the fishing area. Inside this shack is an iron dagger respawn.
- It may prove useful to do Cook's Assistant and The Blood Pact (quests) before training anywhere, because you will receive food (20, noted),equipment, and experience to level up your combat skills.
2. Kill Cows south of Falador, near Beefy Bill, or east of Lumbridge.
A Cow
Combat level: 2
Advantages:
- Cows drop raw beef, which can be cooked to be used as food or it sold at the Grand Exchange for 829gp each.
- Beefy Bill can deposit raw beef, flour and cowhides for a 10% commission (if you give him 10 cowhides, he will bank 9 and keep 1. Beware, however, if you give him 11 hides, he will bank 9 and keep 2). This can result in great profit for low level players.
- Cows are fairly inaccurate.
- Respawns are fast.
Disadvantages:
- Extremely popular. Sometimes the spots are so crowded that players have to compete to attack the cows.
- At Beefy Bill's, cow respawns are spaced far apart.
- He will take some of your cowhides if you bank through him.
Tips:
- It is best to keep the cowhides and sell them for a high amount at the Grand Exchange. Players can easily buy Iron, Black, Mithril, or even Adamant equipment with several inventories of cowhides.
- It is recommended to use Beefy Bill's area on a less populated world, as you will have the area to yourself.
3. Kill Chickens at the farm opposite the Lumbridge cow field.
A Chicken
Combat level: 1
Advantages:
- Chickens are nearly harmless.
- Raw chickens are a good source of food.
- Feathers are stackable and come in stacks of 5, 10, and 15, worth 10 coins each on the Grand Exchange.
- Rather swift respawn rate.
Disadvantages:
- The area may be crowded, as it is a popular macro location.
- Poor experience for players who can deal at least 30 damage in one blow.
Tips:
- A Bronze hatchet can be found at some chicken farms to help make a fire.
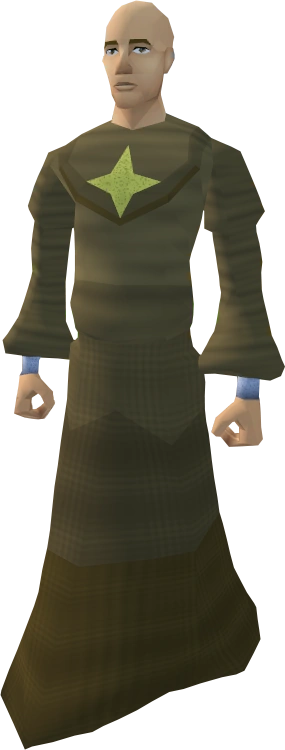
4. Kill men or women found anywhere in RuneScape.
A Man
Combat level: 2
Advantages:
- They do not hit very often, and their life points are high for their level.
- They have decent drops for beginners.
- They often congregate in cities and towns, so it is easy to find them.
Disadvantages:
- Can pack a mean punch on low leveled or unequipped players.
- Spots with fast respawns are crowded.
Tips:
- Try find a low populated world and go to Edgeville house, there are more men at one point.
5. Kill Seagulls on the pier in Port Sarim.
The Port Sarim docks where seagulls can be found
Combat level: 2 or 3
Advantages:
- Seagulls have high lifepoints and rarely deal damage.
- There is a bank box by the monks where you can bank bones to either sell or bury for Prayer experience.
Disadvantages:
- No drops other than bones.
- Even the slightest bit of competition may make this area inefficient for training.
Tips:
- If you are a level 3-10, it is advised not to attack level 3 Seagulls, as they have a bit higher Defence than level 2 Seagulls.
6. Kill Monks found in the Monastery near Edgeville.
A Monk
Combat level: 5
Advantages:
- They have high Constitution, low Defence, and do not hit hard.
- There is a plot of cabbages in the monastery garden which can be used as a food source.
- They will heal you if you talk to them.
- They are located near a bank in Edgeville.
- There is an altar nearby (31 Prayer needed).
Disadvantages:
- They only drop bones.
- They will not heal you if you have recently attacked one of their order.
7. Kill Muggers in the dungeon south of Port Sarim, or at the Stronghold of Player Safety.
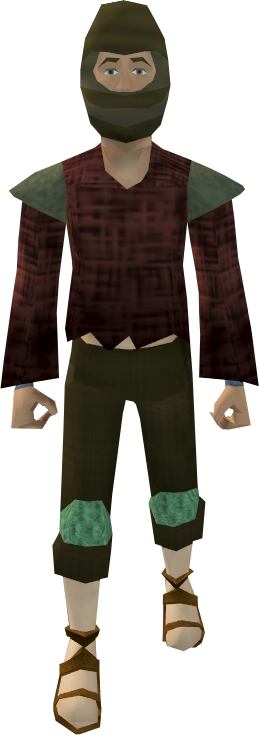

A Mugger
Combat level: 6
Advantages:
- They will automatically attack you unless you are above level 12 combat, or using the spot south of Port Sarim.
- Good drops for their level.
Disadvantages:
- Their attacks are extremely accurate for their level so bring some food and armour if you want to stay here for a long time.
- Fairly low life points.
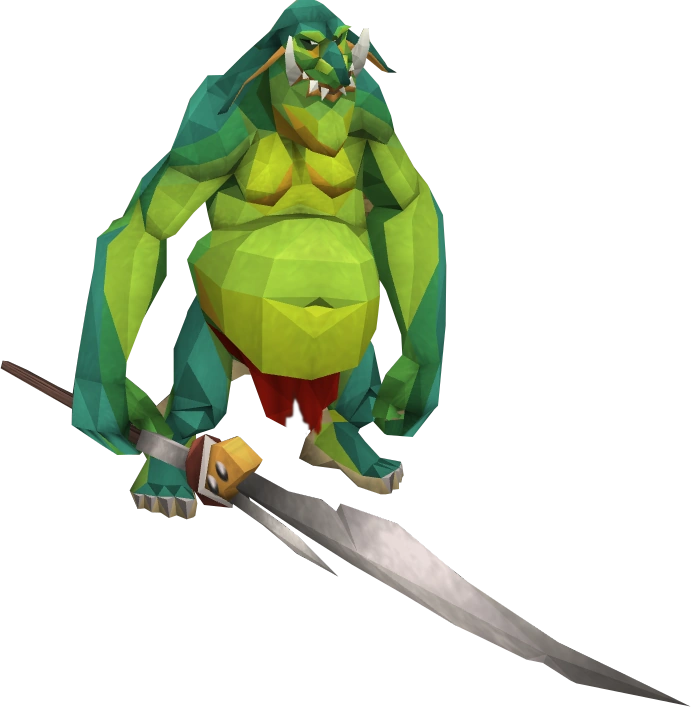
8. Kill Goblins west of Lumbridge or east of Gunnarsgrunn.
A Goblin
Combat levels: 2, 5
Advantages:
- There are banks by either of the two aforementioned locations.
Disadvantages:
- Goblin attacks are quite accurate.
- Players often kill steal.
9. Kill low level monsters in the Stronghold of Security (Level 1). Combat levels: 1-5 (It is strongly advised not to attack any monsters over level 5.)
Advantages:
- There are a lot of monsters in one area.
- The War Gates can be used for easy escape.
Disadvantages:
- It can get quite crowded.
- A lot of the monsters can hit quite accurately and hard.
Level 16 to 30
By this point, you should have Steel armour (5 Defence) and a Steel weapon (5 Attack), or even Black equipment if your Attack or Defence level is 10. If you are rich enough and have the right stats (20 Attack or Defence), go for Mithril equipment!
Many of these monsters have higher levels, so they may be so powerful that they cause a higher amount of damage per hit. Watch out for red splats having a greater number than "20". Some of the fiercest of these can splat "40"'s, or perhaps even more.
It is recommended to still stick with killing lower levelled monsters, but if you want more of a challenge, then...
1. Kill Cockroach drones in the Stronghold of Player Safety.

A Cockroach drone
Combat level: 8
Advantages:
- The area is far from crowded.
- They have 110 HP, which is an easy kill at level 16 Combat or higher.
- Very good drops for their level, including elemental Runes (3 - 6 at a time), noted Coal, between 10-40gp, Limpwurt roots, Red Spider eggs, and last but certainly not least, uncut gems (you can sell them at the Grand Exchange or use them to train Crafting)!
- They're not aggressive so you do not need to worry about finding a quick exit on normal worlds.
- Just south of the Stronghold of Player Safety is Gunnarsgrunn, and the large hall at the northern part of the village has cooked meat and beer spawns if you get low on health.
Disadvantages:
- They do not drop bones.
- Accurate attacks for their level, lower levels should get food before entering. WARNING: They may cause more than one injury with a single attack.
- If you haven't entered the Stronghold of Player Safety before, you have to go through the start of the activity.
- Some parts are multi combat areas, thus meaning other players can steal your kill.
Tips:
- Do the activity first, you get 10000 coins and Safety gloves once you've finished. What's better than easy money?
- There are also Muggers inside here, so you can start on them, move up to the Cockroach drones.
- Do not even try attacking bigger cockroaches, not even from safespot (workers may trap you inside your spot and soldiers have a VERY dangerous acid ranged shot even for higher leveled players).
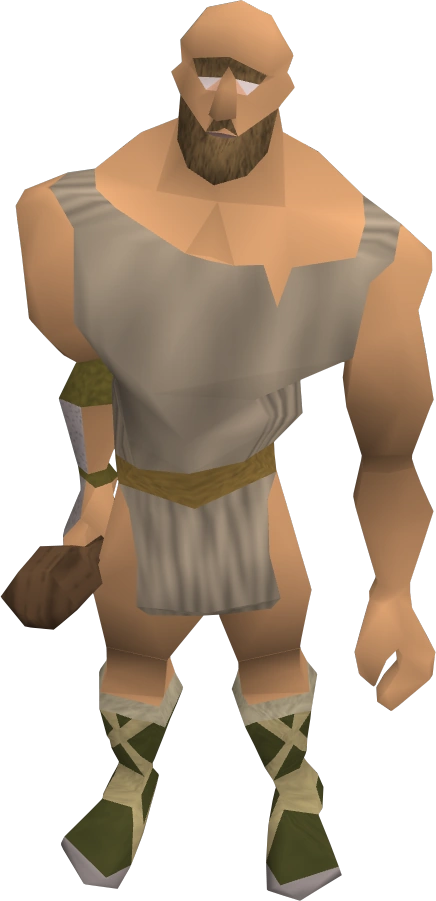
2. Kill Barbarians in Gunnarsgrunn.
A Barbarian
Combat level: 9 or 10
Advantages:
- They do not have very high Defence.
- Players may increase their strength and constitution a bit with the beer at the Longhall tables.
- There are fishing spots and cooking fires, which are useful if you can catch trout or salmon. NOTE: On most free-to-play worlds as well as crowded pay-to-play worlds, there will be fishers at the fishing spot near the bridge to Varrock who will give free fish, either cooked or raw depending on whether or not they are training only fishing or fishing and cooking.
- They will sometimes drop rare items like uncut diamonds.
Disadvantages:
- It is possible that you could accidentally get into a fight with multiple barbarians.
- They use different attack styles.
- Although a Barbarian's defence is low, it will still be difficult if you have a low Combat level.
- The Longhall is crowded by rangers.
- This is a multi-combat area, and so people may attack the barbarian you are attacking.
Tips:
- Do not underestimate these guys. They are pretty tough opponents and vary in level.
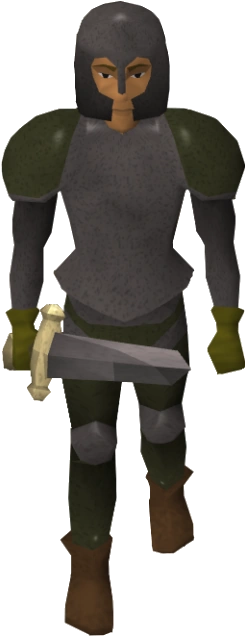
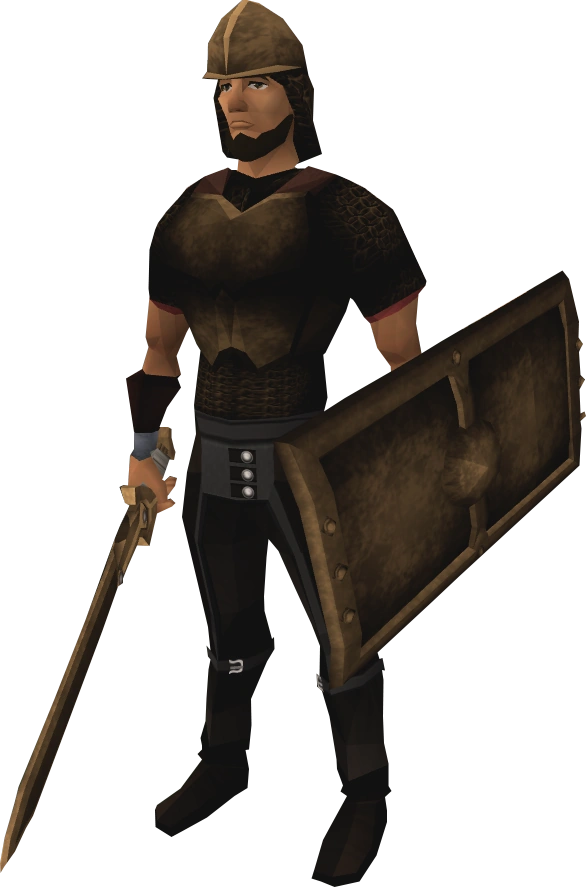
3. Kill Al-Kharid warriors in the Al Kharid palace.
An Al-Kharid warrior
Combat level: 9
Advantages:
- They have scimitars, which are bad against most types of Melee Armour.
- There is a bank close by.
- There is a man selling kebabs just beside the bank for 1 coin each, which can easily be bought from coin drops
- They help each other by attacking players who attack their comrades. You can have up to 4 attacking you at the same time (with several others in line).
Disadvantages:
- May get very busy at times. Go to a less busy server to avoid crowding.
- All idle Al-Kharid warriors attack you if they see you attack one of them. This can easily kill a low leveled player.
- They are masters at killing players below combat 15.
Tips:
- Careful...this is a multi-combat area! When you attack a warrior, any other warriors nearby will shout and run to his aid (unless they are already in combat), so you may be attacked by up to 4 enemies at once! This is dangerous if your combat level is in the 20s. It is good experience though if you are over level 30.
4. Kill Minotaurs in the 1st level of the Stronghold of Security.
A Minotaur
Combat level: 12
Advantages:
- Frequent iron arrow drops.
- Although there may be many players training, there are enough minotaurs that you should not get into problems with too many people.
- Surprisingly, many people leave them around a lot.
- Some of the drops are noted so they can be stacked to save inventory space.
- Occasionally they drop a Right skull half.
Disadvantages:
- Low life point levels, meaning slower experience.
- This area gets extremely crowded and other people may steal your kills because it is a multi-combat area.
Tips:
- Stick with the level 12 Minotaurs at first. There are level 27 Minotaurs further in the Stronghold and are slightly stronger BUT much more accurate then their level 12 counterparts. None of them are aggressive, however.
- Minotaurs constantly drop iron arrows, around 7 to 14 at a time. Save them for Ranging!
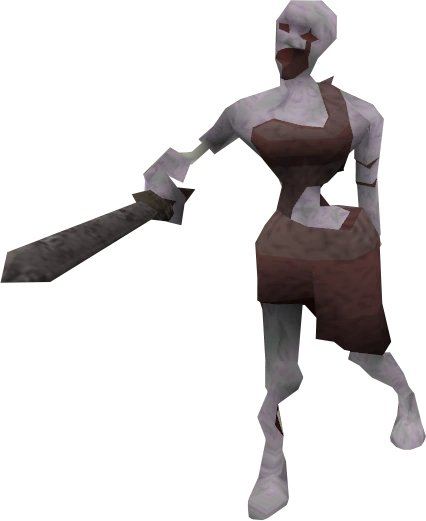
5. Kill Dark warriors in the Wilderness.

A Dark warrior
Combat level: 8
Advantages:
- Several types of runes spawn in the castle, meaning that you can make quite a bit of money along the way (or level up Magic, since the warriors wear metal armour).
- This place is not usually crowded due to its location.
- A fair amount of life points.
- There are many doors in the Dark Warriors' Fortress, so you can use them to your advantage.
- They are known to drop Black maces.
Disadvantages:
- As of 1st February 2011, players can now kill you in the wilderness, this is a big disadvantage, though if prepared well, you might be able to get out of an attack.
- Multi-combat zone, so multiple warriors will attack you.
- Their drops aren't that great.
- Accurate enough to hit even with high Defence.
- Notable risk of dying if you cannot teleport away.
- If you die you will not get a gravestone on death.
6. Kill Dark wizards found south of Varrock.
A Dark wizard
Combat level: 7, 20
Advantages:
- They drop a good amount of runes, and sometimes they drop rarer runes (like Cosmic runes)!
- Many respawn points and fast respawning time.
Disadvantages:
- Very crowded.
- They use magic, so they will hit you very often and hit high damage if you wear melee armour.
- The level 20 wizards can hit 60s, and they hit very often.
- They cast magic faster than the player.
- They can weaken you at shorter ranges, causing you to do less damage and gain slower experience.
- There is a risk of dying.
7. Kill Elemental wizards in the Rimmington Meadow.
An Elemental wizard
Combat level: 13
Advantages:
- Not aggressive and have incredible supply of life points, with 250 LP at level 13.
- They drop a lot of elemental runes.
- Can be easily reached by using the Cabbage patch teleport feature of the Explorer ring level 3.
- Low melee and ranged defence.
- May rarely drop talismans.
Disadvantages:
- There are only 4 of them, which is insufficient for supplying multiple trainers in a single world.
- Uses magic and the earth and fire wizard have a maximum hit of 60.
- Wizards using lower-levelled spells are fairly accurate.
- No bone drops.
- Some higher-levelled players tend to hog the wizards.
- Will cast weaken, so this may not be suitible for most melee training unless you have a very high magic level.
- Elemental spells will heal the respective wizard.
Tips:
- It is recommended that you use leather armour to defend against their magic attacks. It is very cheap, and you can still use your melee weapon. An Anti-dragonfire Shield is also recommended for its +2 magic defence bonus.
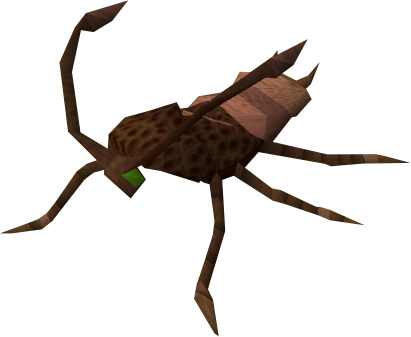
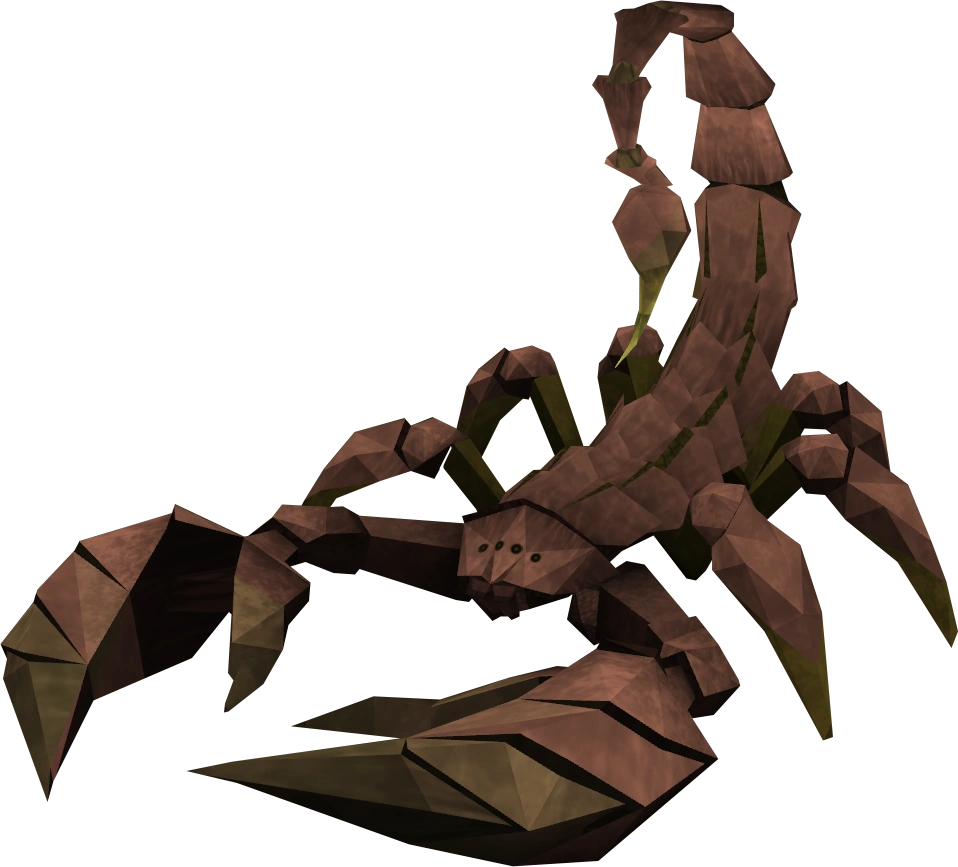
8. Kill Scorpions in the Varrock Sewers or in Al Kharid mining spot.
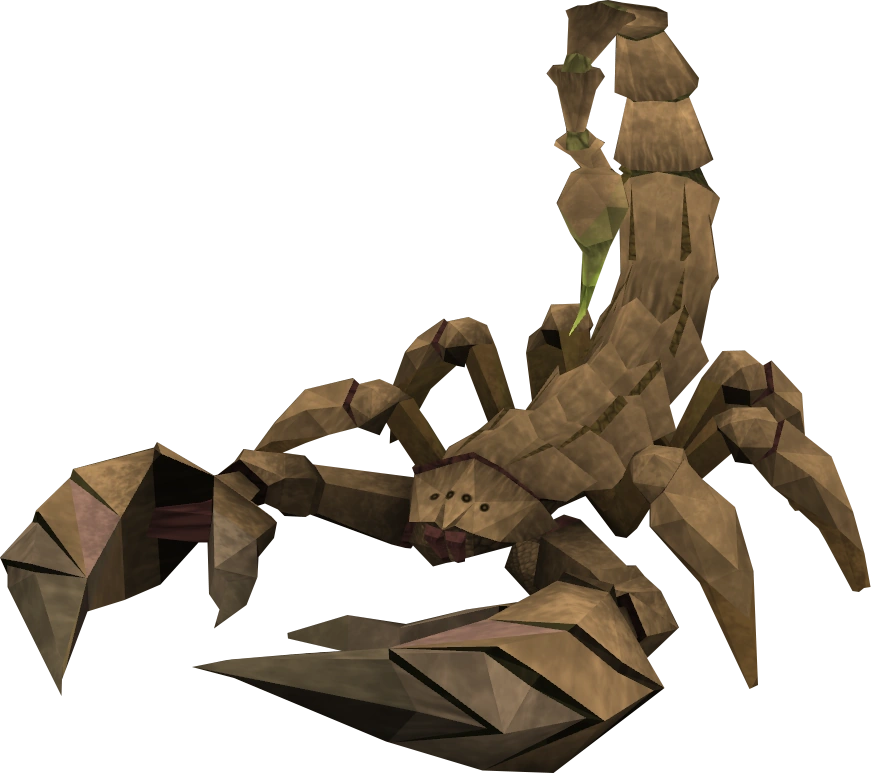

A scorpion
Combat level: 14
Advantages:
- Scorpions are not aggressive if you are level 29 or over in combat.
- Their attacks are very inaccurate.
- The area is hardly a bustling hive of activity.
- Their rate of respawning is very fast.
- Since they drop nothing, you can solely focus on training your stats.
Disadvantages:
- They seemingly vary in toughness much more than most foes.
- You will hardly hit if you use slash or stab.
- They do not drop anything.
Tips:
- Try travelling light in Al Kharid so that you do not lose anything when you die. The scorpions will not give you anything, so having your weapon and only 2 pieces armour will mean that when you die; you have nothing to lose and it is not far away from Lumbridge, so you can easily return when you do kick the bucket.
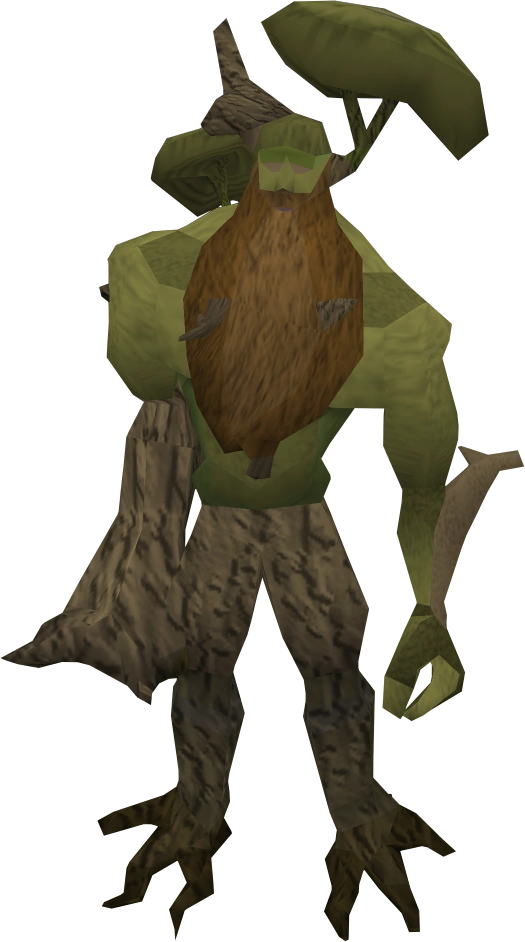
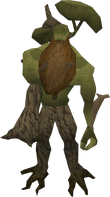
9. Kill the warped monsters in the Lumbridge catacombs.

A warped monster
Combat levels: 1, 5, 9, 12, 14 (various monsters) Dragith Nurn Level 20 ( Good For Killing As Low Risk And Fast Respawn Time)
Advantages:
- Low combat levels.
- Have very good drops.
- Commonly drops stacking items thus reducing or possibly completely negating banking trips
Disadvantages:
- Requires The Blood Pact completion to access.
Level 31 to 45
By now, you should have at least Mithril equipment, Adamant equipment or Rune equipment.
1. Kill Hill giants in Edgeville Dungeon.

A Hill giant
Combat level: 28
Advantages:
- Hill giants always drop big bones, for either selling (they sell for a high amount of coins at the Grand Exchange, although sometimes can take some to shift if selling for the highest price) or training prayer.
- They also drop limpwurt roots for either selling or making strength potions.
- If a player is training melee and has at least 20 fishing (with feathers) and a hatchet and tinderbox, this method can be very successful as a player can be training attack, defence, strength, fishing, woodcutting, firemaking, prayer, and cooking simultaneously. Only in Edgeville Dungeon, a Brass key is needed. (A Brass key can be found in the Edgeville Dungeon closer to the zombies, or bought from the Grand Exchange)
- This is also a great way to obtain money, as the Big bones sell for 650 each at the Grand Exchange, which is nearby(Edgeville Dungeon only).
Disadvantages:
- Rangers will hide behind a rock and range Hill giants, making it difficult for you to acquire a kill.
- For players with combat levels in the 30s, Hill giants may be a bit harder to kill. Bring plenty of food and best equipment you can use.
- This place may get unbelievably crowded, with multiple people competing for each giant. Being a quick clicker with fast reflexes will help a great deal, if you have a touchpad then this may not be the place for you. It is best to log in to an un-crowded world.
Tips:
- Memorise a hill giant respawn point and you may get a kill most of the time. (EXTREMELY useful, as most do not use this, will give you a huge advantage knowing where to click when the others do not)
- It may be hard to get a kill, so be patient. Try to pay attention to other people's battles so you know when the next hill giant will appear (e.g. If Player A defeats giant at 1:32, and Player B defeats giant at 1:40, go to the spawn point of Player A for a quicker spawn)
- Bring an air staff and get Wind rush ready, and when a monster respawns click on the monster. This way rangers won't have advantage over you.
2. Kill Zombies in the 2nd level of the Stronghold of Security.
A Zombie
Combat level: 30
Advantages:
- The place isn't as crowded as Hill Giants. The ratio from person to monster is 1:2 or 1:3, which is low unlike the ratio at Hill Giants, which is 2:1 or 1:1.
- They drop steel arrows, you can sell them for good profit.
Disadvantages:
- You need to get past the 1st level of the Stronghold of Security.
- Zombies are aggressive only for 5–10 minutes, then you have to re-enter the level.
- The drops are not so good.
- They have a maximum hit of 40.
3. Kill Hobgoblins found in many places, such as Edgeville Dungeon, Asgarnian Ice Dungeon, or in the Hobgoblin Peninsula outside the Crafting Guild.

A Hobgoblin
Combat level: 28, 42
Advantages:
- Drops limpwurt roots, along with other good drops.
- They are aggressive.
- Asgarnian Ice Dungeon is not crowded, and range attackers cannot reach all the hobgoblins at peninsula, unless they use a longbow or come close-up.
- They are found in groups of close proximity.
Disadvantages:
- They hit hard and accurately.
- They have high defence.
4. Kill Zombies or Skeletons in the Varrock sewers or Edgeville Dungeon.


A Skeleton
Combat levels: 13, 18, 24 (Zombies) and 21, 22, 25, 45 (Skeletons)
Advantages:
- They have a decent amount of life points for their level.
- Skeletons have weak attack.
Disadvantages:
- Their drops are terrible.
- This place is better for rangers, causing crowds.
- Level 25 skeletons, only ones without rivals, are very deadly.
5. Kill Zombies in the Graveyard of Shadows.
The Graveyard of Shadows
Combat levels: 18, 24
Advantages:
- Low level with lots of life points.
- Close to Clan Wars, so you can go into the safe free-for-all and get killed, regenerating your health, run energy, and prayer.
Disadvantages:
- Level 18s only drop bones, and level 24s drop only bones and low amounts of coins, or air, mind and cosmic runes only if you are very lucky.
- Multi-combat area, so many zombies can pile you at once, or someone can steal your kill.
- Players can now attack you as of the February 1st, 2011 update.
- This place is in the Wilderness, so it might be a risky adventure for lower level players.
6. Kill Barbarians in the Gunnarsgrunn Longhall.
Gunnarsgrunn Longhall
Combat levels: 15, 17
Advantages:
- They give very good and fast XP each kill.
- There are Cooked meat respawns on the tables for restoring life points, also dropped by barbarians.
Disadvantages:
- Can get very crowded.
- It is a multi-way combat area so other players can take your kill.
Tips:
- In a crowded world such as World 1, there are usually players giving away free food by the fishing area, east of the village.
7. Kill Guards at the entrances of Varrock and numerous locations in Falador.

A guard. Note that guards in Varrock wear yellow and white armour.
Combat levels: 19-22
Advantages:
- They have low Defence, making it easy to hit them.
- People tend to train in the palace, so it is not very crowded.
- There is a bank nearby, so you can bank any drops or get food easily.
- Not many people train here as their drops are not worthwhile.
Disadvantages:
- On top of the wall, where it is least crowded, there are only two Guards.
- If it gets crowded, it is nearly impossible to get a fight.
- They hit 30s, and often
8. Kill King scorpions on Crandor or in the Falador mining dungeon.

A King scorpion
Combat level: 32
Advantages :
- They have low defence, making them easy to hit.
- It is not very crowded as people come to Karamja/Crandor to fight Lesser Demons or fish.
- They can easily be killed, giving you fast xp.
- Aggressive until level 65.
- They have weak attacks.
- Fast respawn.
- You help low-leveled miners.
Disadvantages:
- No drops. Note: some players might find this as an advantage because it means less bank trip and more xp/hour.
- The way to them is hard, as you have to run through the Karamja/Crandor Volcano.
9. Kill Al-Kharid warriors in the Al Kharid Palace.
An Al-Kharid warrior
Combat level: 9
Advantages:
- Warriors can be killed within seconds at this level.
- The Warriors have a low defence, making it easy to hit the player's max hit often.
- Warriors do low damage.
- Lumbridge is close by, so on death it does not take long to return.
- Works well with pures.
- Cabbage spawn in western room for some healing.
Disadvantages:
- It's often very crowded.
- If you attack a warrior, the ones near you will also attack you.(this may actually work to your advantage if your defence is relatively high as it would allow you to attract many warriors at once, which would allow for lazier training).
10. Kill Scorpions at the north Al Kharid mining spot.

A Scorpion
Combat level: 14
Advantages:
- Max hit is only 20.
- Less crowded.
- High lifepoints and low Defence.
- It is not a multi-combat area, so no one can still take your kill.
- You help low-levelled miners.
Disadvantages:
- They hit constantly, therefore low level players need food.
- They do not drop anything (for f2p players). Note: some players might find this as an advantage because it means less bank trips and more xp/hour.
- They are a little spread out, reducing the kills per hour.
11. Kill Jail guards at Draynor village.
Some Jail guards
Combat level: 26
Advantages:
- They are usually not crowded.
- You can hit often because their armour is leatherbody and they have low Defence.
Disadvantages:
- They only drop bones.
- They are accurate, so food may be needed.
Tips:
- It's multi-combat, so if you are weak, you can just ask another stronger player to help.
Level 46 to 55
Make sure to bring food and put auto-retaliate on so you will automatically attack the monsters.
1. Kill Moss giants in Crandor, in the Wilderness or in the Varrock sewers.
A Moss giant
Combat levels: 42, 48
Advantages:
- Moss Giants drop big bones for Prayer or selling.
- They also drop runes quite frequently.
- There are several chaos rune spawns near the Wilderness Moss Giants.
- The Wilderness spawns are usually deserted.
- Their attack rate is fairly slow.
- 600 life points per giant means good experience.
Disadvantages:
- Must have started Dragon Slayer to access Crandor (you do not have to complete the quest, just sail to Crandor and do not kill the dragon). This means pures can train here without gaining unwanted defence xp.
- Crandor can get crowded at peak times, Varrock sewers often crowded by high-levels (casual kill and loot stealing).
- The ones in Varrock sewers are in a multiway combat area.
- They have good attack and can hit through rune armour even in high defence levels.
2. Kill Black Knights in or near the Black Knights' Fortress or at the Wilderness Wall north of Varrock.
A Black Knight
Combat level: 33, 35 inside fortress
Advantages:
- Inside the fortress is a very high number of knights. This area is generally not overly crowded.
- They are very good experience.
- They have decent drops.
- If you have 31+ Prayer, you can recharge your prayer points at the nearby Monastery. You can also ask the monks to heal you for free.
- Alternatively, inside the fortress is a chaos altar, so if you have 43+ Prayer you can avoid having to go to a bank for food by using Protect from Melee.
- They are agressive to players under level 67, or 69 for the level 35s.
Disadvantages:
- You can get damaged quite often, and they have high defence.
- To go inside the fortress requires completion of Black Knights' Fortress and a bronze medium helmet as well as an iron chainbody.
- The nearest bank is in Edgeville, a bit of a walk away.
Tips:
- Unlike many training points, scimitars may not do well here because the knights' armour has a high slash defence. Using a crushing
weapon - battleaxe, mace, warhammer or two-handed sword - is recommended as plate armour is weak to crush. The battleaxe or mace is the preferred choice due to them being considerably faster than the warhammer or the 2h sword.
3. Kill White Knights in the White Knights' Castle.
.png)
A White Knight
Combat levels: 36, 38, 39, 42
Advantages:
- They are close to a bank.
- The swords wielded by the knights have a slow attack rate.
- Crush weapons do well against their armour.
- There is a place for training range on the top floor.
Disadvantages:
- All of Falador is a multi-combat area, and a decent amount of people train here so you will have to world-hop every so often when it gets crowded.
- White Knights hit hard for their level.
- Quicker weapons such as daggers and shortswords lack the punch needed to effectively penetrate the knights' defence. A heavier weapon, like a longsword or battleaxe, is definitely recommended.
Tips:
- The upper level of the White Knight's Castle is usually not crowded; going there is a good idea.
- The upper levels also have more knights than the courtyard.
- The lowest level has a chicken that respawns frequently. There is also a cooking range that is fairly close to the chicken.
- Using the altar in the Castle, you can use prayers (increase attack, strength, etc.) thus giving you an advantage constantly if you recharge.
4. Kill Deadly red spiders in the Karamja-Crandor dungeon or Varrock Sewers.
A Deadly red spider
Combat level: 34
Advantages:
- High LP and low defence makes them very good experience source for this levels.
- Red spiders' eggs respawn near the spiders.
- Aggressive even against high levels.
Disadvantages:
- The Deadly red spiders hit higher than one would expect.
- Nearby lesser demons will attack anyone who comes too close, they hit high and often.
- Red spiders have no drops for non-members.
- There is no bank close by, so you need to conserve your inventory between food, fishing and firemaking gear and spider eggs.
Tips:
- Using the Cabbage teleport on the Explorer's Ring 3 will allow you quick access to the Draynor bank. Then you can get 30 gp and rush back to Port Sarim and sail back to Karamja.
- If you take food: every time you eat, pick up Red spiders' eggs. This makes up for the cost of food.
- You can fish and cook food on Karamja, then use it to train.
5. Kill Flesh crawlers in the 2nd level of the Stronghold of Security.
A Flesh crawler
Combat levels: 25, 38, 41
Advantages:
- They have high life points.
- They have some decent drops such as uncut gems.
- For the most part, they are an aggressive monster.
- Very hard to get killed unless you are away from your keyboard for a long time because they can only hit a max of 16.
- There's an areas with no zombies
- Not in a multi-combat area so they cannot gang up on you.
Disadvantages:
- They tend to hit continuously especially on the pures, so you need to pay attention.
- Somewhat high defence.
6. Kill Hobgoblins in Edgeville dungeon, Hobgoblin Peninsula, or Ice Caves South of Port Sarim.

A Hobgoblin
Combat levels: 28, 42
Advantages:
- They have high life points.
- They drop limpwurt roots very often which can be sold at good price.
- They are relatively easy to kill at this level.
- The Ice Caves are generally uncrowded.
- There is a bank nearby if using Edgeville dungeon.
Disadvantages:
- They have a high defence level and somewhat accurate.
- Level 42 Hobgoblins can hit up to 50 life points.
Level 56 to 75
1. Kill Catablepons or Giant spiders found in level 3 of the Stronghold of Security.
A Catablepon
Combat levels: 50 (Giant spiders) and 49, 64, 68 (Catablepons)
Advantages:
- Catablepons drop a piece of the skull sceptre. (Top of Sceptre)
- High LP.
- Catablepons are usually not crowded.
- There are many of them, and they'll attack you regardless of your combat level.
Disadvantages:
- Catablepons can drain your strength by up to 10%, which makes it ineffective for warriors.
- Giant spiders are often crowded.
- They can damage fairly often to everyone.
- The Giant spiders have no drops.
- You need time to find a specific area where only one kind of monsters is available.
- Catablepons have very high defence, possibly causing players below level 50 Combat unable to defeat them.
2. Kill Ice warriors or Ice giants in the Ice Caves south of Port Sarim or Ice Plateau in Level 48 Wilderness.
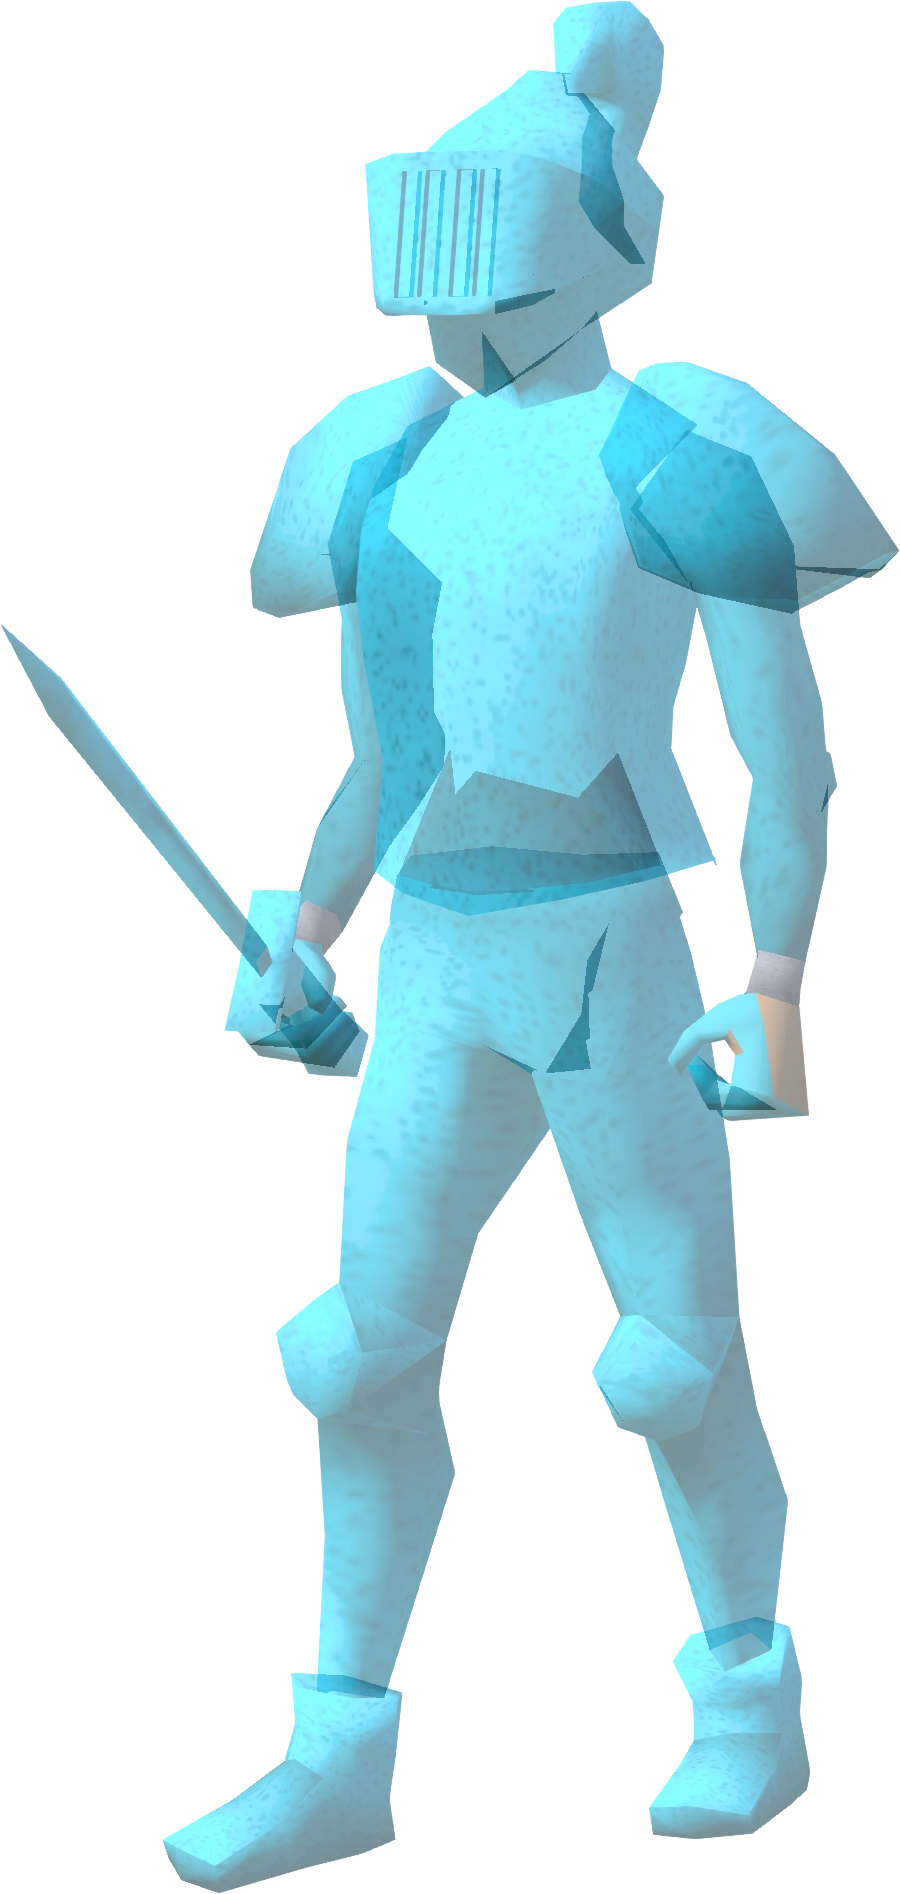

An Ice warrior
An Ice giant
Combat levels: 57 (Ice warrior) and 53 (Ice giant)
Advantages:
- These areas are not very crowded.
- They respawn quickly.
- They have decent drops, with lots of runes such as nature, chaos, death, law and cosmic.
- They are aggressive and will attack you.
- They drop jugs of wine and bananas which can be used for healing.
Disadvantages:
- You have to navigate through rough and dangerous terrain for resupply.
- Ice Warriors hit frequent 60s and 70s, and sometimes even higher.
- If only fighting Ice Giants, the Ice warriors can cause a disturbance. After 12–60 minutes, they will stop attacking you.
- If training in the Wilderness, be extremely wary of PKers.
Tips for Wilderness training:
- Do not bring anything you are not ready to replace if lost.
- Swordfish is a good food to have along.
- Always save some food for the trip back.
- While training, try to keep over half of your life points intact.
- It is suggested to bring a small clan of 4-6 people including you to decrease the possibility of death and item-loss since your friends can repair or even bless your gravestone.
3. Kill Cockroach workers in the Stronghold of Player Safety
A Cockroach worker
Combat level: 56
Advantages:
- There are many scattered around on different levels of the area.
- Close to the rope that leads to Edgeville (top floor), so if close to death a quick getaway is possible.
- This area is nearly always uncrowded.
- As with all cockroaches, they have very good drops for their level.
- Excellent xp for higher levels
- They are not aggressive
Disadvantages:
- They hit frequent 50s and 60s.
- Watch out for kill-stealers.
- They have a good defence.
- They don't drop bones, so do not kill them if you plan to advance your prayer level.
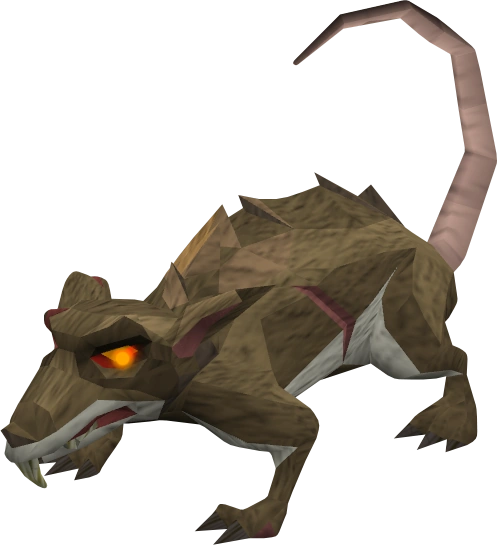
4. Kill Zombies or Giant rats found in level 2 of the Stronghold of Security.

A Zombie
Combat levels: 30, 40, 44, 53 (Zombies) and 26 (Giant rats)
Advantages:
- They have low attack.
- Good LP.
- They have low Defence.
- They drop steel arrows, that can be sold at the Grand Exchange for 17 each, you can also choose to save them to train Ranged.
Disadvantages:
- Unless you go on one of the worlds with lower amount of people, it is very crowded.
- Their damage range is 40-70.
- Flesh Crawlers might get in your way, as they are aggressive to ALL LEVELS.
5. Kill Giant Spiders in level 3 Stronghold of Security
Advantages:
- You can use the portals and ladders to in the SoS to get to them quickly.
- There is almost always someone fishing salmon and trout in River Lum right next to Gunnersgruun.
- Players can cook the salmon and/or trout using the fire in the longhall (having level 15 or 25+ cooking).
- There are lots of spiders to kill, so players won't have to wait for them to regenerate.
- They are agressive so you don't need to look at the screen for the whole time.
Disadvantages:
- There may be other players training there too.
- They have good attack and will bring players health to low, so it is recomended to bring food
Level 76 to 99
It is recommended that you bring your best non-degradable armour while fighting these monsters, as they can pack quite a punch. Food like tuna, lobsters, and swordfish are recommended.
1. Kill Flesh crawlers in level 2 of the Stronghold of Security.
A Flesh crawler
Combat levels: 28, 35, 41
Advantages:
- Tons of damage dealt and little damage received if the player has a reasonable Defence level and armour.
- Close to Edgeville Bank.
- They are aggressive, which means less clicking is involved.
- A good training source for higher levels when chatting with players or doing other activities, as you do not have to pay as much attention to other enemies at this level.
- No matter what level you are, Flesh Crawlers will attack you when you enter the area they are in.
- Low maximum hit of 16.
- They have a high respawn rate.
- Close to the Monastery, where you can get free healing and Prayer recharge (if your Prayer is level 31 or above for the ladder).
- Drops a piece of the Skull Sceptre . (Bottom of Sceptre)
Disadvantages:
- Although the Flesh Crawlers are quick experience, they only have 250 health, which means only 133 experience per kill.
- High rate of hits to people without decent defence.
- Other aggressive creatures are in the same area - such as Zombies which can do more damage; unless you are in the room with the level 30 Zombies.
- No bones are dropped, so this place is terrible for training Prayer.
- Tolerance vastly reduces the effectiveness of the area.
- Often very crowded.
Tips:
- The best location is the south east corner which has the largest concentration of enemies.
2. Kill Ankous in the Stronghold of Security.


An Ankou
Combat level: 75, 82, 86
Advantages:
- Close to Edgeville Bank.
- Very vulnerable to stab attack, one with a rune sword can kill them within several hits.
- Drops adamant arrows fairly often.
- Drops a piece of the Skull Sceptre. (left skull half)
Disadvantages:
- This place can be somewhat crowded at times.
- They hit up to 80, and fairly often.
- They have high accuracy.
- Ankous have high defence against slash attacks, a rune scimitar won't do so well.
- Their drops are not as good as their combat level suggests.
3. Kill Skeletons near Elvarg in the Karamja Volcano.

A Skeleton
Combat level: 45
Advantages:
- They have low defence and fairly high life points.
- They are aggressive to players until 90+ combat.
- They lack accuracy.
- Like all Karamjan options, you can fish at the docks near the banana plantation for a fast restock on supplies.
- A very entertaining cinema, where you can watch low-levelled players getting killed by Elvarg, or vice versa, so you can watch people cut off her head over and over again.
Disadvantages:
- Horrible drops, such as bones and a few coins.
- Far from a bank like all Karamjan monsters.
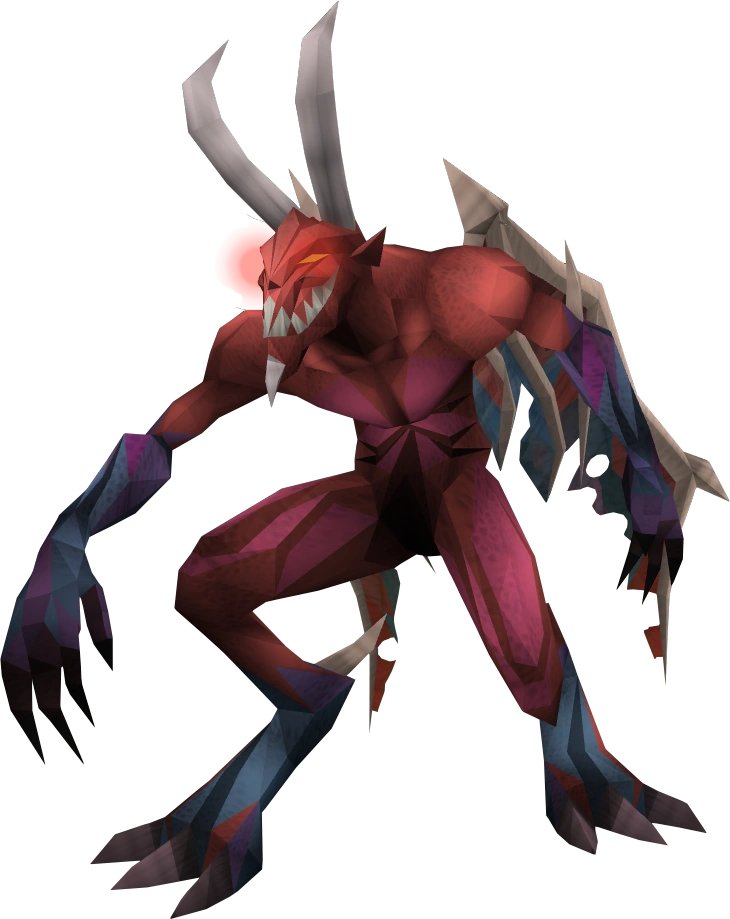
4. Kill Lesser demons in the Karamja Volcano, or the Wilderness.
A Lesser demon
Combat level: 82
Advantages:
- Low defence and high life points.
- Good drops for F2P, including Rune med helms and uncut diamonds!
- You can use Telekinetic Grab on the nature runes in the Wilderness once in a while if you train there. There are 3 or 4 nature runes per spawn.
- Outside of the Volcano is a fishing spot in case you are running out of food.
- Drop ashes which you can scatter for Prayer xp or carry the prayer urns.
Disadvantages:
- Often crowded
- They can hit 70s and 80s constantly, so you will need to resupply fairly often.
- Banks are far away. But if you are training in the Karamja Volcano and you have a Explorer's Ring level 3 or 4, you can use Cabbage Teleport to get close to the deposit box near the monk. Remember to retain 30 gp in inventory so you can pay fare to go back to Karamja. This does not count for players training in the Wilderness Volcano.
- Although receiving Rune medium helmet seems great, but they are dropped rarely, most of the time you only get coins, gems, or runes, which are unable to pay for the food you consumed during the fight, making killing these monsters unprofitable most of the time.
5. Kill Greater Demons in the Demonic Ruins,Wilderness Volcano or Forinthry dungeon.

A Greater demon
Combat level: 92
Advantages:
- Their drops are much better than the lesser demon's drops.
- They are a great source of experience.
- Great drops for F2P, including a Rune full helm
- If you run into trouble, it is easy to retreat into the ruins, which is safe from demons.
- There is a fishing spot nearby. You should, however, always save a little food because PKers may be wandering around.
- Drop ashes which you can scatter for Prayer xp or carry the prayer urns.
Disadvantages:
- Greater demons are capable of dealing 90 life points often. (maximum hit is 92)
- The Demonic Ruins is a multi-combat area. It's dangerous to get piled by demons
- These demons have better defence than their Southern relatives.
- The area is so dangerous that it may become your graveyard even when paying attention.
- The wilderness volcano also contains level 85 skeletons, hellhounds, lesser demons and ankous, which may attack you.
6. Kill Ice giants and Ice warriors in the Asgarnian Ice Dungeon near Port Sarim.
An Ice warrior
Combat levels: 57 (Ice warrior) and 53 (Ice giant)
Advantages:
- They are aggressive, and it is single combat.
- They have decent drops, such as a Mithril sq shield, it is recommended to use the spell High Level Alchemy for some decent money.
- They have a high LP level.
- Ice Giants drop big bones, which are good to train Prayer.
- Ice Warriors are not that good at offence.
- Combination of 70+ attack and rune longsword will shatter both of them.
- They drop jugs of wine and bananas which can be used for healing.
- The training spot is very close to an altar, for quick recharges without taking too much time.
Disadvantages:
- Far from a bank (for convenience, take a level 3 Explorer's Ring).
- Ice giants are somewhat accurate and they can hit up to 77.
- This place is crowded at peak times.
- If your attack is low, you may have to take secondary weapon to repel the well-armoured warriors.
- If you only plan on killing Ice Giants, the Ice Warriors can be extremely frustrating since there are many of them and they are aggressive to all players below combat level 115.
7. Kill Giant spiders found in level 3 of the Stronghold of Security.
A Giant spider
Combat level: 50
Advantages:
- They have high life points.
- Combine high life points with low Defence.
- They are aggressive to any combat level.
- They are weak against slashing attacks.
- A full inventory of lobsters will last a very long time if you have a good Defence level.
- For a poor player, it's advisable to use tuna, it is cheap and last quite long time for level 70+ Defence
Disadvantages:
- Their vicious bite does a lot of damage, even high levels cannot survive without healing.
- They have no drops.
- This area can get a bit crowded sometimes.
- They are very accurate.
- A couple or more strength potions are recommended to increase exp gained per hour.
Tips:
- When spiders become tolerant, just go to another room and have another creature attack you.
- By choosing world which does have 100-300 players are very recommended when the place get too crowd. But don't hop worlds often, it will just waste your time.
8. Kill Cockroach soldiers in the Stronghold of Player Safety

A Cockroach soldier
Combat level: 83
Advantages:
- High LP
- Great drops such as rune scimitar, rune square shield, and decent amounts of coins, law runes, death runes, and 1 noted adamantite and 3 noted mithril ores.
- Good place for lootshare.
- They are not in wilderness.
- They are not aggressive, so you don't have to pay very close attention.
- They are close to the fishing spot east of barbarian village where people/botters who drop plenty of fish (salmon and trout), and there are two fires inside of barbarian village, so you don't need anything extra to take along.
Disadvantages:
- They have VERY high defence, weaker weapons aren't as effective as they are on normal NPCs, if you pick to use a powerful weapon instead, such as a battleaxe or 2h sword, it sacrifices speed, food, and time.
- Their close melee attack is powerful enough to be a serious danger, doing up to 80 life points with quite an accuracy. Their acidic shot is easy enough to dodge, but it can deal up to 110 damage.
- The area is often crowded at peak times.
- The fact that they concentrate solely on the player who first struck them can act as incentive for other players to attempt to deal more damage and steal the player's drops.
- Because of their high combat level and high LP, many higher leveled players will come and more than likely take most drops.
- Extremely deadly if you don't pay attention to your health.
Tips:
- If you have low offensive stats, do not try to compete killing them with other players.
- Though they have higher defence than their combat level suggests, they are shelled 'stony' monsters, and are weaker to crush attacks. It is recommended not to use a rune scimitar until 85+ attack.
- Higher defence levels are STRONGLY RECOMMENDED or you will waste lots of time on restocking food, and worse, if you have bad luck and didn't receive a good drop, you will lose a certain amount of cash.
- Lobsters, swordfish, and Anchovy pizzas are recommended.
- A good method is buying tuna and killing cockroach soldiers to get back the money spent. It takes a few trips to earn the money spent on tunas. The rest of the tunas can be used for training on spiders in the level 3 of the stronghold of security. Depending on the defence level of the player, a sizeable amount of tuna may be left to train on the spiders.
- Because many higher levels will take drops, it is advised that you go to the cockroach soldiers downstairs. There are 5 total and are pretty close together so you won't waste your running energy going everywhere.
A Hellhound
9. Kill Hellhounds in the Wilderness Volcano.
Combat level: 122
Advantages:
- Low defence
- High life points, giving 464 experience and 154 Constitution experience per kill.
- Non-multi combat area, so you won't get piled by them (unless you're training in the Forinthry Dungeon).
Disadvantages:
- Occasionally crowded
- Have high offensive stats; they can hit pretty often.
- Their maximum hit is 118.
- They only drop bones in free play.
- There might be PKers around who can kill you.
- They are away from a bank (the banker outside Wilderness Volcano no longer exists due to an update).
OVERALL TIP/S:
- Training the Magic skill increases you magical defence and magical potency. So the higher your level in the Magic skill is, the better your defence against magic is and the harder you will hit against mage armour.
| Free-to-play guides | |
| Members' guides |
|
Template:Checkftw