(→Repair) |
No edit summary |
||
| (30 intermediate revisions by 24 users not shown) | |||
| Line 1: | Line 1: | ||
| + | {{External|os}} |
||
| − | {{redirect3|Workshop|For the Artisans workshop, see [[Artisans Workshop]], for the music track see [[Workshop (music track)]]}} |
||
| + | {{Otheruses|the player-owned house workshop}} |
||
| + | {{Confuse|Workbench}} |
||
| + | {{Infobox Room |
||
| + | |name = Workshop |
||
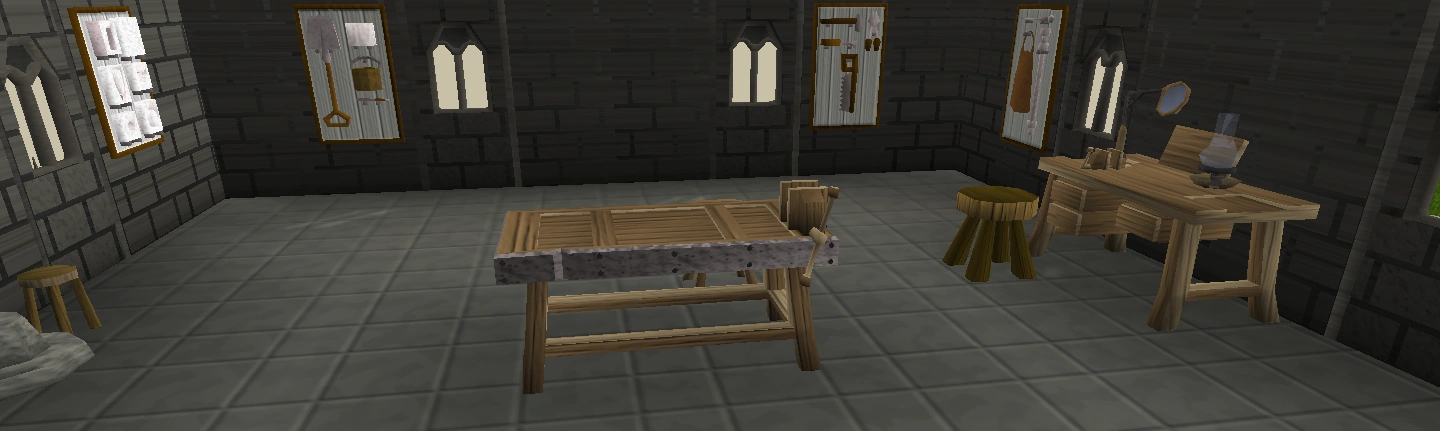
| + | |image = [[File:Workshop.png|350px]] |
||
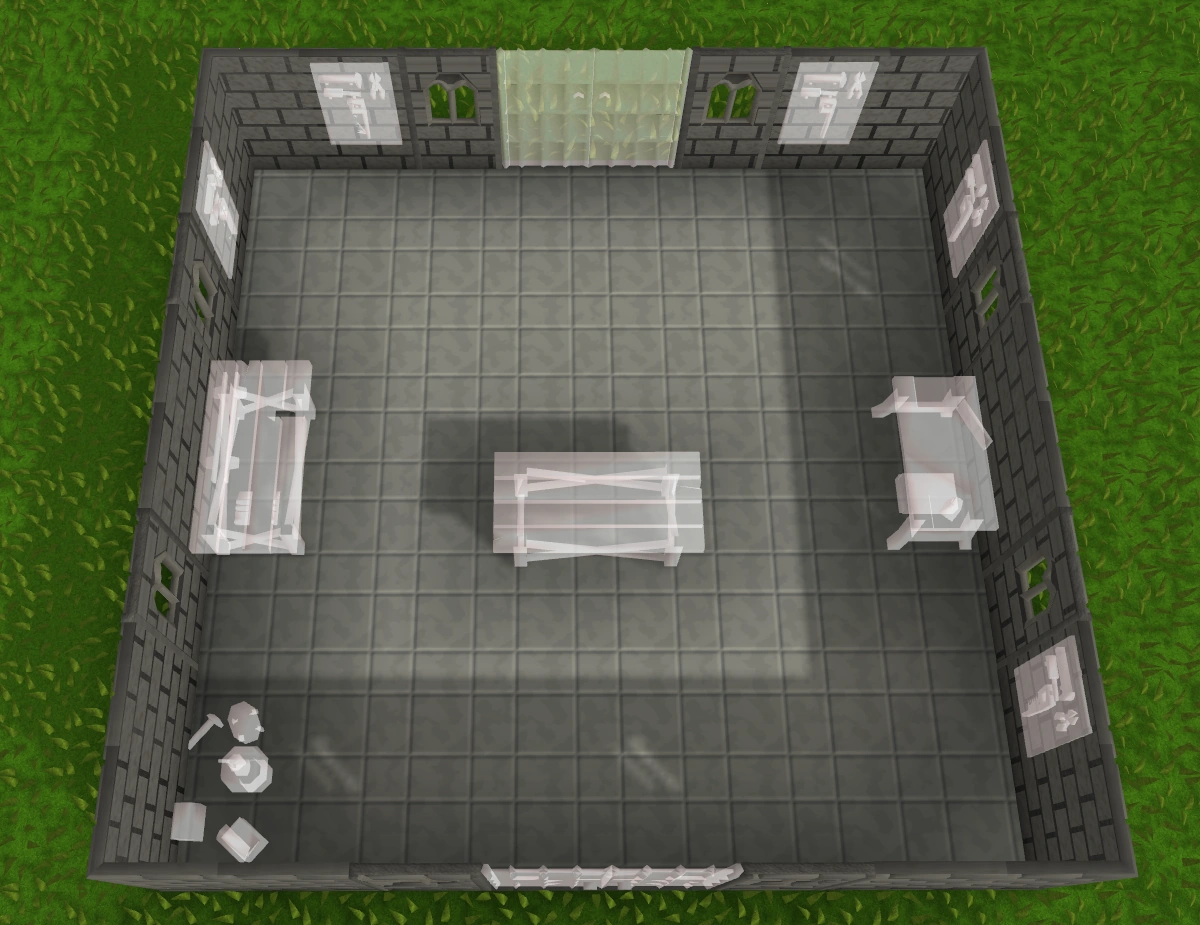
| + | |hotspot image = [[File:Workshop hotspots.png|350px]] |
||
| + | |release = [[31 May]] [[2006]] |
||
| + | |update = PLAYER-OWNED HOUSES! |
||
| + | |level = 15 {{skillclickpic|Construction}} |
||
| + | |cost = 10,000 |
||
| + | |doors = 2 |
||
| + | |hotspots = 9 |
||
| + | |clevel = 77 {{skillclickpic|Construction}} |
||
| + | |ccost = {{formatnum:{{#expr:10000+{{Min|{{CP|Oak plank|42}}|{{GEP|Oak plank|42}}}}+{{GEP|Steel bar|6}}+{{Min|{{CP|Limestone brick}}|{{GEP|Limestone brick}}}}+{{Min|{{CP|Bolt of cloth|2}}|{{GEP|Bolt of cloth|2}}}}+{{GEP|Molten glass|3}}}}}} |
||
| + | }} |
||
| + | The '''Workshop''' in a [[player-owned house]] is a room where players can make [[flatpack]] items, [[clockwork]] toys, and heraldic items. It can be built at level 15 [[Construction]] for 10,000 coins. This room is mostly used to complete [[Daily challenges]] and to repair degradable equipment such as [[Barrows equipment]], [[Torva equipment]], [[Pernix equipment]], [[Virtus equipment]] or any of the other higher level sets. |
||
| + | Material for some objects can be bought from shops run by suppliers such as [[Construction Supplies (Lumber Yard)|Construction Supplies]] (run by the [[Sawmill operator]] in Varrock or Prifddinas) and [[Keldagrim Stonemason]] (run by the [[Stonemason]] in Keldagrim). |
||
| − | [[File:Workshop.png|thumb|A workshop within a player owned house.]] |
||
| + | ==Hotspots== |
||
| − | The '''Workshop''' in a [[player-owned house]] is a room where the player can create heraldic items, clockwork toys, and [[flatpack]] items. |
||
| + | There are 9 [[hotspot]]s available: |
||
| + | * Workbench |
||
| − | This room can be created with 15 [[Construction]] and 10,000 [[coins]]. |
||
| + | * Repair |
||
| + | * Heraldry |
||
| + | * Clockmaking |
||
| + | * Tool (5) |
||
| + | ===Workbenches=== |
||
| − | There are 9 different [[Hotspot]]s available: |
||
| + | Workbenches can be used to make [[flatpack]]s. Flatpacks may be sold at the [[Grand Exchange]], used for [[Daily challenges]], or used to pay subjects (with completion of the hard [[Fremennik Province Tasks]]). |
||
| + | {|class="wikitable" style="text-align:center" |
||
| − | * '''Workbench''' |
||
| + | !colspan="2"|Object |
||
| − | * '''Heraldry''' |
||
| + | !Detailed |
||
| − | * '''Repair''' |
||
| + | !Level |
||
| − | * '''Tool store 1''' |
||
| + | !colspan="2"|Materials |
||
| − | * '''Tool store 2''' |
||
| + | !Experience |
||
| − | * '''Tool store 3''' |
||
| + | !Supplier price |
||
| − | * '''Tool store 4''' |
||
| + | !GE price |
||
| − | * '''Tool store 5''' |
||
| − | * '''Clockmaking''' |
||
| − | <br /> |
||
| − | ==Workbench== |
||
| − | This is where you can create [[flatpacks]] that can be sold at the [[Grand Exchange]], used to pay your subjects (with completion of the hard [[Fremennik Province Tasks]]) or just for [[experience]]. |
||
| − | {|class="wikitable" |
||
| − | ! Workbench!!Image!!Level!!Materials!!Experience |
||
|- |
|- |
||
| + | |[[File:Wooden workbench.png]] |
||
| − | |[[Wooden workbench]]||align="center"|[[File:Wood workbench.png]]||align="center"|17||5 [[Plank]]s,<br />5 [[nails]]||align="center"|143 |
||
| + | |{{left}}|[[Wooden workbench]] |
||
| + | |[[File:Wooden workbench built.png|100px]] |
||
| + | |17 |
||
| + | |[[File:Plank.png]] [[File:Bronze nails.png]] |
||
| + | |{{left}}|[[Plank]] ×5<br />[[Nails]] ×5 |
||
| + | |145 |
||
| + | |{{coins|{{CP|Plank|5}} + {{CP|Bronze nails|5}}}} |
||
| + | |{{coins|{{GEP|Plank|5}} + {{GEP|Bronze nails|5}}}} |
||
|- |
|- |
||
| − | + | |[[File:Oak workbench.png]] |
|
| + | |{{left}}|[[Oak workbench]] |
||
| + | |[[File:Oak workbench built.png|100px]] |
||
| + | |32 |
||
| + | |[[File:Oak plank.png]] |
||
| + | |{{left}}|[[Oak plank]] ×5 |
||
| + | |300 |
||
| + | |{{coins|{{CP|Oak plank|5}}}} |
||
| + | |{{coins|{{GEP|Oak plank|5}}}} |
||
|- |
|- |
||
| + | |[[File:Steel framed bench.png]] |
||
| − | |[[Steel framed bench]]||align="center"|[[File:Steel framed workbench.png]]||align="center"|46||6 [[Oak plank]]s,<br />4 [[steel bar]]s||align="center"|440 |
||
| + | |{{left}}|[[Steel framed bench]] |
||
| + | |[[File:Steel framed bench built.png|100px]] |
||
| + | |46 |
||
| + | |[[File:Oak plank.png]] [[File:Steel bar.png]] |
||
| + | |{{left}}|[[Oak plank]] ×6<br />[[Steel bar]] ×4 |
||
| + | |440 |
||
| + | |{{coins|{{CP|Oak plank|6}} + {{GEP|Steel bar|4}}}} |
||
| + | |{{coins|{{GEP|Oak plank|6}} + {{GEP|Steel bar|4}}}} |
||
|- |
|- |
||
| + | |[[File:Bench with vice.png]] |
||
| − | |[[Bench with vice]]||align="center"|[[File:Bench with vice.png]]||align="center"|62||Steel framed bench,<br />2 [[oak plank]]s,<br />1 [[steel bar]]||align="center"|140 |
||
| + | |{{left}}|[[Bench with vice]] |
||
| + | |[[File:Bench with vice built.png|100px]] |
||
| + | |62 |
||
| + | |[[File:Steel framed bench.png]] [[File:Oak plank.png]] [[File:Steel bar.png]] |
||
| + | |{{left}}|Steel framed bench<br />[[Oak plank]] ×2<br />[[Steel bar]] ×1 |
||
| + | |750 |
||
| + | |{{coins|{{CP|Oak plank|8}} + {{GEP|Steel bar|5}}}} |
||
| + | |{{coins|{{GEP|Oak plank|8}} + {{GEP|Steel bar|5}}}} |
||
|- |
|- |
||
| + | |[[File:Bench with lathe icon.png]] |
||
| − | |[[Bench with a lathe]]||align="center"|[[File:Bench with lathe.png]]||align="center"|77||Bench with vice,<br />2 [[oak plank]]s,<br />1 [[steel bar]]||align="center"|140 |
||
| + | |{{left}}|[[Bench with lathe]] |
||
| + | |[[File:Bench with lathe built.png|100px]] |
||
| + | |77 |
||
| + | |[[File:Bench with lathe icon.png]] [[File:Oak plank.png]] [[File:Steel bar.png]] |
||
| + | |{{left}}|Bench with vice<br />[[Oak plank]] ×2<br />[[Steel bar]] ×1 |
||
| + | |1,000 |
||
| + | |{{coins|{{CP|Oak plank|10}} + {{GEP|Steel bar|6}}}} |
||
| + | |{{coins|{{GEP|Oak plank|10}} + {{GEP|Steel bar|6}}}} |
||
|} |
|} |
||
| + | ===Repair benches=== |
||
| − | ==Heraldry== |
||
| + | Repair benches can be used to fix bent arrows and broken staves. Whetstones can be used to fix broken arrows, staves, and to sharpen rusty swords. Armour stands can be used to fix broken arrows, staves, rusty swords, and damaged armour including [[Barrows equipment]]. There is a discount to the cost that NPC's charge to repair Barrows equipment, based on the player's [[Smithing]] level, with the maximum discount at 50% at level 100 Smithing, obtainable by operating a [[Smithing cape]] at level 99. |
||
| − | This is where you can colour steel and rune full helms and kite shields with your herald symbol and make banners. Pluming stand can do helms, shield easel can do helms and shields, and banner easels can make all three. |
||
| − | {|class="wikitable" |
+ | {|class="wikitable" style="text-align:center" |
| + | !colspan="2"|Object |
||
| − | ! Heraldry!!Image!!Level!!Materials!!Experience |
||
| + | !Detailed |
||
| + | !Level |
||
| + | !colspan="2"|Materials |
||
| + | !Experience |
||
| + | !Supplier price |
||
| + | !GE price |
||
|- |
|- |
||
| + | |[[File:Repair bench.png]] |
||
| − | |[[Pluming stand]]||align="center"|[[File:Pluming stand.png]]||align="center"|16||2 [[Oak plank]]s||align="center"|120 |
||
| + | |{{left}}|[[Repair bench]] |
||
| + | |[[File:Repair bench built.png|100px]] |
||
| + | |15 |
||
| + | |[[File:Oak plank.png]] |
||
| + | |{{left}}|[[Oak plank]] ×2 |
||
| + | |120 |
||
| + | |{{coins|{{CP|Oak plank|2}}}} |
||
| + | |{{coins|{{GEP|Oak plank|2}}}} |
||
|- |
|- |
||
| + | |[[File:Whetstone.png]] |
||
| − | |[[Shield easel]]||align="center"|[[File:Shield easel.png]]||align="center"|41||4 [[Oak plank]]s||align="center"|240 |
||
| + | |{{left}}|[[Whetstone]] |
||
| + | |[[File:Whetstone built.png|100px]] |
||
| + | |35 |
||
| + | |[[File:Oak plank.png]] [[File:Limestone brick.png]] |
||
| + | |{{left}}|[[Oak plank]] ×4<br />[[Limestone brick]] ×1 |
||
| + | |260 |
||
| + | |{{coins|{{CP|Oak plank|4}} + {{CP|Limestone brick}}}} |
||
| + | |{{coins|{{GEP|Oak plank|4}} + {{GEP|Limestone brick}}}} |
||
|- |
|- |
||
| + | |[[File:Armour stand icon.png]] |
||
| − | |[[Banner easel]]||align="center"|[[File:Banner easel.png]]||align="center"|66||8 [[Oak plank]]s, 2 [[Bolt of cloth|bolts of cloth]]||align="center"|510 |
||
| + | |{{left}}|[[Armour stand]] |
||
| + | |[[File:Armour stand built.png|100px]] |
||
| + | |55 |
||
| + | |[[File:Oak plank.png]] [[File:Limestone brick.png]] |
||
| + | |{{left}}|[[Oak plank]] ×8<br />[[Limestone brick]] ×1 |
||
| + | |500 |
||
| + | |{{coins|{{CP|Oak plank|8}} + {{CP|Limestone brick}}}} |
||
| + | |{{coins|{{GEP|Oak plank|8}} + {{GEP|Limestone brick}}}} |
||
|} |
|} |
||
| + | ===Heraldry stands=== |
||
| − | ==Repair== |
||
| + | Heraldry stands can be used to make banners and to re-colour steel and rune full helms and kiteshields with the player's heraldry. Pluming stand can be used for helms, shield easel for helms and shields, and banner easels for all helms, shields, and banners. |
||
| − | Repair benches fix bent arrows and broken staves. Whetstones fix broken arrows, staves, and sharpen rusty swords. Armour stands fix broken arrows, staves, rusty swords, and damaged armour as well as repairing Barrows armour for a fraction of the cost that NPC's charge. The discount received at the armour stand is based on the players smithing level, with the maximum bonus received being 50% less at level 100 smithing, obtainable by opperating a [[Smithing cape|Smithing Cape]] at level 99. |
||
| + | |||
| − | {|class="wikitable" |
||
| + | {|class="wikitable" style="text-align:center" |
||
| − | ! Repair!!Image!!Level!!Materials!!Experience |
||
| + | !colspan="2"|Object |
||
| + | !Detailed |
||
| + | !Level |
||
| + | !colspan="2"|Materials |
||
| + | !Experience |
||
| + | !Supplier price |
||
| + | !GE price |
||
|- |
|- |
||
| + | |[[File:Pluming stand.png]] |
||
| − | |[[Repair bench]]||align="center"|[[File:Repair bench.png]]||align="center"|15||2 [[Oak plank]]s||align="center"|120 |
||
| + | |{{left}}|[[Pluming stand]] |
||
| + | |[[File:Pluming stand built.png|100px]] |
||
| + | |16 |
||
| + | |[[File:Oak plank.png]] |
||
| + | |{{left}}|[[Oak plank]] ×2 |
||
| + | |120 |
||
| + | |{{coins|{{CP|Oak plank|2}}}} |
||
| + | |{{coins|{{GEP|Oak plank|2}}}} |
||
|- |
|- |
||
| + | |[[File:Shield easel.png]] |
||
| − | |[[Whetstone]]||align="center"|[[File:Whetstone.png]]||align="center"|35||4 [[Oak plank]]s, 1 [[limestone brick]]||align="center"|260 |
||
| + | |{{left}}|[[Shield easel]] |
||
| + | |[[File:Shield easel built.png|100px]] |
||
| + | |41 |
||
| + | |[[File:Oak plank.png]] |
||
| + | |{{left}}|[[Oak plank]] ×4 |
||
| + | |240 |
||
| + | |{{coins|{{CP|Oak plank|4}}}} |
||
| + | |{{coins|{{GEP|Oak plank|4}}}} |
||
|- |
|- |
||
| + | |[[File:Banner easel icon.png]] |
||
| − | |[[Armour stand]]||align="center"|[[File:Armour stand.png]]||align="center"|55||8 [[Oak plank]]s, 1 [[limestone brick]]||align="center"|500 |
||
| + | |{{left}}|[[Banner easel]] |
||
| + | |[[File:Banner easel built.png|100px]] |
||
| + | |66 |
||
| + | |[[File:Oak plank.png]] [[File:Bolt of cloth.png]] |
||
| + | |{{left}}|[[Oak plank]] ×8<br />[[Bolt of cloth]] ×2 |
||
| + | |510 |
||
| + | |{{coins|{{CP|Oak plank|8}} + {{CP|Bolt of cloth|2}}}} |
||
| + | |{{coins|{{GEP|Oak plank|8}} + {{GEP|Bolt of cloth|2}}}} |
||
|} |
|} |
||
| + | ===Clockmaking/Crafting tables=== |
||
| − | ==Tool== |
||
| + | Clockmaking or crafting tables can be used to [[clockwork]] toys. Unlike other hotspots, this hotspot is upgradeable and therefore removal of inferior objects is unnecessary. |
||
| − | There are 5 shown tool store hotspots, but they act as one. When a tool store hotspot is upgraded, another (different) tool store is added to the room. |
||
| − | {|class="wikitable" |
+ | {|class="wikitable" style="text-align:center" |
| + | !colspan="2"|Object |
||
| − | ! Tool!!Image!!Level!!Materials!!Experience |
||
| + | !Detailed |
||
| − | |- |
||
| + | !Level |
||
| − | |[[Tool store 1]]||align="center"|[[File:Tool store 1.png]]||align="center"|15||2 [[Oak plank]]s||align="center"|120 |
||
| + | !colspan="2"|Materials |
||
| + | !Experience |
||
| + | !Supplier price |
||
| + | !GE price |
||
|- |
|- |
||
| + | |[[File:Crafting table 1.png]] |
||
| − | |[[Tool store 2]]||align="center"|[[File:Tool store 2.png]]||align="center"|25||2 more<br />[[Oak plank]]s||align="center"|120 |
||
| + | |{{left}}|[[Crafting table 1]] |
||
| + | |[[File:Crafting table 1 built.png|100px]] |
||
| + | |16 |
||
| + | |[[File:Oak plank.png]] |
||
| + | |{{left}}|[[Oak plank]] ×4 |
||
| + | |240 |
||
| + | |{{coins|{{CP|Oak plank|4}}}} |
||
| + | |{{coins|{{GEP|Oak plank|4}}}} |
||
|- |
|- |
||
| + | |[[File:Crafting table 2.png]] |
||
| − | |[[Tool store 3]]||align="center"|[[File:Tool store 3.png]]||align="center"|35||2 more<br />[[Oak plank]]s||align="center"|120 |
||
| + | |{{left}}|[[Crafting table 2]] |
||
| + | |[[File:Crafting table 2 built.png|100px]] |
||
| + | |25 |
||
| + | |[[File:Crafting table 1.png]] [[File:Molten_glass.png]] |
||
| + | |{{left}}|Crafting table 1<br />[[Molten glass]] ×1 |
||
| + | |100 |
||
| + | |{{coins|{{CP|Oak plank|4}} + {{GEP|Molten glass}}}} |
||
| + | |{{coins|{{GEP|Oak plank|4}} + {{GEP|Molten glass}}}} |
||
|- |
|- |
||
| + | |[[File:Crafting table 3.png]] |
||
| − | |[[Tool store 4]]||align="center"|[[File:Tool store 4.png]]||align="center"|44||2 more<br />[[Oak plank]]s||align="center"|120 |
||
| + | |{{left}}|[[Crafting table 3]] |
||
| + | |[[File:Crafting table 3 built.png|100px]] |
||
| + | |34 |
||
| + | |[[File:Crafting table 2.png]] [[File:Molten glass.png]] |
||
| + | |{{left}}|Crafting table 2<br />[[Molten glass]] ×2 |
||
| + | |175 |
||
| + | |{{coins|{{CP|Oak plank|4}} + {{GEP|Molten glass|3}}}} |
||
| + | |{{coins|{{GEP|Oak plank|4}} + {{GEP|Molten glass|3}}}} |
||
|- |
|- |
||
| + | |[[File:Crafting table 4.png]] |
||
| − | |[[Tool store 5]]||align="center"|[[File:Tool store 5.png]]||align="center"|55||2 more<br />[[Oak plank]]s||align="center"|121 |
||
| + | |{{left}}|[[Crafting table 4]] |
||
| + | |[[File:Crafting table 4 built.png|100px]] |
||
| + | |42 |
||
| + | |[[File:Crafting table 3.png]] [[File:Oak plank.png]] |
||
| + | |{{left}}|Crafting table 3<br />[[Oak plank]] ×2 |
||
| + | |240 |
||
| + | |{{coins|{{CP|Oak plank|6}} + {{GEP|Molten glass|3}}}} |
||
| + | |{{coins|{{GEP|Oak plank|6}} + {{GEP|Molten glass|3}}}} |
||
|} |
|} |
||
| − | == |
+ | ===Tool stores=== |
| + | Although there are 5 hotspots, these act as a single upgradeable hotspot. When the hotspot is upgraded, a different tool store is added to the room. |
||
| − | {|class="wikitable" |
||
| + | |||
| − | ! Clockmaking |
||
| + | {|class="wikitable" style="text-align:center" |
||
| − | !Image |
||
| + | !colspan="2"|Object |
||
| + | !Detailed |
||
!Level |
!Level |
||
| − | !Materials |
+ | !colspan="2"|Materials |
!Experience |
!Experience |
||
| + | !Supplier price |
||
| + | !GE price |
||
|- |
|- |
||
| − | |[[ |
+ | |[[File:Tool store 1.png]] |
| + | |{{left}}|[[Tool store 1]] |
||
| − | |align="center"|[[File:Crafting table 1.png]] |
||
| + | |[[File:Tool store 1 built.png|100px]] |
||
| − | |align="center"|16 |
||
| + | |15 |
||
| − | |4 [[Oak plank]]s |
||
| + | |[[File:Oak plank.png]] |
||
| − | | style="text-align: center"|240 |
||
| + | |{{left}}|[[Oak plank]] ×2 |
||
| + | |120 |
||
| + | |{{coins|{{CP|Oak plank|2}}}} |
||
| + | |{{coins|{{GEP|Oak plank|2}}}} |
||
|- |
|- |
||
| − | |[[ |
+ | |[[File:Tool store 2.png]] |
| + | |{{left}}|[[Tool store 2]] |
||
| − | |align="center"|[[File:Crafting table 2.png]] |
||
| + | |[[File:Tool store 2 built.png|100px]] |
||
| − | |align="center"|25 |
||
| + | |25 |
||
| − | |[[Crafting table 1]],<br />1 [[molten glass]] |
||
| + | |[[File:Tool store 1.png]] [[File:Oak plank.png]] |
||
| − | |align="center"|1 |
||
| + | |{{left}}|Tool store 1<br />[[Oak plank]] ×2 |
||
| + | |120 |
||
| + | |{{coins|{{CP|Oak plank|4}}}} |
||
| + | |{{coins|{{GEP|Oak plank|4}}}} |
||
|- |
|- |
||
| − | |[[ |
+ | |[[File:Tool store 3.png]] |
| + | |{{left}}|[[Tool store 3]] |
||
| − | |align="center"|[[File:Crafting table 3.png]] |
||
| + | |[[File:Tool store 3 built.png|100px]] |
||
| − | |align="center"|34 |
||
| + | |35 |
||
| − | |[[Crafting table 2]],<br />2 [[molten glass]] |
||
| + | |[[File:Tool store 2.png]] [[File:Oak plank.png]] |
||
| − | |align="center"|2 |
||
| + | |{{left}}|Tool store 2<br />[[Oak plank]] ×2 |
||
| + | |120 |
||
| + | |{{coins|{{CP|Oak plank|6}}}} |
||
| + | |{{coins|{{GEP|Oak plank|6}}}} |
||
|- |
|- |
||
| − | |[[ |
+ | |[[File:Tool store 4.png]] |
| + | |{{left}}|[[Tool store 4]] |
||
| − | |align="center"|[[File:Crafting table 4.png]] |
||
| + | |[[File:Tool store 4 built.png|100px]] |
||
| − | |align="center"|42 |
||
| + | |44 |
||
| − | |[[Crafting table 3]],<br />2 [[oak plank]]s |
||
| + | |[[File:Tool store 3.png]] [[File:Oak plank.png]] |
||
| − | |align="center"|120 |
||
| + | |{{left}}|Tool store 3<br />[[Oak plank]] ×2 |
||
| + | |120 |
||
| + | |{{coins|{{CP|Oak plank|8}}}} |
||
| + | |{{coins|{{GEP|Oak plank|8}}}} |
||
| + | |- |
||
| + | |[[File:Tool store 5.png]] |
||
| + | |{{left}}|[[Tool store 5]] |
||
| + | |[[File:Tool store 5 built.png|100px]] |
||
| + | |55 |
||
| + | |[[File:Tool store 4.png]] [[File:Oak plank.png]] |
||
| + | |{{left}}|Tool store 4<br />[[Oak plank]] ×2 |
||
| + | |120 |
||
| + | |{{coins|{{CP|Oak plank|10}}}} |
||
| + | |{{coins|{{GEP|Oak plank|10}}}} |
||
|} |
|} |
||
| + | ==Cost of completion== |
||
| − | ==From Scratch to Complete room.== |
||
| + | To build this room with the highest level objects in one go, players would require: |
||
| − | With 77 construction you can make the best things in this room. Doing this will take 3 [[Molten glass|molten glass]], 42 [[Oak plank|oak planks]], 1 [[Limestone brick|limestone brick]], 2 [[Bolt of Cloth|bolts of cloth]] and 6 [[Steel bar]]s, for a total cost of {{formatnum:{{#expr:3*{{GEP|Molten glass}}+42*{{GEP|Oak plank}}+{{GEP|Limestone brick}}+2*{{GEP|Bolt of cloth}}+6*{{GEP|Steel bar}}}}}} coins. You will also gain 3716 experience. |
||
| + | |||
| + | {|class="wikitable" style="text-align:center" |
||
| + | !colspan="5"|Level |
||
| + | |77 {{Skillclickpic|Construction}} |
||
| + | |- |
||
| + | !colspan="5"|Room cost |
||
| + | |10,000 |
||
| + | |- |
||
| + | !Hotspot |
||
| + | !colspan="2"|Object |
||
| + | !colspan="2"|Material |
||
| + | !Price* |
||
| + | |- |
||
| + | |{{left}}|Workbench |
||
| + | |[[File:Bench with lathe icon.png]] |
||
| + | |{{left}}|[[Bench with lathe]] |
||
| + | |[[File:Oak plank.png]] [[File:Steel bar.png]] |
||
| + | |{{left}}|[[Oak plank]] ×10<br />[[Steel bar]] ×6 |
||
| + | |{{coins|{{Min|{{CP|Oak plank|10}}|{{GEP|Oak plank|10}}}} + {{GEP|Steel bar|6}}}} |
||
| + | |- |
||
| + | |{{left}}|Repair |
||
| + | |[[File:Armour stand icon.png]] |
||
| + | |{{left}}|[[Armour stand]] |
||
| + | |[[File:Oak plank.png]] [[File:Limestone brick.png]] |
||
| + | |{{left}}|[[Oak plank]] ×8<br />[[Limestone brick]] ×1 |
||
| + | |{{coins|{{Min|{{CP|Oak plank|8}}|{{GEP|Oak plank|8}}}}+{{Min|{{CP|Limestone brick}}|{{GEP|Limestone brick}}}}}} |
||
| + | |- |
||
| + | |{{left}}|Heraldry |
||
| + | |[[File:Banner easel icon.png]] |
||
| + | |{{left}}|[[Banner easel]] |
||
| + | |[[File:Oak plank.png]] [[File:Bolt of cloth.png]] |
||
| + | |{{left}}|[[Oak plank]] ×8<br />[[Bolt of cloth]] ×2 |
||
| + | |{{coins|{{Min|{{CP|Oak plank|8}}|{{GEP|Oak plank|8}}}}+{{Min|{{CP|Bolt of cloth|2}}|{{GEP|Bolt of cloth|2}}}}}} |
||
| + | |- |
||
| + | |{{left}}|Clockmaking |
||
| + | |[[File:Crafting table 4.png]] |
||
| + | |{{left}}|[[Crafting table 4]] |
||
| + | |[[File:Oak plank.png]] [[File:Molten glass.png]] |
||
| + | |{{left}}|[[Oak plank]] ×6<br />[[Molten glass]] ×3 |
||
| + | |{{coins|{{Min|{{CP|Oak plank|6}}|{{GEP|Oak plank|6}}}}+{{GEP|Molten glass|3}}}} |
||
| + | |- |
||
| + | |{{left}}|Tool |
||
| + | |[[File:Tool store 5.png]] |
||
| + | |{{left}}|[[Tool store 5]] |
||
| + | |[[File:Oak plank.png]] |
||
| + | |{{left}}|[[Oak plank]] ×10 |
||
| + | |{{coins|{{Min|{{CP|Oak plank|10}}|{{GEP|Oak plank|10}}}}}} |
||
| + | |- |
||
| + | !colspan="5"|Total cost (including room cost) |
||
| + | |{{coins|10000 + {{Min|{{CP|Oak plank|42}}|{{GEP|Oak plank|42}}}} + {{GEP|Steel bar|6}} + {{Min|{{CP|Limestone brick}}|{{GEP|Limestone brick}}}} + {{Min|{{CP|Bolt of cloth|2}}|{{GEP|Bolt of cloth|2}}}} + {{GEP|Molten glass|3}}}} |
||
| + | |} |
||
| + | |||
| + | <nowiki>*</nowiki> Price is taken as the lower between the Grand Exchange price and Supplier price. The price of logs is not included as these are assumed to be obtained by players themselves. |
||
| − | {{WP also}} |
||
| − | {{Room}} |
||
{{Workshop}} |
{{Workshop}} |
||
| + | {{Room}} |
||
[[nl:Workshop]] |
[[nl:Workshop]] |
||
[[fi:Workshop]] |
[[fi:Workshop]] |
||
| − | [[Category:Player-owned house]] |
||
Latest revision as of 14:45, 26 March 2018
| |
| Release date | 31 May 2006 (Update) |
|---|---|
| Level | 15 |
| Room cost | 10,000 coins |
| Doors | 2 |
| Hotspots | 9 |
| Completion level | 77 |
| Completion cost | 29,414 coins |
| |
The Workshop in a player-owned house is a room where players can make flatpack items, clockwork toys, and heraldic items. It can be built at level 15 Construction for 10,000 coins. This room is mostly used to complete Daily challenges and to repair degradable equipment such as Barrows equipment, Torva equipment, Pernix equipment, Virtus equipment or any of the other higher level sets.
Material for some objects can be bought from shops run by suppliers such as Construction Supplies (run by the Sawmill operator in Varrock or Prifddinas) and Keldagrim Stonemason (run by the Stonemason in Keldagrim).
Hotspots
There are 9 hotspots available:
- Workbench
- Repair
- Heraldry
- Clockmaking
- Tool (5)
Workbenches
Workbenches can be used to make flatpacks. Flatpacks may be sold at the Grand Exchange, used for Daily challenges, or used to pay subjects (with completion of the hard Fremennik Province Tasks).
| Object | Detailed | Level | Materials | Experience | Supplier price | GE price | ||
|---|---|---|---|---|---|---|---|---|
| Wooden workbench | 
|
17 | Plank ×5 Nails ×5 |
145 | 535 | 4,045 | ||
| Oak workbench | 
|
32 | Oak plank ×5 | 300 | 1,250 | 2,780 | ||
| Steel framed bench | 
|
46 | Oak plank ×6 Steel bar ×4 |
440 | 5,336 | 7,172 | ||
| Bench with vice | 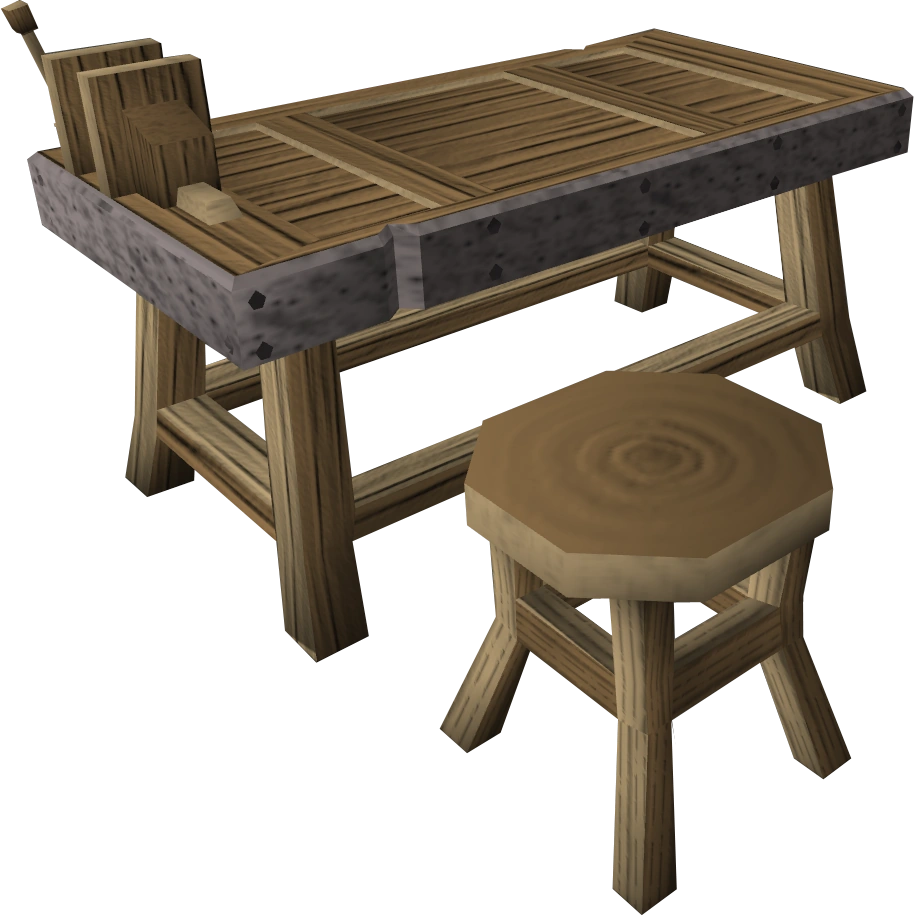
|
62 | Steel framed bench Oak plank ×2 Steel bar ×1 |
750 | 6,795 | 9,243 | ||
| Bench with lathe | 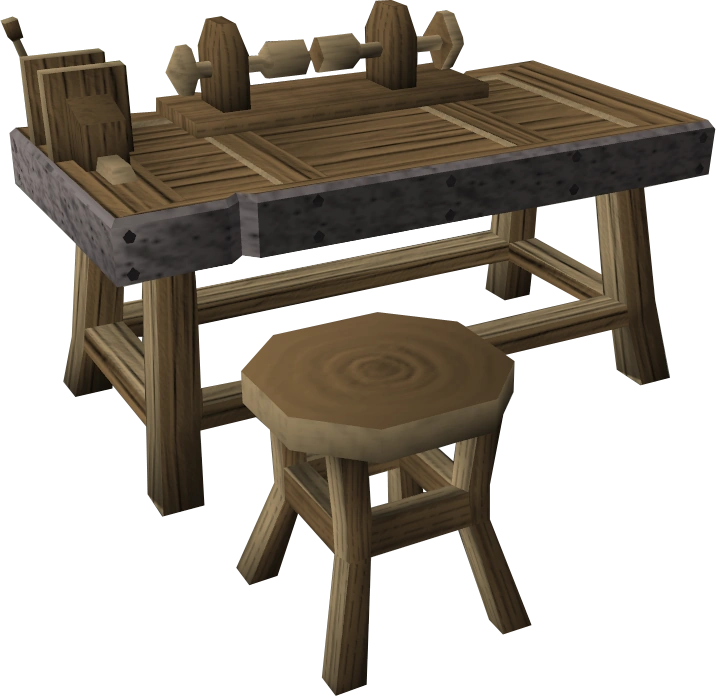
|
77 | Bench with vice Oak plank ×2 Steel bar ×1 |
1,000 | 8,254 | 11,314 | ||
Repair benches
Repair benches can be used to fix bent arrows and broken staves. Whetstones can be used to fix broken arrows, staves, and to sharpen rusty swords. Armour stands can be used to fix broken arrows, staves, rusty swords, and damaged armour including Barrows equipment. There is a discount to the cost that NPC's charge to repair Barrows equipment, based on the player's Smithing level, with the maximum discount at 50% at level 100 Smithing, obtainable by operating a Smithing cape at level 99.
| Object | Detailed | Level | Materials | Experience | Supplier price | GE price | ||
|---|---|---|---|---|---|---|---|---|
| Repair bench | 15 | Oak plank ×2 | 120 | 500 | 1,112 | |||
| Whetstone | 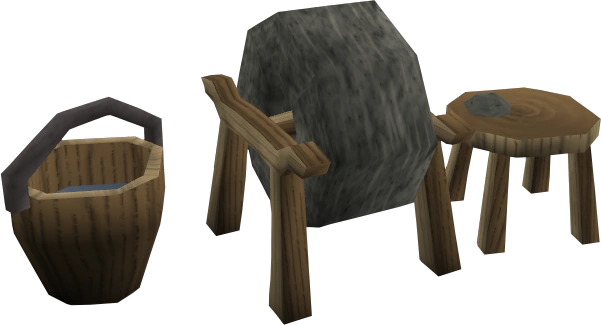
|
35 | Oak plank ×4 Limestone brick ×1 |
260 | 1,021 | 2,620 | ||
| Armour stand | 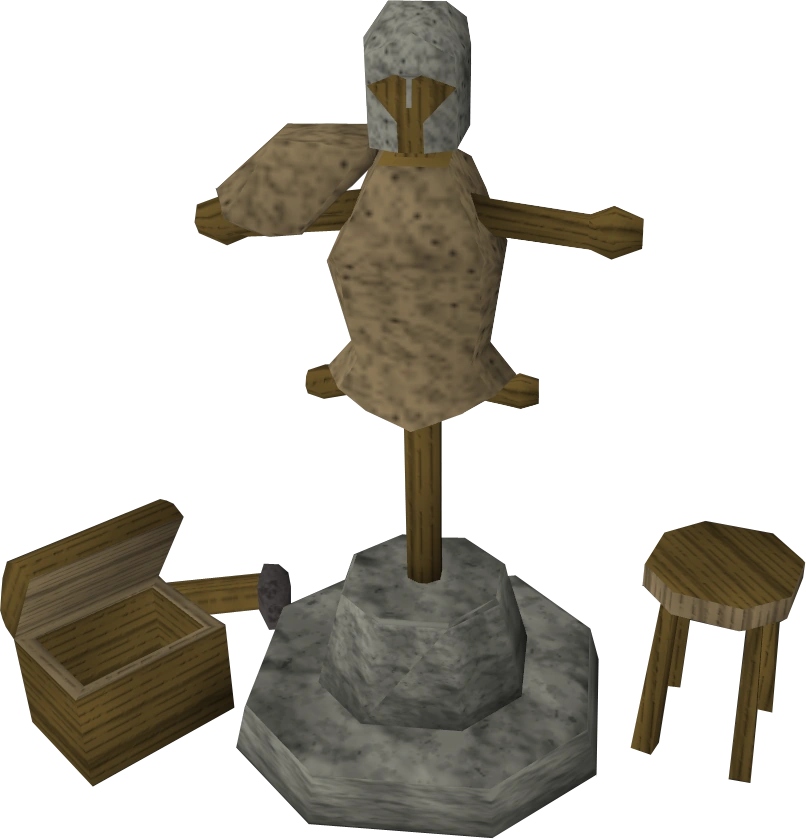
|
55 | Oak plank ×8 Limestone brick ×1 |
500 | 2,021 | 4,844 | ||
Heraldry stands
Heraldry stands can be used to make banners and to re-colour steel and rune full helms and kiteshields with the player's heraldry. Pluming stand can be used for helms, shield easel for helms and shields, and banner easels for all helms, shields, and banners.
| Object | Detailed | Level | Materials | Experience | Supplier price | GE price | ||
|---|---|---|---|---|---|---|---|---|
| Pluming stand | 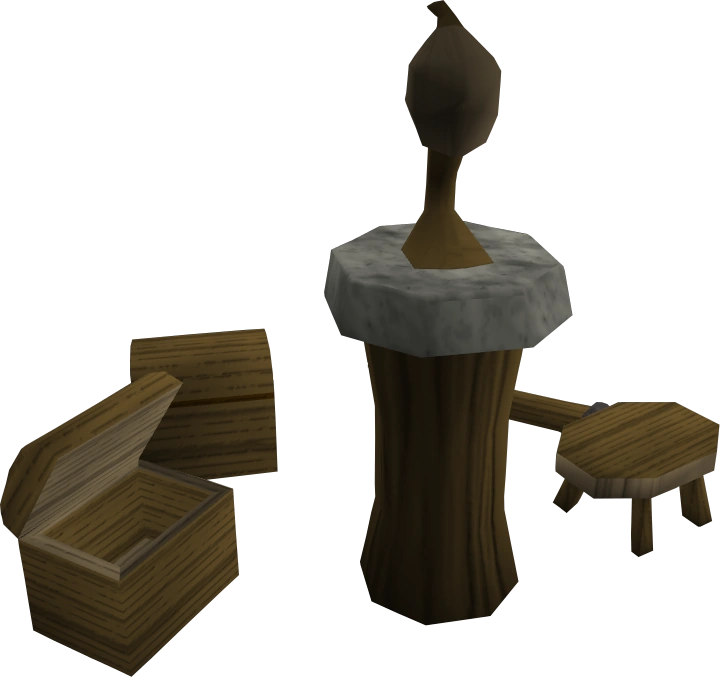
|
16 | Oak plank ×2 | 120 | 500 | 1,112 | ||
| Shield easel | 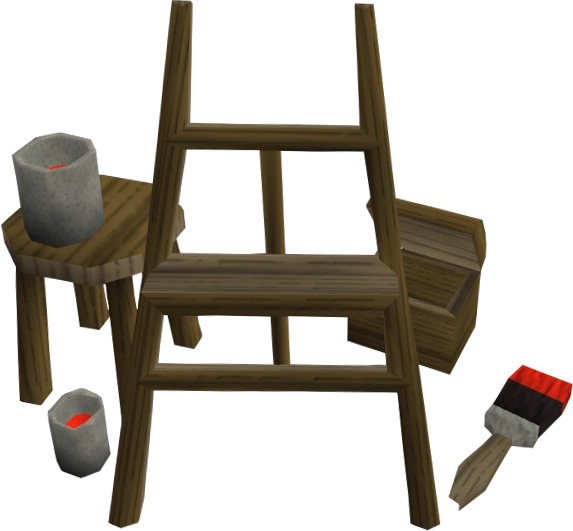
|
41 | Oak plank ×4 | 240 | 1,000 | 2,224 | ||
| Banner easel | 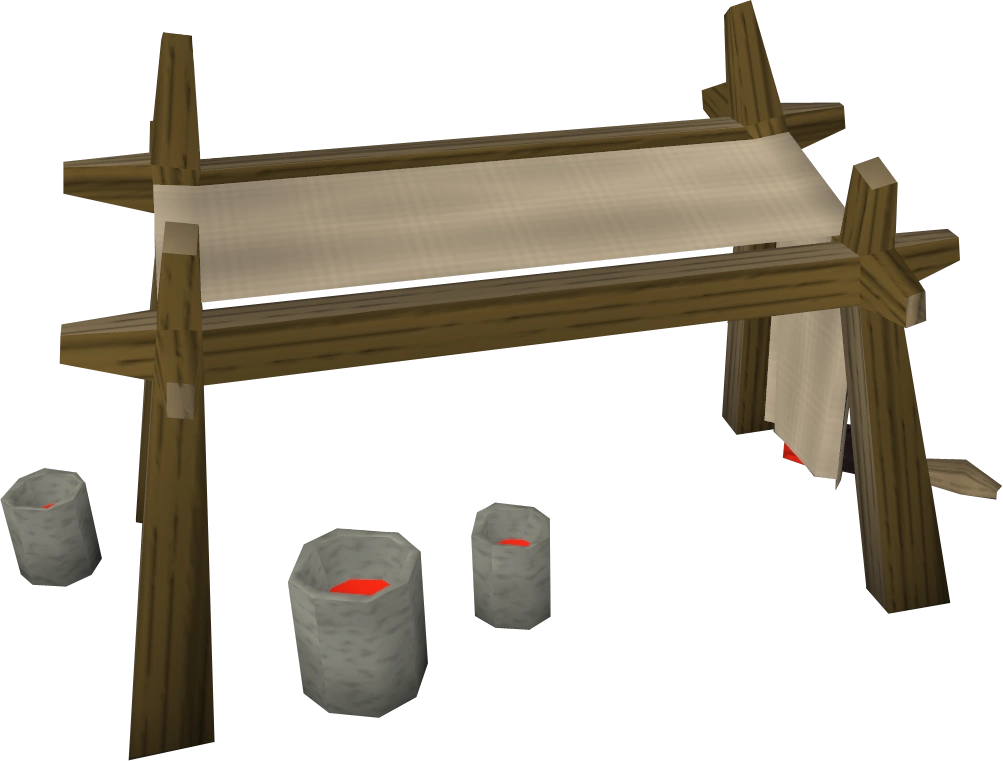
|
66 | Oak plank ×8 Bolt of cloth ×2 |
510 | 3,300 | 7,392 | ||
Clockmaking/Crafting tables
Clockmaking or crafting tables can be used to clockwork toys. Unlike other hotspots, this hotspot is upgradeable and therefore removal of inferior objects is unnecessary.
| Object | Detailed | Level | Materials | Experience | Supplier price | GE price | ||
|---|---|---|---|---|---|---|---|---|
| Crafting table 1 | 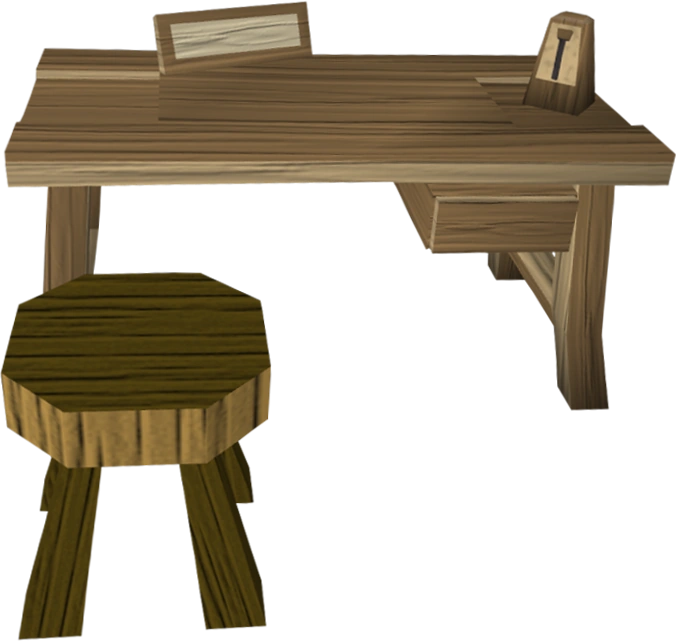
|
16 | Oak plank ×4 | 240 | 1,000 | 2,224 | ||
| Crafting table 2 | 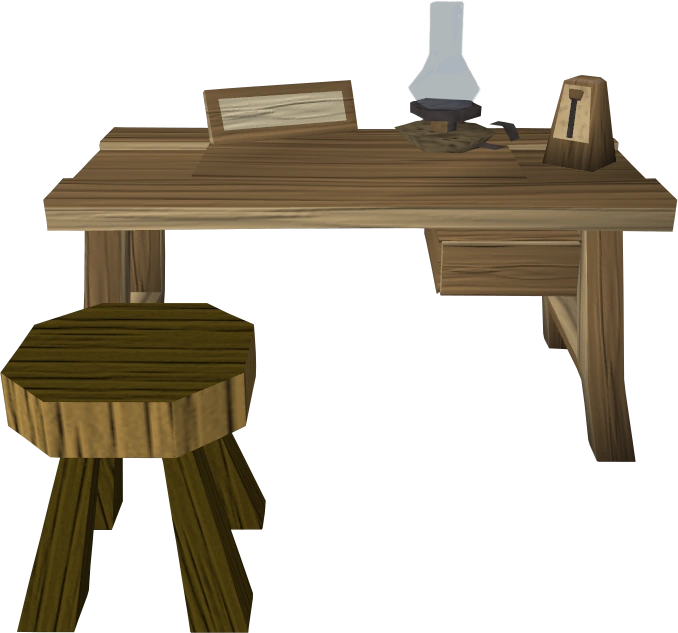
|
25 | Crafting table 1 Molten glass ×1 |
100 | 1,613 | 2,837 | ||
| Crafting table 3 | 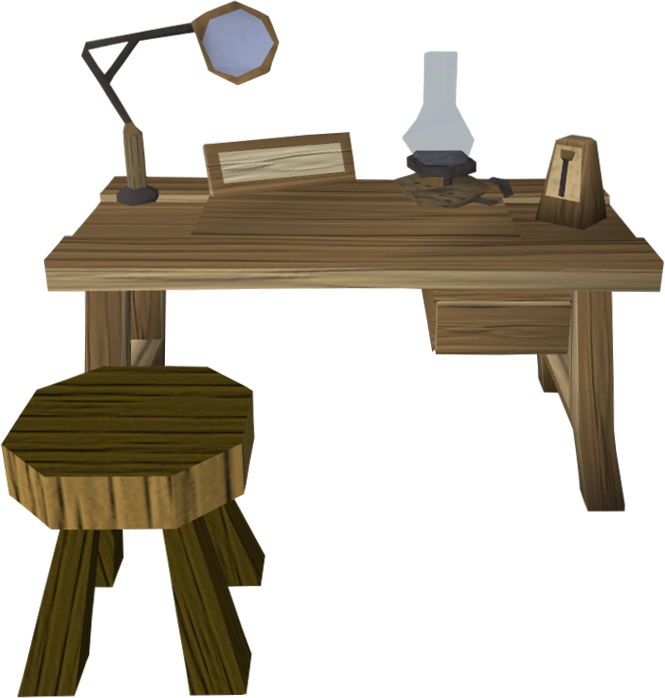
|
34 | Crafting table 2 Molten glass ×2 |
175 | 2,839 | 4,063 | ||
| Crafting table 4 | 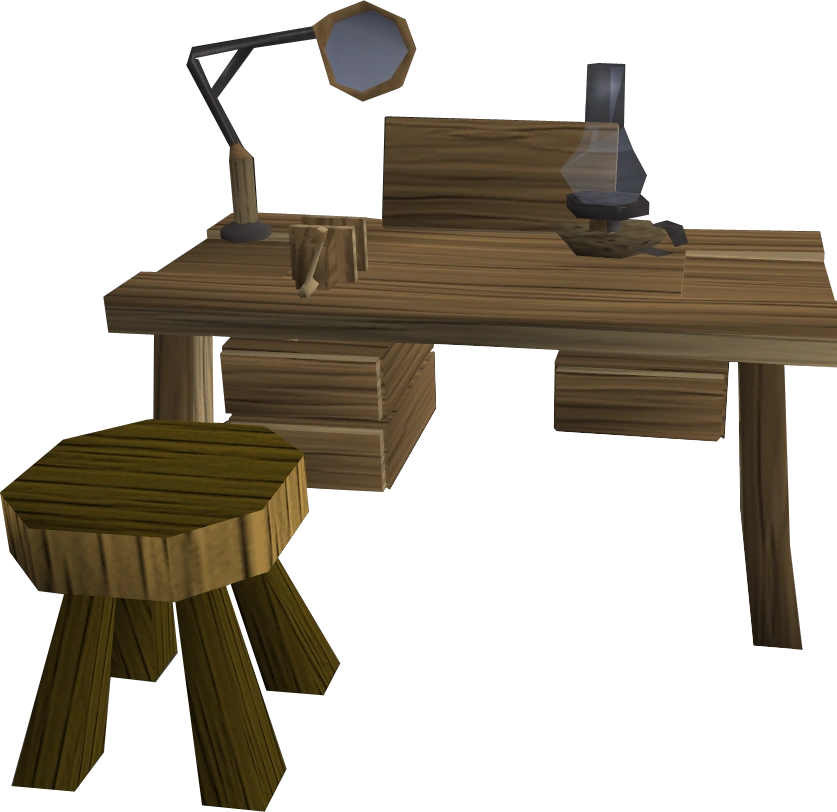
|
42 | Crafting table 3 Oak plank ×2 |
240 | 3,339 | 5,175 | ||
Tool stores
Although there are 5 hotspots, these act as a single upgradeable hotspot. When the hotspot is upgraded, a different tool store is added to the room.
| Object | Detailed | Level | Materials | Experience | Supplier price | GE price | ||
|---|---|---|---|---|---|---|---|---|
| Tool store 1 | 
|
15 | Oak plank ×2 | 120 | 500 | 1,112 | ||
| Tool store 2 | 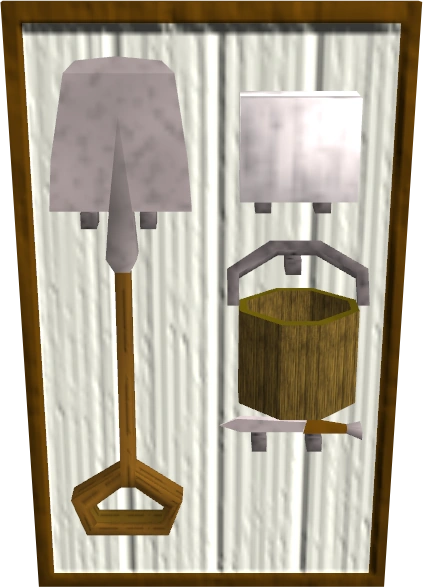
|
25 | Tool store 1 Oak plank ×2 |
120 | 1,000 | 2,224 | ||
| Tool store 3 | 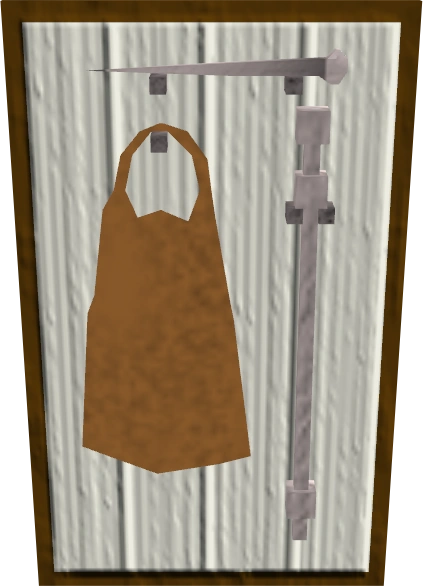
|
35 | Tool store 2 Oak plank ×2 |
120 | 1,500 | 3,336 | ||
| Tool store 4 | 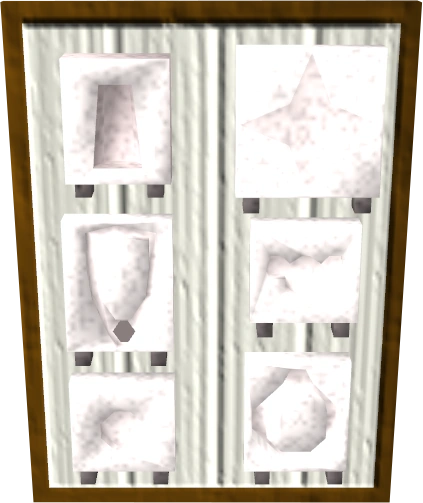
|
44 | Tool store 3 Oak plank ×2 |
120 | 2,000 | 4,448 | ||
| Tool store 5 | 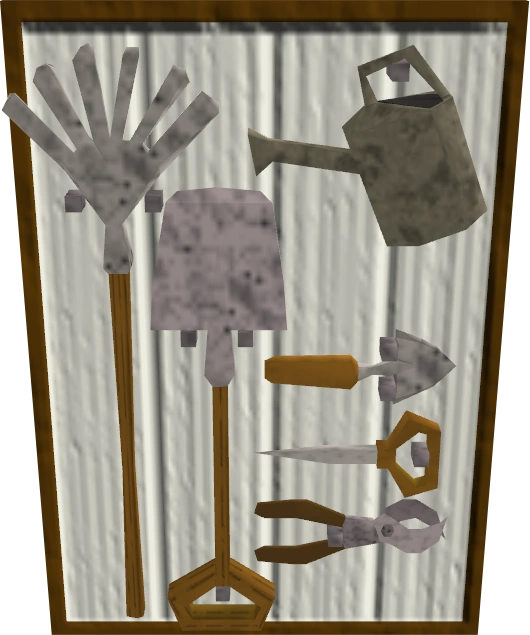
|
55 | Tool store 4 Oak plank ×2 |
120 | 2,500 | 5,560 | ||
Cost of completion
To build this room with the highest level objects in one go, players would require:
| Level | 77 | ||||
|---|---|---|---|---|---|
| Room cost | 10,000 | ||||
| Hotspot | Object | Material | Price* | ||
| Workbench | Bench with lathe | Oak plank ×10 Steel bar ×6 |
8,254 | ||
| Repair | Armour stand | Oak plank ×8 Limestone brick ×1 |
2,021 | ||
| Heraldry | Banner easel | Oak plank ×8 Bolt of cloth ×2 |
3,300 | ||
| Clockmaking | Crafting table 4 | Oak plank ×6 Molten glass ×3 |
3,339 | ||
| Tool | Tool store 5 | Oak plank ×10 | 2,500 | ||
| Total cost (including room cost) | 29,414 | ||||
* Price is taken as the lower between the Grand Exchange price and Supplier price. The price of logs is not included as these are assumed to be obtained by players themselves.
Workshop | |
|---|---|
| Workbenches | |
| Heraldry stands |
|
| Repair benches |
|
| Tool stores |
|
| Crafting tables |
|