Tag: Visual edit |
m (cleanup) |
||
| (284 intermediate revisions by more than 100 users not shown) | |||
| Line 1: | Line 1: | ||
| − | {{redirect3|WGS|For the Dungeoneering boss, see [[World-gorger Shukarhazh]]}} |
||
{{Has quick guide}} |
{{Has quick guide}} |
||
{{Infobox Quest |
{{Infobox Quest |
||
| − | | |
+ | |image = [[File:Lucien and the Stone of Jas.png|300px]] |
| − | | |
+ | |name = While Guthix Sleeps |
| + | |aka = WGS |
||
| − | | update = While Guthix Sleeps |
||
| + | |release = [[26 November]] [[2008]] |
||
| − | | aka = WGS |
||
| + | |update = While Guthix Sleeps |
||
| − | | release = [[26 November]] [[2008]] |
||
| − | | |
+ | |members = Yes |
| − | | |
+ | |voice = No |
| − | | |
+ | |series = [[The Rise of Lucien quest series|The Rise of Lucien]]<br />[[Temple Knight quest series|Temple Knight]]<br />[[Dragonkin quest series|Dragonkin]] |
| − | | |
+ | |difficulty = Grandmaster |
| + | |number = 147 |
||
| − | | length = Extremely Long |
||
| + | |developer = [[Tytn H]] |
||
| − | | number = 144 |
||
| − | | |
+ | |leaddesign = [[Mark Ogilvie|Mark O]] |
| + | |secdev = [[Paul Gower|Paul G]], John H |
||
| + | |assdev = [[Lewis M]], Tim C, Matt H, Marion C |
||
| + | |addwriting = [[John A]], Luke M, [[Content Developers#Stephen R|Stephen R]] |
||
| + | |techsupport = [[Content Developers#Ashleigh B|Ashleigh B]], [[Benny P]], [[Content Developers#Chihiro Y|Chihiro Y]] |
||
| + | |review = John A, [[Rod C]], Matt H |
||
| + | |leadartist = James W |
||
| + | |graphics = Matthew S, Mark B, Alex R, Matthew M, Paul B, Jeff K, Wayne M, Matthew N, Kavi M, Daniel J, Giuseppe G |
||
| + | |qa = Daniel O'R, Dan G, James H, Florian P |
||
| + | |editorial = Stephen R, [[David Osborne|Dave O]], Luke M, Veronika H |
||
| + | |questhelp = Katie B |
||
| + | |audio = Adam B |
||
}} |
}} |
||
| − | '''While Guthix Sleeps''' |
+ | '''While Guthix Sleeps''' was the first grandmaster [[quest]] in ''[[RuneScape]]'', released on [[26 November]] [[2008]]. It is the sequel to [[Temple of Ikov]]. Prior to its release, various teasers and hints towards this quest were released in a multitude of different content, as well as in website features, over the course of nearly two years. |
| − | Although newer quests such as [[Nomad's |
+ | It was, for a long time, considered the longest and hardest quest in ''RuneScape''. Although some newer quests such as [[Nomad's Elegy]] or [[The Lord of Vampyrium]] are generally considered to be more difficult in terms of combat, While Guthix Sleeps is still regarded as having one of the most immersive storylines in the game, and is often claimed to be one of the greatest quests released. |
==Introduction== |
==Introduction== |
||
| + | {{Cquote2|Movario licked his dry, cracked lips, not taking his eyes off the ancient book in front of him. His hand, acting almost like a separate entity, scratched spidery notes onto parchment. He knew who V was, but the references to the stone intrigued him. Fragmentary thoughts were gathering, forming up together into something important – but something was missing, some key detail. With trembling fingers he turned the yellowed page. |
||
| − | {{Cquote2|The craggy, bearded face of the druid shook with anger as he addressed his congregation: “How safe do you really feel? And are you happy to stand by while 'He' plans to make [[Gielinor]] his own?” |
||
| + | |||
| + | “The stone was clearly not of this world...” |
||
| + | |||
| + | A triumphant scratch of Movario's quill tore through the parchment. That was it! After all this time his research was finally bearing fruit!'<nowiki/>' |
||
| + | |||
| + | The antiquated surroundings of the temple afforded little warmth, and the only luxury was the lone, guttering candle by which he read. The chill still reached inside, but it did not register for Movario as his unyielding research ground on through the days.}} |
||
| + | |||
| + | ==Official description== |
||
| + | {{Quote|'<nowiki/>'The craggy, bearded face of the druid shook with anger as he addressed his congregation: "How safe do you really feel? And are you happy to stand by while 'He' plans to make [[Gielinor]] his own?" |
||
| − | The congregation murmured in apprehension. |
+ | '<nowiki/>'The congregation murmured in apprehension. |
| − | The druid continued, |
+ | '<nowiki/>'The druid continued, "I, for one, will no longer live in fear: we must act now!" |
| − | There was a commotion outside, and soon a red-faced youth ran in, |
+ | '<nowiki/>'There was a commotion outside, and soon a red-faced youth ran in, "Another murder...the tracker...he's been found!" |
| + | A power grows in the north, and an efficient spy network reports all that transpires to its master. The long, dark fear buried in the back of everyone's mind is starting to grow. That which was once overlooked has now become hard to ignore. |
||
| − | == Official description == |
||
| − | {{Cquote2|A power grows in the north, and an efficient spy network reports all that transpires to its master. The long, dark fear buried in the back of everyone's mind is starting to grow. That which was once overlooked has now become hard to ignore. |
||
For what nefarious purpose are there spies in Draynor? |
For what nefarious purpose are there spies in Draynor? |
||
| Line 38: | Line 56: | ||
Any interested parties should contact Radimus Erkle for what may prove to be the most challenging experience of their entire career.}} |
Any interested parties should contact Radimus Erkle for what may prove to be the most challenging experience of their entire career.}} |
||
| − | == |
+ | ==Walkthrough== |
{{Quest details |
{{Quest details |
||
|icon = While Guthix Sleeps icon.png |
|icon = While Guthix Sleeps icon.png |
||
|start = Speak to Radimus Erkle at the [[Legends' Guild]] |
|start = Speak to Radimus Erkle at the [[Legends' Guild]] |
||
|difficulty = Grandmaster |
|difficulty = Grandmaster |
||
| + | |length = Very, Very Long |
||
| − | |length = Extremely long (Can take up to 7 hours, or as few as 3 if fully prepared) |
||
|members = Yes |
|members = Yes |
||
|requirements = |
|requirements = |
||
| − | {{Questreq|While Guthix Sleeps}} |
+ | {{Questreq|While Guthix Sleeps|5}} |
{{Skillreq|Summoning|23}} |
{{Skillreq|Summoning|23}} |
||
| + | {{Skillreq|Agility|25}} |
||
| − | {{Skillreq|Hunter|55}} ([[Hunter#Temporary boosts|temporary boost]] possible, only needed to start quest) |
||
| + | {{Skillreq|Hunter|55}} |
||
| − | {{Skillreq|Thieving|60}} ([[Thieving#Temporary boosts|temporary boost]] possible) |
||
| + | {{Skillreq|Thieving|60}} |
||
{{Skillreq|Defence|65}} |
{{Skillreq|Defence|65}} |
||
| − | {{Skillreq|Farming|65}} |
+ | {{Skillreq|Farming|65}} |
| − | {{Skillreq|Herblore|65}} |
+ | {{Skillreq|Herblore|65}} |
| + | {{Skillreq|Magic|75}} |
||
| − | {{Skillreq|Magic|75}} ([[Magic#Temporary Magic boosting items|temporary boost]] possible, only needed to start quest) |
||
| + | * Be eligible for entry to the [[Warriors' Guild]] (the sum of your Attack and Strength must be at or above 130, or one of them must be 99) |
||
| − | *Gained a total of 270 [[Quest Point]]s |
||
| + | * Have defeated [[Bork]] in the [[Chaos Tunnels]] |
||
| − | *Be eligible for entry to the [[Warriors' Guild]] (the sum of your Attack and Strength must be at or above 130, or one of them must be 99) |
||
| − | *Have defeated [[Bork]] in the [[Chaos Tunnels]] (Which means at least finishing [[The Hunt for Surok]] miniquest) |
||
|items = |
|items = |
||
| − | *[[Sapphire lantern]] |
+ | * [[Sapphire lantern]] |
| − | *3 [[Air rune]]s and 1 each of [[Earth rune|earth]], [[Fire rune|fire]], [[Water rune|water]], [[Mind rune|mind]], [[Law rune|law]] and [[death rune]] |
+ | * 3 [[Air rune]]s and 1 each of [[Earth rune|earth]], [[Fire rune|fire]], [[Water rune|water]], [[Mind rune|mind]], [[Law rune|law]] and [[death rune]] |
| − | *1 [[log]] (any type) |
+ | * 1 [[log]] (any type except [[acadia logs]]) |
| − | *[[Charcoal]] and [[papyrus]] (These may easily be obtained during the quest) |
+ | * [[Charcoal]] and [[papyrus]] (These may easily be obtained during the quest) |
| − | *[[Lantern lens]] |
+ | * [[Lantern lens]] |
| + | * [[Mort myre fungus]] |
||
| − | *[[Ring of Charos|Ring of Charos (a)]] |
||
| − | *[[Unpowered orb]] |
+ | * [[Unpowered orb]] |
| + | * [[Ring of charos (a)]] or 5,000 [[coin]]s |
||
| − | *A [[bronze helm]] and an [[iron chainbody]] (can be obtained during the quest) |
||
| + | * Items to enter the [[Black Knights' Fortress]] ([[Skull of Remembrance]], [[bronze helm]]/[[iron chainbody]], [[black armour set]] or [[black knight captain's armour]] (cosmetic version works)) |
||
| − | *Runes to cast the [[NPC Contact]] spell (2 [[air rune]]s, 1 [[Astral rune]], 1 [[Cosmic rune]]) |
||
| − | *Runes |
+ | * Runes to cast the [[NPC Contact]] spell (2 [[air rune]]s, 1 [[Astral rune]], 1 [[Cosmic rune]]) |
| + | * Runes for any charge orb spell (30 runes of a chosen element and 3 [[cosmic rune]]s) |
||
| − | *Equipment for two different attack styles |
||
| + | * Equipment for two different attack styles |
||
| − | *Either a [[snapdragon seed]] or enough coins to buy one from Thaerisk at 25% off the GE price |
||
| + | * Either a [[snapdragon seed]] or enough coins to buy one from Thaerisk at 25% off the GE price |
||
| − | '''Recommended Items:''' |
||
| + | |recommended = |
||
| − | *Activated [[lodestone]]s in [[Burthorpe]], [[Canifis]], [[Edgeville]], [[Falador]], [[Karamja]], [[Oo'glog]], [[Port Sarim]], [[Seers' Village]], [[Taverley]], [[Varrock]] and [[Yanille]] |
||
| + | * Activated [[lodestone]]s in [[Burthorpe]], [[Canifis]], [[Edgeville]], [[Falador]], [[Karamja]], [[Oo'glog]], [[Port Sarim]], [[Seers' Village]], [[Taverley]], [[Varrock]] and [[Yanille]] |
||
| − | *A [[Dramen staff|dramen]] or [[lunar staff]], unless you have completed [[Fairy Tale III - Orks Rift]] |
||
| + | * A [[Dramen staff|dramen]] or [[lunar staff]], unless you have completed [[Fairy Tale III - Orks Rift]] |
||
| − | *A [[games necklace]] |
||
| + | * A [[games necklace]] |
||
| − | *Runes to cast the [[NPC Contact]] spell 3 additional times (6 [[air rune]]s, 3 [[Astral rune]], 3 [[Cosmic rune]]) |
||
| + | * Runes to cast the [[NPC Contact]] spell 3 additional times (6 [[air rune]]s, 3 [[Astral rune]], 3 [[Cosmic rune]]) |
||
| − | *Lots of [[super energy potion]]s |
||
| + | * Some [[super energy potion]]s |
||
| − | *[[Druid pouch]] or [[Ouroboros pouch]] |
||
| + | * [[Druid pouch]] or [[ouroboros pouch]] |
||
| − | *A set of [[elite black armour]] to save time |
||
| + | * A set of [[elite black armour]] to save time, otherwise you will have to kill guards until you collect each piece |
||
| − | *[[Ring of life]] |
||
| + | * [[Ring of life]] |
||
|kills = |
|kills = |
||
| − | *[[Assassin (While Guthix Sleeps)|Assassins]] x2 (level |
+ | * [[Assassin (While Guthix Sleeps)|Assassins]] x2 (level 42) |
| − | *[[Mercenary |
+ | * [[Mercenary mage]] (level 70) |
| − | *[[Mercenary axeman]] x2 (level |
+ | * [[Mercenary axeman]] x2 (level 91) |
| − | *[[Elite Black Knight]] x3 (level |
+ | * [[Elite Black Knight]] x3 (level 100) |
| + | * [[Balance Elemental]] (level 117) |
||
| − | *[[Tormented demon]] x2 (level 170; your stats are boosted extremely high during the fight) |
||
| + | * [[Tormented demon]] x2 (level 119; your stats are boosted extremely high during the fight) |
||
| − | *[[Balance Elemental]] (level 146) |
||
}} |
}} |
||
| − | ===Something |
+ | ===Something fishy=== |
[[File:Radimus Erkle chathead.png|left]] |
[[File:Radimus Erkle chathead.png|left]] |
||
To begin, talk to [[Radimus Erkle]], the Grand Vizier of the [[Legends' Guild]] (fairy ring {{fairycode|blr}}). He will direct you to [[Ivy Sophista]], a druidess in [[Taverley]], who is planning to lead a mission into [[Karamja]] in order to establish a new temple dedicated to [[Guthix]]. He will not reveal any information about the mission, saying it is top secret. He informs you of the pass phrase to say to Ivy: "''Our friend in common places great faith in totems''". |
To begin, talk to [[Radimus Erkle]], the Grand Vizier of the [[Legends' Guild]] (fairy ring {{fairycode|blr}}). He will direct you to [[Ivy Sophista]], a druidess in [[Taverley]], who is planning to lead a mission into [[Karamja]] in order to establish a new temple dedicated to [[Guthix]]. He will not reveal any information about the mission, saying it is top secret. He informs you of the pass phrase to say to Ivy: "''Our friend in common places great faith in totems''". |
||
| − | |||
| − | If you are using boosts to start the quest, your skills must be boosted when you begin speaking with Radimus Erkle. If they fall below the required skills before you accept but after you begin talking to him, you can still start the quest. |
||
Make your way to Taverley. Ivy is located in a house, west of Pikkupstix. Speak to her and say the correct phrase. She will reveal that there is no plan to construct a Guthixian temple on Karamja and Radimus was led to believe so in order to protect him. She will send you to [[Thaerisk Cemphier]], who can be found upstairs. |
Make your way to Taverley. Ivy is located in a house, west of Pikkupstix. Speak to her and say the correct phrase. She will reveal that there is no plan to construct a Guthixian temple on Karamja and Radimus was led to believe so in order to protect him. She will send you to [[Thaerisk Cemphier]], who can be found upstairs. |
||
| − | {{clear}} |
||
| + | {{Clear}} |
||
===Crux Eqal=== |
===Crux Eqal=== |
||
| − | + | {{Needed|recommended=A weapon to kill two assassins}} |
|
[[File:Thaerisk Cemphier chathead.png|left]] |
[[File:Thaerisk Cemphier chathead.png|left]] |
||
[[File:Assasins attack Thaerisk Cemphier.png|thumb|250px|Thaerisk fighting back.]] |
[[File:Assasins attack Thaerisk Cemphier.png|thumb|250px|Thaerisk fighting back.]] |
||
| − | Go up the ladder and speak to Thaerisk. He confirms that the temple is just a cover story by his organisation, [[Crux Eqal]], which was made by druids to combat the threat of the [[Mahjarrat]]. Thaerisk explains to you that a certain foe, [[Lucien]], is trying to achieve the status of a God using the [[Staff of |
+ | Go up the ladder and speak to Thaerisk. He confirms that the temple is just a cover story by his organisation, [[Crux Eqal]], which was made by druids to combat the threat of the [[Mahjarrat]]. Thaerisk explains to you that a certain foe, [[Lucien]], is trying to achieve the status of a God using the [[Staff of Armadyl]], not unlike Zamorak. While gathering info, his spies are mysteriously killed, which is keeping them at a major disadvantage. |
As you are talking to him, two [[Assassin (While Guthix Sleeps)|assassins]] will appear and will attempt to kill you. They use range, but aren't much of a threat. Kill both of them and speak to Thaerisk again. |
As you are talking to him, two [[Assassin (While Guthix Sleeps)|assassins]] will appear and will attempt to kill you. They use range, but aren't much of a threat. Kill both of them and speak to Thaerisk again. |
||
| Line 111: | Line 128: | ||
He will then read some of the oldest documents in the archive, in old, barely decipherable languages to obtain Movario's location. During your conversation, he says, "Do I look like an expert tracker?", but suggests using "some jungle creatures that are able to take a scent and track it down." He says to "talk to some sort of jungle hunting expert on the matter." |
He will then read some of the oldest documents in the archive, in old, barely decipherable languages to obtain Movario's location. During your conversation, he says, "Do I look like an expert tracker?", but suggests using "some jungle creatures that are able to take a scent and track it down." He says to "talk to some sort of jungle hunting expert on the matter." |
||
| − | ===Jungle |
+ | ===Jungle fever=== |
| + | {{Needed|[[Logs]], [[mort myre fungus]]|recommended=If you have completed [[As a First Resort]] and do not have 55 Hunter, it is advised to travel to Oo'glog and take a dip in the mud bath to boost your Hunter level.}} |
||
| − | '''''Items needed:''' [[Logs]].'' |
||
| + | [[File:Catching a Broav.png|thumb|left|200px|Catching a Broav]] |
||
| + | Locate the [[Hunting expert]], the most proficient hunter, in the [[Feldip Hunter area]] inside her hut. Ways to get to the Hunting expert are teleports to [[Oo'glog]] [[lodestone]], [[Mobilising Armies]] teleport, {{fairycode|aks}} [[fairy ring]] code or the [[gnome glider]] to [[Gnormadium Avlafrim]]. There is a guide marker that appears as an i on the map at her location. |
||
| + | When you ask her about animals that could be used to track down scents, she tells you to catch a [[broav]], who are famous for their powerful sense of smell. They are, however, extremely hard to catch, but she pinpoints the only location where a trap can be used. Also, the bait needed to catch a broav are mushrooms from [[Morytania]], which you will receive from the Hunting Expert. |
||
| − | '''''Recommended:''' Teleports to [[Oo'glog]] (fastest), [[Mobilising Armies]], [[Yanille]] [[fairy ring]] {{fairycode|aks}} or the [[gnome glider]] to [[Gnormadium Avlafrim]]. If you have completed [[As a First Resort...]] and do not have 55 Hunter, it is advised to travel to Oo'glog and take a dip in the mud bath to boost your Hunter level.'' |
||
| + | Go to the pit, located west of the Hunting expert, and build a [[pitfall trap]] using a log and a knife, and finally bait it with some [[mort myre fungus]]. Stand aside and be patient, and eventually, a wild broav will appear and fall in the trap. Dismantle the trap to obtain an [[unconscious broav]] in your inventory. Bring your latest catch to the expert, who will then agree to train it to track scents for you. |
||
| − | [[File:Catching a Broav.png|thumb|left|200px|Catching a Broav.]] |
||
| − | Locate the [[Hunting expert]], the most proficient hunter, in the [[Feldip Hunter area]] inside her hut. When you ask her about animals that could be used to track down scents, she tells you to catch a [[Broav]], who are famous for their powerful sense of smell. They are, however, extremely hard to catch, but she pinpoints the only location where a trap can be used. Also, the bait needed to catch a broav are mushrooms from [[Morytania]], which you will receive from the Hunting Expert. |
||
| − | |||
| − | Go to the pit west of the [[Hunting expert]] and build a [[Hunter#Pitfall Trapping|pitfall trap]] using a log and a knife, and finally bait it with some [[mort myre fungus]]. Stand aside and be patient, and eventually a wild [[Broav]] will appear and fall in the trap. Dismantle the trap to obtain an [[unconscious broav]] in your inventory. Bring your latest catch to the expert, who will then agree to train it to track scents for you. |
||
===Bravo Broav!=== |
===Bravo Broav!=== |
||
| − | + | {{Needed|[[Ring of charos (a)]] or 5,000 [[coin]]s, a rune each of [[Mind rune|mind]], [[Air rune|air]], [[Water rune|water]], [[Earth rune|earth]], and [[Fire rune|fire]], for later use.}} |
|
| − | |||
| − | '''''Recommended:''' Fairy code {{fairycode|djp}} - [[Tower of Life]], or an [[Ardougne cloak 2]] or higher.'' |
||
| − | |||
[[File:Broav chathead.png|left]] |
[[File:Broav chathead.png|left]] |
||
[[File:WGS door.png|thumb|250px|Where your Broav leads you to.]] |
[[File:WGS door.png|thumb|250px|Where your Broav leads you to.]] |
||
| − | As you have obtained a way to track down Movario's scent, you now need an object which belonged to him. Earlier, Reldo had mentioned |
+ | As you have obtained a way to track down [[Movario]]'s scent, you now need an object which belonged to him. Earlier, Reldo had mentioned Movario's Khazard accent, so you might be able to find something there that may lead you to him. Speak to [[Angor]] at the bar near [[Fight Arena (location)|Khazard's Fight Arena]] about Movario, who says that he frequently saw Movario lugging his laundry to a house nearby. A few ways to get there are by using the {{fairycode|djp}} fairy ring code, [[Yanille]] lodestone, [[Tower of Life (building)|Tower of Life]] teleport, or an [[Ardougne cloak 1]] or higher. |
| − | Go to the laundry house just west of the [[Fight Arena (building)|Fight Arena]] with an activated [[ring of |
+ | Go to the laundry house just west of the [[Fight Arena (building)|Fight Arena]] with an activated [[ring of charos]], and charm the [[Khazard launderer]] into giving you Movario's [[dirty laundry]]. Alternatively, you can use 5,000 coins to bribe him (you need to have the coins in your inventory to access the bribe option, so you may have to withdraw gold from your money pouch). |
| − | Drop your broav and use the dirty clothes on |
+ | Drop your broav and use the dirty clothes on it. As it can get stuck behind obstacles while following Movario's scent, you should move around the obstacle, use the "call pet" option in the pet interface, and use the shirt on it again to get it to resume tracking. The broav will eventually lead you to the north-westerly building on the [[battlefield]], where Khazard troops and [[gnome]]s are engaged in combat. The door is locked, so climb over the broken wall nearby. Call your broav then use the clothes on it again. When you get the message ''It seems that the Broav has found something interesting with this table'', search the table to find a trapdoor leading into a dungeon. |
*If you have completed Fight Arena, the guards will not talk to you. In this case, you must talk to the local on the northwest corner of the arena to continue with the quest. |
*If you have completed Fight Arena, the guards will not talk to you. In this case, you must talk to the local on the northwest corner of the arena to continue with the quest. |
||
| − | ===Movario's |
+ | ===Movario's base=== |
:''See [[Movario's base]] for a map of the dungeon.'' |
:''See [[Movario's base]] for a map of the dungeon.'' |
||
| + | {{Needed|recommended=Combat equipment for killing [[Elite Khazard guard]]s and some food may be helpful. [[Blood Burst]]/[[Blood Barrage]] from the [[Ancient Magicks]] spellbook are '''extremely''' helpful for killing multiple guards at once. Also have at least six inventory spaces open}} |
||
| + | ====No welcome mat?==== |
||
| − | '''''Recommended:''' If you have under 60 [[Thieving]], bring some temporary boosts. Combat equipment for killing [[Elite Khazard guard]]s and some food may be helpful. [[Blood Burst]]/[[Blood Barrage]] from the [[Ancient Magicks]] spellbook are '''extremely''' helpful for killing multiple guards at once. Also have at least six inventory spaces open.'' |
||
| + | Enter the trapdoor and go through the passage until you reach the crossroads, after which you need to head north along the curving path. At the end of the path are some stairs. Climb down. |
||
| − | |||
| − | ====No Welcome Mat?==== |
||
| − | Enter the trapdoor and go through the passage till you reach the crossroads, after which you need to head north along the curving path. At the end of the path are some stairs. Climb down. |
||
There is an old battered door at the south end of the corridor. Choosing the option to open the door will not work, as it is locked. Search on the door instead to read the sign. |
There is an old battered door at the south end of the corridor. Choosing the option to open the door will not work, as it is locked. Search on the door instead to read the sign. |
||
| − | Look closely at the text "Further Access Prohibited". One of the letters is replaced by the symbol of a rune, which is the rune you must use to unlock the door and disarm the first of its two traps. If you use an incorrect rune, the door will fire an unblockable blast spell at you, causing 250 damage to your |
+ | Look closely at the text "Further Access Prohibited". One of the letters is replaced by the symbol of a rune, which is the rune you must use to unlock the door and disarm the first of its two traps. If you use an incorrect rune, the door will fire an unblockable blast spell at you, causing 250 damage to your life points. |
| − | The colour of the blast spell signifies the rune you should have used on the door - blue for water, red for fire, green for earth, white for air, or purple for mind |
+ | The colour of the blast spell signifies the rune you should have used on the door - blue for water, red for fire, green for earth, white for air, or purple for mind, though the required rune changes after every incorrect try. |
{| class="wikitable" |
{| class="wikitable" |
||
| Line 153: | Line 165: | ||
! colspan="4" | "Prohibited" is the key indicating which rune to use. In the game, only 1 letter will be affected. |
! colspan="4" | "Prohibited" is the key indicating which rune to use. In the game, only 1 letter will be affected. |
||
|- |
|- |
||
| − | !Symbol (Letter) |
+ | ! Symbol (Letter) |
| − | !Rune |
+ | ! Rune |
| − | !Blast colour |
+ | ! Blast colour |
| rowspan="6" |[[File:Movario Locked Door.gif|center|Locked Door]] |
| rowspan="6" |[[File:Movario Locked Door.gif|center|Locked Door]] |
||
|- |
|- |
||
| {{ctr}} | [[File:O rune.png]] (O) |
| {{ctr}} | [[File:O rune.png]] (O) |
||
| {{ctr}} | [[File:Mind rune.png|Mind rune]] |
| {{ctr}} | [[File:Mind rune.png|Mind rune]] |
||
| − | |Purple |
+ | | Purple |
|- |
|- |
||
| {{ctr}} | [[File:H rune.png]] (H) |
| {{ctr}} | [[File:H rune.png]] (H) |
||
| {{ctr}} | [[File:Earth rune.png|Earth rune]] |
| {{ctr}} | [[File:Earth rune.png|Earth rune]] |
||
| − | |Green |
+ | | Green |
|- |
|- |
||
| {{ctr}} | [[File:E rune.png]] (E) |
| {{ctr}} | [[File:E rune.png]] (E) |
||
| {{ctr}} | [[File:Air rune.png|Air rune]] |
| {{ctr}} | [[File:Air rune.png|Air rune]] |
||
| − | |White |
+ | | White |
|- |
|- |
||
| {{ctr}} | [[File:unk rune.png]] (E) |
| {{ctr}} | [[File:unk rune.png]] (E) |
||
| {{ctr}} | [[File:Fire rune.png|Fire rune]] |
| {{ctr}} | [[File:Fire rune.png|Fire rune]] |
||
| − | |Red |
+ | | Red |
|- |
|- |
||
| {{ctr}} | [[File:D rune.png]] (D) |
| {{ctr}} | [[File:D rune.png]] (D) |
||
| {{ctr}} | [[File:Water rune.png|Water rune]] |
| {{ctr}} | [[File:Water rune.png|Water rune]] |
||
| − | |Blue |
+ | | Blue |
|} |
|} |
||
| − | After you enter the correct rune, you hear a click. ''' |
+ | After you enter the correct rune, you hear a click. Boost your Thieving level if necessary, then '''search''' the door again and you will find a trap to attempt to disarm. If you fail at your attempt or try to open the door without searching it first, it will cause 350 damage and inflict an 88 damage poison condition. Three [[Elite Khazard guard]]s will also be summoned to attack, and must be killed before attempting to disarm the trap again. Using area-of-effect abilities and/or Burst or Barrage spells from the [[Ancient Magicks]] spellbook will make short work of them. Once you successfully disarm the trap, you will be able to go through. |
''You cannot enter the base with less than 1 kg weight, so un-equip any [[weight-reducing clothing]] that you might be wearing.'' |
''You cannot enter the base with less than 1 kg weight, so un-equip any [[weight-reducing clothing]] that you might be wearing.'' |
||
| − | ====Electrifying |
+ | ====Electrifying ordeal==== |
| − | Once inside, a message appears notifying you that the floor has slightly sunk under your weight. |
+ | Once inside, a message appears notifying you that the floor has slightly sunk under your weight. |
You find yourself in a large room filled with bookcases, with wires running between them. Searching the painting on the east wall reveals a small room with a pile of weights, drawer and a thermometer. No need to do anything here yet. |
You find yourself in a large room filled with bookcases, with wires running between them. Searching the painting on the east wall reveals a small room with a pile of weights, drawer and a thermometer. No need to do anything here yet. |
||
| − | [[File:Electric door.png|thumb|250px|The electric door |
+ | [[File:Electric door.png|thumb|250px|The electric door]] |
To open the cage door, you need to divert all the power from the electrified gate to the wires, using the bookcases. Search the bookshelves until you hear a CLICK. You should search the outer bookcases that have electricity running towards them to disable them. From that bookshelf, follow the wire that faintly glows to find the next bookshelf to search. Repeat until the electric door opens. |
To open the cage door, you need to divert all the power from the electrified gate to the wires, using the bookcases. Search the bookshelves until you hear a CLICK. You should search the outer bookcases that have electricity running towards them to disable them. From that bookshelf, follow the wire that faintly glows to find the next bookshelf to search. Repeat until the electric door opens. |
||
* "You pull the book lever and hear a faint click, but notice nothing in particular happening." means to try another bookcase. |
* "You pull the book lever and hear a faint click, but notice nothing in particular happening." means to try another bookcase. |
||
| − | * "You pull a book lever." "CLICK!" means that was the correct bookcase. |
+ | * "You pull a book lever." "CLICK!" means that was the correct bookcase. Follow the lit up wires to the next case. |
* "CLICK! Chherrkizzz. You hear a locking sound coming from the large door in the north." means the electrified door has been disabled and can be opened. |
* "CLICK! Chherrkizzz. You hear a locking sound coming from the large door in the north." means the electrified door has been disabled and can be opened. |
||
| + | The process can reset, so keep trying. Searching/entering the room with the painting may reset the process. |
||
| − | Search the stairs once the door is unlocked to disarm a trap. If you do not disarm it you will be dealt 420 life points, knocking you out and sending you to Taverley. Beware of the spike traps that hit 190 life points. Climb up. |
||
| + | |||
| + | Search the stairs once the door is unlocked to disarm a trap. If you do not disarm it you will be dealt up to 1500 damage points. Climb up. |
||
====Proportionality==== |
====Proportionality==== |
||
| − | You are now in Movario's study room. |
+ | You are now in Movario's study room. Do not take anything from the treasure box; it is a trap, and you will be hit for 500 life points. Searching the treasure reveals it to be fake, so don't bother. Search the desk to obtain [[Movario's notes (volume 1)]]. Read the notes. Pick up the [[waste-paper basket]] next to the desk and search it to find a [[ruby key]]. Search the bookcase to the west of the trash can, and use the ruby key on it. A set of steps will rise in the north-west corner of the room. |
| − | Climb up the staircase. Search the bed to remove the covers, revealing a hidden chest. Search the bed again to dismantle the bed-chest trap and finally use the ruby key on the chest. Open and search the chest to obtain a [[strange key loop]], [[strange key teeth]], and [[ |
+ | Climb up the staircase. If you need to boost your Thieving level again, do so now. Search the bed to remove the covers, revealing a hidden chest. Search the bed again to dismantle the bed-chest trap and finally use the ruby key on the chest. Open and search the chest to obtain a [[strange key loop]], [[strange key teeth]], and [[Movario's notes (volume 2)]]. Read these notes too. |
| − | + | Do not drop either of the sets of notes after reading; you will need to show them to Thaerisk later. |
|
Now that you have plundered Movario's base, you need to leave the area with the obtained items. When you attempt to leave by conventional methods, you find that a magical force is blocking your teleportation matrix. Therefore, you must now find another way out. |
Now that you have plundered Movario's base, you need to leave the area with the obtained items. When you attempt to leave by conventional methods, you find that a magical force is blocking your teleportation matrix. Therefore, you must now find another way out. |
||
| − | Go back down to the wire room and search the drawers, in the small east room you had uncovered, to obtain [[ |
+ | Go back down to the wire room and search the drawers, in the small east room you had uncovered, to obtain [[notes on pressure]]. Look at the thermometer; it should read a number. |
| − | *The number is a certain amount of "Tickits" - the value represents how much you weighed when you entered the area. |
+ | * The number is a certain amount of "Tickits" - the value represents how much you weighed when you entered the area. |
| − | *To exit the room, the number of "Tickits" must be exactly equal to your current weight - shown in your |
+ | * To exit the room, the number of "Tickits" must be exactly equal to your current weight - shown in your equipment screen. |
| − | *If your mass is different than the "Tickits" value, you must add enough weights to the statue, so that it adds up to the higher number. |
+ | * If your mass is different than the "Tickits" value, you must add enough weights to the statue, so that it adds up to the higher number. |
| − | **For example, if you weigh 41 |
+ | ** For example, if you weigh 41{{kg}}, and the "Tickits" says 11, you must put 30{{kg}} on the statue (11 + 30 = 41). If you weigh 29{{kg}} and the 'Tickits" says 31{{kg}}, you must pick up 2{{kg}} from the weight pile and keep it in your inventory (31 - 29 = 2). |
| − | There is a pile of weights next to the temperature gauge. There are 3 sizes: [[weight (1kg)|1kg]], [[weight (2kg)|2kg]], and [[weight (5kg)|5kg.]] Pick out weights equal to the number that is required and place them on the statue |
+ | There is a pile of weights next to the temperature gauge. There are 3 sizes: [[weight (1kg)|1kg]], [[weight (2kg)|2kg]], and [[weight (5kg)|5kg.]] Pick out weights equal to the number that is required and place them on the statue found up the stairs in the study room, just north of the stairs. Use the weights on the statue. |
| − | + | If your weight changed while you were in the room, then you must repeat these steps to get the correct weight. |
|
After depositing the weights, go through the door in his office. If you succeed, the door will open and you can leave. If you don't, the small circle near the door will countdown from 3 for each failure. If the counter reaches 0, the door opens and you'll be suffocated by a gas and thrown into a jail room. You will also lose Movario's notes and the key teeth and loop, and will need to get them back again; though you don't have to repeat any of the above steps again apart from the tickits puzzle. You can teleport out when you open the door. |
After depositing the weights, go through the door in his office. If you succeed, the door will open and you can leave. If you don't, the small circle near the door will countdown from 3 for each failure. If the counter reaches 0, the door opens and you'll be suffocated by a gas and thrown into a jail room. You will also lose Movario's notes and the key teeth and loop, and will need to get them back again; though you don't have to repeat any of the above steps again apart from the tickits puzzle. You can teleport out when you open the door. |
||
| − | ===Battle for the |
+ | ===Battle for the truth=== |
| − | + | {{Needed|recommended=A weapon to kill [[Mercenary axeman|mercenary axemen]]; [[gloves of silence]] might help as well}} |
|
| − | [[File:Mercenary axemen.png|thumb|250px|left|The slaying of Armadyl followers |
+ | [[File:Mercenary axemen.png|thumb|250px|left|The slaying of Armadyl followers]] |
| + | Head back to Thaerisk, on the {{FloorNumber|2}} of the house west of Pikkupstix, and show him all the items that you obtained in the base. If you do not have all the notes in your inventory, Cemphier will send you back to get more information. He reads the notes and tells you that Lucien is reaching closer to a powerful artefact, one that brought magic to Gielinor and was touched by the very gods themselves, and that immediate action should be taken. Thaerisk now wants you to go to [[McGrubor's Wood]], to meet with the [[Guardians of Armadyl]]. [[McGrubor's Wood]] is west of Seer's Village lodestone. You will meet the Guardians on the north end. |
||
| + | [[File:Talking to Idria.png|thumb|200px|Idria in the Forester's Arms]] |
||
| − | Head back to Thaerisk and show him all the items that you obtained in the base. If you do not have all the notes in your inventory, Cemphier will send you back to get more information. He reads the notes and tells you that Lucien is reaching closer to the staff and that immediate action should be taken. Thaerisk now wants you to go to [[McGrubor's Wood]], to meet with the [[Guardians of Armadyl]]. |
||
| + | Head to the building in McGrubor's Wood, and a cutscene will start. Lucien's minions are attacking the guardians and you've arrived just right in the middle of the battle. Kill all the [[Mercenary axeman|mercenary axemen]] and attack the lone [[mercenary mage]], who teleports to safety. Search the dead mercenaries to find a damaged and bloodied [[pendant of Lucien]], although you choose not to take it. Talk to the [[wounded guardian]], who will ask you to find [[Idria]] in the "arms of a forester," before losing consciousness. |
||
| + | Go to the [[Seers' Village]] pub, the [[Forester's Arms]], walk upstairs, and talk to Idria. She reveals that Lucien is raising an army of undead heroes in the [[wilderness]] to the north; Lucien's spy network has infiltrated most of [[Misthalin]]. She then reveals that their plan is to capture a spy in Draynor and interrogate him for Lucien's exact whereabouts. |
||
| − | [[File:Talking to Idria.png|thumb|200px|Idria in the Forester's Arms.]] |
||
| − | Head to the building in [[McGrubor's Wood]] and a cutscene will start. Lucien's minions are attacking the guardians and you've arrived just right in the middle of the battle. Kill all the [[Mercenary Axemen]] and attack the lone [[Mercenary mage]], who teleports to safety. Search the dead mercenaries to find a damaged and bloodied [[pendant of Lucien]], although you choose not to take it. Talk to the [[wounded guardian]], who will ask you to find [[Idria]] in the "arms of a forester," before losing consciousness. |
||
| + | [[File:The Crux Eqal alliance.png|thumb|left|200px|Thaerisk, Idria, and Akrisae discussing plans]] |
||
| − | |||
| + | Go to [[Falador]] and talk to [[Sir Tiffy Cashien]] in the park. He will send you to the [[White Knights' Castle]]. At the castle, you find the three allied organisation leaders - Thaerisk, [[Akrisae]] and his assistant [[Silif]], and Idria - together. They are in the eastern room on the {{FloorNumber|1}}, by the jail cell. They agree to put aside their differences and focus on defeating Lucien. They will give you a [[Teleorb (While Guthix Sleeps)|teleorb]] to put on one of Lucien's spies in Draynor Village. Akrisae will offer to teleport you there. |
||
| − | Go to the [[Seer's village]] pub, the [[Forester's Arms]], walk upstairs, and talk to Idria. She reveals that Lucien is raising an army of undead heroes in the [[wilderness]] to the north; Lucien's spy network has infiltrated most of [[Misthalin]]. She then reveals that their plan is to capture a spy in Draynor and interrogate him for Lucien's exact whereabouts. |
||
| − | |||
| − | [[File:The Crux Eqal alliance.png|thumb|left|200px|Thaerisk, Idria, and Akrisae discussing plans.]] |
||
| − | Go to [[Falador]] and talk to [[Sir Tiffy Cashien]] in the park. He will send you to the [[White Knights' Castle]]. At the castle, you find the three allied organisation leaders - Thaerisk, [[Akrisae]] and his assistant [[Silif]], and Idria - together. They are in the eastern room on the ground floor, by the jail cell. They agree to put aside their differences and focus on defeating Lucien. They will give you a [[Teleorb (While Guthix Sleeps)|teleorb]] to put on one of Lucien's spies in Draynor Village. Akrisae will offer to teleport you there. |
||
[[File:Druid with super truth serum.png|thumb|200px|The druid attempting to administer the truth serum to the stranger.]] |
[[File:Druid with super truth serum.png|thumb|200px|The druid attempting to administer the truth serum to the stranger.]] |
||
| Line 237: | Line 249: | ||
[[File:Druid chathead.png|left]] |
[[File:Druid chathead.png|left]] |
||
| − | Return to [[Falador]] |
+ | Return to [[Falador]] after successfully planting the orb and talk to Thaerisk and Akrisae. The spy will be teleported into the cell, and the truth serum will be brought in by a druid. A [[cutscene]] shows a very clumsy attempt to administer the truth serum, as, despite the presence of a [[druid bodyguard]], the stranger attacks the druid. Oops! The serum drops and breaks, and you will have to make another one. Thaerisk will ask you to hurry to [[Betty]] in [[Port Sarim]], with a [[snapdragon seed]], so that she can enchant it and you can get on with the truth. |
| − | ===Rosy |
+ | ===Rosy serum=== |
| − | + | {{Needed|recommended=Bringing a [[Falador teleport|Falador Teletab]] is a good idea, as you need to return to Falador before you can recruit the other heroes. Also, having a [[lantern lens]] and a [[snapdragon seed]] ready might speed things along.}} |
|
| + | You can either use the [[lodestone network]] or Thaerisk's free teleport to reach [[Port Sarim]]. Thaerisk will also sell you a snapdragon seed for 25% off the current Grand Exchange price (currently {{formatnum: {{#expr: 0.75 * {{GEP|Snapdragon seed}} - 2 round 0}} }} coins instead of {{GEPrice|Snapdragon seed}} coins) so if you don't have one to spare, it is advised to buy it from Thaerisk. |
||
| − | |||
| − | You can either use the [[lodestone network]] or Thaerisk's free teleport to reach [[Port Sarim]]. Thaerisk will also sell you a snapdragon seed for 25% off the current Grand Exchange price (currently {{formatnum: {{#expr: 0.75 * {{:Exchange:Snapdragon seed|View=price}} - 2 round 0}} }} coins instead of {{GEPrice|Snapdragon seed}} coins) so if you don't have one to spare, it is advised to buy it from Thaerisk. |
||
[[File:Enriching the snapdragon seed.png|thumb|left|A player uses a rose tinted lens on the snapdragon seed]] |
[[File:Enriching the snapdragon seed.png|thumb|left|A player uses a rose tinted lens on the snapdragon seed]] |
||
| Line 250: | Line 261: | ||
[[File:Harvesting the enriched Snapdragon.png|thumb|A player harvests the enriched snapdragon from the farming patch on the top of the castle.]] |
[[File:Harvesting the enriched Snapdragon.png|thumb|A player harvests the enriched snapdragon from the farming patch on the top of the castle.]] |
||
| − | Go back to [[Falador]] and talk to Thaerisk. He says that the seed must be planted in a specially created patch on the top of the castle |
+ | Go back to [[Falador]] and talk to Thaerisk. He says that the seed must be planted in a specially created patch on the top of the castle; climb up the western stairs to the top and plant the seed in the patch. |
Go talk to [[Idria]], who asks you to recruit four heroes to apprehend Lucien: |
Go talk to [[Idria]], who asks you to recruit four heroes to apprehend Lucien: |
||
| − | #[[Duradel]]; in [[Shilo Village]] |
+ | # [[Duradel]]; slayer master in [[Shilo Village (location)|Shilo Village]] |
| − | #[[Hazelmere]]; east of [[Yanille]] ( |
+ | # [[Hazelmere]]; east of [[Yanille]] ([[Fairy ring]] code: {{fairycode|cls}}) |
| − | #[[Mazchna]]; north-east of [[Canifis]] |
+ | # [[Mazchna]]; the slayer master north-east of [[Canifis]] |
| − | #[[Turael]]; |
+ | # [[Turael]]; south end of [[Taverley]] |
| − | Additionally, you may activate [[Lunar |
+ | Additionally, you may activate [[Lunar spells]] and use [[NPC Contact]] to contact the three [[slayer masters]], since you will need NPC Contact again in the next section. |
===The Fellowship=== |
===The Fellowship=== |
||
| − | + | {{Needed|[[Charcoal]] and [[papyrus]] (both can be found on location)}} |
|
| + | Once you have successfully enrolled everyone, head to the top of the White Knights' Castle to collect the fully grown [[enriched snapdragon]] herb from the patch. Once you have the enriched snapdragon, mix it into your [[truth serum]] to make [[super truth serum]]. |
||
| − | |||
| − | Once you have successfully enrolled everyone, talk to Thaerisk, who tells you to collect the fully grown [[enriched snapdragon]] herb from the patch. Once you have the enriched snapdragon, mix it into your [[truth serum]] to make [[super truth serum]]. |
||
| − | Head back to the room with the leaders and open the cupboard. Inside you can find a papyrus and charcoal. Now go into the cell and convince the captured spy to drink |
+ | Head back to the room with the leaders and open the cupboard. Inside you can find a papyrus and charcoal. Now go into the cell and convince the captured spy to drink the serum. You will be given 3 options. The correct method varies by player, and there is no penalty for choosing an incorrect option. |
[[File:While Guthix Sleeps heroes.png|thumb|300px|All of the heroes together.]] |
[[File:While Guthix Sleeps heroes.png|thumb|300px|All of the heroes together.]] |
||
He will reveal his master's identity to you, which you will sketch with your charcoal and papyrus, to get a [[suspect sketch]]. Give the sketch to Idria, who will put up [[poster]]s seeking information on the wizard known as [[Dark Squall]]. Then she will ask you to recruit four more heroes: |
He will reveal his master's identity to you, which you will sketch with your charcoal and papyrus, to get a [[suspect sketch]]. Give the sketch to Idria, who will put up [[poster]]s seeking information on the wizard known as [[Dark Squall]]. Then she will ask you to recruit four more heroes: |
||
| − | #[[Ghommal]] |
+ | # [[Ghommal]]; at the entrance of the [[Warriors' Guild]] |
| − | #[[Harrallak Menarous]] |
+ | # [[Harrallak Menarous]]; ground floor of the Warriors' Guild |
| + | # [[Sloane]]; first floor of the Warriors' Guild, past the gate to the east |
||
| − | #[[Sloane]] |
||
| − | #[[Cyrisus]] |
+ | # [[Cyrisus]]; by using the [[NPC Contact]] spell |
| − | The first three can be found at the [[Warriors' Guild]]. If you |
+ | The first three can be found at the [[Warriors' Guild]]. If you don't have a black armour set to enter the Black Knights' Fortress, you can buy an [[iron chainbody]] and [[bronze helm]] in the guild instead. Cyrisus may only be contacted by using the [[NPC Contact]] spell. Remember to switch back to normal magics for the next section. |
| − | Return and speak to |
+ | Return and speak to Akrisae. He will send you to find [[Silif]], who has gone missing in action whilst following the Dark Squall, and was last seen entering the [[Black Knights' Fortress (building)|Black Knights' Fortress]]. |
===The Dark Squall=== |
===The Dark Squall=== |
||
:''See [[Black Knights' Catacombs]] for a map of the dungeon.'' |
:''See [[Black Knights' Catacombs]] for a map of the dungeon.'' |
||
| + | {{Needed|13 free inventory spaces, [[bronze helm]] and [[iron chainbody]] (or a [[black armour set]], the [[Black Knight captain's armour]], or its cosmetic version, obtained from [[The Death of Chivalry]]), an [[unpowered orb]] and the runes for any charge-orb spell '''([[standard spellbook]] is required)''', food for fighting multiple enemies, equipment for two combat styles '''OR''' an [[elite black armour set]] to avoid combat and save time. Emergency teleport such as [[ectophial]] for anyone around 100 combat}} |
||
| − | |||
| + | With the required items, head to the [[Black Knights' Fortress (building)|Black Knights' Fortress]] and equip the bronze helm and iron chainbody, or full (elite) black set or [[black knight captain's armour]]. A good way to get there is to use the [[skull of remembrance]] and climb down the tower to the {{FloorNumber|1}}. |
||
| − | '''''Items needed:''' 13 free inventory spaces, [[bronze helm]] and [[iron chainbody]] (or [[black armour set]], or the [[Black Knight captain's armour]] obtained during [[The Death of Chivalry]]), [[unpowered orb]] and the runes for any charge orb spell '''(the normal spellbook is required)''', food for fighting multiple enemies, equipment for two combat styles '''OR''' an [[elite black armour set]] to avoid combat and save time. Emergency teleport such as [[ectophial]] for anyone around 140 combat.'' |
||
| + | * From the front entrance, open the portcullis and go down the ladder at the south-western corner of the floor. Near the east wall, '''search''' the floor tile with an orb marking on it. Cast a charge orb spell on the tile and the unpowered orb in your inventory will reveal a trap door. This destroys the orb, although the trapdoor will remain open. |
||
| − | |||
| + | ** If you get the message, "You see no reason to waste runes casting magic on the floor", you either haven't searched the tile or you haven't checked back with Akrisae yet. |
||
| − | With the required items, head to the [[Black Knights' Fortress (building)|Black Knights' Fortress]] and equip the bronze helm and iron chainbody, or full (elite) black set or [[black knight captain's armour]]. |
||
| − | *Open the porticullis and go down the ladder at the south-western corner of the floor. Near the east wall, search the floor tile with an orb marking on it; cast a charge orb spell on the tile and the unpowered orb in your inventory will reveal a trap door. ''Future trips down the trapdoor do not require an orb or runes for the spell.'' |
||
<gallery position="center" widths="280px"> |
<gallery position="center" widths="280px"> |
||
Black Knights' Fortress catacombs trapdoor entrance.png|The ladder leading down to the Black Knight basement |
Black Knights' Fortress catacombs trapdoor entrance.png|The ladder leading down to the Black Knight basement |
||
WGS orb door.png|The tile on which you need to cast Charge Orb. Better not forget your runes and the standard spellbook! |
WGS orb door.png|The tile on which you need to cast Charge Orb. Better not forget your runes and the standard spellbook! |
||
</gallery> |
</gallery> |
||
| − | *Climb down the ladder. You will be attacked by [[elite black knight]]s, along with their [[Elite Dark Ranger|ranger]], [[Elite Dark Mage|mage]] and [[Elite Dark Warrior|warrior]] counterparts. Your goal is to kill three black knights and collect an [[elite black armour]] set. |
||
[[File:Silif in prison.png|thumb|250px|Silif in prison]] |
[[File:Silif in prison.png|thumb|250px|Silif in prison]] |
||
| + | * Climb down the ladder. You will be attacked by [[elite black knight]]s, along with their [[Elite Dark Ranger|ranger]], [[Elite Dark Mage|mage]] and [[Elite Dark Warrior|warrior]] counterparts. Your goal is to kill three black knights and collect an [[elite black armour]] set. |
||
| − | **There is an altar on the second floor of the fortress that you can use to recharge your prayer points, instead of using prayer potions in between kills. |
||
| + | ** There is an altar on the {{FloorNumber|3}} of the fortress that you can use to recharge your prayer points, instead of using prayer potions in between kills. |
||
| − | **If you run east, there is a relatively clear area where players can fight a single knight. It is suggested to do this now as crossing the broken bridge will land you in a group of both knights and mages. |
||
| + | ** If you run east, there is a relatively clear area where players can fight a single knight. It is suggested to do this now as crossing the broken bridge will land you in a group of both knights and mages. |
||
| − | **You will need at least two combat styles to kill the knights, as they pray against the style you use. However, their prayer runs out after 20 attacks, and you'll be able to fight with your choice of attack style. For this purpose, it is best to run down their prayer with a high speed attack, such as darts. |
||
| + | ** You will need at least two combat styles to kill the knights, as they pray against the style you use. However, their prayer runs out after 20 attacks, and you'll be able to fight with your choice of attack style. For this purpose, it is best to run down their prayer with a high speed attack, such as darts. |
||
| − | **The knights drop a piece of [[elite black armour]], until you have gained a full set; you can also save a lot of time by purchasing the set on the GE. When you've got the full armour, equip it, and no one in the dungeon will be aggressive any more. |
||
| + | ** The knights drop individual pieces of elite black armour, until you have gained a full set; you can also save a lot of time by purchasing the set on the GE. The [[Black Knight captain's armour]] will not make the knights non-aggressive. Be sure to buy an additional set of elite black armour, or keep your existing full [[black equipment]] for the next section of the quest. Otherwise, when you've got the full elite armour, equip it, and no one in the dungeon will be aggressive any more. |
||
| − | *Head north by jumping across the broken bridge; be sure to click on the side you wish to jump to. Go east, and climb up the wall, before running north and over the barricade. |
||
| + | * Head north by jumping across the broken bridge; be sure to click on the side you wish to jump to. Go east, and climb up the wall, before running north and over the barricade. |
||
[[File:Surok's desks.png|thumb|250px|Searching through [[Dark Squall]]'s desks.]] |
[[File:Surok's desks.png|thumb|250px|Searching through [[Dark Squall]]'s desks.]] |
||
| − | *Walk north-west from the barricade until you reach a fork in the path, then head east. You will reach a set of jail cells, one of which holds Silif. |
+ | * Walk north-west from the barricade until you reach a fork in the path, then head east. You will reach a set of jail cells, one of which holds Silif. |
| − | Talk to Silif, who says that he feels very weak. Head west to the fork in the path, and take the north path and enter the northern door. Search all the desks and wardrobes in the room. You will find [[Dagon'hai]] robes, a set of |
+ | Talk to Silif, who says that he feels very weak. Head west to the fork in the path, and take the north path and enter the northern door. Search all the desks and wardrobes in the room. You will find [[Dagon'hai]] robes, a set of elite black armour, a [[strange teleorb]], a [[lobster]] and a [[restore potion]]. Do not consume the lobster and restore potion. Search the key rack on the northern wall for a [[cell key]]. |
| + | * If you already have any pieces of the Dagon'hai robe set, you will not obtain those when you search the wardrobe. Necromancer's robe pieces in your bank (in the absence of Dagon'hai robe pieces) have the same effect within the base; however, after you return to the white knights' castle Silif will hand you a set. |
||
| − | '''''Notes:''''' |
||
| + | * Items dropped in this room will disappear after leaving and there is no way to get them back. |
||
| − | *If you already have any pieces of the Dagon'hai robe set, you will not obtain those when you search the wardrobe. Necromancer's robe pieces in your bank (in the absence of Dagon'hai robe pieces) have the same effect within the base, however, after you return to the white knights' castle Silif will hand you a set. |
||
| − | *Do not attempt to climb the ladder in the eastern part of the room or attempt to wear any of the clothes you found in the wardrobes. Attempting any of these will turn the guards, rangers, and mages aggressive, in this room and elsewhere. If you do try to climb the ladder, you must exit the room through the door you originally entered and then re-enter the room to make the dungeon inhabitants non aggressive again. |
+ | * Do not attempt to climb the ladder in the eastern part of the room or attempt to wear any of the clothes you found in the wardrobes. Attempting any of these will turn the guards, rangers, and mages aggressive, in this room and elsewhere. If you do try to climb the ladder, you must exit the room through the door you originally entered and then re-enter the room to make the dungeon inhabitants non aggressive again. Alternatively, you can find a safe spot and then unequip and re-equip your Elite black armour. |
| − | *If you log out while Silif is following you, he will go back to his cell and to his original armour. You don't need to get him another set of black armour, as he will retain the previous one. |
+ | * If you log out while Silif is following you, he will go back to his cell and to his original armour. You don't need to get him another set of black armour, as he will retain the previous one. |
| − | Return to [[Silif]]'s cell and unlock the door using the key. Use the food and potion on Silif to recover him. If you have a familiar at this point, dismiss it or Silif will not take your [[ |
+ | Return to [[Silif]]'s cell and unlock the door using the key. Use the food and potion on Silif to recover him. If you have a familiar at this point, dismiss it or Silif will not take your [[elite black armour]]. Speak to him. He will put on the Elite black armour and follow you. |
[[File:Surok's reveal.png|thumb|left|200px|It's Surok!]] |
[[File:Surok's reveal.png|thumb|left|200px|It's Surok!]] |
||
| − | Return to the northern room |
+ | Return to the northern room and lead Silif to the maps on the southern wall, and talk to him. He says that he needs some time to study the maps, and hands you a [[Teleorb (While Guthix Sleeps)|teleorb]] to plant on Dark Squall while he does so. You will succeed, but Dark Squall recognises you, and he reveals that he is actually [[Surok]]. |
Surok calls on his minions to attack you, at which point, everyone in Surok's base becomes aggressive. The best method of escape is to simply teleport out, but if you don't have a teleport, activate Protect/Deflect Magic and run back to safety. |
Surok calls on his minions to attack you, at which point, everyone in Surok's base becomes aggressive. The best method of escape is to simply teleport out, but if you don't have a teleport, activate Protect/Deflect Magic and run back to safety. |
||
| − | {{clear}} |
||
| + | {{Clear}} |
||
| − | ===Lucien's Might=== |
||
| + | |||
| − | '''''Items needed:''' [[Strange teleorb]], 1 [[law rune]], 1 [[death rune]] and [[Dagon'hai]] robes.'' |
||
| + | ===Lucien's might=== |
||
| + | {{Needed|[[Strange teleorb]], 1 [[law rune]], 1 [[death rune]] and [[Dagon'hai]] robes. In this section, there is a brief encounter in the Wilderness wherein it is possible to lose all items and spawn no grave, therefore banking all unnecessary items is recommended}} |
||
[[File:Teleport to lucien.png|thumb|250px|Remember to bring a [[death rune|death]] and [[law rune]]!]] |
[[File:Teleport to lucien.png|thumb|250px|Remember to bring a [[death rune|death]] and [[law rune]]!]] |
||
| + | [[File:Lucien (skeletal) chathead.png|left]] |
||
| − | [[File:Lucien skeletal chathead.png|left]]In Falador, talk to Akrisae. He will instruct you to impersonate Surok, so that you can infiltrate Lucien's base, by wearing his robes. When ready, wear the [[Dagon'hai]] robes and enter the nearby jail cell. The teleorb you set on Surok will be used to imprison him there, and you will be teleported to Surok's hideout instead. |
||
| + | In Falador, talk to Akrisae. He will instruct you to impersonate Surok, so that you can infiltrate Lucien's base, by wearing his robes. When ready, wear the [[Dagon'hai]] robes and enter the nearby jail cell. The teleorb you set on Surok will be used to imprison him there, and you will be teleported to Surok's hideout instead. |
||
| − | + | If you forget something and have to teleport out, you will have to use the tunnels you used before to get to Silif. Make sure to wear your [[Dagon'hai robes]] as well when doing this. |
|
| − | After being teleported inside, climb up the ladder in the north-eastern corner and stand in the stone circle in the middle of the room. Activate the strange teleorb to be teleported into Lucien's camp near the [[God Wars Dungeon]]. Follow the north-eastern path towards the chapel and climb up the ice wall. Jump across to a ledge on the chapel and walk east. |
+ | After being teleported inside, climb up the ladder in the north-eastern corner and stand in the stone circle in the middle of the room. Activate the strange teleorb to be teleported into Lucien's camp near the [[God Wars Dungeon]]. Talk to an elite black knight to learn that Lucien is 'recruiting' and you should go to the chapel to "observe". Follow the north-eastern path towards the chapel and climb up the ice wall. Jump across to a ledge on the chapel and walk east. |
[[File:BattleReadyHeroes.png|thumb|left|250px|The heroes, ready for battle with Lucien.]] |
[[File:BattleReadyHeroes.png|thumb|left|250px|The heroes, ready for battle with Lucien.]] |
||
| − | A cutscene will play. [[Lucien]] emerges from the nearby cave and raises undead heroes from their graves, some appearing to be the Barrows brothers and another seems to be Bork. Lucien then |
+ | A cutscene will play. [[Lucien]] emerges from the nearby cave and raises undead heroes from their graves, some appearing to be the Barrows brothers and another seems to be Bork. Lucien then reveals that he is aware of your presence, and that you are not Surok. He attacks with magic, which you manage to avoid; the spell strikes two Elite Black Knights instead, destroying them. [[Hazelmere]], detecting danger, teleports into battle along with the rest of the fellowship – [[Turael]], [[Duradel]], [[Mazchna]], [[Ghommal]], [[Sloane]], [[Harrallak Menarous|Harrallak]], and [[Cyrisus]]. |
| − | During the ensuing battle, Duradel, Turael, Hazelmere, Sloane, Cyrisus, and Ghommal are all tragically slain by Lucien, who then sends his guards to attack you. After the cutscene ends, you'll find yourself on the chapel's ledge |
+ | During the ensuing battle, Duradel, Turael, Hazelmere, Sloane, Cyrisus, and Ghommal are all tragically slain by Lucien, who then sends his guards to attack you. After the cutscene ends, you'll find yourself on the chapel's ledge; jump to the nearby snow wall and return to Falador. You cannot teleport from the chapel itself, since it is in level 38 [[Wilderness]], but you can avoid the wilderness by backtracking to the stone circle and using the strange teleorb to go back to the black knight's area, or simply using a teleport from the snow wall itself. |
:''For images, see [[Skirmish at the Chaos Temple#Gallery]]'' |
:''For images, see [[Skirmish at the Chaos Temple#Gallery]]'' |
||
| − | ===The |
+ | ===The ancient Guthix temple=== |
| + | {{Needed|[[Dagon'hai]] robe set and a lit [[sapphire lantern]]. Filled [[druid pouch]]es might also be useful. (Unnecessary; there are skeletal remains you can search that contain six of them, as well as a blessed sickle.) |recommended=A [[games necklace]] to teleport you directly to the [[Tears of Guthix cavern]] (if you choose to walk instead, a [[spiny helmet]] or other protective gear from [[wall beast]]s is advised), [[energy potion]]s, and an [[Ouroboros pouch]] to save a little time. It is also recommended to have full prayer points and/or [[prayer potions]], as you '''will''' have to use the [[Bloom]] ability.}} |
||
| − | '''''Items needed:''' [[Dagon'hai]] robe set and a lit [[sapphire lantern]].'' |
||
| − | |||
| − | '''''Recommended:''' A [[games necklace]] to teleport you directly to the [[Tears of Guthix cavern]] (if you choose to walk instead, a [[spiny helmet]] or other protective gear from [[wall beast]]s is advised), [[energy potion]]s, and an [[Ouroboros pouch]] to save a little time. It is also recommended to have full prayer points and/or [[prayer potions]] for using the [[Bloom]] ability.'' |
||
| − | |||
[[File:StoneofJasSearch.png|thumb|286px|[[Movario]] searches for the [[Stone of Jas]].]] |
[[File:StoneofJasSearch.png|thumb|286px|[[Movario]] searches for the [[Stone of Jas]].]] |
||
| − | Once back in Falador, talk to Idria and she will say that [[Movario]] has been moving. He was last seen at the Lumbridge Swamps, searching for the Fist of Guthix. Your next task is to impersonate Surok and glean more information from him. Wearing the [[Dagon'hai]] robe set, go to the Tears of Guthix cavern, where the [[ |
+ | Once back in Falador, talk to Idria and she will say that [[Movario]] has been moving. He was last seen at the Lumbridge Swamps, searching for the Fist of Guthix. Your next task is to impersonate Surok and glean more information from him. Wearing the [[Dagon'hai]] robe set, go to the Tears of Guthix cavern, where the [[light creature]]s are, and make sure to bring a [[sapphire lantern]]. |
| − | Inside the cavern, talk to Movario. He believes that a powerful artefact, the [[Stone of Jas]], which is synonymous for the "Fist of Guthix" and "Eye of Saradomin", is resting inside the chasm below, but has no viable way to get there. Volunteer to go down to the chasm and explore for him. Attract a |
+ | Inside the cavern, talk to Movario. He believes that a powerful artefact, the [[Stone of Jas]], which is synonymous for the "Fist of Guthix" and "Eye of Saradomin", is resting inside the chasm below, but has no viable way to get there. Volunteer to go down to the chasm and explore for him. Attract a light creature with your sapphire lantern, and with some help from Movario, opt to go ''into the chasm''. |
====Into the Abyss==== |
====Into the Abyss==== |
||
{{Listen|align=right|filename=WGS descent.ogg|title=Descending into the chasm|desc=}} |
{{Listen|align=right|filename=WGS descent.ogg|title=Descending into the chasm|desc=}} |
||
| + | After landing in the chasm, search the nearby skeletons for a [[silver sickle (b)]], and six [[druid pouch]]es (the other tools are on the [[tool belt]] so you may drop them). Use the "Search" option on two nearby rocks in each northern corner to uncover two smashed braziers. Afterward, use a chisel on the smashed braziers to obtain a [[Fire orb]] and an [[Earth orb]]. Similarly, go to the air and water braziers, which are intact, and use the chisel on them to acquire an [[Air orb]] and [[Water orb]]. |
||
| − | |||
| − | After landing in the chasm, search the three nearby skeletons for a [[hammer]], [[chisel]], [[spade]], [[silver sickle (b)]], and six [[druid pouch]]es. Use the spade on the two rocks with a "Search" option to uncover two smashed braziers. Afterward, use the chisel on the smashed braziers, in each northern corner, to obtain a [[Fire orb]] and an [[Earth orb]]. Similarly, go to the air and water braziers, which are intact, and use the chisel on them to acquire an [[Air orb]] and [[Water orb]]. |
||
Head south until you reach three skull cavities on the southern wall. For each skull, examine its recessed block and use the respective orb on the block to acquire the corresponding elemental key; [[Air Key|air]], [[Earth Key|earth]] and [[Fire Key|fire keys]] should be obtained. Climb up the wall between the fire and earth cavities to reach a fourth skull cavity, which is behind a stone cube. Use the water orb on the recessed block to acquire the [[Water Key|water elemental key]]. |
Head south until you reach three skull cavities on the southern wall. For each skull, examine its recessed block and use the respective orb on the block to acquire the corresponding elemental key; [[Air Key|air]], [[Earth Key|earth]] and [[Fire Key|fire keys]] should be obtained. Climb up the wall between the fire and earth cavities to reach a fourth skull cavity, which is behind a stone cube. Use the water orb on the recessed block to acquire the [[Water Key|water elemental key]]. |
||
| − | For each of the three lower skulls, enter its nose cavity |
+ | For each of the three lower skulls, enter its nose cavity ([[Summoning]] familiars cannot be brought into these cavities, and you cannot have anything equipped in your weapon and shield slot). Crawl along the tunnel in each cavity to its end. Examine the door there and insert the respective key into the door lock. Crawl back through the tunnel and exit the skull. |
At this point, you must have used all the keys except for the fire key. Climb up the walls to the upper skull. Use the fire key on the skull's recessed block, and search the stone cube in front of the skull. The recessed block moves to reveal a cave opening in the skull. Climb through to enter the [[Ancient Guthix Temple]]. |
At this point, you must have used all the keys except for the fire key. Climb up the walls to the upper skull. Use the fire key on the skull's recessed block, and search the stone cube in front of the skull. The recessed block moves to reveal a cave opening in the skull. Climb through to enter the [[Ancient Guthix Temple]]. |
||
====The Temple of Balance==== |
====The Temple of Balance==== |
||
| + | [[File:Ancient Guthix Temple map.png|thumb|Click to view a larger version (opens on a new page)|link=Map:Ancient Guthix Temple]] |
||
| − | {{Mapthumb |
||
| − | |image = Ancient Guthix Temple map.png |
||
| − | |link = Map:Ancient Guthix Temple |
||
| − | |caption = Click to view a larger version (opens on a new page). |
||
| − | |float = right |
||
| − | }} |
||
| − | |||
The Guthixian Temple is made of a central chamber, consisting of an ancient stone table upon which smaller stone platforms are mounted. Also, to the opposite side of the table, is a giant door. Leading away from the chamber are multiple forks which lead to eight statues, each representing an aspect of ''RuneScape''. Examining the statue will reveal what it depicts. Along the forks, [[Druid Spirit]]s can be found wandering. The giant door seems to be linked to each of the statues. |
The Guthixian Temple is made of a central chamber, consisting of an ancient stone table upon which smaller stone platforms are mounted. Also, to the opposite side of the table, is a giant door. Leading away from the chamber are multiple forks which lead to eight statues, each representing an aspect of ''RuneScape''. Examining the statue will reveal what it depicts. Along the forks, [[Druid Spirit]]s can be found wandering. The giant door seems to be linked to each of the statues. |
||
| − | Use your druid |
+ | Use your [[druid pouch]]es on the druid spirits - having an [[ouroboros pouch]] in your [[Tool belt|Slayer tool belt]] will not utilise your druid pouch charges. They will thank you for releasing them and then drop the ingredients for one of the statues. |
| − | '''''Do not make potions or eat the toad legs.''' |
+ | '''''Do not make any potions or eat the toad legs.''''' |
Use the herbs and the secondary ingredients on the statues in any order. For each statue, determine which skill it represents and use the appropriate herb and secondary as listed below. For defence, energy, and strength, you might receive the ingredients for its super-doses variant. After correctly placing the ingredients on the statue of its specific element, you will receive a [[Dolmen]]. |
Use the herbs and the secondary ingredients on the statues in any order. For each statue, determine which skill it represents and use the appropriate herb and secondary as listed below. For defence, energy, and strength, you might receive the ingredients for its super-doses variant. After correctly placing the ingredients on the statue of its specific element, you will receive a [[Dolmen]]. |
||
| Line 372: | Line 373: | ||
Use the eight dolmens on the platforms on the stone table in the middle of the temple, and the giant door will open. |
Use the eight dolmens on the platforms on the stone table in the middle of the temple, and the giant door will open. |
||
| − | [[File:8 dolmen.png|thumb|250px|All 8 dolmens in place |
+ | [[File:8 dolmen.png|thumb|250px|All 8 dolmens in place]] |
Any of the 8 potions may include: |
Any of the 8 potions may include: |
||
* Agility: [[Clean toadflax]] and [[toad's legs]] |
* Agility: [[Clean toadflax]] and [[toad's legs]] |
||
| Line 379: | Line 380: | ||
* Combat: [[Clean harralander]] and [[goat horn dust]] |
* Combat: [[Clean harralander]] and [[goat horn dust]] |
||
* Defence: [[Clean cadantine]] and [[white berries]] |
* Defence: [[Clean cadantine]] and [[white berries]] |
||
| − | * Energy: [[Clean |
+ | * Energy: [[Clean avantoe]] and [[mort myre fungus]] |
* Fishing: [[Clean avantoe]] and [[snape grass]] |
* Fishing: [[Clean avantoe]] and [[snape grass]] |
||
* Hunter: [[Clean avantoe]] and [[kebbit teeth dust]] |
* Hunter: [[Clean avantoe]] and [[kebbit teeth dust]] |
||
| Line 385: | Line 386: | ||
* Prayer: [[Clean ranarr]] and [[snape grass]] |
* Prayer: [[Clean ranarr]] and [[snape grass]] |
||
* Range: [[Clean dwarf weed]] and [[wine of Zamorak]] |
* Range: [[Clean dwarf weed]] and [[wine of Zamorak]] |
||
| − | * Restoration: [[Clean snapdragon]] and [[red spiders' eggs]] |
+ | * Restoration: [[Clean snapdragon]] and [[red spiders' eggs]] |
| − | * Strength: [[Clean |
+ | * Strength: [[Clean kwuarm]] and [[limpwurt root]] |
| − | + | '''Notes:''' |
|
*The statues are different for every player. |
*The statues are different for every player. |
||
* The druid spirits will drop the ingredients for each potion a '''single time only'''. If you lose any ingredient, you will have to supply a new one yourself, so make sure you have a lot of inventory space to pick them all up. Also, for statues that may take the ingredients for regular or super versions of potions, you cannot substitute between the versions. For example, if a druid spirit drops the ingredients for a super energy potion and you lose them, the ingredients for a regular energy potion '''cannot''' be used at the energy statue. |
* The druid spirits will drop the ingredients for each potion a '''single time only'''. If you lose any ingredient, you will have to supply a new one yourself, so make sure you have a lot of inventory space to pick them all up. Also, for statues that may take the ingredients for regular or super versions of potions, you cannot substitute between the versions. For example, if a druid spirit drops the ingredients for a super energy potion and you lose them, the ingredients for a regular energy potion '''cannot''' be used at the energy statue. |
||
| Line 394: | Line 395: | ||
<gallery widths="120"> |
<gallery widths="120"> |
||
| − | + | Dolman 1 Energy statue.png|Energy |
|
| − | + | Dolman 2 Balance statue.png|Balance |
|
| − | + | Dolman 3 Prayer statue.png|Prayer |
|
| − | + | Dolman 4 Hunting statue.png|Hunting |
|
| − | + | Dolman 5 Fishing statue.png|Fishing |
|
| − | + | Dolman 6 Magic statue.png|Magic |
|
| − | + | Dolman 7 Defence statue.png|Defence |
|
| − | + | Dolman 8 Strength statue.png|Strength |
|
| − | + | Dolman 9 Agility Statue.png|Agility |
|
| − | + | Dolman 10 Restoration statue.png|Restoration |
|
Attack statue.png|Attack |
Attack statue.png|Attack |
||
guthixtemple range.png|Range |
guthixtemple range.png|Range |
||
| Line 410: | Line 411: | ||
</gallery> |
</gallery> |
||
| − | === |
+ | ===The Stone of Jas=== |
[[File:While Guthix Sleeps.png|thumb|220px|A player touches the Stone of Jas, receiving temporary power.]] |
[[File:While Guthix Sleeps.png|thumb|220px|A player touches the Stone of Jas, receiving temporary power.]] |
||
| − | ''Make whatever arrangements necessary to battle a level |
+ | ''Make whatever arrangements necessary to battle a level 117 [[Balance Elemental]] that can use all three combat styles and lower your combat stats, as well as two level 119 [[Tormented demon]]s, capable of using all three combat styles and hitting up to 1100. As the demons can use protection prayers, it is highly recommended to '''bring an alternate combat style gear''' with you. You can leave the area to get supplies, but always bring your lit sapphire lantern.'' |
'''Inventory:''' |
'''Inventory:''' |
||
| − | *A [[sapphire lantern]], a ranged or magic weapon and ammo/runes, 2 [[super restore (4)]] and a mode of emergency teleportation. |
+ | * A [[sapphire lantern]], a ranged or magic weapon and ammo/runes, 2 [[super restore (4)]] and a mode of emergency teleportation. |
| − | *A Beast of Burden familiar (such as a [[Spirit terrorbird]]) - fill all its slots with food. |
+ | * A Beast of Burden familiar (such as a [[Spirit terrorbird]]) - fill all its slots with food. |
| − | *Fill the remaining slots of your inventory with food and [[prayer potions]]. |
+ | * Fill the remaining slots of your inventory with food and [[prayer potions]]. |
'''Tips:''' |
'''Tips:''' |
||
| + | * Use stat-boosting [[prayers]]. |
||
| − | * You should have [[Chivalry]]/[[Piety]] on at all times. |
||
* The elemental's magic attack will find its target even through solid rock. |
* The elemental's magic attack will find its target even through solid rock. |
||
* You can send your familiar to attack the elemental, temporarily distracting it, but you may lose your [[Summoning familiars|familiar]] in the process, so it is advised not to store valuable things in it. |
* You can send your familiar to attack the elemental, temporarily distracting it, but you may lose your [[Summoning familiars|familiar]] in the process, so it is advised not to store valuable things in it. |
||
| + | * The Balance Elemental will almost always attack with ranged first. |
||
| − | *If you plan to flash prayers, using melee, this is one recommended set-up: |
||
| − | **'''Helmet:''' [[Torva helmet]] > [[Bandos Helmet]] > [[Helm of Neitiznot]] |
||
| − | **'''Torso:''' [[Torva platebody]] > [[Bandos chestplate]] > [[Dragon platebody]] > [[Proselyte hauberk]] |
||
| − | **'''Legs:''' [[Torva platelegs]] > [[Bandos tassets]] > [[Dragon platelegs]] = [[Dragon plateskirt]] |
||
| − | **'''Boots:''' [[Torva boots]] > [[Bandos Boots|Bandos boots]] > [[Dragon boots]] |
||
| − | **'''Gloves:''' [[Torva gloves]] > [[Bandos gloves]] > [[Barrow gloves]] |
||
| − | **'''Amulet:''' [[Amulet of fury]] > [[Amulet of glory]] |
||
| − | **'''Weapon:''' [[Drygore weaponry]] > [[Chaotic weaponry]] > {{Godsword]]/[[Zamorakian Spear]]/[[Saradomin Sword]]/[[Abyssal vine whip]] > [[Barrows weapons]]/[[Blisterwood polearm]]/[[Abyssal whip]] > [[Dragon weaponry]] |
||
| − | **'''Shield (optional):''' [[Chaotic kiteshield]] > [[Divine spirit shield]] > [[Bandos warshield]] > [[Dragonfire shield]] > [[Toktz-Ket-Xil]]/[[Dragon kiteshield]] > [[Falador shield 3]]/[[Falador shield 4|4]] |
||
| − | **'''Cape:''' [[Soul Wars Cape]] > [[Fire cape]]. |
||
| − | **'''Ring:''' [[Ring of life]], or if you're confident enough, a [[TokKul-Zo (Charged)]], for the critical hit bonuses it gives across all combat styles. |
||
| − | *The Balance Elemental will almost always attack with range first, but you can quickly activate [[Protect from missiles]]/[[Deflect Missiles]]. |
||
| − | ===The |
+ | ====The Balance Elemental==== |
[[File:Fighting elemental.png|thumb|250px|The Balance Elemental.]] |
[[File:Fighting elemental.png|thumb|250px|The Balance Elemental.]] |
||
Proceed down the corridor that was revealed when the huge door was opened. Enter a large chamber that contains a mysterious stone on a raised set of platforms. Once ready, search the stone. A short cutscene will play, in which the Balance Elemental materializes. |
Proceed down the corridor that was revealed when the huge door was opened. Enter a large chamber that contains a mysterious stone on a raised set of platforms. Once ready, search the stone. A short cutscene will play, in which the Balance Elemental materializes. |
||
| − | *The elemental is level |
+ | * The elemental is level 117 and will use all three aspects of the combat triangle. It does a maximum of 1051 life points per hit, and it has no weakness. It has two different melee attacks, one which it uses up close, and another, very rarely used, long-distance melee attack similar to that of the [[Warped Gulega]]. Its magic attack also lowers combat stats in a similar effect to [[Ahrim's set]]. |
| − | *The [[Balance Elemental]] seems to use a pattern in its attacks. It will often, though not always, attack for 3-4 rounds with one attack style, use its magical stat-lowering attack, then repeat with the same ''or'' a different attack style. |
+ | * The [[Balance Elemental]] seems to use a pattern in its attacks. It will often, though not always, attack for 3-4 rounds with one attack style, use its magical stat-lowering attack, then repeat with the same ''or'' a different attack style. |
| − | *The Balance Elemental will change appearance slightly depending on what attack it is going to use. If it has a large, flaming bow in its left hand, it is ranging. When maging, it will have large water spikes on top of its head and no weapon. If it has an enlarged arm of stone, it is meleeing. The elemental will vary its attack style based on the protection prayer you use. |
+ | * The Balance Elemental will change appearance slightly depending on what attack it is going to use. If it has a large, flaming bow in its left hand, it is ranging. When maging, it will have large water spikes on top of its head and no weapon. If it has an enlarged arm of stone, it is meleeing. The elemental will vary its attack style based on the protection prayer you use. It always begins the fight using Ranged. |
| − | *Several times while battling the elemental, it will initiate dialogues with you at around 2/3, 1/2 and 1/3 health. Its message takes up your chat box but it says nothing of importance. It seems to know you and speaks regretfully, perhaps sardonically, about your death, which seems to have happened in the elemental's past. If fighting from a distance, you will continue to attack it, thus closing the chat box. |
+ | * Several times while battling the elemental, it will initiate dialogues with you at around 2/3, 1/2 and 1/3 health. Its message takes up your chat box but it says nothing of importance. It seems to know you and speaks regretfully, perhaps sardonically, about your death, which seems to have happened in the elemental's past. If fighting from a distance, you will continue to attack it, thus closing the chat box. |
| − | *You can leave the fight while the elemental is still alive, such as by teleporting away to resupply. However, when you come back, you will have to search the mysterious stone again to call forth the elemental, which will be fully healed no matter how much damage it had when you left. |
+ | * You can leave the fight while the elemental is still alive, such as by teleporting away to resupply. However, when you come back, you will have to search the mysterious stone again to call forth the elemental, which will be fully healed no matter how much damage it had when you left. |
After you defeat the elemental, touch the mysterious stone again. Another cutscene will play, in which it is revealed that the mysterious stone is actually the [[Stone of Jas]]. All your combat stats will be boosted up to level 255. |
After you defeat the elemental, touch the mysterious stone again. Another cutscene will play, in which it is revealed that the mysterious stone is actually the [[Stone of Jas]]. All your combat stats will be boosted up to level 255. |
||
| − | ===Master of the |
+ | ====Master of the thousand curses==== |
[[File:Lucien spills the beans.png|thumb|Lucien and Movario appear.]] |
[[File:Lucien spills the beans.png|thumb|Lucien and Movario appear.]] |
||
After you discover the Stone of Jas, [[Movario]] and [[Darve]] will appear and apparently gloat over their find. Talk to Movario and go through all the options in order. Without the Elemental to annihilate him, [[Lucien]] will appear, and he will berate them for not informing him of their find. Talk to Lucien and go through all the chat options as well. |
After you discover the Stone of Jas, [[Movario]] and [[Darve]] will appear and apparently gloat over their find. Talk to Movario and go through all the options in order. Without the Elemental to annihilate him, [[Lucien]] will appear, and he will berate them for not informing him of their find. Talk to Lucien and go through all the chat options as well. |
||
[[File:The summoning of the tormented demons..png|thumb|left|Lucien summons the demons]] |
[[File:The summoning of the tormented demons..png|thumb|left|Lucien summons the demons]] |
||
| − | Movario and Darve will teleport away, followed by Lucien, who will take the Stone of Jas with him after summoning two [[tormented demon]]s to deal with you. [[Idria]] and some [[Guardian of Armadyl|Guardians of Armadyl]] will teleport in to assist you against the demons. The demons are fairly easy to defeat as you have been imbued with power by the Stone of Jas, with greatly enhanced stats — you will have level 255 in every combat skill. Note that despite being boosted by the stone, |
+ | Movario and Darve will teleport away, followed by Lucien, who will take the Stone of Jas with him after summoning two [[tormented demon]]s to deal with you. [[Idria]] and some [[Guardian of Armadyl|Guardians of Armadyl]] will teleport in to assist you against the demons. The demons are fairly easy to defeat as you have been imbued with power by the Stone of Jas, with greatly enhanced stats — you will have level 255 in every combat skill. Note that despite being boosted by the stone, the demons can still do a lot of damage, so do not underestimate them. |
[[File:Tormented demon fight.png|thumb|The player and several [[Guardians of Armadyl]] battling Lucien's "pets".]] |
[[File:Tormented demon fight.png|thumb|The player and several [[Guardians of Armadyl]] battling Lucien's "pets".]] |
||
| − | You will need at least ''two'' different combat styles for this battle, as each demon uses prayer and changes its protection prayer based on your attack style. As long as you switch styles at the right moment, you can defeat them fairly quickly. If you leave the battle, your stats will be reset; however, they will return to 255 when you return. |
+ | You will need at least ''two'' different combat styles for this battle, as each demon uses prayer and changes its protection prayer based on your attack style. As long as you switch styles at the right moment, you can defeat them fairly quickly. The Guardians of Armadyl can influence the Tormented Demons to pray Melee, so using Ranged or Magic is highly advised. If you leave the battle, your stats will be reset; however, they will return to 255 when you return. Use the nearby pillars to block one demon while you're fighting another. |
''If you '''die''' to the tormented demons, your grave will appear outside the Tears of Guthix minigame.'' |
''If you '''die''' to the tormented demons, your grave will appear outside the Tears of Guthix minigame.'' |
||
| + | [[File:Idria teleports player.png|thumb|left|Idria teleports the adventurer.]] |
||
| − | After you defeat the Tormented Demons, talk to Idria. She will commend you for your efforts and teleport you to Falador, where you must speak to her again to be presented with either of a [[Ruined dragon armour lump]], [[Ruined dragon armour shard]] or a [[Ruined dragon armour slice]] and 5,000 coins from the demons. |
||
| + | After you defeat the Tormented Demons, talk to Idria. She will commend you for your efforts and teleport you to Falador, where you must speak to her again to be presented with either of a [[Ruined dragon armour lump]], [[Ruined dragon armour shard]] or a [[Ruined dragon armour slice]] and 5,000 coins from the demons. |
||
| + | Congratulations, quest complete! |
||
| − | ====Post-Credits==== |
||
| + | |||
| + | ===Post-credits=== |
||
| + | [[File:Dragonkin cutscene.png|thumb|A dragonkin contemplating return to Gielinor during the epilogue.]] |
||
When the quest officially concludes, after using of all four 100,000 experience boosts, talk to Idria again to view the "Elsewhere..." epilogue in which you learn about the [[Dragonkin]]'s return. |
When the quest officially concludes, after using of all four 100,000 experience boosts, talk to Idria again to view the "Elsewhere..." epilogue in which you learn about the [[Dragonkin]]'s return. |
||
| + | |||
| + | If you need to re-watch the epilogue for the [[master quest cape]] after completing the quest, you can talk to Silif on the east side of the White Knights' Castle on the ground floor. |
||
| + | |||
| + | {{Clear}} |
||
==Rewards== |
==Rewards== |
||
| + | {{Quest rewards |
||
| − | [[File:While Guthix Sleeps reward.png|centre|Rewards.]] |
||
| + | |name = While Guthix Sleeps |
||
| − | *5 Quest Points |
||
| + | |qp = 5 |
||
| + | |rewards = |
||
{{Listen |
{{Listen |
||
|title=Congratulations! Quest Complete! |
|title=Congratulations! Quest Complete! |
||
| Line 475: | Line 475: | ||
|filename=Quest point cape.ogg |
|filename=Quest point cape.ogg |
||
}} |
}} |
||
| − | *A random piece of [[Ruined dragon armour lump|ruined dragon armour]] |
+ | * A random piece of [[Ruined dragon armour lump|ruined dragon armour]] |
| − | *A set of [[Elite black armour]]. |
+ | * A set of [[Elite black armour]]. |
| − | *A set of [[Dagon'hai robes set|Dagon'hai robes]]. |
+ | * A set of [[Dagon'hai robes set|Dagon'hai robes]]. |
| + | * The Balance Elemental can be faced in [[Dominion Tower]]. |
||
| − | *5,000 [[coins]] |
||
| + | * 5,000 [[coins]] |
||
| − | *4 x 100,000 experience from [[Idria]], in any skill that is at least 65. |
||
| + | * 4 x 100,000 experience from [[Idria]], in any skill that is at least 65. |
||
| − | [[File:Dragonkin cutscene.png|thumb|A dragonkin contemplating return to Gielinor during the epilogue.]] |
||
| − | *A new pet - [[Broav]]. |
+ | * A new pet - [[Broav]]. |
| − | *Access to the [[Black Knights' Catacombs]]. |
+ | * Access to the [[Black Knights' Catacombs]]. |
| − | *Opportunity to loot [[Movario's base]]. |
+ | * Opportunity to loot [[Movario's base]]. |
| − | **The base has 100 each of magic logs, coal, fire runes, and death runes; note that the logs and ores are in their |
+ | ** The base has 100 each of magic logs, coal, fire runes, and death runes; note that the logs and ores are in their un-noted form. At GE market prices, the items are worth approximately {{coins|{{GEP|Fire rune|100}} + {{GEP|Death rune|100}} + {{GEP|Coal|100}} + {{GEP|Magic logs|100}}}} coins. |
| − | *Ability to kill [[Tormented demon]]s for dragon metal pieces, dragon claw and dragon limbs. |
+ | * Ability to kill [[Tormented demon]]s for dragon metal pieces, dragon claw and dragon limbs. |
| − | *A [[Strange key teeth]] and a [[Strange key loop]] |
+ | * A [[Strange key teeth]] and a [[Strange key loop]] |
| − | + | |post quest = |
|
| + | ====Dragon Forge==== |
||
| − | ==Post-quest== |
||
| − | ===Dragon Forge=== |
||
By using either the [[Strange key teeth]] or the [[Strange key loop]] on a [[Mithril dragon]], with both pieces in your inventory, you obtain a [[Dragonkin key]]. With this key, you can unlock the [[Dragon Forge]] in the [[Ancient Cavern]], near the mithril dragons. |
By using either the [[Strange key teeth]] or the [[Strange key loop]] on a [[Mithril dragon]], with both pieces in your inventory, you obtain a [[Dragonkin key]]. With this key, you can unlock the [[Dragon Forge]] in the [[Ancient Cavern]], near the mithril dragons. |
||
| − | Inside the forge are three dragon heads and a giant orb in the centre. |
+ | Inside the forge are three dragon heads and a giant orb in the centre. Lighting each head will cause fire to appear in their mouths and slide towards the centre. Once the orb is lit, the player can leave and return to the mysterious forge to find it full of molten lava. It is here, using a [[Blast fusion hammer]] purchased from the Foreman at the [[Blast Furnace]] for 1,000,000 coins, that the player can fuse together the three parts of the [[Dragon platebody]] with [[Smithing]] level 92 (was level 99 when first released <ref>[http://forum.runescape.com/forums.ws?15,16,653,57967040 RS Forum This Week's Updates - FAQ 28-Nov-08]</ref>). The current price of the platebody is {{GEPrice|Dragon platebody}} coins. |
| − | ===Memorial |
+ | ====Memorial statues==== |
Due to the death of the close friends of your character and heroes of ''Runescape'', memorial statues were put up at several spots in remembrance of them. |
Due to the death of the close friends of your character and heroes of ''Runescape'', memorial statues were put up at several spots in remembrance of them. |
||
| − | When these statues are examined, it reads "In honour of the hero |
+ | When these statues are examined, it reads "In honour of the hero [Dead Hero's Name], who died attacking the Mahjarrat known as "Lucien". |
<gallery captionalign="left"> |
<gallery captionalign="left"> |
||
| − | + | Turael and Duradel Memorial Statues.png|Two statues of Turael and Duradel at the entrance of the Slayer Tower. |
|
Ghommal and Sloan Memorial Statues.png|Two memorial statues of Ghommal and Sloane now flank the entrance to the Warriors Guild. |
Ghommal and Sloan Memorial Statues.png|Two memorial statues of Ghommal and Sloane now flank the entrance to the Warriors Guild. |
||
Falador park statues.png|Around the pond in Falador Park, all of the memorial statues of the fallen heroes circle it. |
Falador park statues.png|Around the pond in Falador Park, all of the memorial statues of the fallen heroes circle it. |
||
</gallery> |
</gallery> |
||
| − | ===Replaced characters=== |
+ | ====Replaced characters==== |
[[File:Cyrisius Greyed out of NPC contact.png|thumb|350px|When you open up the Lunar spell NPC Contact, Cyrisus is still there, but grayed out. If you choose him, the chat box says "You take a moment of silence in honour of your fallen brethren, Cyrisus. Lucien will be made to pay."]] |
[[File:Cyrisius Greyed out of NPC contact.png|thumb|350px|When you open up the Lunar spell NPC Contact, Cyrisus is still there, but grayed out. If you choose him, the chat box says "You take a moment of silence in honour of your fallen brethren, Cyrisus. Lucien will be made to pay."]] |
||
| − | |||
After the quest, new replacement NPCs appear since Lucien killed most of the team of warriors organised to stop him in the Wilderness, although there is no replacement for [[Hazelmere]] or [[Cyrisus]]. |
After the quest, new replacement NPCs appear since Lucien killed most of the team of warriors organised to stop him in the Wilderness, although there is no replacement for [[Hazelmere]] or [[Cyrisus]]. |
||
| − | *[[Turael]] -> [[Spria]] |
+ | * [[Turael]] -> [[Spria]] |
| − | *[[Duradel]] -> [[Lapalok]] |
+ | * [[Duradel]] -> [[Lapalok]] |
| − | *[[Ghommal]] -> [[Laidee Gnonock]] |
+ | * [[Ghommal]] -> [[Laidee Gnonock]] |
| − | *[[Sloane]] -> [[Yadech Strongarm]] |
+ | * [[Sloane]] -> [[Yadech Strongarm]] |
| − | *[[Lucien]] -> [[Local Thug]] and [[Local Mage]] |
+ | * [[Lucien]] -> [[Local Thug]] and [[Local Mage]] |
| − | *[[Mazchna]] -> [[Achtryn]] - only during the quest |
+ | * [[Mazchna]] -> [[Achtryn]] - only during the quest |
| + | |music = |
||
| − | {{clear}} |
||
| + | {{Listen |
||
| + | |title = Temple Desecrated |
||
| + | |desc = Music unlocked during While Guthix Sleeps. |
||
| + | |filename = Temple Desecrated.ogg |
||
| + | }} |
||
| + | * [[Dangerous Logic]] (after entering table trapdoor) |
||
| + | * [[Black of Knight]] (in the [[Black Knights' Fortress]] dungeon) |
||
| + | * [[The Evil Within]] (in the cutscene where [[Lucien]] slays the heroes) |
||
| + | * [[The Sound of Guthix]] (in the Ancient Guthix temple) |
||
| + | * [[Temple Desecrated]] (at the battle with the [[Balance Elemental]] near the [[Stone of Jas]]) |
||
| + | }} |
||
| − | == |
+ | ==Achievements== |
| + | * {{Achievement|Epi Logueque Experience|15|Claim the experience reward and watch the epilogue following the 'While Guthix Sleeps' quest.}} |
||
| − | {{Hasdialogue|quest}} |
||
| + | * {{Achievement|One Man's Junk...Is Mine|20|Fully loot Movario's base.}} |
||
| − | |||
| + | * {{Achievement|Relight my Fire|20|Re-kindle the Dragon Forge.}} |
||
| − | ==Music unlocked== |
||
| − | {{Listen |
||
| − | | title = Temple Desecrated |
||
| − | | desc = Music unlocked during While Guthix Sleeps. |
||
| − | | filename = Temple Desecrated.ogg}} |
||
| − | * [[Dangerous Logic]] - after entering table trapdoor |
||
| − | * [[Black of Knight]] - in the [[Black Knight's Fortress]] dungeon. |
||
| − | * [[The Evil Within]] - in the cutscene where [[Lucien]] slays the heroes. |
||
| − | * [[The Sound of Guthix]] - in the Ancient Guthix temple. |
||
| − | * [[Temple Desecrated]] - at the battle with the [[Balance Elemental]] near the [[Stone of Jas]]. |
||
==Required for completing== |
==Required for completing== |
||
Completion of While Guthix Sleeps is required for the following: |
Completion of While Guthix Sleeps is required for the following: |
||
| − | *[[Ritual of the Mahjarrat]] |
+ | * [[Ritual of the Mahjarrat]] |
| − | *[[Karamja Tasks]]: |
+ | * [[Karamja Tasks]]: |
| − | **'''[[ |
+ | ** '''[[Elite Karamja Tasks|Elite]]:''' "Ten In a Row" |
| + | * [[Desert Tasks]]: |
||
| + | ** '''[[Elite Desert Tasks|Elite]]:''' "Sun Shade" (the Balance Elemental needs to be killed in the [[Dominion Tower]]) |
||
| + | |||
| + | {{Clear}} |
||
| + | ==Transcript== |
||
| + | {{Hasdialogue|quest}} |
||
==Trivia== |
==Trivia== |
||
[[File:Head image mahjarrat.png|centre|650px]] |
[[File:Head image mahjarrat.png|centre|650px]] |
||
| + | * When Silif dons the Elite Black armour, he appears to be wearing matching gauntlets and boots, although those items do not exist in game for players. Elite Black Knights also appear to wear them, although they are not dropped. |
||
* On the day of release, the spoiler read: ''The spoilers are concealed within the most challenging of puzzles, disguised by a rubric, and placed at the bottom of a perilous gorge. We may have the courage to recover them tomorrow.'' |
* On the day of release, the spoiler read: ''The spoilers are concealed within the most challenging of puzzles, disguised by a rubric, and placed at the bottom of a perilous gorge. We may have the courage to recover them tomorrow.'' |
||
| − | * At the time of release, the 270 quest point requirement meant only those who had completed all previously released quests were able to start While Guthix Sleeps, similar to the Legends' Quest's requirements when it was released. |
||
* At one point Lucien says "I am Lord Lucien of the Mahjarrat, Master of the Thousand Curses, look upon my work and despair!", a reference to ''{{wp|Ozymandias}}'', a sonnet by {{wp|Percy Bysshe Shelley}}, which reads, "My name is Ozymandias, king of kings: Look on my works, ye Mighty, and despair!" |
* At one point Lucien says "I am Lord Lucien of the Mahjarrat, Master of the Thousand Curses, look upon my work and despair!", a reference to ''{{wp|Ozymandias}}'', a sonnet by {{wp|Percy Bysshe Shelley}}, which reads, "My name is Ozymandias, king of kings: Look on my works, ye Mighty, and despair!" |
||
| + | * The name of the quest was suggested by Mod Rowley.{{CiteForum|title = Lore Campfire - Q&A|forum = RuneScape Lore Discussion|postdate = 17 April 2014|author = Mod Rowley|url = http://www.webcitation.org/6SGcYpRwV}} |
||
| − | |||
| + | * After completion of the quest, Gianne Jnr. from the gnome restaurant minigame is unaware of Hazelmere's death. He may assign a food order for Hazelmere, but the player's character will inform that "Hazelmere is no longer with us". |
||
| − | == Development team == |
||
| + | * During [[The Path of Glouphrie]], when the player is healing the sick spirit tree, they telepathically call Hazelmere out of a dream. Hazelmere complains that he was dreaming of the future, and was about to see "something that would save [his] life." It is likely that the moment referenced was his death at Lucien's hands, and thus that the player accidentally caused Hazelmere's death. |
||
| − | *'''Developer:''' Tytn H |
||
| + | * The quest requirements for While Guthix Sleeps were adjusted in the [[11 February]] [[2019]] [[patch notes]]. The following requirements were removed: 270 quest points, [[Mourning's End Part II]], [[Recipe for Disaster]], [[Summer's End]], [[Swan Song]], and [[Zogre Flesh Eaters]]. The following requirements were added: 25 Agility, [[Wanted!]], and [[Nature Spirit]] (recommended). |
||
| − | *'''Lead Design Editor:''' [[Mark Ogilvie|Mark O]] |
||
| + | ** At the time of release, the 270 quest point requirement meant only those who had completed all previously released quests were able to start While Guthix Sleeps, similar to the Legends' Quest's requirements when it was released. |
||
| − | *'''Second Developers:''' [[Paul Gower]], John H |
||
| − | *'''Assistant Developers:''' Lewis M, Tim C, Matt H, Marion C |
||
| − | *'''Additional Writing:''' John A, Luke M, Stephen R |
||
| − | *'''Technical Support:''' Ash B, Benny P, Chihiro Y |
||
| − | *'''Code Review:''' John A, Rod C, Matt H |
||
| − | *'''Lead Graphics Artist:''' James W |
||
| − | *'''Graphics:''' Matthew S, Mark B, Alex R, Matthew M, Paul B, Jeff K, Wayne M, Matthew N, Kavi M, Daniel J, Giuseppe G |
||
| − | *'''[[Quality Assurance]]:''' Daniel O'R, Dan G, James H, Florian P |
||
| − | *'''Editorial:''' Stephen R, Dave O, Luke M, Veronika H |
||
| − | *'''[[QuestHelp]]: Katie B''' |
||
| − | *'''Audio:''' Adam B |
||
==References== |
==References== |
||
{{Reflist}} |
{{Reflist}} |
||
| + | {{While Guthix Sleeps}} |
||
{{Mahjarrat quest series}} |
{{Mahjarrat quest series}} |
||
{{Temple Knights quest series}} |
{{Temple Knights quest series}} |
||
| + | {{Dragonkin quest series}} |
||
| + | {{Druid's Circles quest series}} |
||
| + | {{Gnome quest series}} |
||
[[pt:Equanto Guthix Dorme]] |
[[pt:Equanto Guthix Dorme]] |
||
[[de:Doch Guthix schläft]] |
[[de:Doch Guthix schläft]] |
||
| Line 571: | Line 571: | ||
[[pl:While Guthix Sleeps]] |
[[pl:While Guthix Sleeps]] |
||
[[Category:Mahjarrat]] |
[[Category:Mahjarrat]] |
||
| − | [[Category:While Guthix Sleeps| ]] |
||
| − | [[Category:Wikia Game Guides quests]] |
||
[[Category:Temple Knights]] |
[[Category:Temple Knights]] |
||
Latest revision as of 12:33, 8 June 2019
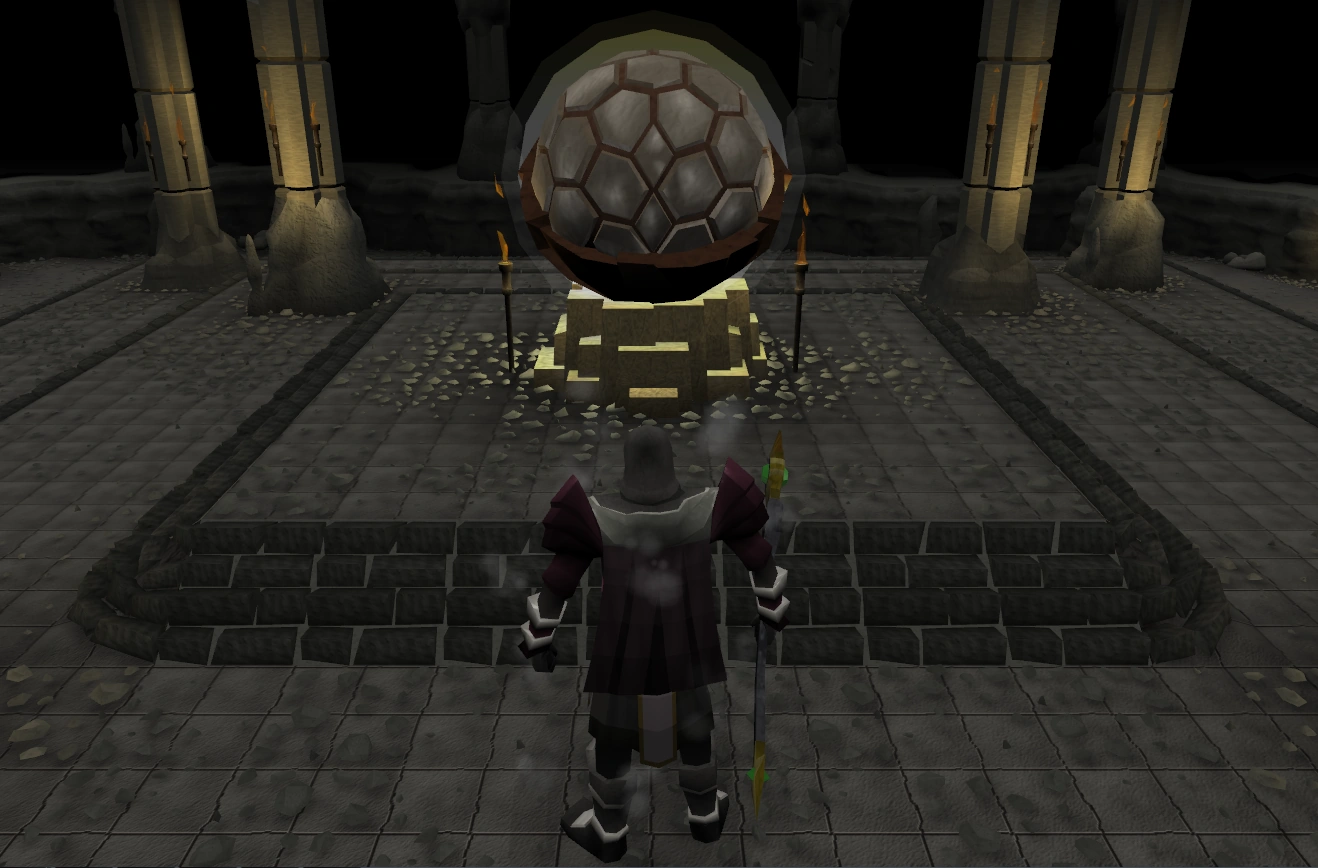
| |||||||||||||||||||||||||||||||||||||||||||||||
| Also called | WGS | ||||||||||||||||||||||||||||||||||||||||||||||
|---|---|---|---|---|---|---|---|---|---|---|---|---|---|---|---|---|---|---|---|---|---|---|---|---|---|---|---|---|---|---|---|---|---|---|---|---|---|---|---|---|---|---|---|---|---|---|---|
| Release date | 26 November 2008 (Update) | ||||||||||||||||||||||||||||||||||||||||||||||
| Members | Yes | ||||||||||||||||||||||||||||||||||||||||||||||
| Voice Over | No | ||||||||||||||||||||||||||||||||||||||||||||||
| Official difficulty | Grandmaster | ||||||||||||||||||||||||||||||||||||||||||||||
| Quest series | The Rise of Lucien Temple Knight Dragonkin | ||||||||||||||||||||||||||||||||||||||||||||||
| Age | Fifth Age | ||||||||||||||||||||||||||||||||||||||||||||||
| |||||||||||||||||||||||||||||||||||||||||||||||
While Guthix Sleeps was the first grandmaster quest in RuneScape, released on 26 November 2008. It is the sequel to Temple of Ikov. Prior to its release, various teasers and hints towards this quest were released in a multitude of different content, as well as in website features, over the course of nearly two years.
It was, for a long time, considered the longest and hardest quest in RuneScape. Although some newer quests such as Nomad's Elegy or The Lord of Vampyrium are generally considered to be more difficult in terms of combat, While Guthix Sleeps is still regarded as having one of the most immersive storylines in the game, and is often claimed to be one of the greatest quests released.
Introduction
| “ | Movario licked his dry, cracked lips, not taking his eyes off the ancient book in front of him. His hand, acting almost like a separate entity, scratched spidery notes onto parchment. He knew who V was, but the references to the stone intrigued him. Fragmentary thoughts were gathering, forming up together into something important – but something was missing, some key detail. With trembling fingers he turned the yellowed page.
“The stone was clearly not of this world...” A triumphant scratch of Movario's quill tore through the parchment. That was it! After all this time his research was finally bearing fruit!'' The antiquated surroundings of the temple afforded little warmth, and the only luxury was the lone, guttering candle by which he read. The chill still reached inside, but it did not register for Movario as his unyielding research ground on through the days. |
” |
Official description
''The craggy, bearded face of the druid shook with anger as he addressed his congregation: "How safe do you really feel? And are you happy to stand by while 'He' plans to make Gielinor his own?"
''The congregation murmured in apprehension.
''The druid continued, "I, for one, will no longer live in fear: we must act now!"
''There was a commotion outside, and soon a red-faced youth ran in, "Another murder...the tracker...he's been found!"
A power grows in the north, and an efficient spy network reports all that transpires to its master. The long, dark fear buried in the back of everyone's mind is starting to grow. That which was once overlooked has now become hard to ignore.
For what nefarious purpose are there spies in Draynor? Exactly what is Movario looking for in the Lumbridge Swamp caves? What of the ancient power of the Mahjarrat and the dragonkin? Has something been missed? The ancient powers of the gods - where did it come from, and what would happen if a mortal could tap its power?
Any interested parties should contact Radimus Erkle for what may prove to be the most challenging experience of their entire career.
Walkthrough
| Start point | |||
|---|---|---|---|
| Member requirement | |||
| Official difficulty | |||
| Official length | Very, Very Long | ||
| Requirements | Skill requirements are not boostable unless marked with a [B] for boostable.
| ||
| Items required | Items from the tool belt are not listed unless they do not work or are not automatically added.
| ||
| Recommended |
| ||
| Enemies to defeat |
|
Something fishy

To begin, talk to Radimus Erkle, the Grand Vizier of the Legends' Guild (fairy ring blr). He will direct you to Ivy Sophista, a druidess in Taverley, who is planning to lead a mission into Karamja in order to establish a new temple dedicated to Guthix. He will not reveal any information about the mission, saying it is top secret. He informs you of the pass phrase to say to Ivy: "Our friend in common places great faith in totems".
Make your way to Taverley. Ivy is located in a house, west of Pikkupstix. Speak to her and say the correct phrase. She will reveal that there is no plan to construct a Guthixian temple on Karamja and Radimus was led to believe so in order to protect him. She will send you to Thaerisk Cemphier, who can be found upstairs.
Crux Eqal

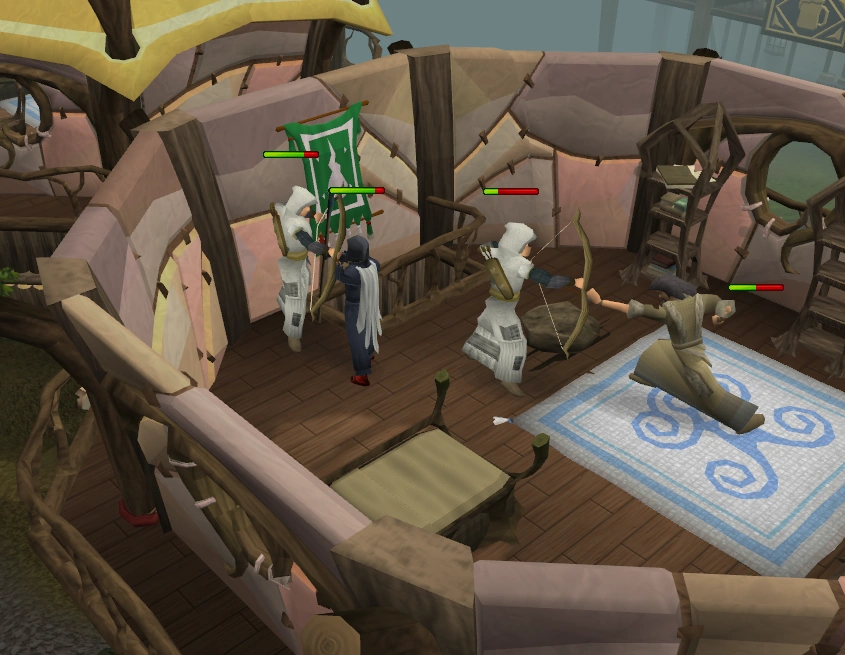

Thaerisk fighting back.
Go up the ladder and speak to Thaerisk. He confirms that the temple is just a cover story by his organisation, Crux Eqal, which was made by druids to combat the threat of the Mahjarrat. Thaerisk explains to you that a certain foe, Lucien, is trying to achieve the status of a God using the Staff of Armadyl, not unlike Zamorak. While gathering info, his spies are mysteriously killed, which is keeping them at a major disadvantage.
As you are talking to him, two assassins will appear and will attempt to kill you. They use range, but aren't much of a threat. Kill both of them and speak to Thaerisk again.
He continues, saying that the Crux Eqal has allied with the Temple Knights and the Guardians of Armadyl to build a strong base against Lucien. Enemy spies have been located in Draynor Village, with a certain Movario, whom Thaerisk wants to gather more information about. To do this, he sends you to talk to the Varrock librarian, Reldo.
Head to the Varrock Library and talk to Reldo. He seems to have explicit knowledge on Movario; Movario speaks with a slight Khazard accent, is interested in traps, housing improvements, and divination - "One thing 'No-Fingers McGrew' was reported to have said was 'solving the puzzle arms the trap'."
He will then read some of the oldest documents in the archive, in old, barely decipherable languages to obtain Movario's location. During your conversation, he says, "Do I look like an expert tracker?", but suggests using "some jungle creatures that are able to take a scent and track it down." He says to "talk to some sort of jungle hunting expert on the matter."
Jungle fever
Items recommended: If you have completed As a First Resort and do not have 55 Hunter, it is advised to travel to Oo'glog and take a dip in the mud bath to boost your Hunter level.

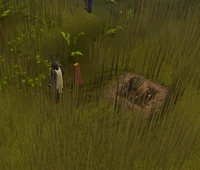
Catching a Broav
Locate the Hunting expert, the most proficient hunter, in the Feldip Hunter area inside her hut. Ways to get to the Hunting expert are teleports to Oo'glog lodestone, Mobilising Armies teleport, aks fairy ring code or the gnome glider to Gnormadium Avlafrim. There is a guide marker that appears as an i on the map at her location.
When you ask her about animals that could be used to track down scents, she tells you to catch a broav, who are famous for their powerful sense of smell. They are, however, extremely hard to catch, but she pinpoints the only location where a trap can be used. Also, the bait needed to catch a broav are mushrooms from Morytania, which you will receive from the Hunting Expert.
Go to the pit, located west of the Hunting expert, and build a pitfall trap using a log and a knife, and finally bait it with some mort myre fungus. Stand aside and be patient, and eventually, a wild broav will appear and fall in the trap. Dismantle the trap to obtain an unconscious broav in your inventory. Bring your latest catch to the expert, who will then agree to train it to track scents for you.
Bravo Broav!


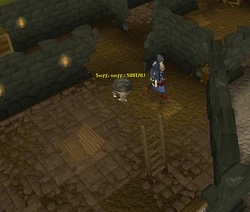
Where your Broav leads you to.
As you have obtained a way to track down Movario's scent, you now need an object which belonged to him. Earlier, Reldo had mentioned Movario's Khazard accent, so you might be able to find something there that may lead you to him. Speak to Angor at the bar near Khazard's Fight Arena about Movario, who says that he frequently saw Movario lugging his laundry to a house nearby. A few ways to get there are by using the djp fairy ring code, Yanille lodestone, Tower of Life teleport, or an Ardougne cloak 1 or higher.
Go to the laundry house just west of the Fight Arena with an activated ring of charos, and charm the Khazard launderer into giving you Movario's dirty laundry. Alternatively, you can use 5,000 coins to bribe him (you need to have the coins in your inventory to access the bribe option, so you may have to withdraw gold from your money pouch).
Drop your broav and use the dirty clothes on it. As it can get stuck behind obstacles while following Movario's scent, you should move around the obstacle, use the "call pet" option in the pet interface, and use the shirt on it again to get it to resume tracking. The broav will eventually lead you to the north-westerly building on the battlefield, where Khazard troops and gnomes are engaged in combat. The door is locked, so climb over the broken wall nearby. Call your broav then use the clothes on it again. When you get the message It seems that the Broav has found something interesting with this table, search the table to find a trapdoor leading into a dungeon.
- If you have completed Fight Arena, the guards will not talk to you. In this case, you must talk to the local on the northwest corner of the arena to continue with the quest.
Movario's base
- See Movario's base for a map of the dungeon.
No welcome mat?
Enter the trapdoor and go through the passage until you reach the crossroads, after which you need to head north along the curving path. At the end of the path are some stairs. Climb down. There is an old battered door at the south end of the corridor. Choosing the option to open the door will not work, as it is locked. Search on the door instead to read the sign.
Look closely at the text "Further Access Prohibited". One of the letters is replaced by the symbol of a rune, which is the rune you must use to unlock the door and disarm the first of its two traps. If you use an incorrect rune, the door will fire an unblockable blast spell at you, causing 250 damage to your life points.
The colour of the blast spell signifies the rune you should have used on the door - blue for water, red for fire, green for earth, white for air, or purple for mind, though the required rune changes after every incorrect try.
| "Prohibited" is the key indicating which rune to use. In the game, only 1 letter will be affected. | |||
|---|---|---|---|
| Symbol (Letter) | Rune | Blast colour | 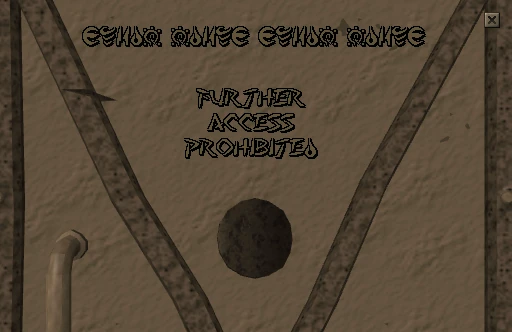 |
| Purple | |||
| Green | |||
| White | |||
| Red | |||
| Blue | |||
After you enter the correct rune, you hear a click. Boost your Thieving level if necessary, then search the door again and you will find a trap to attempt to disarm. If you fail at your attempt or try to open the door without searching it first, it will cause 350 damage and inflict an 88 damage poison condition. Three Elite Khazard guards will also be summoned to attack, and must be killed before attempting to disarm the trap again. Using area-of-effect abilities and/or Burst or Barrage spells from the Ancient Magicks spellbook will make short work of them. Once you successfully disarm the trap, you will be able to go through.
You cannot enter the base with less than 1 kg weight, so un-equip any weight-reducing clothing that you might be wearing.
Electrifying ordeal
Once inside, a message appears notifying you that the floor has slightly sunk under your weight.
You find yourself in a large room filled with bookcases, with wires running between them. Searching the painting on the east wall reveals a small room with a pile of weights, drawer and a thermometer. No need to do anything here yet.
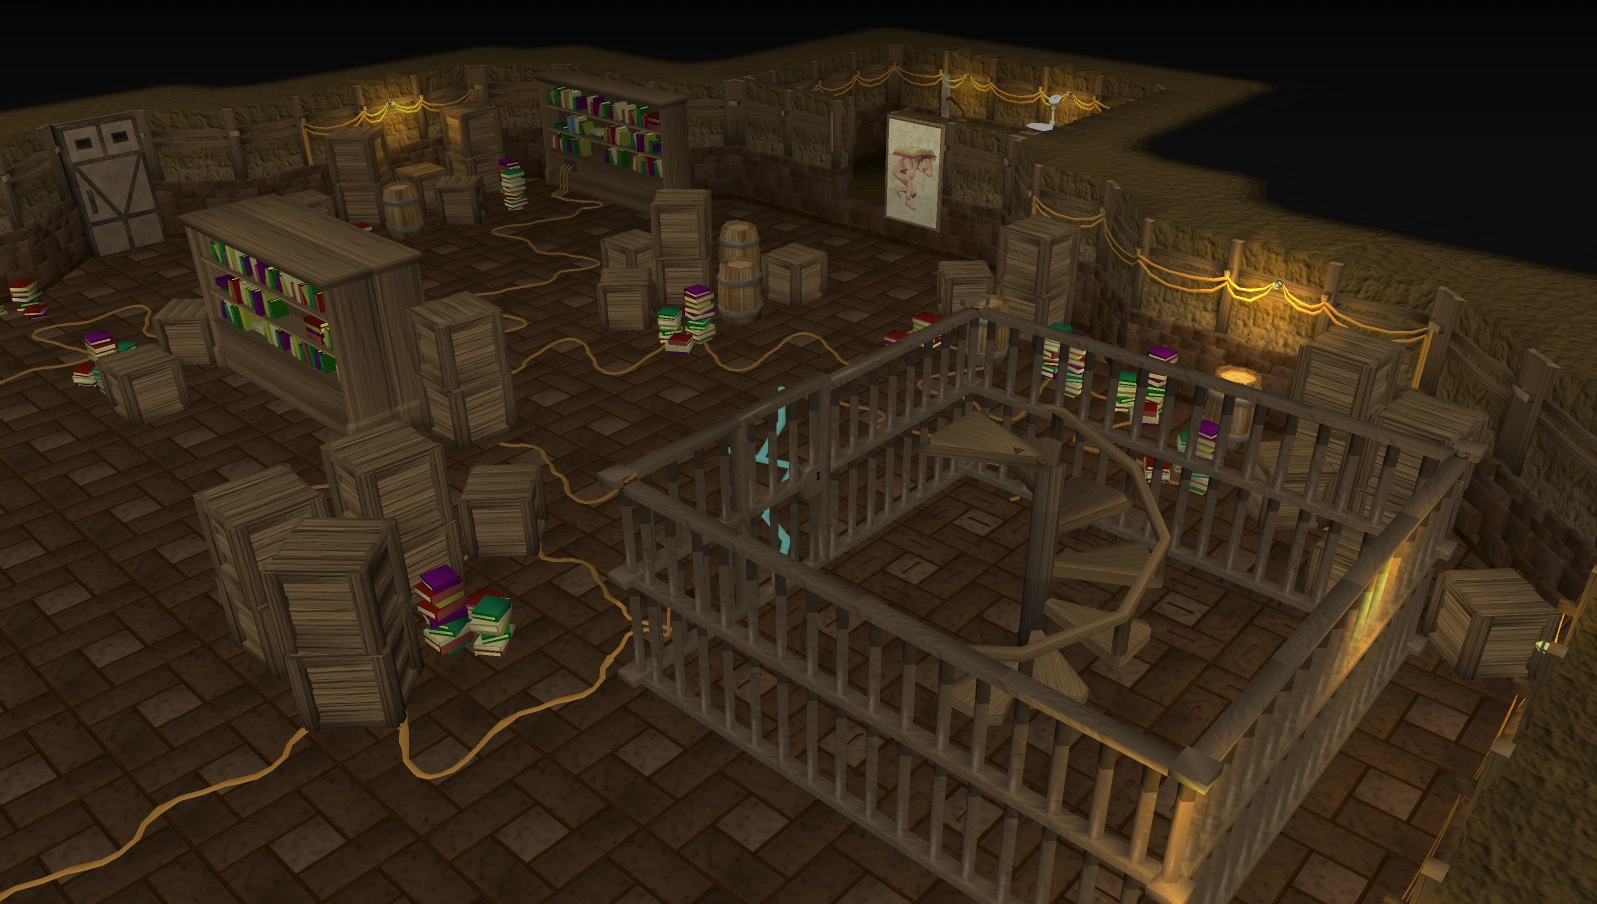
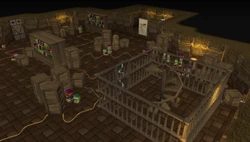
The electric door
To open the cage door, you need to divert all the power from the electrified gate to the wires, using the bookcases. Search the bookshelves until you hear a CLICK. You should search the outer bookcases that have electricity running towards them to disable them. From that bookshelf, follow the wire that faintly glows to find the next bookshelf to search. Repeat until the electric door opens.
- "You pull the book lever and hear a faint click, but notice nothing in particular happening." means to try another bookcase.
- "You pull a book lever." "CLICK!" means that was the correct bookcase. Follow the lit up wires to the next case.
- "CLICK! Chherrkizzz. You hear a locking sound coming from the large door in the north." means the electrified door has been disabled and can be opened.
The process can reset, so keep trying. Searching/entering the room with the painting may reset the process.
Search the stairs once the door is unlocked to disarm a trap. If you do not disarm it you will be dealt up to 1500 damage points. Climb up.
Proportionality
You are now in Movario's study room. Do not take anything from the treasure box; it is a trap, and you will be hit for 500 life points. Searching the treasure reveals it to be fake, so don't bother. Search the desk to obtain Movario's notes (volume 1). Read the notes. Pick up the waste-paper basket next to the desk and search it to find a ruby key. Search the bookcase to the west of the trash can, and use the ruby key on it. A set of steps will rise in the north-west corner of the room.
Climb up the staircase. If you need to boost your Thieving level again, do so now. Search the bed to remove the covers, revealing a hidden chest. Search the bed again to dismantle the bed-chest trap and finally use the ruby key on the chest. Open and search the chest to obtain a strange key loop, strange key teeth, and Movario's notes (volume 2). Read these notes too.
Do not drop either of the sets of notes after reading; you will need to show them to Thaerisk later.
Now that you have plundered Movario's base, you need to leave the area with the obtained items. When you attempt to leave by conventional methods, you find that a magical force is blocking your teleportation matrix. Therefore, you must now find another way out.
Go back down to the wire room and search the drawers, in the small east room you had uncovered, to obtain notes on pressure. Look at the thermometer; it should read a number.
- The number is a certain amount of "Tickits" - the value represents how much you weighed when you entered the area.
- To exit the room, the number of "Tickits" must be exactly equal to your current weight - shown in your equipment screen.
- If your mass is different than the "Tickits" value, you must add enough weights to the statue, so that it adds up to the higher number.
- For example, if you weigh 41 kg, and the "Tickits" says 11, you must put 30 kg on the statue (11 + 30 = 41). If you weigh 29 kg and the 'Tickits" says 31 kg, you must pick up 2 kg from the weight pile and keep it in your inventory (31 - 29 = 2).
There is a pile of weights next to the temperature gauge. There are 3 sizes: 1kg, 2kg, and 5kg. Pick out weights equal to the number that is required and place them on the statue found up the stairs in the study room, just north of the stairs. Use the weights on the statue.
If your weight changed while you were in the room, then you must repeat these steps to get the correct weight.
After depositing the weights, go through the door in his office. If you succeed, the door will open and you can leave. If you don't, the small circle near the door will countdown from 3 for each failure. If the counter reaches 0, the door opens and you'll be suffocated by a gas and thrown into a jail room. You will also lose Movario's notes and the key teeth and loop, and will need to get them back again; though you don't have to repeat any of the above steps again apart from the tickits puzzle. You can teleport out when you open the door.
Battle for the truth
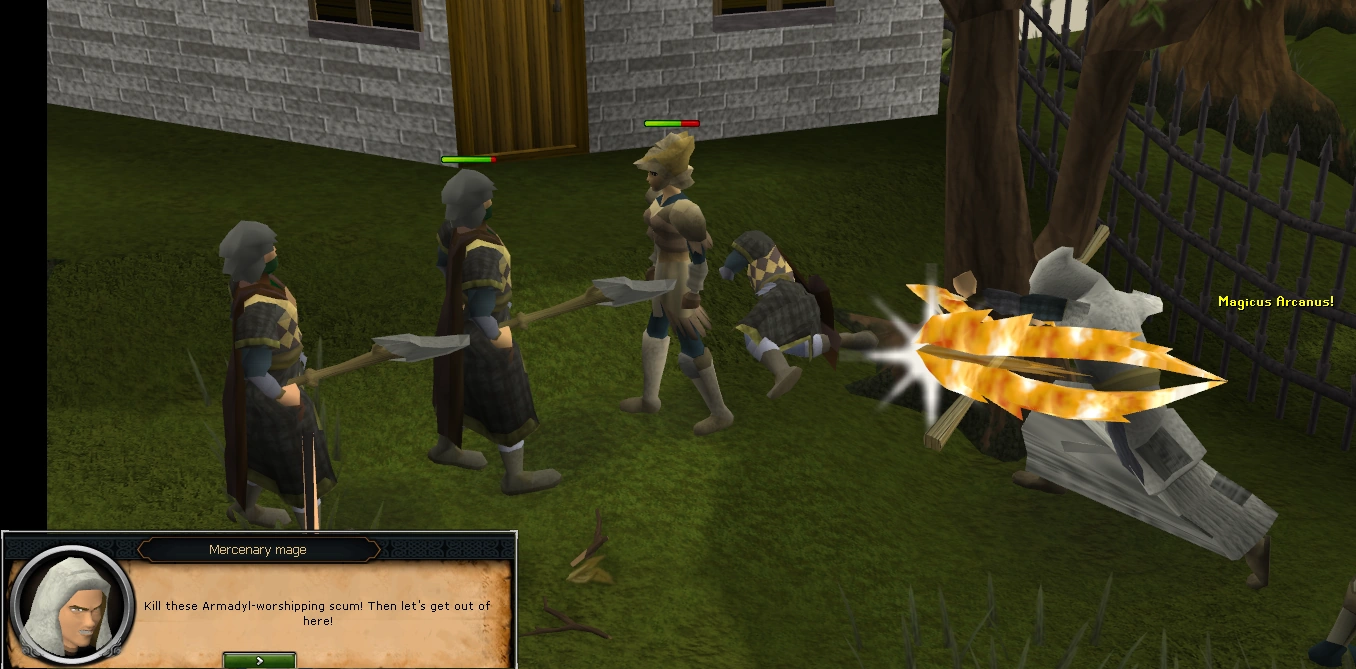

The slaying of Armadyl followers
Head back to Thaerisk, on the 1st floor[UK] of the house west of Pikkupstix, and show him all the items that you obtained in the base. If you do not have all the notes in your inventory, Cemphier will send you back to get more information. He reads the notes and tells you that Lucien is reaching closer to a powerful artefact, one that brought magic to Gielinor and was touched by the very gods themselves, and that immediate action should be taken. Thaerisk now wants you to go to McGrubor's Wood, to meet with the Guardians of Armadyl. McGrubor's Wood is west of Seer's Village lodestone. You will meet the Guardians on the north end.
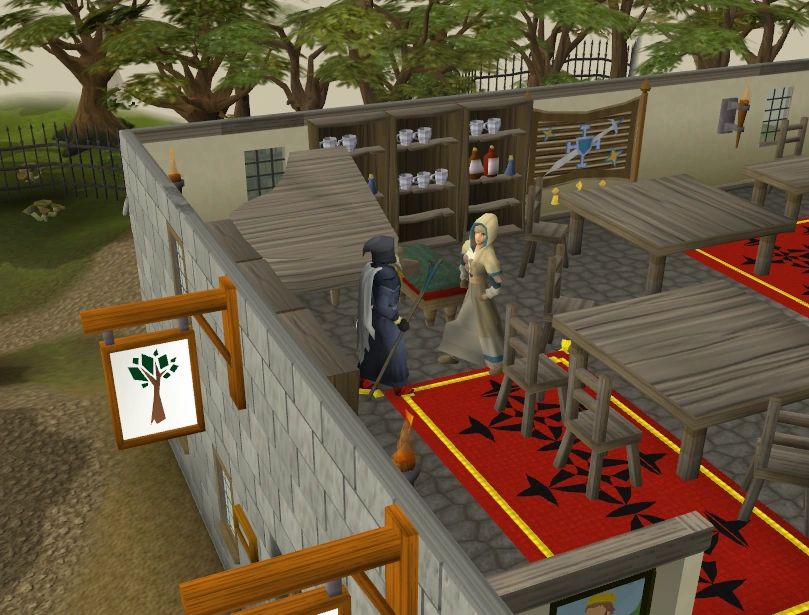

Idria in the Forester's Arms
Head to the building in McGrubor's Wood, and a cutscene will start. Lucien's minions are attacking the guardians and you've arrived just right in the middle of the battle. Kill all the mercenary axemen and attack the lone mercenary mage, who teleports to safety. Search the dead mercenaries to find a damaged and bloodied pendant of Lucien, although you choose not to take it. Talk to the wounded guardian, who will ask you to find Idria in the "arms of a forester," before losing consciousness.
Go to the Seers' Village pub, the Forester's Arms, walk upstairs, and talk to Idria. She reveals that Lucien is raising an army of undead heroes in the wilderness to the north; Lucien's spy network has infiltrated most of Misthalin. She then reveals that their plan is to capture a spy in Draynor and interrogate him for Lucien's exact whereabouts.
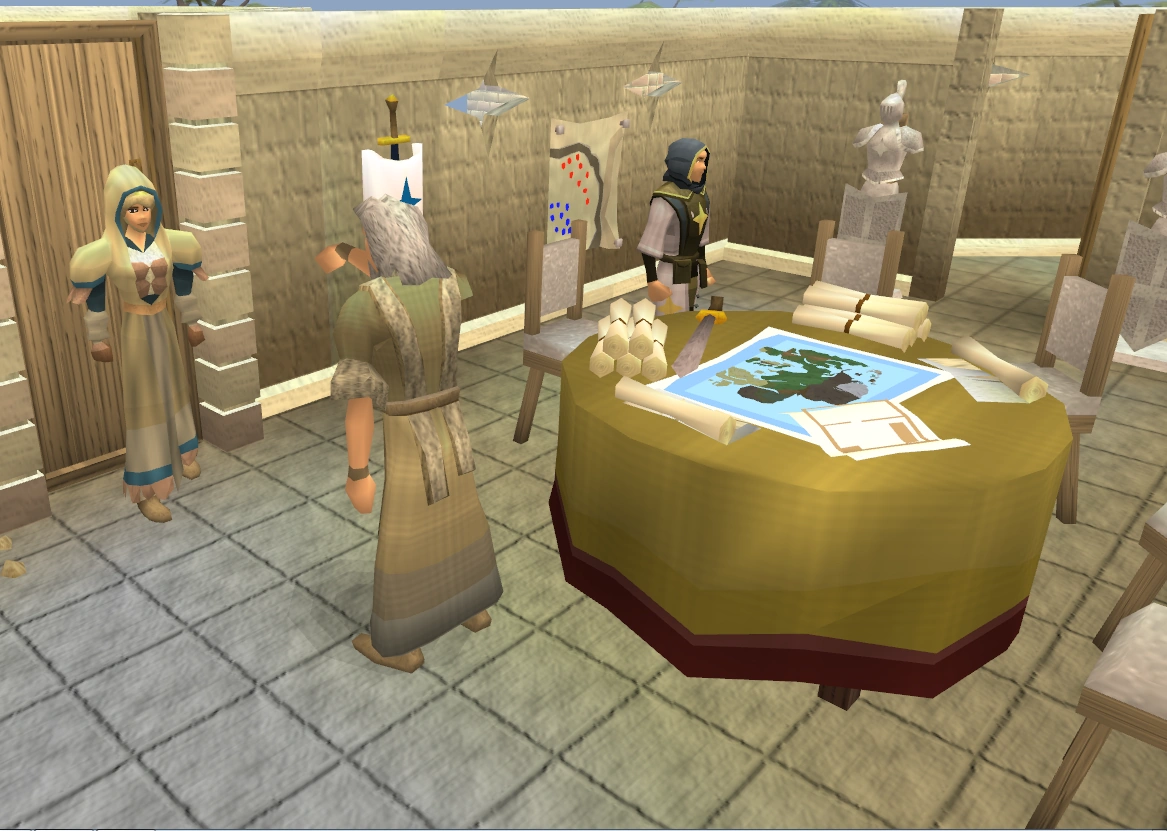
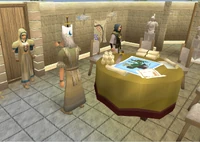
Thaerisk, Idria, and Akrisae discussing plans
Go to Falador and talk to Sir Tiffy Cashien in the park. He will send you to the White Knights' Castle. At the castle, you find the three allied organisation leaders - Thaerisk, Akrisae and his assistant Silif, and Idria - together. They are in the eastern room on the ground floor[UK], by the jail cell. They agree to put aside their differences and focus on defeating Lucien. They will give you a teleorb to put on one of Lucien's spies in Draynor Village. Akrisae will offer to teleport you there.
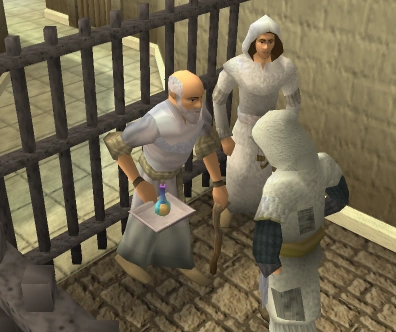

The druid attempting to administer the truth serum to the stranger.
In Draynor Village, you find a few white-robed shady strangers roaming about. The suspicious outsiders wearing the green robes are too alert for you. Plant the teleorb on a stranger - he may also catch you and start fighting you. If so, you can run away until he forgets or else fight him until he teleports away, in which case you must find another one. If you have trouble planting the orb, try using gloves of silence.

Return to Falador after successfully planting the orb and talk to Thaerisk and Akrisae. The spy will be teleported into the cell, and the truth serum will be brought in by a druid. A cutscene shows a very clumsy attempt to administer the truth serum, as, despite the presence of a druid bodyguard, the stranger attacks the druid. Oops! The serum drops and breaks, and you will have to make another one. Thaerisk will ask you to hurry to Betty in Port Sarim, with a snapdragon seed, so that she can enchant it and you can get on with the truth.
Rosy serum
You can either use the lodestone network or Thaerisk's free teleport to reach Port Sarim. Thaerisk will also sell you a snapdragon seed for 25% off the current Grand Exchange price (currently 218 coins instead of 293 coins) so if you don't have one to spare, it is advised to buy it from Thaerisk.

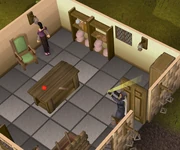
A player uses a rose tinted lens on the snapdragon seed
Travel to Betty's Magic Emporium shop, taking a lantern lens, a snapdragon seed, and 20 coins with you. Speak to her about an enriched snapdragon seed, and she says that sunlight must be concentrated on the seed, through a rose-tinted lens. She takes the seed and places it on the counter.
Buy a pink dye from Betty and use it on the lens to obtain a rose-tinted lens. Then stand just inside the doorway and use the lens with the counter to expose the seed. Finally, search the counter and take the enriched snapdragon seed. If you haven't already got it, Betty will offer to give you a regular truth serum when spoken to.

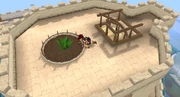
A player harvests the enriched snapdragon from the farming patch on the top of the castle.
Go back to Falador and talk to Thaerisk. He says that the seed must be planted in a specially created patch on the top of the castle; climb up the western stairs to the top and plant the seed in the patch.
Go talk to Idria, who asks you to recruit four heroes to apprehend Lucien:
- Duradel; slayer master in Shilo Village
- Hazelmere; east of Yanille (Fairy ring code: cls)
- Mazchna; the slayer master north-east of Canifis
- Turael; south end of Taverley
Additionally, you may activate Lunar spells and use NPC Contact to contact the three slayer masters, since you will need NPC Contact again in the next section.
The Fellowship
Once you have successfully enrolled everyone, head to the top of the White Knights' Castle to collect the fully grown enriched snapdragon herb from the patch. Once you have the enriched snapdragon, mix it into your truth serum to make super truth serum.
Head back to the room with the leaders and open the cupboard. Inside you can find a papyrus and charcoal. Now go into the cell and convince the captured spy to drink the serum. You will be given 3 options. The correct method varies by player, and there is no penalty for choosing an incorrect option.
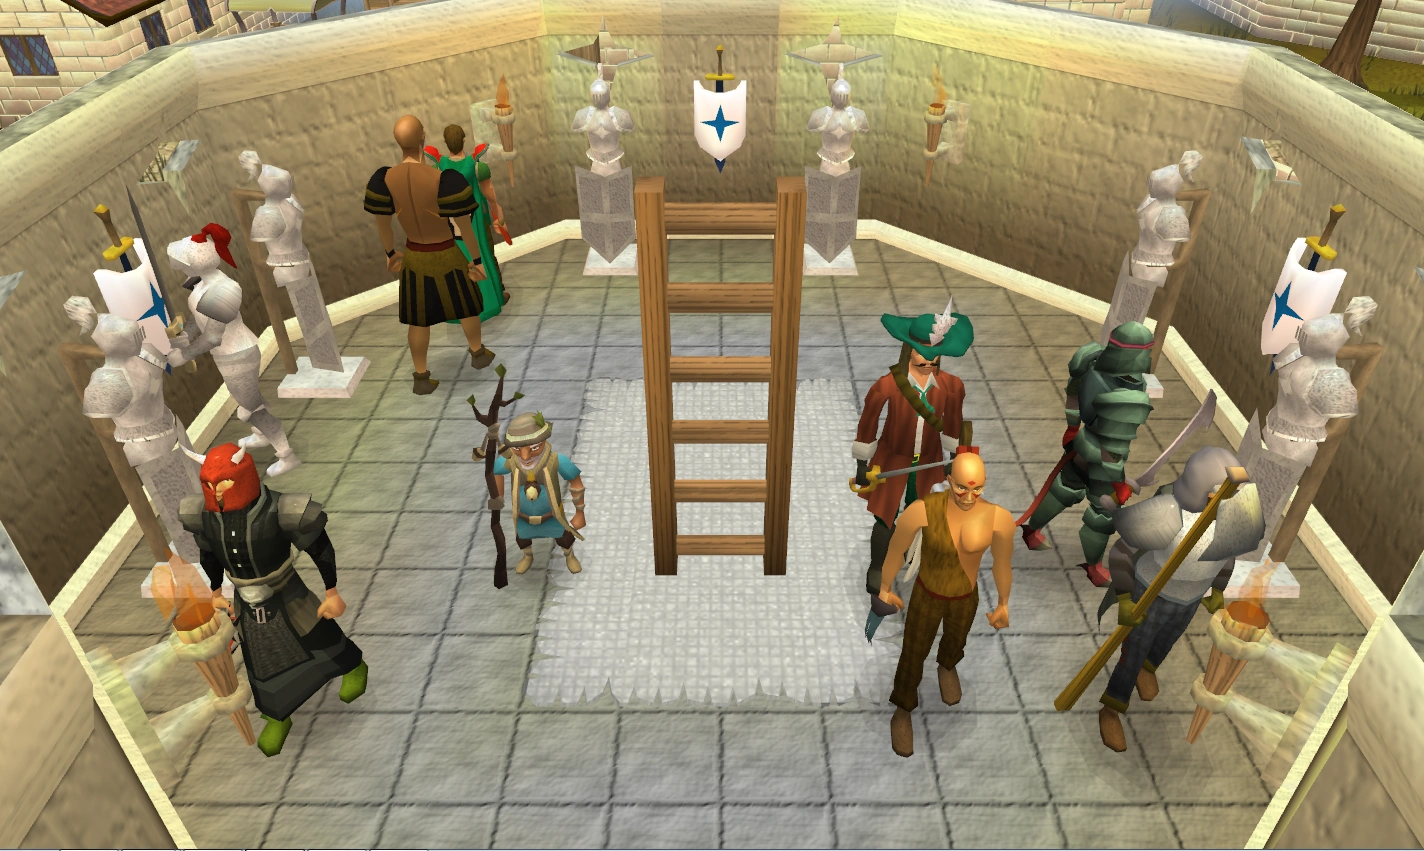

All of the heroes together.
He will reveal his master's identity to you, which you will sketch with your charcoal and papyrus, to get a suspect sketch. Give the sketch to Idria, who will put up posters seeking information on the wizard known as Dark Squall. Then she will ask you to recruit four more heroes:
- Ghommal; at the entrance of the Warriors' Guild
- Harrallak Menarous; ground floor of the Warriors' Guild
- Sloane; first floor of the Warriors' Guild, past the gate to the east
- Cyrisus; by using the NPC Contact spell
The first three can be found at the Warriors' Guild. If you don't have a black armour set to enter the Black Knights' Fortress, you can buy an iron chainbody and bronze helm in the guild instead. Cyrisus may only be contacted by using the NPC Contact spell. Remember to switch back to normal magics for the next section.
Return and speak to Akrisae. He will send you to find Silif, who has gone missing in action whilst following the Dark Squall, and was last seen entering the Black Knights' Fortress.
The Dark Squall
- See Black Knights' Catacombs for a map of the dungeon.
With the required items, head to the Black Knights' Fortress and equip the bronze helm and iron chainbody, or full (elite) black set or black knight captain's armour. A good way to get there is to use the skull of remembrance and climb down the tower to the ground floor[UK].
- From the front entrance, open the portcullis and go down the ladder at the south-western corner of the floor. Near the east wall, search the floor tile with an orb marking on it. Cast a charge orb spell on the tile and the unpowered orb in your inventory will reveal a trap door. This destroys the orb, although the trapdoor will remain open.
- If you get the message, "You see no reason to waste runes casting magic on the floor", you either haven't searched the tile or you haven't checked back with Akrisae yet.
")
")
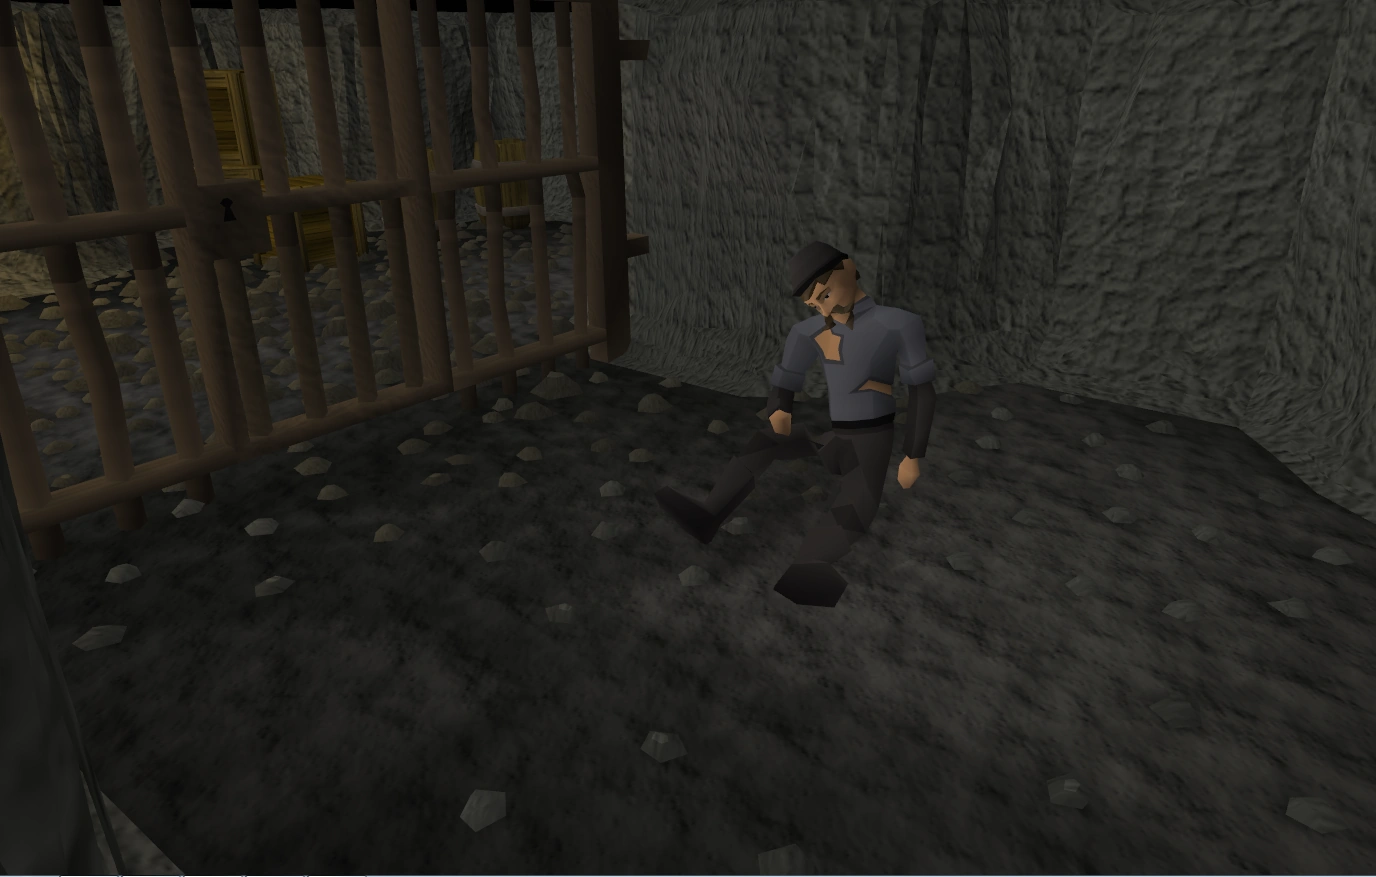
Silif in prison
- Climb down the ladder. You will be attacked by elite black knights, along with their ranger, mage and warrior counterparts. Your goal is to kill three black knights and collect an elite black armour set.
- There is an altar on the 2nd floor[UK] of the fortress that you can use to recharge your prayer points, instead of using prayer potions in between kills.
- If you run east, there is a relatively clear area where players can fight a single knight. It is suggested to do this now as crossing the broken bridge will land you in a group of both knights and mages.
- You will need at least two combat styles to kill the knights, as they pray against the style you use. However, their prayer runs out after 20 attacks, and you'll be able to fight with your choice of attack style. For this purpose, it is best to run down their prayer with a high speed attack, such as darts.
- The knights drop individual pieces of elite black armour, until you have gained a full set; you can also save a lot of time by purchasing the set on the GE. The Black Knight captain's armour will not make the knights non-aggressive. Be sure to buy an additional set of elite black armour, or keep your existing full black equipment for the next section of the quest. Otherwise, when you've got the full elite armour, equip it, and no one in the dungeon will be aggressive any more.
- Head north by jumping across the broken bridge; be sure to click on the side you wish to jump to. Go east, and climb up the wall, before running north and over the barricade.
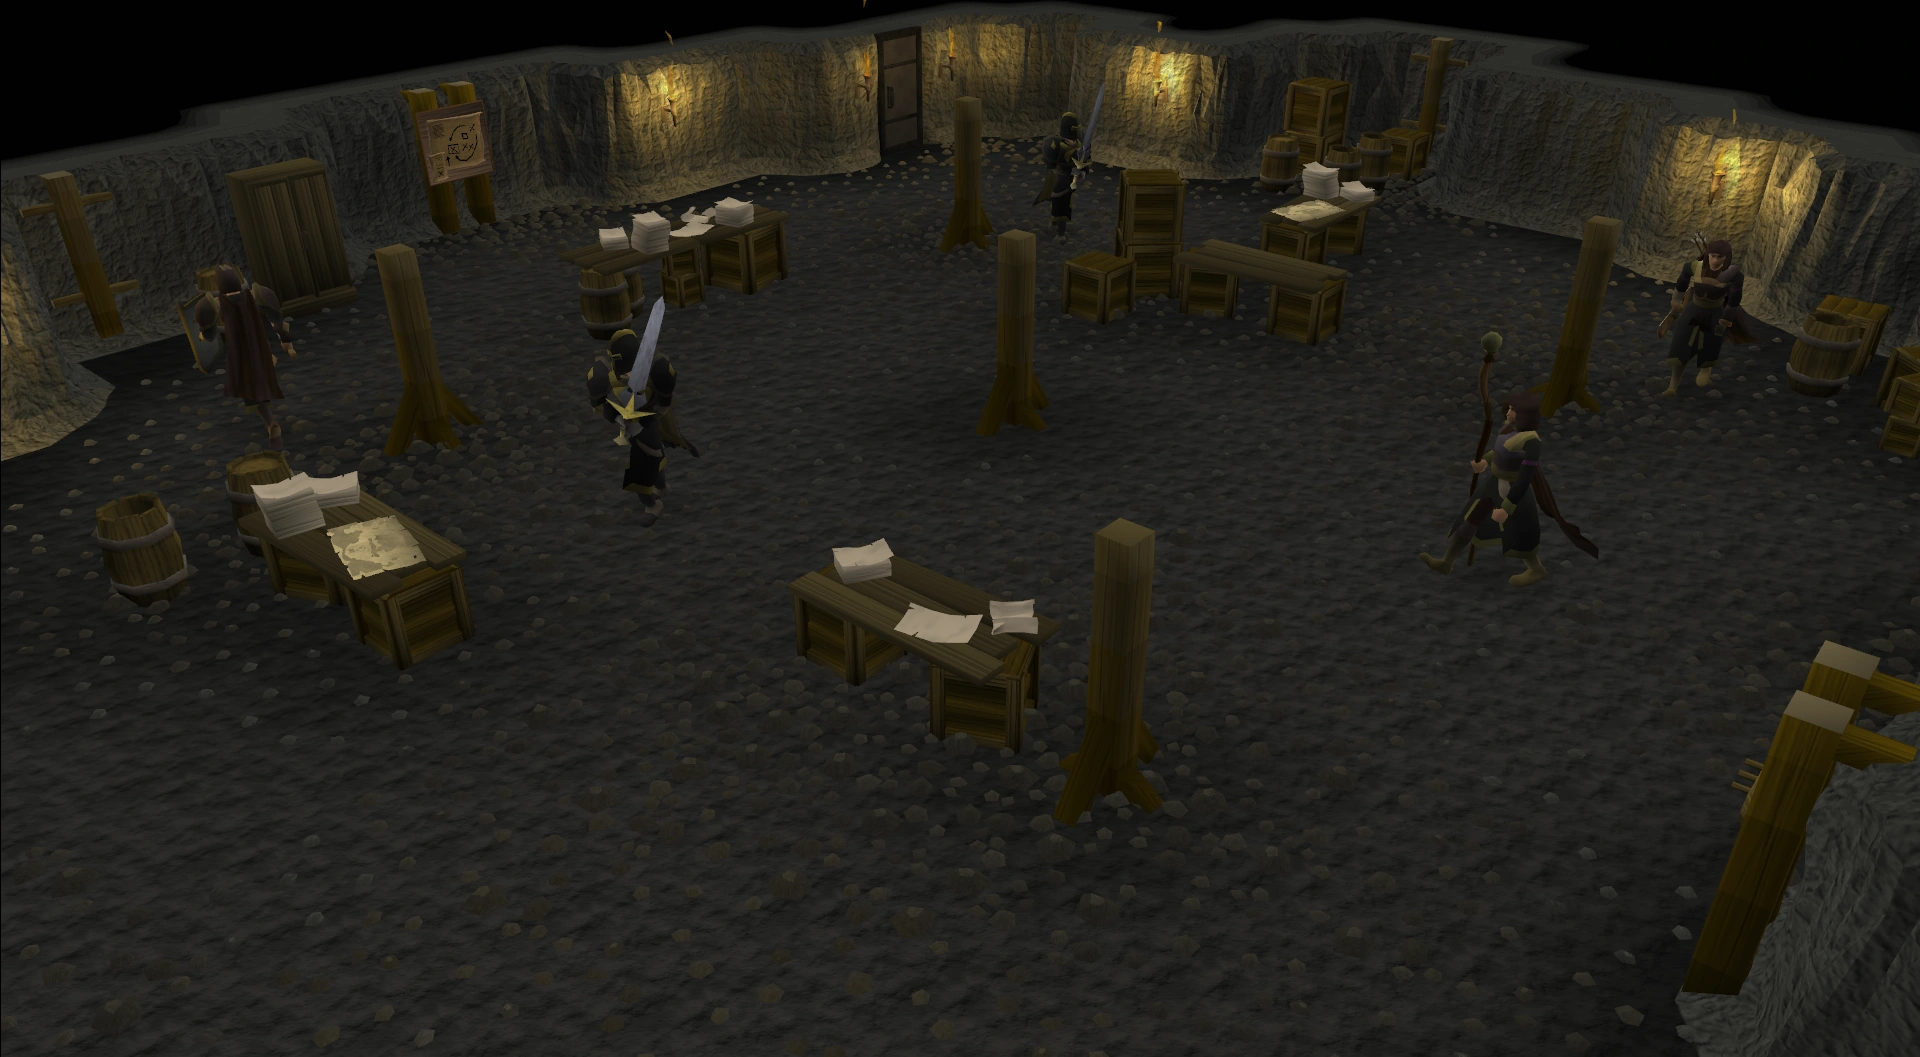
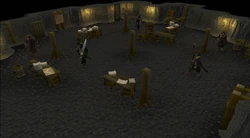
Searching through Dark Squall's desks.
- Walk north-west from the barricade until you reach a fork in the path, then head east. You will reach a set of jail cells, one of which holds Silif.
Talk to Silif, who says that he feels very weak. Head west to the fork in the path, and take the north path and enter the northern door. Search all the desks and wardrobes in the room. You will find Dagon'hai robes, a set of elite black armour, a strange teleorb, a lobster and a restore potion. Do not consume the lobster and restore potion. Search the key rack on the northern wall for a cell key.
- If you already have any pieces of the Dagon'hai robe set, you will not obtain those when you search the wardrobe. Necromancer's robe pieces in your bank (in the absence of Dagon'hai robe pieces) have the same effect within the base; however, after you return to the white knights' castle Silif will hand you a set.
- Items dropped in this room will disappear after leaving and there is no way to get them back.
- Do not attempt to climb the ladder in the eastern part of the room or attempt to wear any of the clothes you found in the wardrobes. Attempting any of these will turn the guards, rangers, and mages aggressive, in this room and elsewhere. If you do try to climb the ladder, you must exit the room through the door you originally entered and then re-enter the room to make the dungeon inhabitants non aggressive again. Alternatively, you can find a safe spot and then unequip and re-equip your Elite black armour.
- If you log out while Silif is following you, he will go back to his cell and to his original armour. You don't need to get him another set of black armour, as he will retain the previous one.
Return to Silif's cell and unlock the door using the key. Use the food and potion on Silif to recover him. If you have a familiar at this point, dismiss it or Silif will not take your elite black armour. Speak to him. He will put on the Elite black armour and follow you.
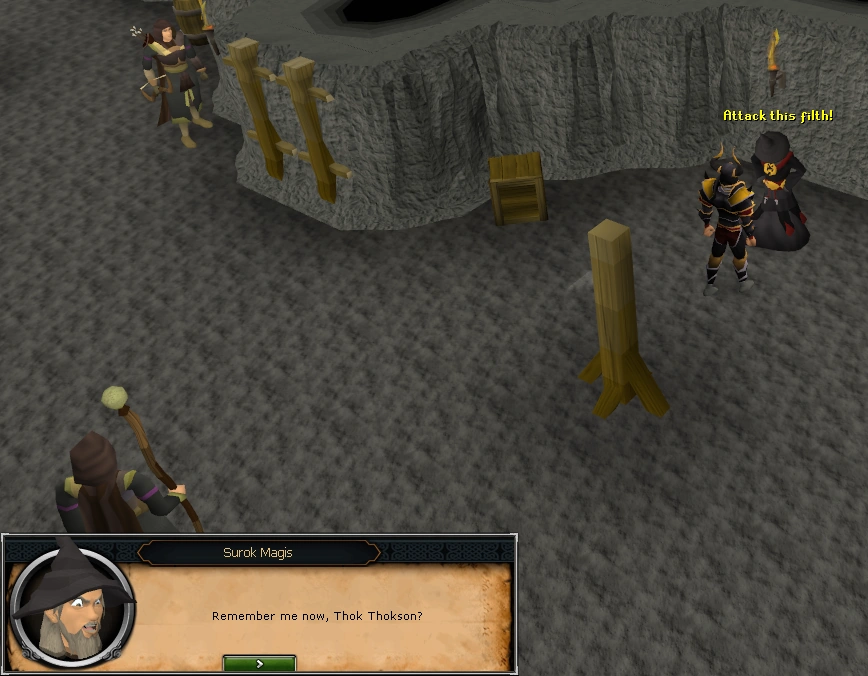
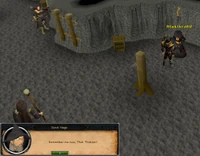
It's Surok!
Return to the northern room and lead Silif to the maps on the southern wall, and talk to him. He says that he needs some time to study the maps, and hands you a teleorb to plant on Dark Squall while he does so. You will succeed, but Dark Squall recognises you, and he reveals that he is actually Surok.
Surok calls on his minions to attack you, at which point, everyone in Surok's base becomes aggressive. The best method of escape is to simply teleport out, but if you don't have a teleport, activate Protect/Deflect Magic and run back to safety.
Lucien's might

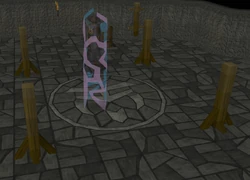

In Falador, talk to Akrisae. He will instruct you to impersonate Surok, so that you can infiltrate Lucien's base, by wearing his robes. When ready, wear the Dagon'hai robes and enter the nearby jail cell. The teleorb you set on Surok will be used to imprison him there, and you will be teleported to Surok's hideout instead.
If you forget something and have to teleport out, you will have to use the tunnels you used before to get to Silif. Make sure to wear your Dagon'hai robes as well when doing this.
After being teleported inside, climb up the ladder in the north-eastern corner and stand in the stone circle in the middle of the room. Activate the strange teleorb to be teleported into Lucien's camp near the God Wars Dungeon. Talk to an elite black knight to learn that Lucien is 'recruiting' and you should go to the chapel to "observe". Follow the north-eastern path towards the chapel and climb up the ice wall. Jump across to a ledge on the chapel and walk east.
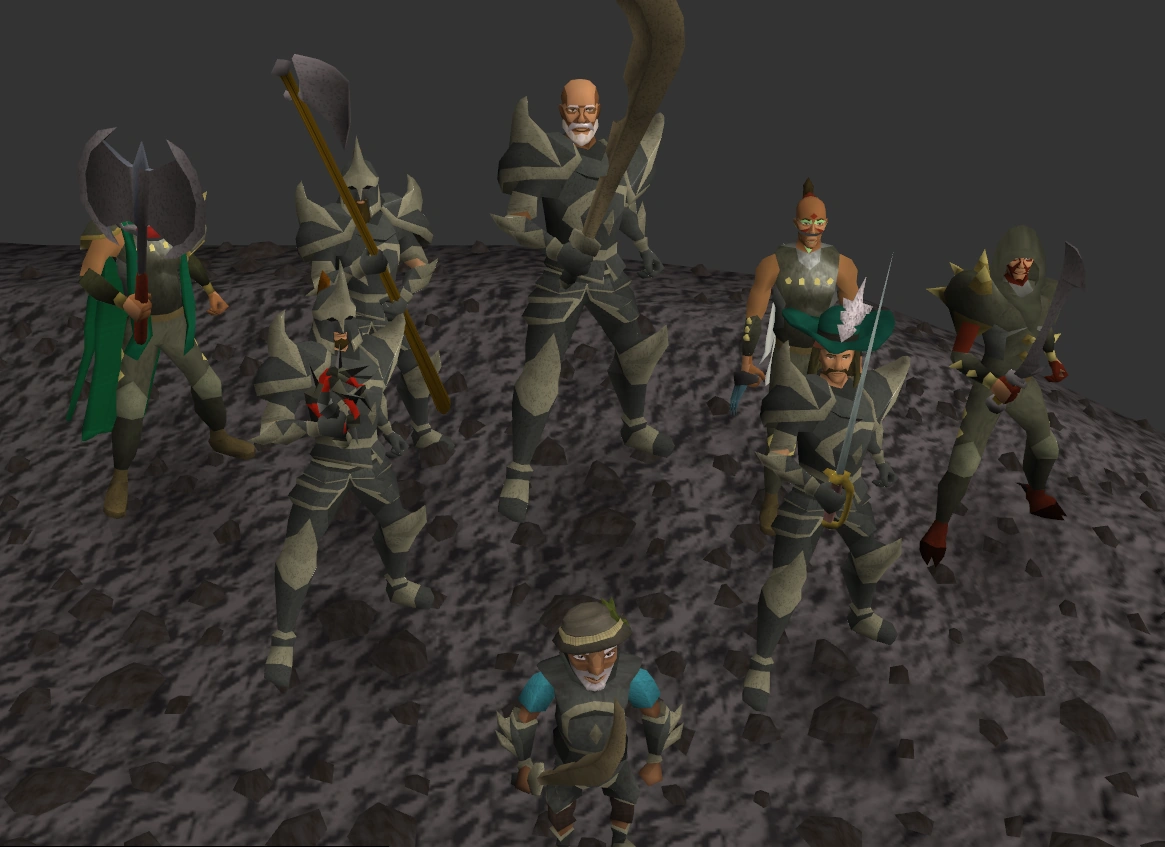

The heroes, ready for battle with Lucien.
A cutscene will play. Lucien emerges from the nearby cave and raises undead heroes from their graves, some appearing to be the Barrows brothers and another seems to be Bork. Lucien then reveals that he is aware of your presence, and that you are not Surok. He attacks with magic, which you manage to avoid; the spell strikes two Elite Black Knights instead, destroying them. Hazelmere, detecting danger, teleports into battle along with the rest of the fellowship – Turael, Duradel, Mazchna, Ghommal, Sloane, Harrallak, and Cyrisus.
During the ensuing battle, Duradel, Turael, Hazelmere, Sloane, Cyrisus, and Ghommal are all tragically slain by Lucien, who then sends his guards to attack you. After the cutscene ends, you'll find yourself on the chapel's ledge; jump to the nearby snow wall and return to Falador. You cannot teleport from the chapel itself, since it is in level 38 Wilderness, but you can avoid the wilderness by backtracking to the stone circle and using the strange teleorb to go back to the black knight's area, or simply using a teleport from the snow wall itself.
- For images, see Skirmish at the Chaos Temple#Gallery
The ancient Guthix temple
Items recommended: A games necklace to teleport you directly to the Tears of Guthix cavern (if you choose to walk instead, a spiny helmet or other protective gear from wall beasts is advised), energy potions, and an Ouroboros pouch to save a little time. It is also recommended to have full prayer points and/or prayer potions, as you will have to use the Bloom ability.
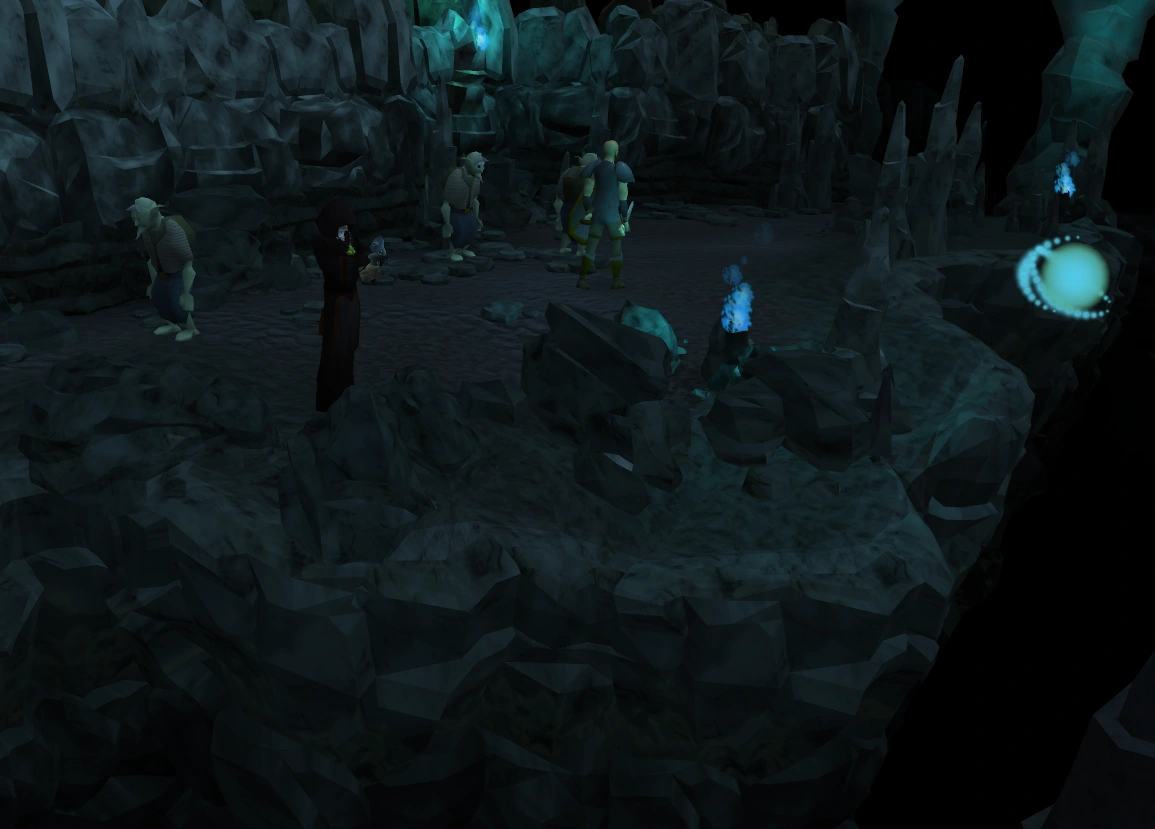
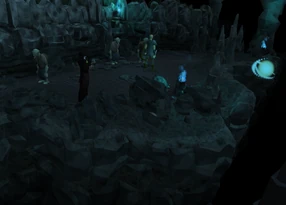
Movario searches for the Stone of Jas.
Once back in Falador, talk to Idria and she will say that Movario has been moving. He was last seen at the Lumbridge Swamps, searching for the Fist of Guthix. Your next task is to impersonate Surok and glean more information from him. Wearing the Dagon'hai robe set, go to the Tears of Guthix cavern, where the light creatures are, and make sure to bring a sapphire lantern.
Inside the cavern, talk to Movario. He believes that a powerful artefact, the Stone of Jas, which is synonymous for the "Fist of Guthix" and "Eye of Saradomin", is resting inside the chasm below, but has no viable way to get there. Volunteer to go down to the chasm and explore for him. Attract a light creature with your sapphire lantern, and with some help from Movario, opt to go into the chasm.
Into the Abyss
After landing in the chasm, search the nearby skeletons for a silver sickle (b), and six druid pouches (the other tools are on the tool belt so you may drop them). Use the "Search" option on two nearby rocks in each northern corner to uncover two smashed braziers. Afterward, use a chisel on the smashed braziers to obtain a Fire orb and an Earth orb. Similarly, go to the air and water braziers, which are intact, and use the chisel on them to acquire an Air orb and Water orb.
Head south until you reach three skull cavities on the southern wall. For each skull, examine its recessed block and use the respective orb on the block to acquire the corresponding elemental key; air, earth and fire keys should be obtained. Climb up the wall between the fire and earth cavities to reach a fourth skull cavity, which is behind a stone cube. Use the water orb on the recessed block to acquire the water elemental key.
For each of the three lower skulls, enter its nose cavity (Summoning familiars cannot be brought into these cavities, and you cannot have anything equipped in your weapon and shield slot). Crawl along the tunnel in each cavity to its end. Examine the door there and insert the respective key into the door lock. Crawl back through the tunnel and exit the skull.
At this point, you must have used all the keys except for the fire key. Climb up the walls to the upper skull. Use the fire key on the skull's recessed block, and search the stone cube in front of the skull. The recessed block moves to reveal a cave opening in the skull. Climb through to enter the Ancient Guthix Temple.
The Temple of Balance
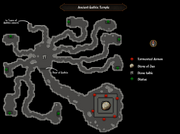
Click to view a larger version (opens on a new page)
The Guthixian Temple is made of a central chamber, consisting of an ancient stone table upon which smaller stone platforms are mounted. Also, to the opposite side of the table, is a giant door. Leading away from the chamber are multiple forks which lead to eight statues, each representing an aspect of RuneScape. Examining the statue will reveal what it depicts. Along the forks, Druid Spirits can be found wandering. The giant door seems to be linked to each of the statues.
Use your druid pouches on the druid spirits - having an ouroboros pouch in your Slayer tool belt will not utilise your druid pouch charges. They will thank you for releasing them and then drop the ingredients for one of the statues.
Do not make any potions or eat the toad legs.
Use the herbs and the secondary ingredients on the statues in any order. For each statue, determine which skill it represents and use the appropriate herb and secondary as listed below. For defence, energy, and strength, you might receive the ingredients for its super-doses variant. After correctly placing the ingredients on the statue of its specific element, you will receive a Dolmen.
Once you run out of druid pouches, use the sickle's Bloom ability on the vines to receive Vine flowers. You can refill the pouch with the flowers, with a set of three making three pouches. Do not refill the pouch unless you have at least 3 flowers, or you may accidentally consume the mort myre fungus secondary ingredient.
Use the eight dolmens on the platforms on the stone table in the middle of the temple, and the giant door will open.
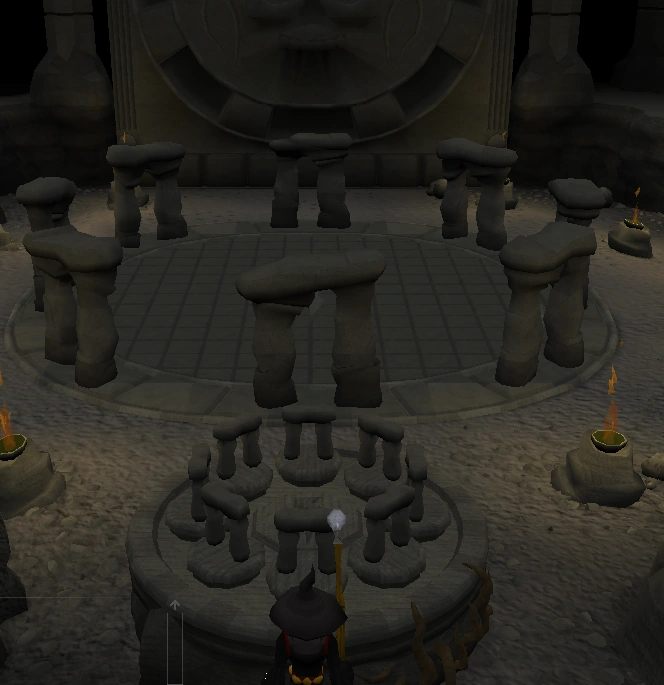
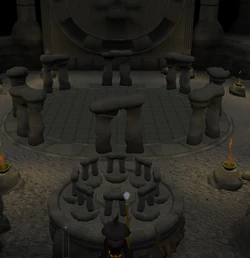
All 8 dolmens in place
Any of the 8 potions may include:
- Agility: Clean toadflax and toad's legs
- Attack: Clean guam and eye of newt OR clean irit and eye of newt
- Balance: Clean harralander, red spiders' eggs, garlic, and silver dust
- Combat: Clean harralander and goat horn dust
- Defence: Clean cadantine and white berries
- Energy: Clean avantoe and mort myre fungus
- Fishing: Clean avantoe and snape grass
- Hunter: Clean avantoe and kebbit teeth dust
- Magic: Clean lantadyme and potato cactus
- Prayer: Clean ranarr and snape grass
- Range: Clean dwarf weed and wine of Zamorak
- Restoration: Clean snapdragon and red spiders' eggs
- Strength: Clean kwuarm and limpwurt root
Notes:
- The statues are different for every player.
- The druid spirits will drop the ingredients for each potion a single time only. If you lose any ingredient, you will have to supply a new one yourself, so make sure you have a lot of inventory space to pick them all up. Also, for statues that may take the ingredients for regular or super versions of potions, you cannot substitute between the versions. For example, if a druid spirit drops the ingredients for a super energy potion and you lose them, the ingredients for a regular energy potion cannot be used at the energy statue.
- If you have a Mort Myre fungus in your inventory, it can fill your druid pouch as well as the vine flowers, so be cautious. The fungus will not be used if you have three flowers but will be used if you just have two flowers. For safety, you can drop the fungus, refill the pouch, and then pick up the fungus again (as long as you do not log out or take a lot of time before picking up the fungus).
")
")
")
")
")
")
")
")
")
")
")
")
")
")
The Stone of Jas
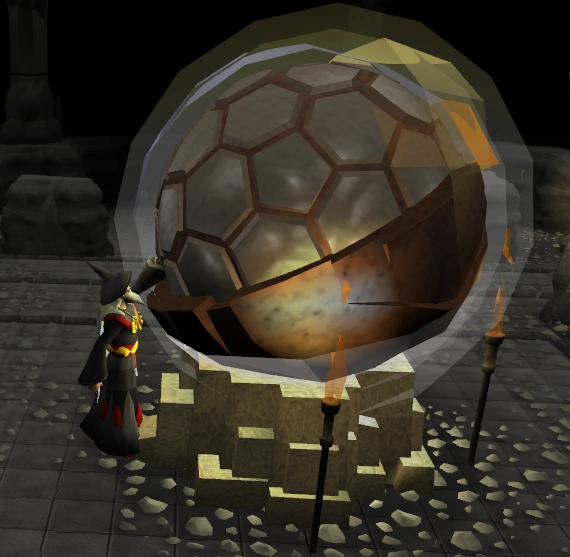

A player touches the Stone of Jas, receiving temporary power.
Make whatever arrangements necessary to battle a level 117 Balance Elemental that can use all three combat styles and lower your combat stats, as well as two level 119 Tormented demons, capable of using all three combat styles and hitting up to 1100. As the demons can use protection prayers, it is highly recommended to bring an alternate combat style gear with you. You can leave the area to get supplies, but always bring your lit sapphire lantern.
Inventory:
- A sapphire lantern, a ranged or magic weapon and ammo/runes, 2 super restore (4) and a mode of emergency teleportation.
- A Beast of Burden familiar (such as a Spirit terrorbird) - fill all its slots with food.
- Fill the remaining slots of your inventory with food and prayer potions.
Tips:
- Use stat-boosting prayers.
- The elemental's magic attack will find its target even through solid rock.
- You can send your familiar to attack the elemental, temporarily distracting it, but you may lose your familiar in the process, so it is advised not to store valuable things in it.
- The Balance Elemental will almost always attack with ranged first.
The Balance Elemental

The Balance Elemental.
Proceed down the corridor that was revealed when the huge door was opened. Enter a large chamber that contains a mysterious stone on a raised set of platforms. Once ready, search the stone. A short cutscene will play, in which the Balance Elemental materializes.
- The elemental is level 117 and will use all three aspects of the combat triangle. It does a maximum of 1051 life points per hit, and it has no weakness. It has two different melee attacks, one which it uses up close, and another, very rarely used, long-distance melee attack similar to that of the Warped Gulega. Its magic attack also lowers combat stats in a similar effect to Ahrim's set.
- The Balance Elemental seems to use a pattern in its attacks. It will often, though not always, attack for 3-4 rounds with one attack style, use its magical stat-lowering attack, then repeat with the same or a different attack style.
- The Balance Elemental will change appearance slightly depending on what attack it is going to use. If it has a large, flaming bow in its left hand, it is ranging. When maging, it will have large water spikes on top of its head and no weapon. If it has an enlarged arm of stone, it is meleeing. The elemental will vary its attack style based on the protection prayer you use. It always begins the fight using Ranged.
- Several times while battling the elemental, it will initiate dialogues with you at around 2/3, 1/2 and 1/3 health. Its message takes up your chat box but it says nothing of importance. It seems to know you and speaks regretfully, perhaps sardonically, about your death, which seems to have happened in the elemental's past. If fighting from a distance, you will continue to attack it, thus closing the chat box.
- You can leave the fight while the elemental is still alive, such as by teleporting away to resupply. However, when you come back, you will have to search the mysterious stone again to call forth the elemental, which will be fully healed no matter how much damage it had when you left.
After you defeat the elemental, touch the mysterious stone again. Another cutscene will play, in which it is revealed that the mysterious stone is actually the Stone of Jas. All your combat stats will be boosted up to level 255.
Master of the thousand curses
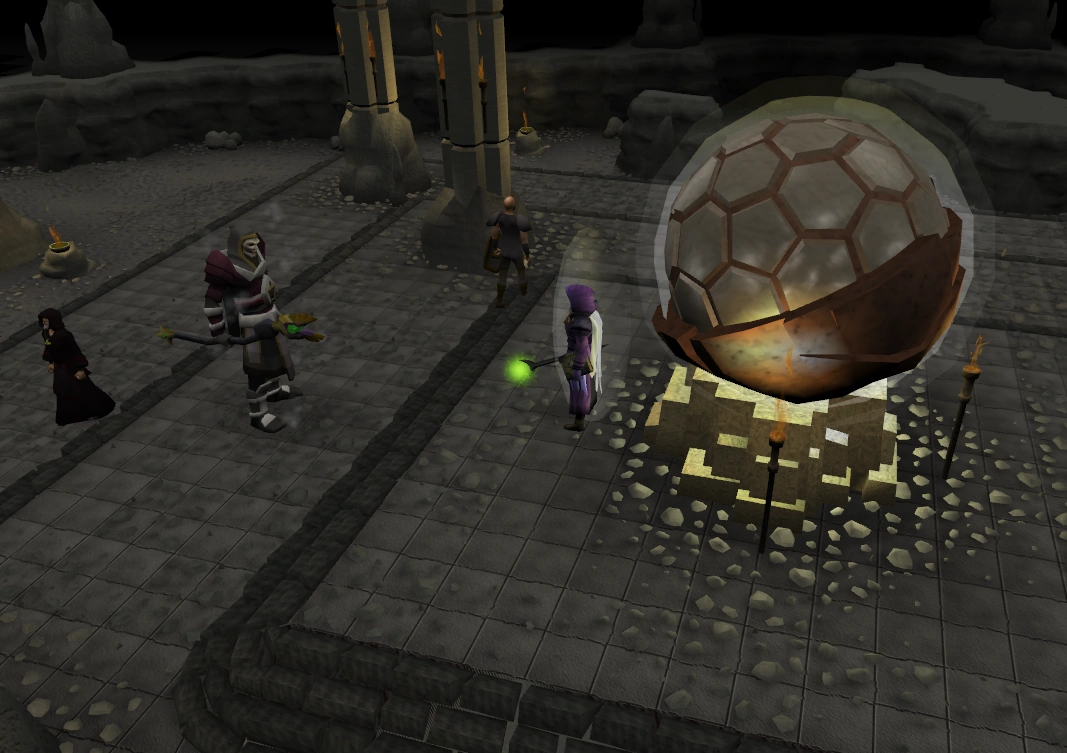
Lucien and Movario appear.
After you discover the Stone of Jas, Movario and Darve will appear and apparently gloat over their find. Talk to Movario and go through all the options in order. Without the Elemental to annihilate him, Lucien will appear, and he will berate them for not informing him of their find. Talk to Lucien and go through all the chat options as well.
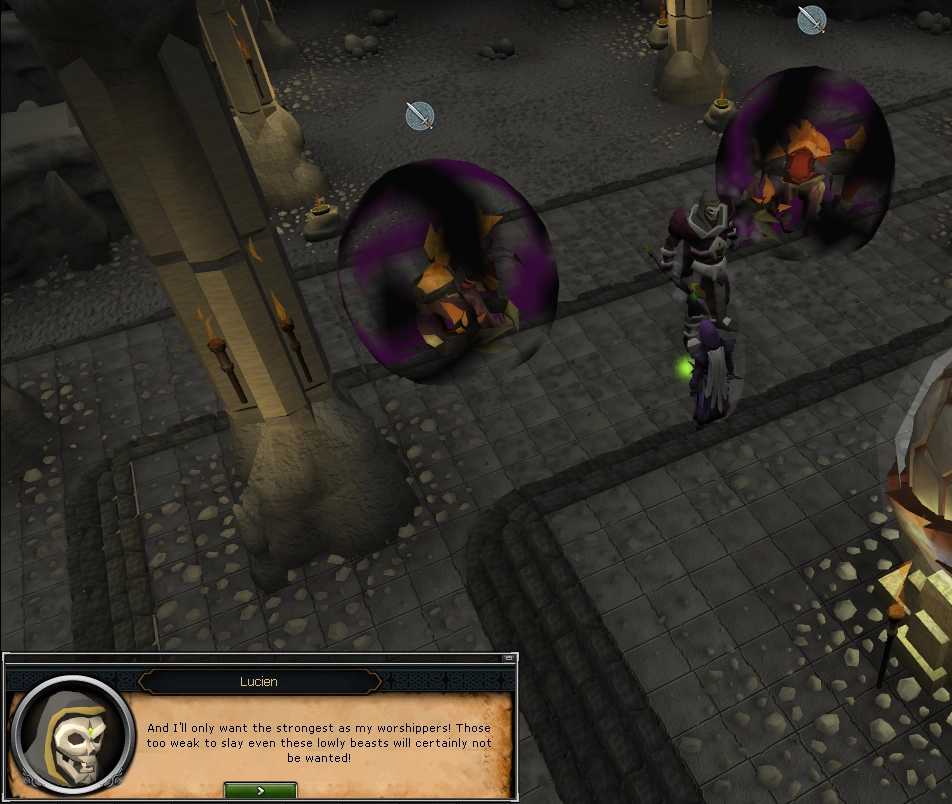

Lucien summons the demons
Movario and Darve will teleport away, followed by Lucien, who will take the Stone of Jas with him after summoning two tormented demons to deal with you. Idria and some Guardians of Armadyl will teleport in to assist you against the demons. The demons are fairly easy to defeat as you have been imbued with power by the Stone of Jas, with greatly enhanced stats — you will have level 255 in every combat skill. Note that despite being boosted by the stone, the demons can still do a lot of damage, so do not underestimate them.


The player and several Guardians of Armadyl battling Lucien's "pets".
You will need at least two different combat styles for this battle, as each demon uses prayer and changes its protection prayer based on your attack style. As long as you switch styles at the right moment, you can defeat them fairly quickly. The Guardians of Armadyl can influence the Tormented Demons to pray Melee, so using Ranged or Magic is highly advised. If you leave the battle, your stats will be reset; however, they will return to 255 when you return. Use the nearby pillars to block one demon while you're fighting another.
If you die to the tormented demons, your grave will appear outside the Tears of Guthix minigame.

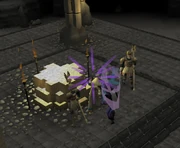
Idria teleports the adventurer.
After you defeat the Tormented Demons, talk to Idria. She will commend you for your efforts and teleport you to Falador, where you must speak to her again to be presented with either of a Ruined dragon armour lump, Ruined dragon armour shard or a Ruined dragon armour slice and 5,000 coins from the demons.
Congratulations, quest complete!
Post-credits

A dragonkin contemplating return to Gielinor during the epilogue.
When the quest officially concludes, after using of all four 100,000 experience boosts, talk to Idria again to view the "Elsewhere..." epilogue in which you learn about the Dragonkin's return.
If you need to re-watch the epilogue for the master quest cape after completing the quest, you can talk to Silif on the east side of the White Knights' Castle on the ground floor.
Rewards
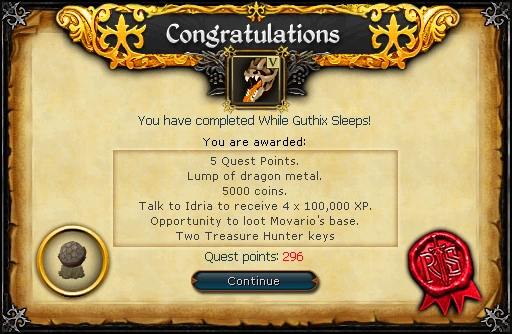
- A random piece of ruined dragon armour
- A set of Elite black armour.
- A set of Dagon'hai robes.
- The Balance Elemental can be faced in Dominion Tower.
- 5,000 coins
- 4 x 100,000 experience from Idria, in any skill that is at least 65.
- A new pet - Broav.
- Access to the Black Knights' Catacombs.
- Opportunity to loot Movario's base.
- The base has 100 each of magic logs, coal, fire runes, and death runes; note that the logs and ores are in their un-noted form. At GE market prices, the items are worth approximately 88,300 coins.
- Ability to kill Tormented demons for dragon metal pieces, dragon claw and dragon limbs.
- A Strange key teeth and a Strange key loop
- 2 Treasure Hunter keys and 2 Hearts of Ice
- Additional rewards/activities
Dragon Forge
By using either the Strange key teeth or the Strange key loop on a Mithril dragon, with both pieces in your inventory, you obtain a Dragonkin key. With this key, you can unlock the Dragon Forge in the Ancient Cavern, near the mithril dragons.
Inside the forge are three dragon heads and a giant orb in the centre. Lighting each head will cause fire to appear in their mouths and slide towards the centre. Once the orb is lit, the player can leave and return to the mysterious forge to find it full of molten lava. It is here, using a Blast fusion hammer purchased from the Foreman at the Blast Furnace for 1,000,000 coins, that the player can fuse together the three parts of the Dragon platebody with Smithing level 92 (was level 99 when first released [1]). The current price of the platebody is 1,815,136 coins.
Memorial statues
Due to the death of the close friends of your character and heroes of Runescape, memorial statues were put up at several spots in remembrance of them.
When these statues are examined, it reads "In honour of the hero [Dead Hero's Name], who died attacking the Mahjarrat known as "Lucien".
")
")
")
Replaced characters


When you open up the Lunar spell NPC Contact, Cyrisus is still there, but grayed out. If you choose him, the chat box says "You take a moment of silence in honour of your fallen brethren, Cyrisus. Lucien will be made to pay."
After the quest, new replacement NPCs appear since Lucien killed most of the team of warriors organised to stop him in the Wilderness, although there is no replacement for Hazelmere or Cyrisus.
- Turael -> Spria
- Duradel -> Lapalok
- Ghommal -> Laidee Gnonock
- Sloane -> Yadech Strongarm
- Lucien -> Local Thug and Local Mage
- Mazchna -> Achtryn - only during the quest
- Music unlocked
- Dangerous Logic (after entering table trapdoor)
- Black of Knight (in the Black Knights' Fortress dungeon)
- The Evil Within (in the cutscene where Lucien slays the heroes)
- The Sound of Guthix (in the Ancient Guthix temple)
- Temple Desecrated (at the battle with the Balance Elemental near the Stone of Jas)
Achievements
- Epi Logueque Experience (
 15) - Claim the experience reward and watch the epilogue following the 'While Guthix Sleeps' quest.
 - One Man's Junk...Is Mine ( 20) - Fully loot Movario's base.
- Relight my Fire ( 20) - Re-kindle the Dragon Forge.
Required for completing
Completion of While Guthix Sleeps is required for the following:
- Ritual of the Mahjarrat
- Karamja Tasks:
- Elite: "Ten In a Row"
- Desert Tasks:
- Elite: "Sun Shade" (the Balance Elemental needs to be killed in the Dominion Tower)
Transcript
Trivia

- When Silif dons the Elite Black armour, he appears to be wearing matching gauntlets and boots, although those items do not exist in game for players. Elite Black Knights also appear to wear them, although they are not dropped.
- On the day of release, the spoiler read: The spoilers are concealed within the most challenging of puzzles, disguised by a rubric, and placed at the bottom of a perilous gorge. We may have the courage to recover them tomorrow.
- At one point Lucien says "I am Lord Lucien of the Mahjarrat, Master of the Thousand Curses, look upon my work and despair!", a reference to Ozymandias, a sonnet by Percy Bysshe Shelley, which reads, "My name is Ozymandias, king of kings: Look on my works, ye Mighty, and despair!"
- The name of the quest was suggested by Mod Rowley.[2]
- After completion of the quest, Gianne Jnr. from the gnome restaurant minigame is unaware of Hazelmere's death. He may assign a food order for Hazelmere, but the player's character will inform that "Hazelmere is no longer with us".
- During The Path of Glouphrie, when the player is healing the sick spirit tree, they telepathically call Hazelmere out of a dream. Hazelmere complains that he was dreaming of the future, and was about to see "something that would save [his] life." It is likely that the moment referenced was his death at Lucien's hands, and thus that the player accidentally caused Hazelmere's death.
- The quest requirements for While Guthix Sleeps were adjusted in the 11 February 2019 patch notes. The following requirements were removed: 270 quest points, Mourning's End Part II, Recipe for Disaster, Summer's End, Swan Song, and Zogre Flesh Eaters. The following requirements were added: 25 Agility, Wanted!, and Nature Spirit (recommended).
- At the time of release, the 270 quest point requirement meant only those who had completed all previously released quests were able to start While Guthix Sleeps, similar to the Legends' Quest's requirements when it was released.
References
| Mysteries of the Mahjarrat | |||||
| Rise of Lucien |
| ||||
| Return of Zaros |
| ||||
| Arrav |
| ||||
| Sliske |
| ||||
| Related quests |
| ||||
| Related miniquests |
| ||||
| Lores and Histories |
| ||||
| Quest recollector |
| ||||
| Main series |
|
| Sea Slug quest series |
|
| Void Knight quest series |
|
| Related quests |
|
| Former quests |
|
| Main quests |
|
| Related quests |
|
| Main series | |
| Related quests |
|
| Main series | |
| Related |
|