This page contains a transcript of the strategies presented in the beasts tab verbatim. Not all information given by the original source is correct; incorrect information has been underlined in this transcript and contains a tooltip for the correct information. Some of the words in this text are coloured differently, as they are in-game; however, the exact colour values have been changed for readability.
Araxxi[]
| Recommended combat level | 120 | 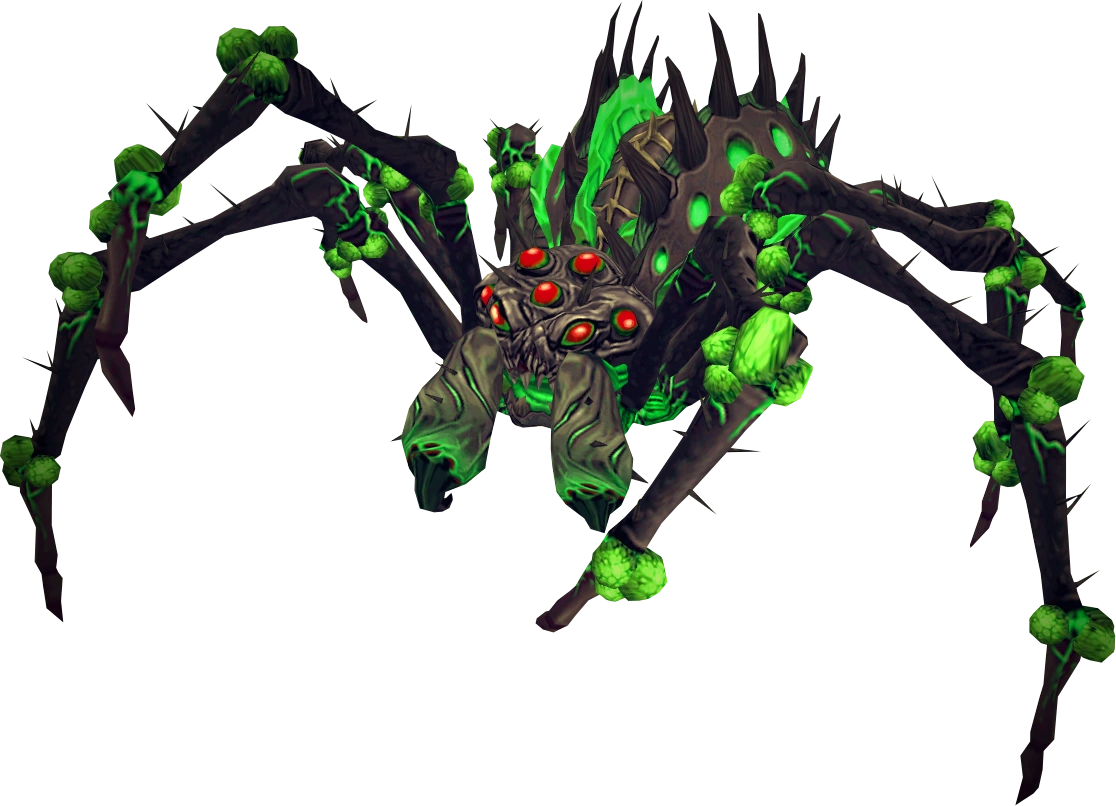
| |
|---|---|---|---|
| Recommended group size | 2 | ||
| Deep in the Araxyte Lair hangs the spider Queen known as Araxxi. She is heavily guarded by her lesser half Araxxor as well as her spawnlings who all use the dark and eerie environment to their advantage. | |||
| Combat level | 3000 | ||
- Stage One
- When the Araxxi encounter begins, you'll be contained within a starting area.
- To progress you must pick one of the two burnable webs to set fire to. After a minute the web will burn away and you can progress to stage two. The webs you can burn change every four days.
- In this stage Araxxor can Cocoon, Cleave and Web Shield.
- There are three types of styles that Araxxor can spawn in, Ranged represented by green legs, and will apply a poison dot throughout the fight, Magic represented by blue legs, and damage throughout the fight will slowly drain stats and lower overload timers and Melee represented by red legs, and will apply a damage dot that increases randomly throughout the dots lifetime.
- Cocoon
- When fired, you will become encased in webbing. The more you click the more you will break free. Using the ability Freedom or Anticipation before this attack will help lower the amount you are cocooned for.
- Web Shield
- A web shielding will cover the boss for 10 seconds. While this is present, the boss will take half damage and reflect half damage to you. If you don't attack, the boss will heal while the shield is present.
- Cleave
- The boss will pull you towards them if you haven't used the Freedom or Anticipation ability. Cleave will hit massive damage to anyone caught in front of the boss.
- Stage Two
- After the web has burned away, you can venture down your chosen path. Depending on what path you choose, Araxxor will gain new attacks. You'll have to deal with these before progressing to Stage Three.
- Burn spawn
- In all paths, Araxxor will spawn a few eggs which will hatch into aggressive spiders if not dealt with. Luckily he'll also launch a fiery projectile towards you. If this explodes on the eggs it will destroy them - enraging the boss!
- Path One: More Spiders!
- If you take the top path, Araxxor will try and spawn spiders to help kill you. Other than standard spiders, he can spawn a pulsing spider that will heal him while it lives, and a mirrorback spider that will make the boss reflect all damage while the mirrorback is alive.
- Path Two: Acid Spiders
- If you take the middle path, Araxxor can fire a projectile at the floor leaving an acidic puddle on the floor for ten seconds.
- After this time the puddle will form into an acidic spider that will rush towards you, exploding for massive damage after a short amount of time or if it touches you.
- Acidic Ramp
- On path two you must degrade the ramp to progress to Stage Three. To do this you must have Araxxor stay in the acid pool to absorb the acid.
- You need him to have at least half the acid to degrade the ramp - note that it will drip off him if he isn't in the pool.
- Darkness
- If you take path three, Araxxor will plunge the entire area into darkness which will inflict increasing damage over time if you do not stand in the light beams.
- Charge
- Roughly every minute in path three, Araxxor will drop down from the ceiling and charge you. If you dodge his attack correctly he'll smash into the wall behind.
- After a few successful attempts[1] the wall will cave in and grant access to stage three.
- Stage three: Finish him!
- On entry to stage three, Araxxor will prioritise finishing off any path mechanics you didn't finish. He may spawn acid spiders if you chose path two and spiders if you chose path one.
- On top of this, the path you didn't pick will become active, so those attacks will occur in stage 3 until Araxxor dies.
- Stage four: Araxxi
- After you have defeated Araxxor, Araxxi will consume him. Araxxi will use any left over attacks (such as acid or spider minions) as well as performing Cleave, Web Shield and Cocoon.
- As Araxxi drops below 50% health she will stop doing special attacks and instead grow increasingly damaging.
- As Araxxi goes below 25% health[2], she will enrage faster and spawn an acid wave that tracks the target down until they are hit. When the acid wave hits, it will remain on the target until they move away, at which point it will bounce away and start again.
The Barrows Brothers[]
| Recommended combat level | 60 | 
| |
|---|---|---|---|
| Recommended group size | 1 | ||
| The Barrows Brothers are ancient warriors that are truly dedicated to combat. Led by Ahrim, each brother has their own fighting style to challenge you as you make your way towards a chest containing your loot. | |||
| Combat level | 150 | ||
- The Crypts
- In the Barrows, there are six barrow mounds. Each leads to a crypt which contains one of the infamous Barrows Brothers. One of the brothers won't be present and instead his grave will give access to the area beneath the crypts.
- In the area beneath the crypts you'll have a chance to encounter any brothers you've not killed. Navigating to the centre will grant access to the reward chest.
- The more Barrows Brothers you kill, the better chance you'll have to receive loot!
- Ahrim the Blighted
- Ahrim is a mage of great strength and will attack with powerful fire spells.
- There is a 1/4 chance with every attack that Ahrim will drain your Strength level.
- Dharok the Wretched
- Dharok wields a massive greataxe. As he attacks you, he'll hit harder the lower his life points are. Protecting for melee or staying at a distance is recommended.
- Guthan the Infested
- Guthan uses his warspear to sap health from his victims. With every attack there is a 1/4 chance he'll heal what he hits!
- Karil the Tainted
- Karil is a strong ranger and uses his repeating crossbow to deal damage. There is a 1/4 chance he'll drain you Magic level if he hits you.
- Torag the Corrupted
- Torag uses his massive hammer to smash his foes. There is a 1/4 chance his melee attacks will drain 5% of your Adrenaline.
- Verac the Defiled
- Verac wears unholy armour that grants his warmace a 1/4 chance to ignore his opponent's armour!
- Akrisae the Doomed
- Akrisae the Doomed is located north in Verac's tomb. Those who fight him should be prepared - he can pray against your attacks and switch styles in reaction to your attacks.
The Barrows: Rise of the Six[]
| Recommended combat level | 120 | 
| |
|---|---|---|---|
| Recommended group size | 4 | ||
| An enhanced version of the original Barrows. This time the brothers are fighting in unison, using the environment to their advantage. Choose your team mates wisely before entering the empowered entrance, or else you might not make it out alive. | |||
| Combat level | 650 | ||
- The Shadow Realm
- At the start of the encounter, the shadow binds the brothers together. If a brother is defeated, you must defeat another within 30 seconds or the shadow will revive that brother to fight once more.[3]
- At the start of the fight one brother will be more in contact with the Shadow Realm and there is a chance he will send all players to the Shadow Realm at a point in the fight.
- Inside the Shadow Realm, all special attacks the brothers perform will have increased accuracy and damage.
- Be warned! If no-one is present on one side of the encounter, the shadow will send all brothers to the other side![4]
- Ahrim
- Ahrim will use standard fire attacks against his opponent that have a 1/8 chance to drain Strength levels. He also uses the Flight, Telejump, Shadow Pits and Turret of Fire special attacks.
- Ahrim: Flight
- When Ahrim drops below 90% life points, he'll take the air. When flying, Ahrim will only use standard attacks against you. While flying Ahrim is immune to melee damage and takes 50% magic damage.
- Ahrim: Telejump
- Ahrim will Telejump to a pillar in the centre of the arena and begin attacking the other side of the encounter - as well as lighting all the shadow pits on the other side.
- Ahrim: Shadow Pits
- When Ahrim sets a pit to shadow, it'll glow brightly and hurt anyone caught in it. There is a 1/8 chance Ahrim's pit will be red. Any brother that walks in a red shadow pit will heal.
- Ahrim: Turret of Fire
- Ahrim will teleport to a spot in the room and ignite his hands. As he rotates on the spot, anyone caught in the flames will take heavy fire damage.
- Dharok
- Dharok uses damaging melee attacks that get far stronger the fewer life points he has.
- Dharok can use the Greatest Axe, Wall Slam, and Hurricane special attacks.
- Dharok: Greatest Axe
- Dharok raises his greataxe for 10 seconds, storing any damage in it that is done against him. After the 10 seconds, he'll unleash it on his next attack!
- Dharok: Wall Slam
- Dharok runs to a nearby wall, runs up it and then flings himself towards his original target, slamming down for massive damage.
- Dharok: Hurricane
- Dharok starts spinning wildly towards his opponent, hitting all nearby with his greataxe for heavy damage.
- Guthan
- Guthan uses his warspear, which has a 1/8 chance to heal an amount equal to his hit.
Guthan can use the Impale, Hurricane, and Throw special attacks.
- Guthan: Impale
- Guthan will try to throw his spear at the farthest target[5]. If the spear impales the target they will bleed for heavy damage, until they run to Guthan and he pulls it back out of them.
- Guthan: Hurricane
- Guthan starts spinning wildly towards his opponent, hitting all nearby with his warspear for heavy damage.
- Guthan: Throw
- Guthan will try to locate Ahrim, Karil or Verac to throw them. If successful, he'll Surge over to them and throw them to a random nearby location, inflicting damage to anyone near where they land.
- Karil
- Karil uses his twin pistol crossbows to inflict ranged damage. There is a 1/8 chance his attacks will drain Attack and Magic levels.
- Karil can also use the Portal Dash, Lightning Conductor and Bombard special attacks.
- Karil: Portal Dash
- Karil will summon a shadow portal at his location that he uses to dash to the other side of the encounter. He will continue jumping side-to-side until he runs out of portals. After 4 seconds the shadow portal will explode if not entered for massive damage to those nearby.[6]
- If you enter a shadow portal you will close it, preventing it from exploding but taking more damage if you have been through portals before.
- Karil: Lightning Conductor
- Karil will teleport to a spot in the room and unleash shadow-lightning from his hands. As he rotates on the spot, anyone caught in the lightning will take heavy damage.
- Karil: Bombard
- Karil will teleport to a pillar in the centre of the arena and begin attacking the other side of the encounter - as well as unleashing a massive lightning barrage down a strip of the room on the other side.
- Torag
- Torag uses his massive hammer to deal melee damage. He has a 1/8 chance to reduce his opponents' adrenaline by 5%, and can use the Hurricane, Throw, Wall Slam and Whack special attacks.
- Torag: Hurricane
- Torag starts spinning wildly towards his opponent, hitting all adjacent with his hammer for heavy damage.
- Torag: Throw
- Torag will try to locate Ahrim, Karil or Verac to throw them. If successful, he'll Surge over to them and throw them to a random nearby location, inflicting damage to anyone near where they land.
- Torag: Wall Slam
- Torag runs to a nearby wall, runs up it and then flings himself towards his original target, slamming down for massive damage.
- Torag: Whack
- Torag will jump into air and smash his opponent from above, pushing them right through the ground! While stuck in the ground, Torag will constantly hit them - until someone else has hurt Torag enough that he stops!
- Verac
- Verac is back with his warmace. He will use standard attacks against you, with a 1/8 chance he'll ignore your armour when hitting.
- Verac can also use the Wall Slam, Throw, Deathcopter and Soulspot special attacks.
- Verac: Wall Slam
- Verac runs to a nearby wall, runs up it and then flings himself towards his original target, slamming down for massive damage.
- Verac: Throw
- Verac will try to locate Ahrim or Karil to throw them. If successful, he'll Surge over to them and throw them to a random nearby location, inflicting damage to anyone near where they land.
- Verac: Deathcopter
- Verac will signal to any of his brothers than he can launch in the next 20 seconds. If another brother tries to Throw Verac in this time he will instead take to the air and track his opponent. Should he get to them he'll smash down for incredible damage.
- Verac: Soulspot
- Verac will tie his opponent's soul to a random point in the environment, marked by green arrows. Until his opponent stands on this spot, Verac will constantly sap their prayer points.
- The Escape
- After the brothers have been defeated, you have to leave to claim any malevolent energy. As you leave the encounter area, it will begin to collapse, and you and your team have 30 seconds to escape before it implodes.
Beastmaster Durzag[]
| Recommended combat level | 120 | 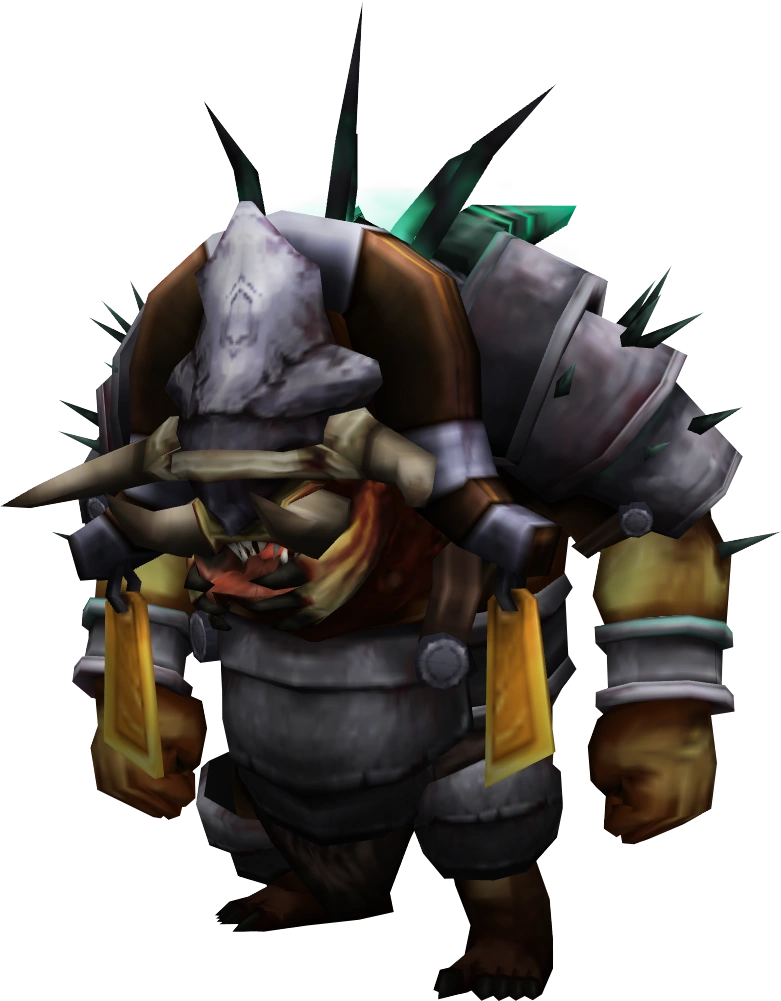
| |
|---|---|---|---|
| Recommended group size | 10 | ||
| Beastmaster Durzag and his ferocious beasts, Tuz and Krar, are terrorising the Goebies of Mazcab. Do you have the courage to challenge them and liberate the Goebies? | |||
| Combat level | 2000 | ||
- Ambush
Before you can fight the Beastmaster, you must first endure several waves of aggressive footsoldiers.
- Airut
The airut that enter the Pit of Trials are much more powerful than those you'll find anywhere else. They will attack with either ranged or melee, and have the potential to deal massive damage rapidly.
Unlike their brethren elsewhere, these airut require no Slayer knowledge to harm.
- Chargers
Chargers are vicious, dog-like creatures that are equipped with a spiked helmet. They will charge at their target and begin biting them with melee attacks.
- Cormes
Midway through the ambush, Cormes will emerge from the western entrance of the arena. Cormes can attack from all three sides of the combat triangle. He will attack his target with either magic or ranged depending on his target's defences.
Cormes' magic attack can inflict a burn; his ranged attack will drain run energy. Both attacks will hit any targets near his main target.
Cormes may also charge at a player, stunning them and hitting them for melee damage.
- Beastmaster Durzag
After surviving the initial onslaught, Beastmaster Durzag himself will enter the arena from the north. Along with him will be one of his pets, either Krar or Tuz.
The beastermaster will attack with melee and ranged. He will also have bombs, chargers, and cages at his disposal.
- Melee Punch
The beastmaster punches his target directly, dealing heavy melee damage.
- Melee Slam
The beastmaster will slam his main target with a powerful punch. The smash is so powerful, it will deal melee damage to both players and monsters within 2 squares of himself or his target.
- Ranged Attack
As the beastmaster attacks his main target, he will also launch spines that target those who are not under the attention of one of his pets, dealing ranged damage.
- Enrage
As the fight progresses, Durzag will grow enraged at his target. As his rage grows stronger, he will deal more damage and reset defensive abilities more often. The effect of his enrage can be countered with the Freedom ability. Durzag also has a short attention span, and he will forget about his anger after some time if not focused on that target.
- Flurry
Durzag flails his arms wildly, dragging other targets in front of him and dealing melee damage to anyone caught in the attack.
- Bombs
Durzag will throw a bomb at a random target, these bombs will follow a player but can be avoided or disarmed. If not defused, it will explode for magic damage and reset the defensive abilities of anyone caught in the blast. The explosion is powerful, and it will hurt Durzag's beasts just as much as it hurts his targets.
Once one of his pets has been killed, Durzag will throw a bomb for every target.
- Cage
Durzag picks a target and throws a cage at them, preventing them from moving.
- Chargers
Durzag drops several cages nearby, each containing a trapped charger. The cage containing the chargers can be opened by a teammate, otherwise they will all open on their own at 70%, attacking whomever set them free. If left imprisoned, they will break free themselves, and attack whomever they please.
When the fight begins, the cages that line the perimeter of the arena will also hold chargers. It is advised to free them yourself to have full control over whom they can attack.
- Trample
Anyone standing under the Beastmaster risks getting trampled under his feet. Move away quickly if his initial stomp misses, or else the damage will be unrelenting.
- Pets
Beastmaster Durzag has two pets that will help him in the fight. Both of Durzag's beasts have some shared attacks, but they still have their own methods of killing their target.
Durzag's first pet will enter the arena with him. His second pet will arrive when called, after his first beast is around 70% life points.
- Melee Attack
The beast will bite at their target, hitting anyone in front of them for melee damage. If their target is up close, then the beasts will focus on biting them.
The bite can also open up a flesh wound, increasing the damage that target takes from attacks. The wound can be partially healed with the Freedom ability, and it will slowly close itself over time; however, the beast may not let up, and continue to open the wound to prevent it from healing.
- Pounce
The beast will pounce at a target and begin to attack them with melee. When they pounce, they will also briefly stun the target.
- Krar
If his target is out of biting distance, Krar will fling spines at them and anyone nearby.
These spines deal heavy ranged damage and will also drain the target's run energy. If his target is out of energy, his attacks will stun them instead.
- Tuz
If his target is out of biting distance, Tuz will blast magic at them and anyone nearby.
The attack also inflicts a magical burn that deals further damage regularly. The burn can be removed with the Freedom ability, but Tuz will quickly attempt to apply another.
- Helping Hand
The closer his beasts are to him, the more accurate Durzag's attacks are. Keep his pets at a distance to minimise the damage you take.
Should the pets die he Durzag[sic] will inherit the on-hit ability of his pets (except Cormes).
- Enough!
Once the Beastmaster has been lowered to 50% of his life points, he will become significantly enraged, increasing the strength and frequency of his attacks.
If either of his pets are still alive, Durzag will take significantly less damage until they are defeated.
- Gongs
Gongs are hung at the centre of each of the four walls. The loud ring of the gong will disrupt Durzag's only reliable sense: his hearing.
Ringing a gong will cost some prayer points, but the result will be effective in confusing Durzag.
If successful, the gong will completely drain the prayer points of whoever rang it, but the noise will halve the beastmaster's attack speed. The gongs are heavy and fragile, so each one can only be used to discombobulate Durzag once.
- Goebie Prisoners
Goebies are cute, rocky creatures that have been held captive by the Beastmaster. Goebies will attempt to assist you in the fight, but they have been left in a weakened state from their imprisonment.
The evil beasts that held them captive will target the goebies just as much as they target you.
It is best if they are focused on you, so provoke any charger or airut that plans to harm one of the little fellows. Remember that freeing the goebies is the goal of this raid; their safety is second to none!
Chaos Elemental[]
| Recommended combat level | 60 | 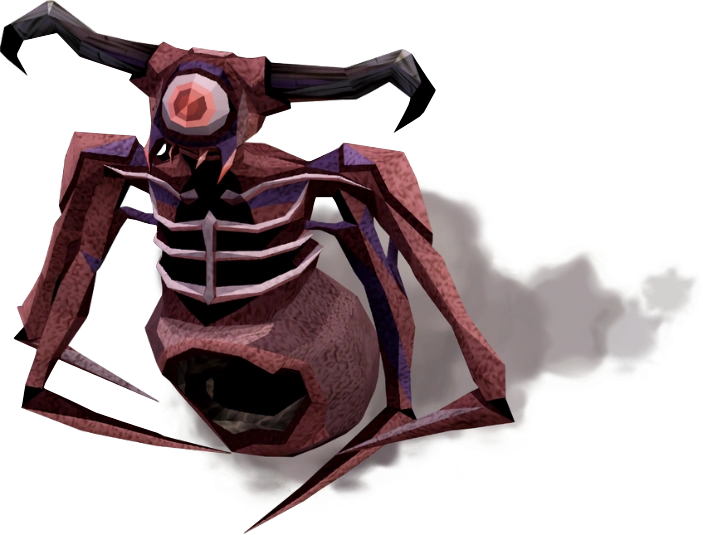
| |
|---|---|---|---|
| Recommended group size | 1 | ||
| Wandering deep in the Wilderness is this strange creature. It uses all kinds of meddlesome magic to confuse you and ensure that you won't leave the Wilderness without at least putting up a first first. | |||
| Combat level | 305 | ||
- Confusion
- The Chaos Elemental confuses his opponents, teleporting them to a random area around him unless they are more than 20m away.
- Discord
- The Chaos Elemental lets chaos decide when discord hits. When it meets its target, it will randomly act as a melee, ranged or magic attack and hit as such.
- Madness
- If you have space in your inventory, the Chaos Elemental may use Madness against you. Madness aims to remove your main-hand weapon and up to three items in random slots.
Commander Zilyana[]
| Recommended combat level | 80 | 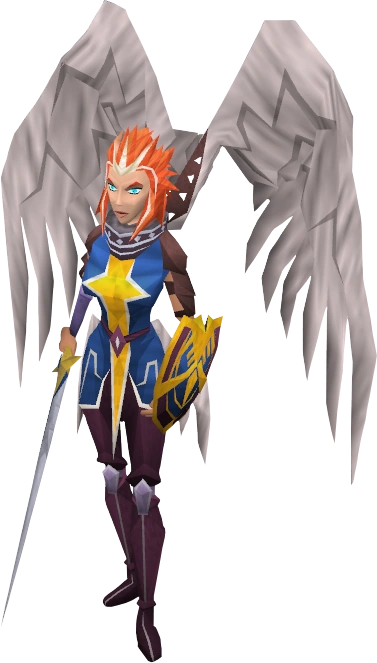
| |
|---|---|---|---|
| Recommended group size | 2 | ||
| Leader of the Saradominist army, the icyene known as Zilyana uses powerful magic and melee attacks to silence her victims. | |||
| Combat level | 596 | ||
- Melee attack
- Commander Zilyana smashes her sword against her target for heavy damage. There is a 50% chance when Zilyana attacks in melee that she instead performs her magical attack.
- Magic attack
- Commander Zilyana finds all nearby targets and calls upon Saradomin's lightning to deal heavy magic damage to all it hits.
- Saradomin bodyguards
- Commander Zilyana has backup with her in the form of Bree, Starlight and Growler. Each uses a different point of the combat triangle and Commander Zilyana will respawn any dead bodyguards every 30 seconds.
- Lightning: Hard mode only
- Commander Zilyana summons a lightning storm on up to five opponents at a time. A lightning storm will move a small amount at random, hitting heavy magical damage to anyone caught in it.
- Ultimate death: Hard mode only
- When Commander Zilyana has been defeated for the second time, she can only be killed via use of an Ultimate ability. If this does not happen after 6 seconds, she will heal up and continue fighting.
Corporeal Beast[]
| Recommended combat level | 70 | 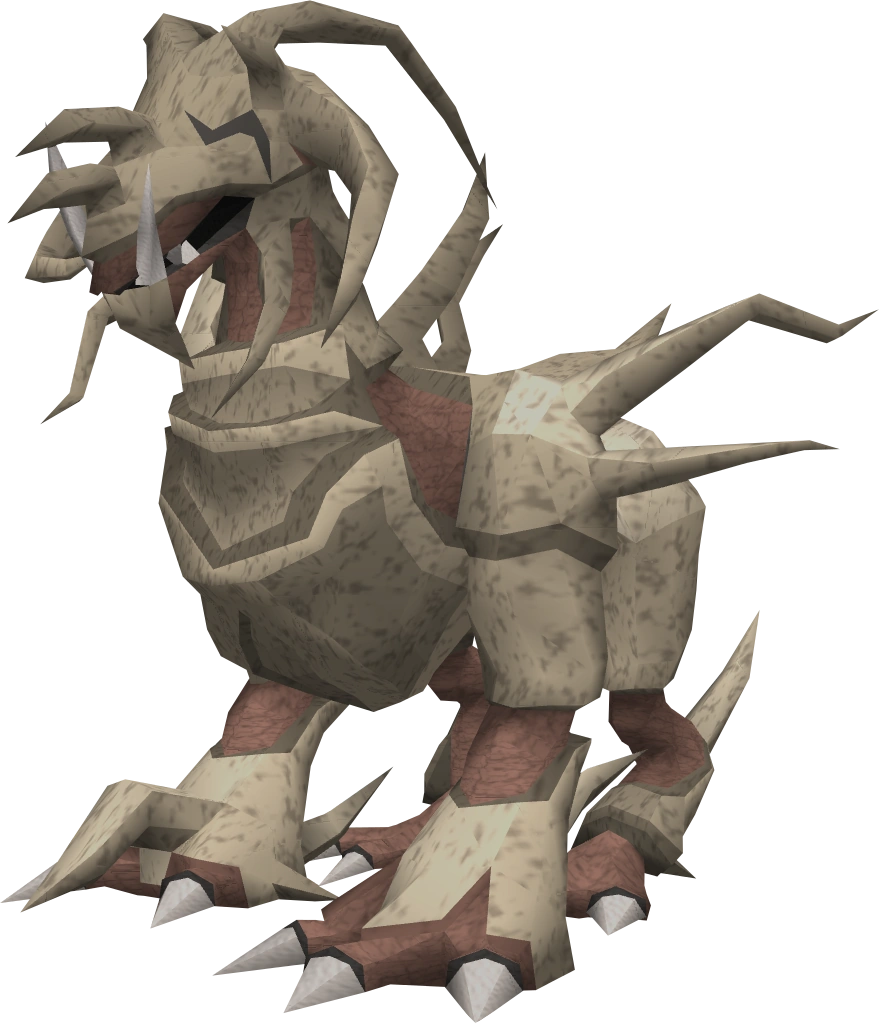
| |
|---|---|---|---|
| Recommended group size | 3 | ||
| This beast resides in a dungeon within the Wilderness. It will devour any familiar you bring, and has strong magic attacks. | |||
| Combat level | 785 | ||
- Melee attack
- The Corporeal Beast will violently swing his feet or stamp them at his target, hitting them for heavy damage with a chance to drain prayer points.
- Magic (single target)
- The Corporeal Beast hit its main target for heavy magic damage, also draining their prayer points, and degrading their summoning and magic levels. (If the targets summoning points are fully drained it will deal extra damage instead)
- Magic (area target)
- The Corporeal Beast fires a magical attack at his current target's position. On impact, it explodes and splits into multiple smaller projectiles - all hitting heavy magical damage to those get caught in the blast.
- Devour
- If the Corporeal Beast senses the presence of a familiar, he will devour it, destroying it completely.
- Stomp
- Anyone caught standing up the Corporeal Beast will feel his wrath as he violently stomps on them, hitting heavy damage until they move away.
- Dark core
- If the Corporeal Beast is below 50% life points,[7] there is a chance he will spawn a dark core if one is not present.
- A dark core will lock on to its target and fling itself towards it. Anyone caught on the dark core will take consistent damage that helps heal the Corporeal Beast.
Dagannoth kings[]
| Recommended combat level | 70 | 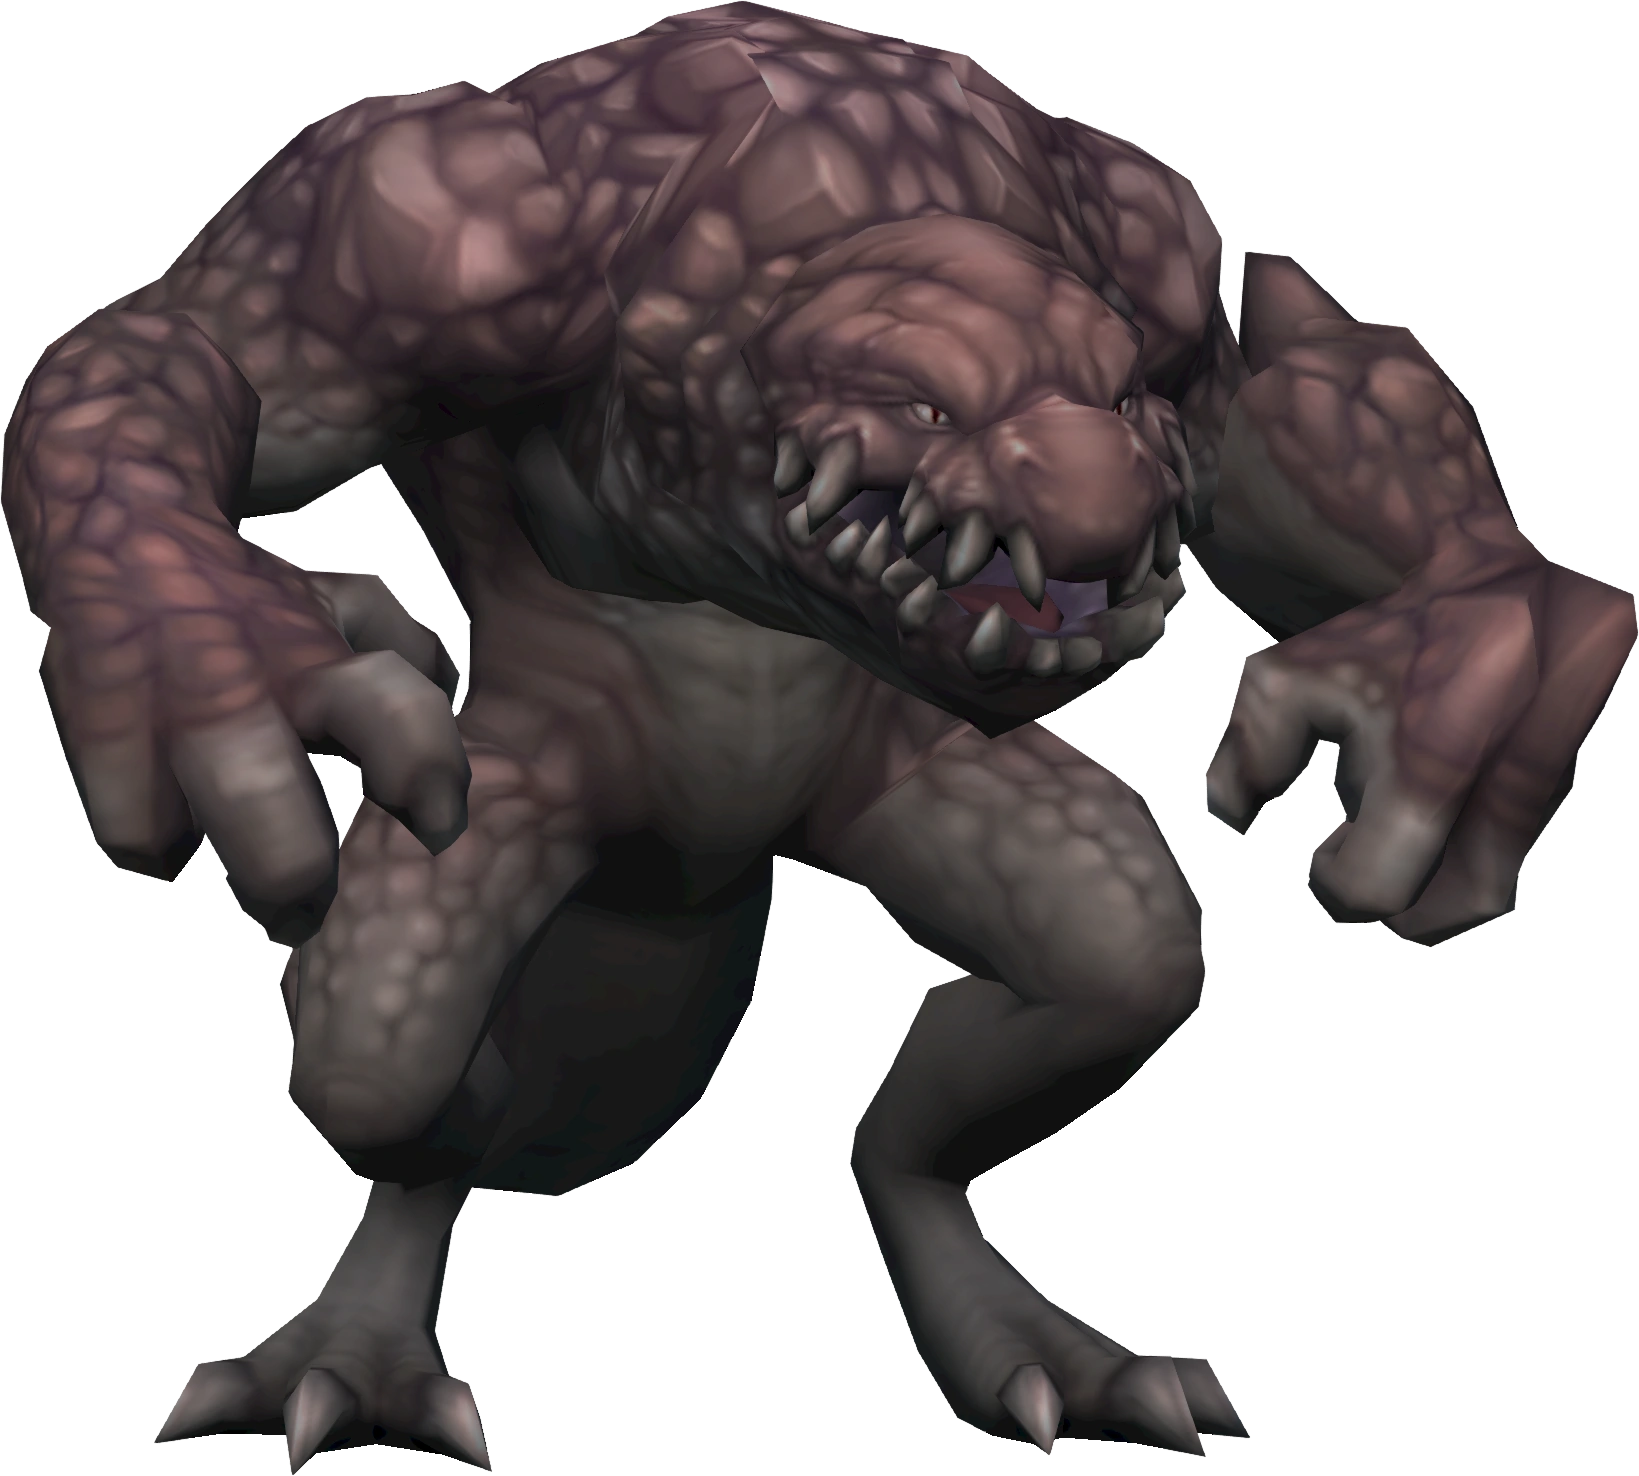
| |
|---|---|---|---|
| Recommended group size | 3 | ||
| Situated deep in the caves of Waterbirth island, reside the three Dagannoth Kings, each using a different combat style. | |||
| Combat level | 303 | ||
- Dagannoth Rex
- Dagannoth Rex is the melee-based dagannoth king. He can only be hurt by magic attacks.
- Dagannoth Prime
- Dagannoth Prime is the magic-based dagannoth king. The magic attack he uses deals area of effect damage to targets adjacent to the main target.[8] He can only be hurt by ranged attacks.
- Dagannoth Supreme
- Dagannoth Supreme is the ranged-based dagannoth king. He can only be hurt by Melee attacks.
- Spinolyp
- Spinolyps can spawn all around the king's chamber in the water. They use a combination of magic and ranged attacks, which also have a chance of poisoning the player. Spinyolps can also dive and disappear into the water for a short time before re-emerging.
General Graardor[]
| Recommended combat level | 80 | 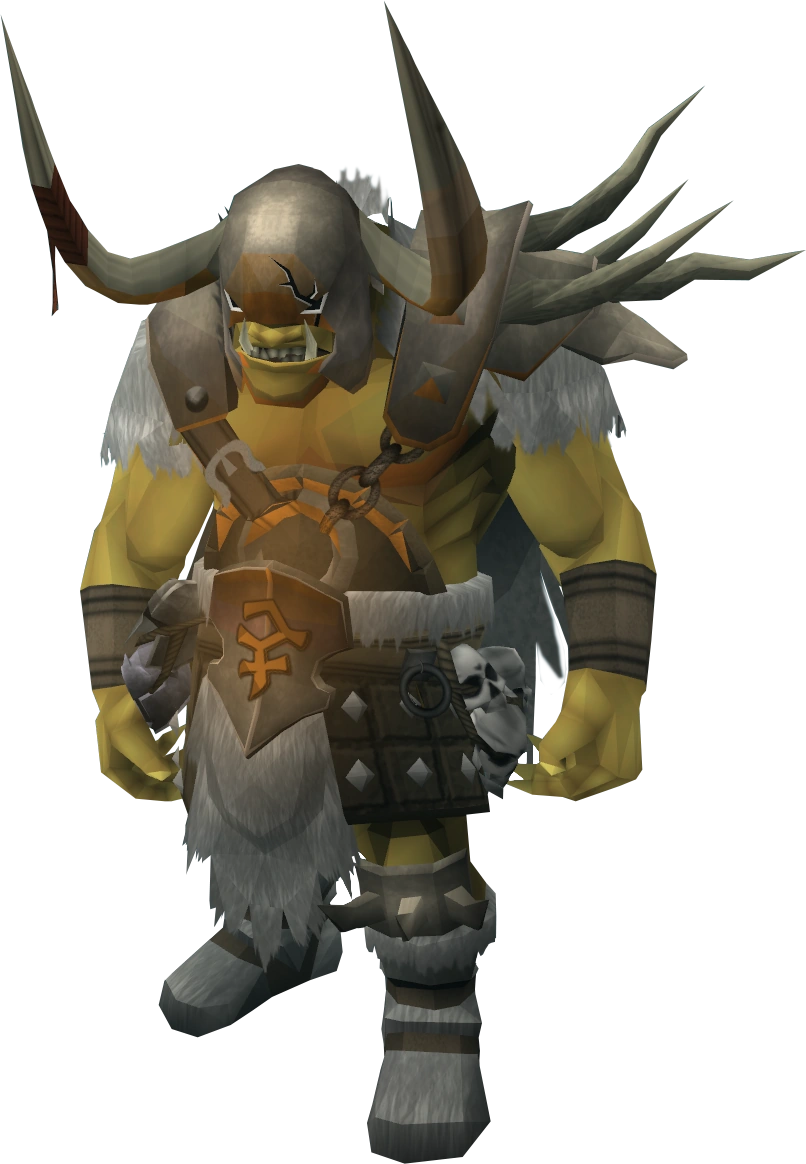
| |
|---|---|---|---|
| Recommended group size | 2 | ||
| Leader of the slain Bandos's army, General Graardor is a powerful ourg with a strong melee attack. | |||
| Combat level | 624 | ||
- Melee attack
- General Graardor punches his main target for massive melee damage.
- Ranged smash
- General Graardor punches the ground in fury, sending the debris from the punch towards targets nearby for ranged damage.
- Bandosian bodyguards
- General Graardor has backup with him in the form of Sergeant Strongstack, Steelwill and Grimspike. Each uses a different combat style, and General Graardor will respawn any dead bodyguards every 30 seconds.
- Protection stance: Hard mode only
- The general goes into a defensive stance for 10 seconds. During this stance, the general reflects half of the damage he takes if inflicted from the front.[9]
- Graardor smash: Hard mode only
- The general smashes his fists into the ground hitting anyone caught for heavy damage. Shortly after the ceiling crumbles down on the targets location, hitting anyone for heavy damage if they do not dodge the debris.[10]
Giant Mole[]
| Recommended combat level | 50 | 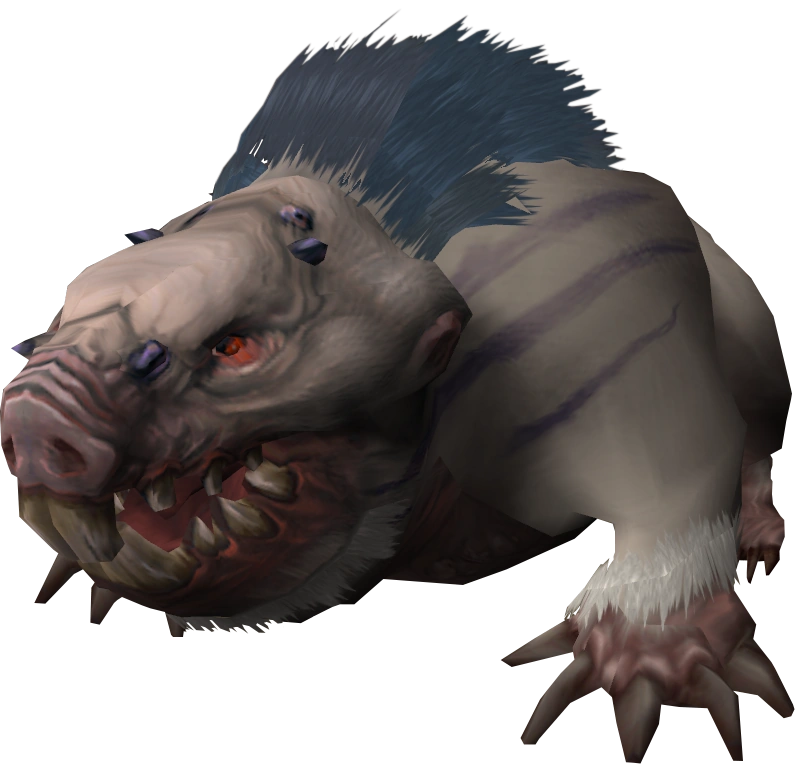
| |
|---|---|---|---|
| Recommended group size | 1 | ||
| Not quite as fluffy as you might imagine, the Giant Mole uses its surroundings to put up a fight against anything you throw at it. | |||
| Combat level | 230 | ||
- Melee attack
- The Giant Mole slashes her main target for melee damage.
- Burrow
- The Giant Mole will burrow into the ground and relocate herself to another area in the environment where she'll re-emerge and continue attacking when found.
- Rockfall
- The giant mole stomps the ground, loosening some of the ceiling. This attack will stun a main target and the mud from above will begin falling on them until they free themselves of the stun[11] or are freed by a team-mate.
- Berserk
- The Giant Mole goes berserk for 15 seconds. During this time, the mole can be stunned and deals increased damage with increased accuracy.
- Mini-moles!
- When the Giant Mole is in the north-western room, she will summon smaller moles to aid her. The Giant Mole gains damage reduction if small moles are alive.
Har-Aken[]
| Recommended combat level | 90 | 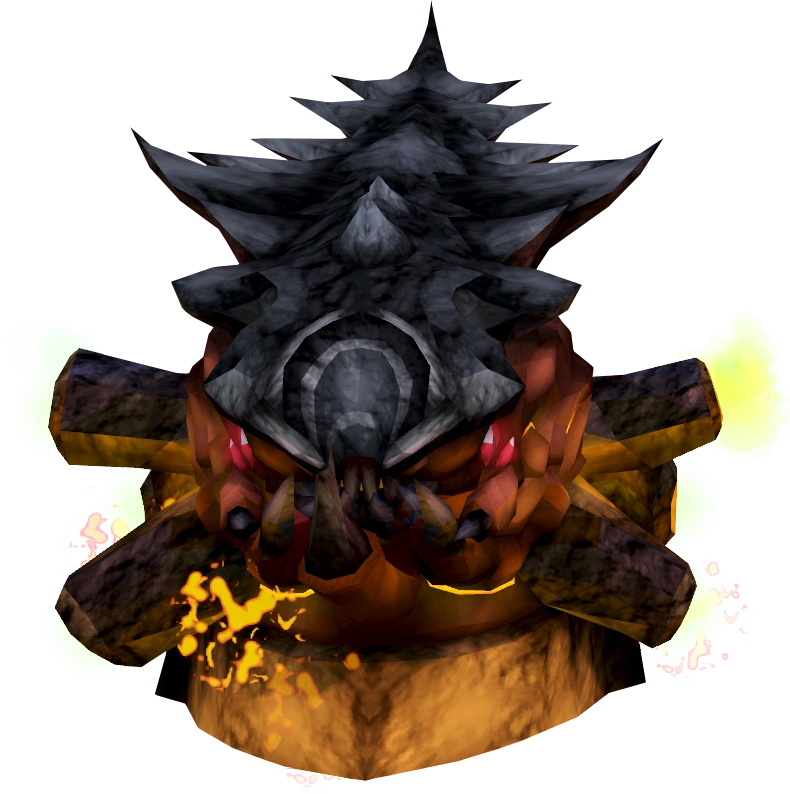
| |
|---|---|---|---|
| Recommended group size | 1 | ||
| Coated in lava, Har-Aken requires immense endurance to reach, and even more to defeat. | |||
| Combat level | 800 | ||
- Har-Aken
- Har-Aken will emerge from the lava every 30 seconds. While it is visible, it can be attacked. After 30 seconds it will submerge once again.
- Tentacles
- While Har-Aken lives, its tentacles will spawn around the platform. These can spawn in magic or ranged forms, getting too close will allow them to melee the target. These should be defeated to keep incoming damage as low as possible.
Kalphite King[]
| Recommended combat level | 100 | 
| |
|---|---|---|---|
| Recommended group size | 4 | ||
| Deep in the Exiled Kalphite Hive lies the Kalphite King. With an army in his service, you're entering into a fight which may not have a happy ending. | |||
| Combat level | 2500 | ||
- Standard attacks
- The Kalphite King will use abilities in between his special attacks.
- If the Kalphite King is in melee form, he will use: Dismember, Punish, Quake, Slaughter and Hurricane.[12]
- If the Kalphite King is in Ranged form, he will use: Binding Shot, Fragmentation Shot, Ricochet, Bombardment[13] and Incendiary Shot.
- If the Kalphite King is in magic form, he will use: Wrack, Impact, Combust, Chain and Wild Magic.
- Charge
- The Kalphite King charges forwards in his current direction, hitting all targets caught in his path for heavy damage, or higher damage if he slams them into a wall.
- Beetlejuice
- The Kalphite King prepares to kill his main target outright, putting all of their defensive abilities on hold. Another combatant is required to Provoke the king off of his target and then prepare to soak/avoid the incoming damage themselves through use of defensive abilities.
- Knockback
- The Kalphite King attacks all nearby targets for melee damage and knocks everyone back a few metres.[14]
- Burrow
- The Kalphite King burrows into the ground and disappears! Shortly after, he'll emerge from the ground at the point of a target he has selected.[15] Any person who is caught when he re-emerges will take large amounts of damage.
- Heal & Defensive Tactics
- If the Kalphite King is hit with a stunning attack, he will use Freedom.
- If the Kalphite King is hit with some ultimate abilities, he may use Barricade, Immortality or Rejuvenate.
- Kalphite Guardians
- At certain points during the fight, as the Kalphite King lowers in health he will summon in swarms of kalphite guardians, strong magic users that will defend the king with magical attacks.
- Stomp
- If a player is caught underneath the Kalphite King, the king will stomp the floor in anger, damaging any person underneath for heavy damage.
Kalphite Queen[]
| Recommended combat level | 60 | 
| |
|---|---|---|---|
| Recommended group size | 2 | ||
| The queen of the kalphites, surrounded by the protection of her army. Be prepared for her change in form or accept your fate. | |||
| Combat level | 333 | ||
- Grounded Stage
- At the start of the fight, the Kalphite Queen is grounded and will protect from all ranged and magical attacks. During her grounded stage she will use the Bite, Claw, Lightning and Spines special attacks.
- Flying Stage
- After the Kalphite Queen is defeated she will hatch and begin her flying stage - in which she is immune to melee attacks. During her flying stage she will continue to use Bite, Claw, Lightning and Spines special attacks.
- Bite
- The Kalphite Queen bites her main target for melee damage.
- Lightning
- The Kalphite Queen unleashes a barrage of lightning on all surround targets, hitting them for magical damage.
- Spines
- The Kalphite Queen launches a spine at every player nearby, hurting them with ranged damage.
King Black Dragon[]
| Recommended combat level | 50 | 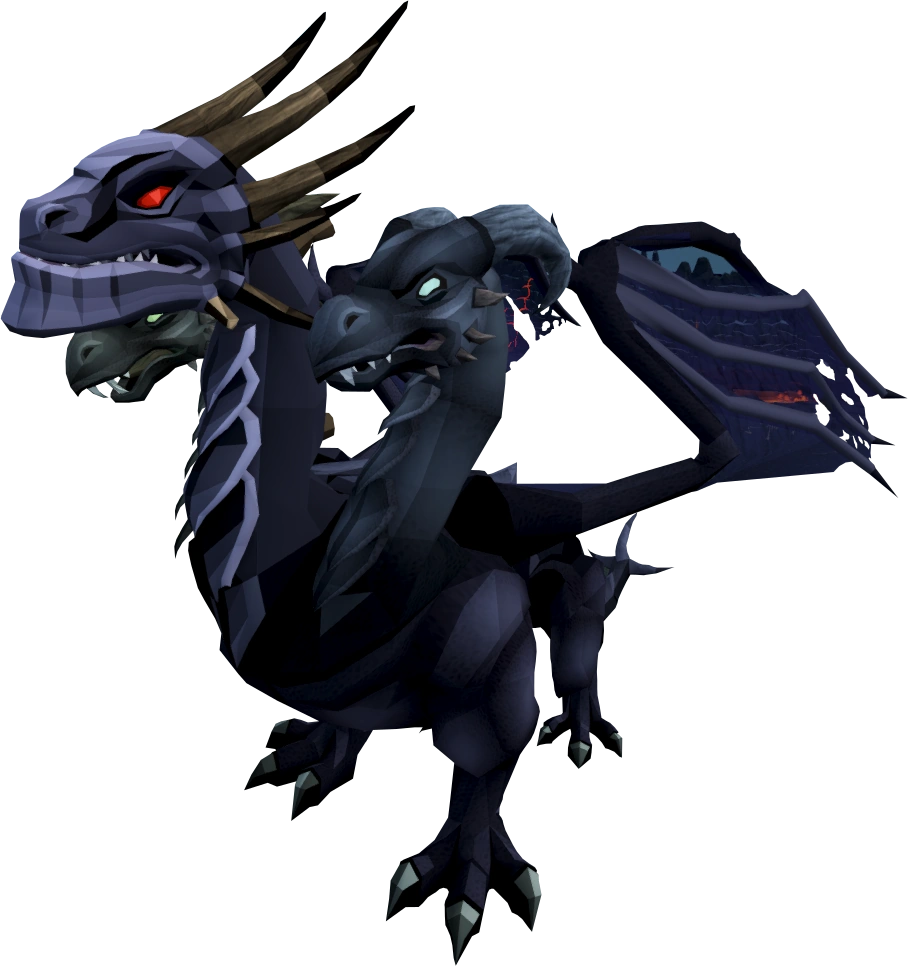
| |
|---|---|---|---|
| Recommended group size | 2 | ||
| Residing deep in the Wilderness is the three-headed king of the dragons. | |||
| Combat level | 276 | ||
- Melee Attacks
- The King Black Dragon will swipe or bite anyone who stands close to him during the fight.
- Fire Breath
- Being a dragon, the King Black Dragon can use extremely powerful fire breath that will destroy anyone who does not bring the appropriate anti-fire protection.
- Frostfire Breath
- The King Black Dragon can use a combined attack that hits with massive fire damage while freezing his opponent in place.
- Toxic Breath
- The King Black Dragon can use a combined attack that hits with massive fire damage and poisons his opponent.
- Charged Breath
- The King Black Dragon can use a combined attack that hits massive fire damage and shocks his opponent, draining their skills and prayer points slightly.
Kree'arra[]
| Recommended combat level | 80 | 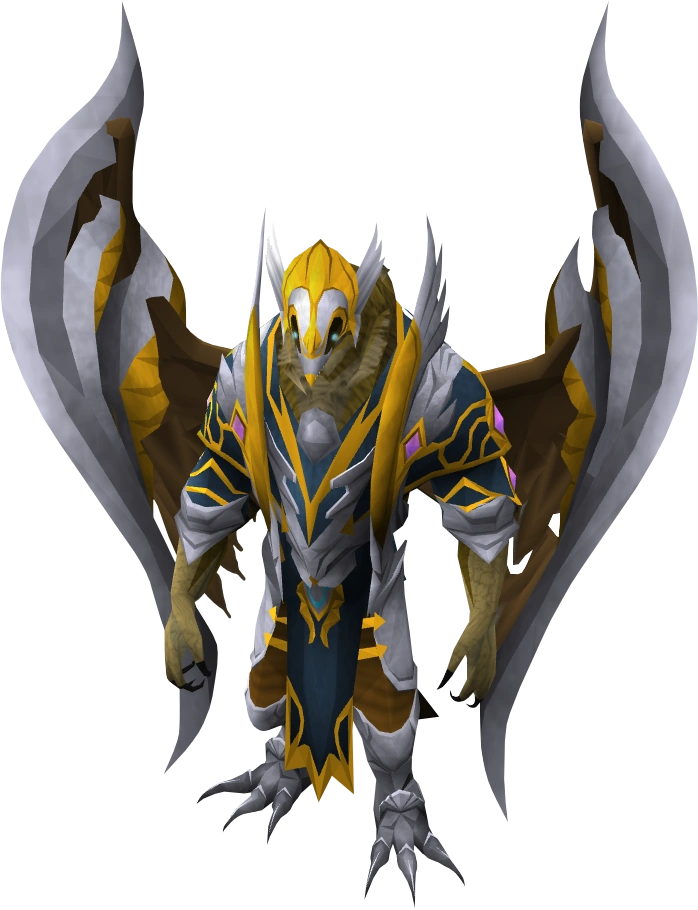
| |
|---|---|---|---|
| Recommended group size | 2 | ||
| Kree'arra, one of Armadyl's most trusted generals, is a huge aviansie that uses his wings to - quite literally - blow you away. | |||
| Combat level | 580 | ||
- Ranged Tornado
- Kree'arra fires tornadoes at nearby targets for heavy ranged damage with a chance to knockback any targets they hit. You can prevent the knockback by using the Anticipation ability.
- Magic Tornado
- Kree'arra fires tornadoes at nearby targets for heavy Magic damage with a chance to knock back any targets they hit. You can prevent the knockback by using the Anticipation ability.
- Swipe
- Any targets who stand close to Kree'arra risk being hit by his heavy swipe attack.
- Armadylean Bodyguards
- Kree'arra has backup with him in the form of Wingman Skree, Flockleader Geerin and Flight Kilisa. Each uses a different combat style and Kree'arra will respawn any dead bodyguards every 30 seconds.
- Vortex: Hard Mode Only
- In Hard mode, Kree'arra calls on the power of his tornadoes in full, having vortexes appear in the room. Anyone caught in a vortex will take massive magic or ranged damage dependant on the type of vortex.
- Alignment: Hard Mode Only
- During Hard mode, Kree'arra will walk to the centre of the area and summon all vortexes too him. Anyone caught in the path of the tornado will take heavy damage. After Kree'arra has summoned them all to him he will disperse them again into the encounter.
K'ril Tsutsaroth[]
| Recommended combat level | 80 | 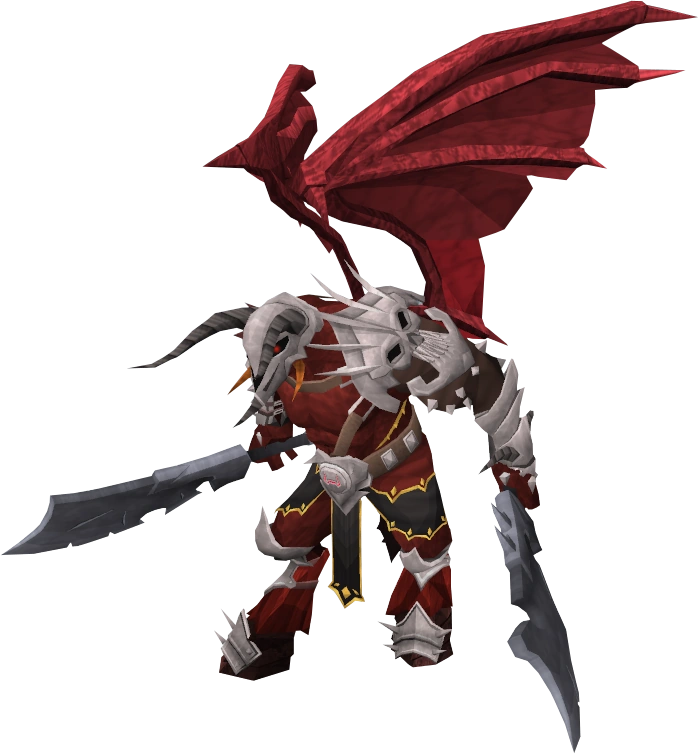
| |
|---|---|---|---|
| Recommended group size | 2 | ||
| Commanding the Zamorakian army, K'ril powers through your prayers, leaving you in a vulnerable state of attack for his minions and himself. | |||
| Combat level | 650 | ||
- Slash
- K'ril uses his massive weapons to melee his primary target and inflict poisonous damage. If the target is protecting against melee attacks or he continues to miss he will start to get enraged.
- Magic Slam
- K'ril uses his massive weapons to slam into the floor and unleash Magic damage on nearby targets. If the target is protecting against Magic attacks or he continues to miss he will start to get enraged.
- Prayer Destruction
- After K'ril has had enough of his target defending or protecting against his attacks he'll leap into the air and smash down, hitting the main target for massive damage, hitting through prayers and draining prayer points.
- Zamorakian Bodyguards
- K'ril has backup with him in the form of Tstanon Karlak, Zakl'n Gritch and Balfrug Kreeyath. Each uses a different point of the combat triangle and K'ril will respawn any dead bodyguards every 30 seconds.
- Charge: Hard Mode only
- K'ril looks at his main opponent and begins charging. Anyone caught in his charge takes massive damage until he hits a wall, stopping him in his tracks.
- Smash: Hard Mode only
- K'ril smashes his blade into the ground, which bursts into spikes from the impact. Standing in the spikes inflicts constant damage until the time out or you move off of them.
- Enrage: Hard Mode only
- K'ril will enrage against his opponent and go into a crazed frenzy, swinging and chasing his target wildly. Anyone caught in his wild weapons will take double damage.
Legios[]
| Recommended combat level | 100 | 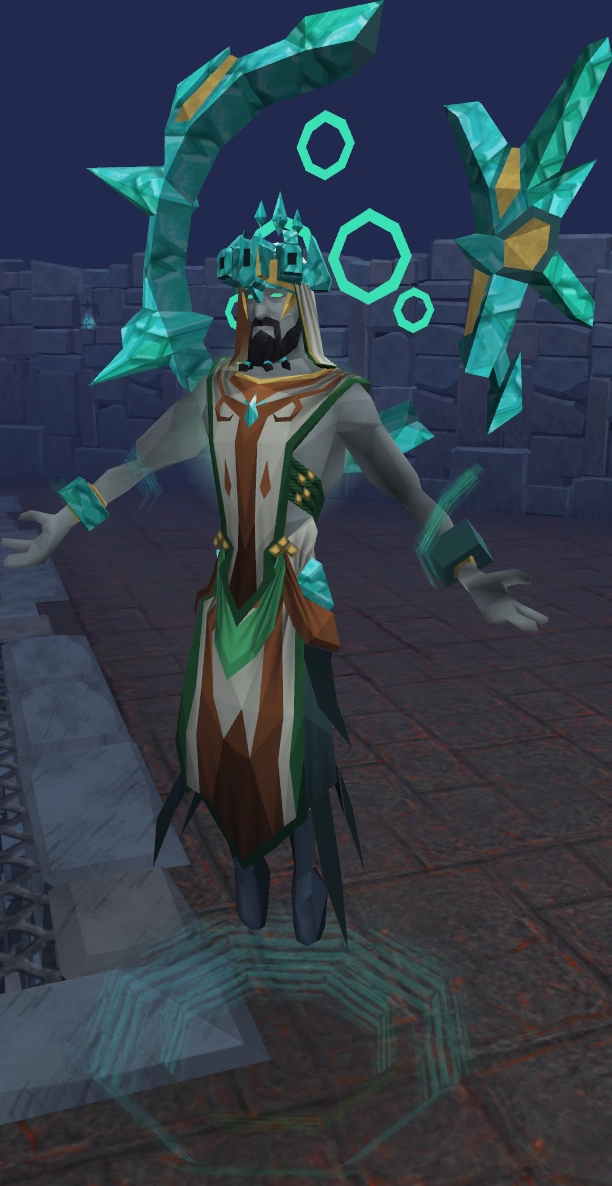
| |
|---|---|---|---|
| Recommended group size | 1 | ||
| Created by Ocellus, the legiones are equipped with Guthixian magic, punishing those who let their guard down. | |||
| Combat level | 304 | ||
- Legio Primus
- Legios use strong magic attacks, firing lightning at the floor at any targets who aren't moving.
- Legio Primus will get stronger as his life points decrease.
- Legio Secundus
- Legios use strong magic attacks, firing lightning at the floor at any targets who aren't moving.
- Legio Secundus will increase the speed he uses his lightning attack as his life points get lower.[16]
- Legio Tertius
- Legios use strong magic attacks, firing lightning at the floor at any targets who aren't moving.
- Legio Tertius will summon rorarii, gladii and capsarii as his life points lower to aid him.
- Legio Quartus
- Legios use strong magic attacks, firing lightning at the floor at any targets who aren't moving.
- Legio Quartus has the special ability to teleport all targets straight towards him.[17]
- Legio Quintus
- Legios use strong magic attacks, firing lightning at the floor at any targets who aren't moving.
- Legio Quintus can create Lines of Ascension that draw across the arena and hurt anyone who dares cross them.[18]
- Legio Sextus
- Legios use strong magic attacks, firing lightning at the floor at any targets who aren't moving.
- Legio Sextus's lightning attack is far larger and lasts longer, making him a very potent legio.
Nex[]
| Recommended combat level | 110 | 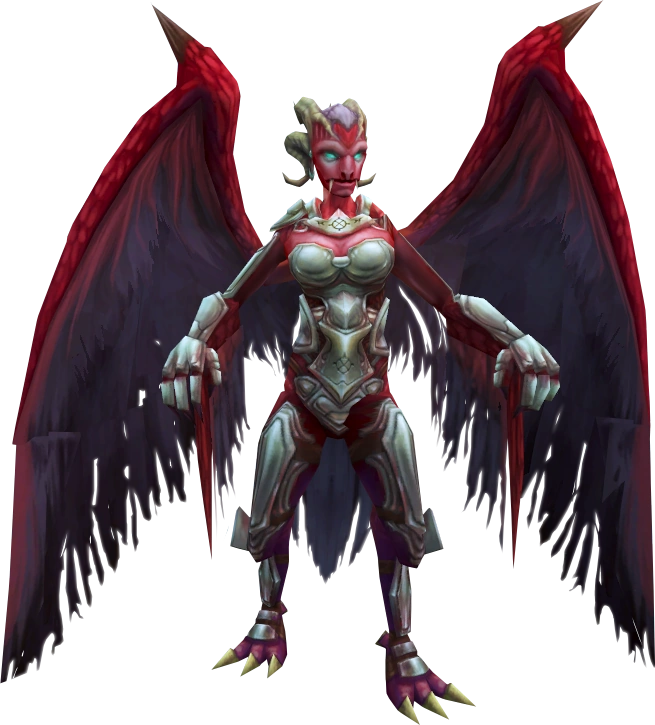
| |
|---|---|---|---|
| Recommended group size | 3 | ||
| All the way from Freneskae, Nex uses her Zarosian powers to cripple unworthy opponents. Enter her prison at your own risk. | |||
| Combat level | 1001 | ||
- Melee Swipe
- Throughout the encounter, Nex will use a powerful sweeping melee attack against any targets within melee distance to her.[19]
- Smoke Magic
- During smoke phase, Nex will fire a barrage of smoky projectiles to all surrounding targets, hitting magical damage. There is also a chance Nex will use this attack to poison you, or pull you towards her if you haven't anticipated the attack.
- Choke
- Nex will infect one target with a virus. As that target coughs the virus away, they will infect any other targets adjacent to them. Every cough of the virus lowers combat stats.
- Smoke bullet
- Nex will align with Zaros, picking a path in the chamber to teleport to and firing herself forward to the centre. Any targets caught in the path or centre will be forced forward by her attack, taking massive damage.
- Fumus
- When Nex drops below 80% life points she will call on Fumus to aid her. Until this point, Fumus is invulnerable. If Fumus is killed, Nex will move onto the next stage, calling on the power of Shadow.
- Shadow Shot
- During the Shadow phase, Nex will use the power of shadow to fling ranged projectiles at all surrounding targets.
- Shadow Smash
- Nex will find all nearby victims and put a deadly shadow below them. Shortly after placing the shadows, they will erupt, hitting heavy damage on anyone caught in the dark.
- Embrace Darkness
- Nex will plunge her targets into darkness, making it darker the closer targets are to her. If any targets are too close to Nex for too long they will become engulfed in shadow, taking constant damage from the pure shadow.
- Umbra
- When Nex drops below 60% life points she will call on Umbra to aid her. Until this point, Umbra is invulnerable. If Umbra is killed, Nex will move onto the next stage, calling on the power of blood.
- Blood Siphon
- Nex will use her wings to shield her from damage and siphon it to heal her. Any Damage over time effects placed on Nex during blood phase will also heal her.
- Any Blood reavers that are alive when Blood siphon starts will die and transfer their life points to Nex.
- Blood Reavers
- When Nex begins Blood Siphon, she will also summon blood reavers to the arena. Any blood reavers that survive until the next Blood Siphon will transfer their life points to Nex.
- Blood Barrage
- During the Blood phase, Nex will shoot Blood Barrage on her targets, healing a percentage of any damage it inflicts on them.
- Blood Sacrifice
- Nex will mark a target for sacrifice. This target has 4 seconds to get as far away from Nex as possible. If they do not manage to get far enough, Nex heals dramatically and instantly fires another Blood Barrage.
- Cruor
- When Nex drops below 40% life points she will call on Cruor to aid her. Until this point, Cruor is invulnerable. If Cruor is killed, Nex will move onto the next stage, calling on the power of ice.
- Ice Prison
- Nex will put one target in a prison of ice.[20] The player has 6 seconds before the ice shatters and they take massive damage. Other combatants can free the imprisoned player by destroying the icicles surrounding them.
- Ice Barrage
- During the Ice phase, Nex will use Ice Barrage against her targets, freezing them in place. Protection from Magic will help reduce damage and freezing effects, but will also increase prayer drain.
- Containment
- Nex smashes the floor, creating surround icicles that damage anyone caught next to her. Half of the icicles then being moving towards their assigned targets, hitting anyone caught in their way until the stop.
- Glacies
- When Nex drops below 20% life points she will call on Glacies to aid her. Until this point, Glacies is invulnerable. If Glacies is killed, Nex will move onto the next stage, calling on the power of Zaros himself.
- Power of Zaros
- Nex calls on Zaros himself to empower her, This heals her, and increases her damage and accuracy for the remainder of her life. She will then cycle between using Soulsplit, Deflect Melee and Leech curses against her opponents.
- During the Zaros phase, Nex's melee attacks become area-of-effect, hitting anyone within 1 metre of her primary target.
- Wrath
- When Nex is defeated, she'll activate the Wrath curse, hitting anyone with an explosion who is nearby where she perishes.
- Deflection
- During the fight, Nex can randomly decide to use a deflection curse (ranged or magic) for 2 minutes. This becomes more probable as the phases carry on. She will only use one type per kill and will alternate between the two as kills go on.
Queen Black Dragon[]
| Recommended combat level | 80 | 
| |
|---|---|---|---|
| Recommended group size | 1 | ||
| The first dragon ever created, the Queen Black Dragon is enormous! Her terrifying roar and incinerating breath will surely stop you in your tracks. Players that have completed the quest 'Song from the Deaths' may find they have an easier time surviving against her. | |||
| Combat level | 900 | ||
- Artefacts
- The Queen Black Dragon cannot be defeated, only returned to slumber. To do this, you must activate four artefacts that become enabled when the Queen Black Dragon reaches 0 life points.
- Melee/Range Attack
- The Queen Black Dragon will use a powerful swipe to any targets found at the front of her platform causing ranged damage, if the target stands melee distance she will resort to biting them if they are completely adjacent.
- Fire Breath
- The Queen Black Dragon can unleash massive fire breath at any point throughout the fight. Those who do not bring appropriate anti-fire protection will burn for incredible damage.
- Wall of Fire
- The Queen Black Dragon summons a massive wall of fire which passes over the platform inflicting fire damage. Keep an eye out for a weak point in the wall that you can pass through unharmed.
- Based on the fights duration, the Queen Black Dragon may summon up to three walls of fire at the same time.
- Convulsion
- After the Queen Black Dragon has been defeated, you need to activate the next appropriate artefact. While this is going on, the Queen Black Dragon will fire out grotworms at the platform that use magic attacks until the artefact is enabled.[21]
- Tortured souls
- From Stage two onwards, the Queen Black Dragon will spawn increasing amounts of Tortured souls. Tortured souls will fire arcane waves along the floor towards their target.
- If they hit a different target on the way, they will disperse - otherwise they hit their target for massive magic damage.[22]
- Time Stop
- A Tortured souls may start chanting a ritual that will result in time stopping temporarily. If the spell completes, the target cannot move or act, but will suffer time stopping for 10 seconds, after which everything the Queen Black Dragon has done will be instantly applied.
- Forging Fire
- Forging Fire is the ultimate fire breath attack the Queen Black Dragon will unleash in stage four. Any target standing in the centre of the fire will take massive fire damage. Note that this is enough heat to forge the royal crossbow.
- Targets on the outskirts of the fire take less damage.
- Crystal Form
- The Queen Black Dragon takes on the consistency of crystal. She is more resistant to magic, but weaker to physical damage for 50 seconds.[23]
- Hardened Carapace
- The Queen Black Dragon hardens her carapace. She is more resistant to physical damage, but more vulnerable to magic for 50 seconds.[24]
TzTok-Jad[]
| Recommended combat level | 60 | 
| |
|---|---|---|---|
| Recommended group size | 1 | ||
| TzTok-Jad can be fought in the FIght Caves or the Fight Kiln - if you can survive long enough to see it, that is. Armed with very strong attacks, you'd better pray that it doesn't end you before you receive your reward. | |||
| Combat level | 702 | ||
- Melee Swipe
- TzTok-Jad has only one focus: killing his target. Expect to die if you do not protect against his massive melee attack. TzTok-Jad will only use melee swipe when the target gets within melee distance.
- Ranged Smash
- TzTok-Jad has only one focus: killing his target. Expect to die if you do not protect against his massive ranged attack.
- Magic Death
- TzTok-Jad has only one focus: killing his target. Expect to die if you do not protect against his massive magic attack.
- Medic!
- When TzTok-Jad passes 50% life points he calls multiple Yt-HurKot's towards him, all with the aim of healing him. If kept unchecked, they will continually heal him for the duration of the encounter.
Vorago[]
| Recommended combat level | 120 | 
| |
|---|---|---|---|
| Recommended group size | 7 | ||
| If you dare challenge this mighty warrior of the earth, you'll have a real fight on your hands. One of the toughest creatures in all of Gielinor, you don't want to enter this fight without a solid team. | |||
| Combat level | 10000 | ||
- Maul of Omens
- Vorago can only be defeated via use of the Maul of Omens. This weapon can be assembled during the fight. Parts are found in stages 1, 2 and 4.
- Melee Swipe
- Vorago hits his main target and swipes them for heavy melee damage. Having another tank in the vicinity can help lower the damage. Anyone adjacent to Vorago will also be hit.
- Magic Bomb
- Vorago launches a magical blue bomb to the target furthest away from him.[25] On impact it detonates, hitting for magical damage. The more targets the bomb hits, the lower the damage.
- Explosive bomb
- Vorago picks a target (preferring the farthest person away) and fires an explosive bomb towards them.[26] On impact it detonates for significant damage - more so if multiple targets are in the explosive area.
- Stomp
- Any targets under Vorago risk being stomped on, which will stun them and hit massive damage until Vorago attacks them again.[27]
- Jump-Smash
- At the end of each stage, Vorago will jump up and smash down in another location. Anyone caught in proximity to him landing risks taking heavy damage. After three smashes the floor will give way and everyone will fall deeper into the encounter.
- Destroy Tank
- Vorago performs a strong melee attack against his main target five times in a row. Each attack will place a damage-over-time effect on the target, which persists if they are close to Vorago.
- If the damage-over-time effect exists on Vorago's target when he attacks them again, the target will suffer a massive melee hit.
- Using abilities such as Provoke and Freedom should be considered to deal with this attack.
- Target Link
- Vorago picks a target nearby and links himself to them for 10 seconds. During this time, any damage done to Vorago is instead applied to the linked target.
- Gravity fields
- Vorago will spawn gravity fields in stage two. If a gravity field is activated and Vorago is nearby, it'll fly towards him. After Vorago has absorbed 4 gravity fields (2 if players fail the next stage) he will be destabilised and can be brought down.
- Bring Him Down!
- After Vorago has absorbed 4 gravity fields all targets will become linked to Vorago and gravity itself. Opponents are then required to attack Vorago repeatedly to pull him into the floor, leaving him vulnerable.
- Destroy Phase
- After Vorago has been pulled into the floor, he will be idle and vulnerable for 10 seconds. During this time his opponents have to deal massive damage to obtain the piece of the Maul of Omens.
- If this is failed, you are required to repeat the gravity fields once again.
- Stage 3
- Stage 3 is a special case. The chasm Vorago falls into may change week on week. Be prepared for any of the following!
- Stage 3.1 : Ceiling rotation
- Vorago will fire a projectile at the sky and follow it up. Shortly after a shadow will appear on the floor and the section of ceiling will fall down and smash anyone found underneath it. Slowly the entire arena may become blocked off if left unchecked.
- Stage 3.1 : Ceiling detonation
- If the arena is becoming locked down due to the ceiling collapse, Vorago's opponents can choose to destroy the debris, but will take heavy damage in the process. Any leftover debris will also fall through into the next stage.
- Stage 3.2 : Scopulus
- Scopuli are all tied to each other in spirit. The closer these creatures are to each other, the more accuracy and damage they will do, as well as increasing the distance they will inflict damage on their targets.
- Stage 3.2 : Scopulus Enrage
- When a scopulus dies, it will heal its linked scopulus for 10% of its life points as well as enrage it - increasing its damage, accuracy, attack speed and attack spread.
- Stage 3.3 : Summon Vitalii
- Vorago will pick an area in the arena and fire a shockwave towards it. When the shockwave arrives, multiple vitalii may spawn. To counteract this, you can have a person stand in the shockwave to prevent a vitalis spawning, taking some damage instead.
- Stage 3.3 : Vitalii
- Vitalii will attack anyone near to themselves or Vorago, hitting quickly for melee damage.
- Stage 3.4 : Gas Bomb
- Vorago fires a green bomb at a random area in the encounter. On impact it will create a Gas cloud as well as bouncing towards a target. When it hits this target it will look to bounce again to another target.
- Each unique target will take damage when it bounces to them.
- If no targets are found, or the bomb bounces to a target who has already bounced it,[28] it will detonate for heavy damage.
- Stage 3.4 : Gas cloud
- Standing in a gas cloud will drain run energy, adrenaline and life points consistently.
- Stage 3.5 : Teamsplit
- Vorago will try to split the team in two. Half of the team will be marked as green and the other half red. Vorago also places coloured zones in the room and begins charging for 8 seconds. After this time, anyone not standing in the matching zone will explode for massive damage.
- Stage 3.6 : The end
- Vorago raises his arms in the air and then slams them down, blocking off a corner of the room. Anyone outside of this area will begin to suffocate.
- Vorago then moves his arms one by one 90 degrees anti-clockwise. In three of the corners he blocks you into there will be a bomb, if no one detonates them they will all be activated simultaneously when Vorago finally lifts his arms.[29]
- Stage 3.6 : Vitalis bomb
- The third bomb reached during 'the end' will also be fired by Vorago in the later stages of the encounter. This bomb will turn you into a vitalis and home in on your for a number of seconds, exploding on impact to reduce adrenaline and deal damage to everyone nearby except the person who was the target.[30] Use of the Barricade ability could help to manage these bombs.
- Stage 4 : Waterfall
- Vorago will open a waterfall from above and teleport to the centre of the encounter to begin charging. 10 seconds later, he will explode for massive fire damage. Anyone not hiding behind a waterfall will absorb massive fire damage.
- Stage 4 : Stone clones
- Vorago will show some of his opponents stone versions of themselves. Each will have to defeat their stone clone, which will use a full suite of combat abilities. If you defeat a clone, you may help team mates who also have stone clones.
- Stage 5 : Finale
- In the final stage of the fight, opponents must face off against Vorago in a race of damage.
- As Vorago inflicts damage, he will push his opponents west. If the team is pushed off of the platform, they all suffer instant death..
- As the team damages Vorago, he will be pushed east. If the team gets Vorago to the far end of the platform, he will be vulnerable to the Maul of Omens which can be used to finish him off.
Yakamaru[]
| Recommended combat level | 120 | 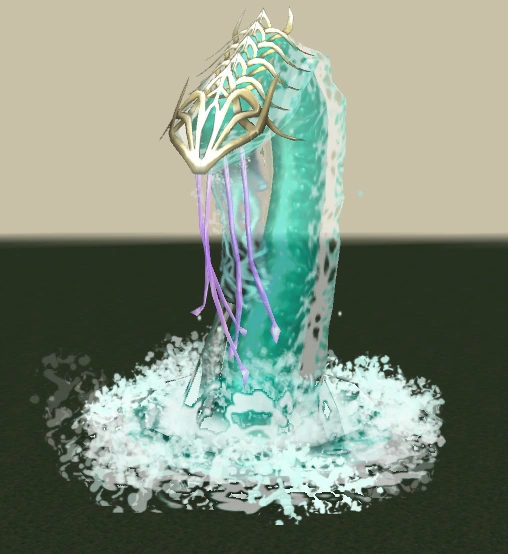
| |
|---|---|---|---|
| Recommended group size | 10 | ||
| The terrifying water snake, Yakamaru, lurks in the waters around Mazcab. An encounter with this titan of water will be far more than just a stroll along the beach! | |||
| Combat level | 10000 | ||
- Water power
Yakamaru's attacks are fuelled by the power of water. As he attacks his main target, he will slowly soak them with water, increasing the power of his attacks. Any one close to his main target will also experience the effects of his drench. The only way to counter this is by using Freedom to shake some of the water off.
- Cowardice
Players who completely avoid all combat with Yakamaru will enrage him, prompting him to fling projectiles at those he considers cowards in an attempt to lure them into combat.
- Magic Splash
Yakamaru splashes the floor, damaging anyone within 2 squares of him with a powerful magic attack.
- Ranged Tendrils
Yakamaru summons small tendrils to pierce anyone outside of his splash distance. These tendrils will always hit his main target and those nearby, but they will not target anyone else preoccupied with another fight.
- Soak
Yakamaru picks a target and soaks them to the fullest extent, turning them into an entity of pure water. Whoever has this form will gradually take increased damage from it. The effect can be passed between teammates by standing together to avoid damage. After a few passes, the soaked form will dissipate completely.
- Jelly Spawn
Yakamaru spits a jellyfish out at the team. When it lands, it will create 5 geysers linked to it. Each geyser can be stood on to remove 20% of the jellyfish's life points, but they will also deal magic damage to anyone on top when they erupt.
- Jellyfish
Jellyfish are powerful creatures that choose a target and barrage them with attacks. Their attack deals melee to damage to anyone in a 3x3 area of their main target.
- Central Pool
The fight will begin in the central pool. In this pool, Yakamaru can use his Soak and Jelly spawn special attacks.
- Outer Pool
As the fight progresses, Yakamaru will swap pools, giving him new techniques in combat. Yakamaru will choose the first outside pool at random and will continue from there clockwise as the fight goes on.
- Southern Pool
In the southernmost pool, Yakamaru has access to much more powerful tendrils. In this pool, he can use his Soak, Jelly spawn, and Tendril assault special attacks.
- Tendril Assault
Yakamaru assaults the team with two different tendril attacks simultaneously Strangling tendrils and Whipping tendrils.[sic]
- Strangling Tendrils
Strangling tendrils targets the players whom Yakamaru considers the most dangerous. These tendrils latch onto the top five damage dealers, preventing movement and resetting all defensive abilities. They asphyxiate their target, dealing gradually increased damage. The only way to escape is to fight back; you must deal enough damage back at Yakamaru for the choking to stop.
- Whipping Tendrils
Yakamaru goes full assault against his current target, summoning a large tendril growth that whips around wildly. Anyone caught inside this growth will take massive damage rapidly, unless they are being asphyxiated by the strandling tendrils.
- South-West Pool
In the south-west pool, Yakamaru calls upon creatures of the sea to assist in the fight. In this pool, he can use his Soak, Jelly spawn, and Sharknado special attacks.
- Sharknado
Yakamaru begins whirling a cyclone, pulling up dangerous explosive fish. While the cyclone is still charging, the sharks can be fished out, removing one explosive charge from the attack.
Any charges remaining will be launched at the team. Yakamaru will attempt to home one fish to each combatant, randomly scattering any spares. When the fish land, they will explode after a few seconds. Fish them away or just run to avoid taking heavy damage.
- North-West Pool
In the north-west pool, Yakamaru will make use of his environment to attack his targets. In this pool, he can use his Soak, Jelly spawn, and Quicksand special attacks.
- Quicksand
Yakamaru dampens the ground, leaving two targets standing. Everyone else will be trapped in quicksand, and slowly sink to the bottom. Anyone with mobility will need to free their teammates. Anyone who sinks below the ground will suffer instant death.
- Northern Pool
In the northernmost pool Yakamaru can use his Soak and Jelly spawn special attacks.
The longer Yakamaru sits in this pool, the harder his body becomes. In his weakest state, Yakamaru will take increased damage, but as his body hardens, he will take less and less damage. To reset his defences, he must be stunned with an ability. When stunned, Yakamaru will immediately retaliate, damaging every target; the weaker Yakamaru is when he is stunned, the more damage he will deal when he retaliates.
- Poison
Near the end of each pool, Yakamaru will purge a poison from his body. To properly defeat the pool, someone will need to absorb the poison and bring it to Yakamaru. If a poisoned player is within splash distance, Yakamaru will be enticed by the scent of the poison and swallow the player whole when defeated.
When the poison transfers to Yakamaru, he will return to the central pool, regurgitating the player he swallowed. The regurgitated player will drown and wash ashore, along with 5 planks that will be needed for later. When Yakamaru returns to the central pool, he will also spawn a Jelly group to come to his aid.
- Resuscitation
The player who was swallowed and regurgitated by Yakamaru will wash ashore incapacitated. One of their teammates will need to perform CPR before the drowning victim loses breath. If not saved, drowning will cause instant death.
- Poisoned
When Yakamaru is still inflicted with the poison he absorbed, he will take increased damage from all attacks.
- Jelly Group
As Yakamaru returns to the central pool, four jellyfish will spawn and begin moving towards Yakamaru. There is one jellyfish for each side of the combat triangle - meleefish, magical jellyfish, piercing jellyfish - and one support jellyfish. If any of these jellyfish reach Yakamaru, they will absorb the poison from his body, curing him. If either of the support jellyfish die, their death will cure Yakamaru.
- Durable Jellyfish
Durable jellyfish can attack with magic, but their main focus will be healing Yakamaru and other jelly fish.
- Reflecting Jellyfish
While the reflecting jellyfish is alive, the three jellyfish in its group will take decreased damage, with 1/4 of that damage being dealt back to players. Reflecting jellyfish are also immune to regular attacks. Each jellyfish under the reflecting jellyfish's protection will damage the reflecting jellyfish for 1/3 of its maximum lifepoints when it dies.
- Mirage Phase
Once Yakamaru has been defeated in every pool, he will hide away and create four images of himself, one in each outer pool. These images do not have as many life points as the real Yakamaru, but they are just as powerful offensively. All four images will need to be fought at once; any image that is not in combat will fling projectiles at the team for increasingly heavy damage.
- Blocking
Unlike the real Yakamaru, mirage images will not return to the central pool when defeated. Instead, they will leap into the air to regenerate their life points. While this is happening, the team will have 5 seconds to block the pool. If not blocked, the image will respawn with full life points and continue attacking. The southernmost and north-west pools require 10 piles of sand from the area to be blocked. The south-west and northernmost pools require 10 reclaimed planks to be blocked.
- Last Stand
After the final image has been defeated, Yakamaru will emerge from the central pool one final time. Once the last bits of his health are taken away, Yakamaru will collapse, defeated.
Corrections[]
Failed to mention[]
- The Giant Mole:
- She has a second burrow attack, used in the south-west chamber, that creates a damage-dealing area of effect.
- She will also create the damage-dealing area of effect underneath her main target if she cannot get into melee range of them.
- She has a final phase where she returns to the central chamber and uses the special attacks from the other four chambers.
- All hard-mode god wars generals have a stomp attack.
- Hard-mode General Graardor has an attack called "Graardor Mad!" where he attacks an area in front of him.
- The Kalphite Queen can spawn workers from the walls when she is close enough.
- The Kalphite King:
- He has an attack that pushes his target against the wall. This is only used if they are up against the edge of the arena.
- He has the ability to heal with 2 different auras:
- A green aura will heal him for all damage that he receives
- A red aura will heal him for all damage that he deals
- He can heal 26,000 life points if he cannot attack his target.
- Nex:
- Nex has an attack on her smoke phase that drags targets towards her, stunning them and temporarily disabling protection prayers.
- Nex will jump across the room if she is unable to attack, sometimes stunning players (generally if they are using an instanced fight).
- Vorago's explosive bombs drain adrenaline and disable defensive abilities.