| |
| Release date | 1 June 2011 (Update) |
|---|---|
| Members? | No |
| Developer | James C |
Three's Company is the first ever Fremennik Saga. It may be started after finding a bear pelt on the frozen floors of Daemonheim. During this saga, you play as three characters; Ariane, Ozan, and Sir Owen, on a hunt for the antagonist Carn.
Official description
| “ | Three's Company tells the tale of three adventurers - Sir Owen, Ariane and Ozan - who come to Daemonheim in search of a criminal who has escaped their clutches. The criminal is attempting to learn the secrets of summoning, and has arrived in the demon halls with a devious plan for domination... | ” |
Development team
- Developer: James C
- Senior Designer: David O
- Graphics: Alex R
- Quality Assurance: Vicki M, Ian H, Daniel H, Stacey N, Liam H
- Audio: Adam B
Walkthrough
| Start point | |
|---|---|
| Member requirement | |
| Official difficulty | Unknown edit |
| Official length | Medium |
| Requirements | Skill requirements are not boostable unless marked with a [B] for boostable.
|
| Items required | Items from the tool belt are not listed unless they do not work or are not automatically added. Ring of kinship to find the bearskin |
| Enemies to defeat |
|
Side objectives
The following must be completed before entering the boss room to reach 100% completion and receive the unabridged tome:
- Investigate a large pile of rocks as Sir Owen to obtain ore.
- Pick up a gold charm and two heim crabs (there are only two heim crabs in the entire dungeon, therefore don't eat the heim crabs), then use them to summon a Gorajo at the summoning obelisk in the room with the bridge and two rangers. Talk to the familiar which teaches the trio about Smithing techniques.
- (After getting past the guard using Ozan's charm) Pick up the broken longsword. It crumbles, leaving nothing but some ore.
- (After getting past the guard using Ozan's charm) Pick up the fractite pickaxe as Sir Owen and mine the zephyrium rock for ore.
Unfreezing Skaldrun
- Skip to the next section if this has already been done.
In order to begin, the player must first unfreeze Skaldrun. This is done by Dungeoneering on the Frozen floors (1-11) in Daemonheim, with Complexity 2 or higher activated. Skaldrun appears randomly in a room, frozen in ice. Kill all the monsters in the room so that the discussion with Skaldrun will not be interrupted. Light any type of fire adjacent to the ice or cast a fire spell on the ice. Talk to him. Choose each option. Once done, tell him to "Leave" and he will teleport to the surface.
Finding the memory fragment


.png)
Smelly and worn. Skaldrun might want to look at this.
The dungeon map for the Three's Company saga
The memory fragment required to start this saga is a bear pelt. It will appear randomly on one of the frozen floors, but many players find it in the same room where Skaldrun was frozen. The bear pelt will be white and shiny, and will most likely catch player's eyes upon entering the right room. The bear pelt does not appear as a red dot on the minimap. Touch the bear pelt and it will disappear. After touching the bear pelt the player will receive a message in the chatbox stating to start the memory the player must talk to Skaldrun.
Into the saga

The hero-switching interface
Bank all your items, including your Ring of kinship. No items can be taken into the saga. Find Skaldrun located west of Thok, Master of Dungeoneering, and talk to him about the bearskin. If you quit the dungeon, you would appear next to Skaldrun. When you start the saga again, you could choose to start from the last checkpoint or from the beginning. The mechanism of checkpoints are not fully known, but it seems that the saga is saved when you unlock a door requiring a key to open. There will be no Smuggler to aid you.
The signature heroes

Switching to Sir Owen
In this saga, the player controls Ariane, Ozan and Sir Owen, who are all needed to complete various puzzles. They are hunting the criminal Carn, who has great control over animals. The main objective is to complete the dungeon without any of the three heroes dying. Achieving only this results in the "abridged" reward. The saga also has an "unabridged" reward which can be earned by additionally completing four side-objectives.
During this saga, the player keeps their combat, prayer and summoning levels, but no prayers may be used and the damage output does not seem to reflect the player's combat level. Each of the heroes has 320 life points. Running energy is shared among the three heroes.
Click a hero's chathead on the left of the screen to switch to that hero. When a hero not under the player's control is at low life points and has food, the hero will eat automatically. If you switch away from a hero with low life points and food, they will eat automatically when they leave your control. Switching heroes causes the hero switched away from to regain 1 life point. This is not a very effective way to heal the heroes, but it does not require food.
Ozan and Sir Owen start with no inventory items while Ariane starts with 1000 air, water, earth, fire, body, mind, and chaos runes. These runes replenish over time.
Starting room
Four dusk eels will appear on the starting room's tables. Pick up some of them with each of the three characters. Using food on each other will cause the food to be eaten if the receiving character is low on health. Otherwise, it will be traded.
Guardian room #1

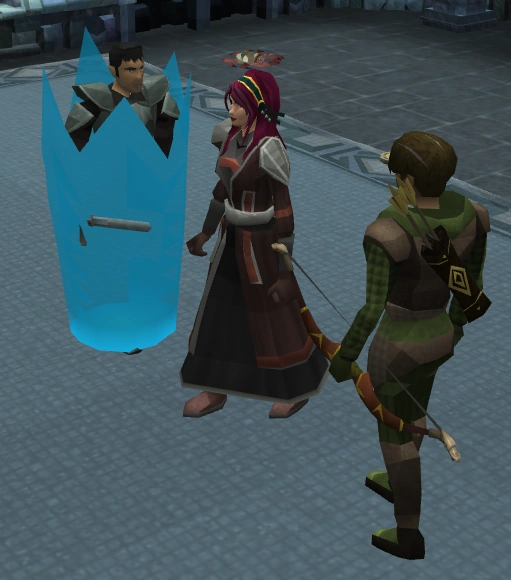
Sir Owen poking around the rubble
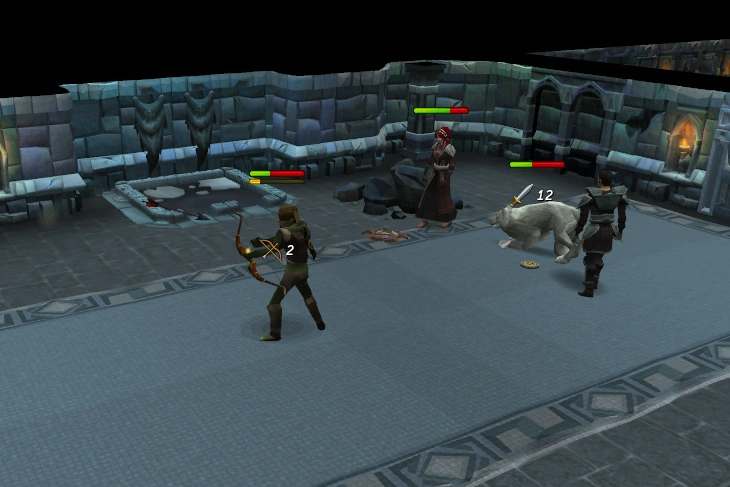
In the first room, there will be a guardian door which must be unlocked. The room is guarded by one level 50 wolf, one level 50 bandit ranger and two level 50 bandit warriors. The bandits in yellow use melee and the one in green use ranged. Kill all four of them. Control Ariane, as she can kill everyone the fastest. She has low defence against melee and ranged defence, so watch her life points carefully. Mark a target to kill them off faster. It is recommended to mark a melee bandit and trap the second melee bandit on his opposite side. Once he is dead, mark and kill the second melee bandit and then the ranged bandit. It is best to save the wolf for last, as it always attacks the heroes not being controlled by the player. As all other 3 enemies always attack the one under player control, this is a way to share the damage and avoid possible death. Currently, there seems to be a bug that causes a hero to die when he/she reaches very low life points (below 30 but not 0). It is advised not to bring the heroes to such low life points. Control Sir Owen to investigate the large pile of rocks to obtain a novite ore. You cannot use the other two heroes as they are not physically strong enough. Pick up the gold charm and two heim crabs. Do not eat these heim crabs! They are used to create a summoning pouch which is required for 100% completion.
Ice puzzle room
Control Ozan in order to press all of the pressure pads. If you attempt to use Ariane or Sir Owen, they will slip and fall while Ozan laughs at their lack of gracefulness. Players can utilise the Dungeon Home Teleport to get out the room easily. The puzzle is different for everyone and every time. Remember that you can slide diagonally. Try sliding from all points at all directions, and you will solve this fairly quickly.
Bridge room
The wolf and the two bandit rangers must be killed because the exit door is a guardian door. The bandits must be killed by ranged or magic as they stand on two separate platforms. It is still recommended that you control Ariane for this battle, as she can kill everyone quickly before anyone is hurt. Summon a cub skinweaver by using the gold charm on the summoning obelisk, and then use Ariane to talk to it.
Tile flip room
Use Ariane to flip the tiles until all of them are yellow or all green. She can even force the tiles without being damaged too much. A guide can be found here. Enter the next room. It is possible to complete without forcing, but is probably not worth it, as neither Ariane nor Ozan says much about it afterwards, and it does not affect the story at all.
If you do complete it, here is the dialogue:
Ariane cheerfully says: "Ha! Ye of little faith!"
Ozan, also joyful, answers:"Okay, fine, well done."
Later, when entering the statue room, Ozan will say: "Oh, Ariane, I completely forgot: here's the 100 gold I owe you from earlier."
Ariane: "How did you smuggle money into this place?"
Ozan: "Smuggle money in? Yes...that's exactly what I did."
100 Coins will then appear in Ariane's inventory.
Mysterious shade room
The room contains three mysterious shades. Killing them is not required, but they could drop dusk eels so it might be worth it. Grab the Green rectangle key. Return to the starting room and unlock the green rectangle door.
Magical imbue room
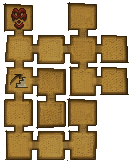
First, have Owen and Ozan "wait" on the two pressure pads. Use Ariane to go through the door, while the other two will be trapped in place. You cannot switch to another hero. Trying to do so would result in a message that you have to solve this alone.
Strange crystal room
Right-click "Get-premonition" on any strange crystal. Six crystals will release puffs of smoke in a sequence (south red, west blue, west blue, north green, west green, south yellow). As there are multiple crystals with the same colour and getting the premonition of the crystals multiple times does not incur any penalty, players could watch the sequence for several times and write it down (It is possible to get the same crystal twice in a row). It might be a good idea to turn on re-sizable mode or full screen mode with low detail in the graphics options. The former two options allow full view of the room, while the area would be brighter in low detail, making it easier to spot a puff of smoke emitted by a strange crystal. Touch the six crystals in the same sequence. Owen and Ozan will be able to move again. If you touched the wrong crystal, it would shock you with a small bolt of energy dealing some minor damage. It should be noted that you cannot switch heroes while solving the puzzle and you cannot teleport out of the crystal room. The only way to heal is natural restoration other than food brought (unless you use the rest option which can take a while). If you try to touch any of the crystals without getting the premonition, you will always be shocked. Grab the Crimson triangle key. Head back to the starting room and unlock the crimson triangle door.
Guardian room #2
Here, simply kill the two bandit rangers and the wolf. Again, it is advised to play as Ariane here because she can kill them much more easily.
Door guard room
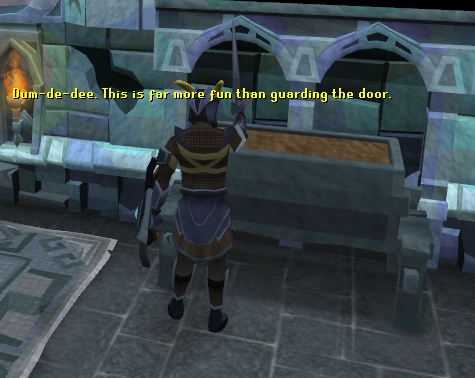

The guard happily harvesting his potatoes.
Use Ozan to talk to the guard. Choose the following options when presented with a choice at different points in the conversation:
- "[Charm] What are you guarding?"
- "Isn't guarding a door in these dungeons a little...redundant?"
- "Who put you up to guarding the door?"
- "Why are you bothering to guard it?".
The guard will then walk off to the nearby farming patch to grow some potatoes, leaving the door unguarded. If you watch the guard long enough after talking to him, a number of things may happen to his potatoes, including: exploding, turning into a giant rat, making him sick when he eats it, and there also being only one potato when he harvests them.
Statue puzzle room
Use Sir Owen to move the statues so that they match the immovable statues. When the first statue is moved, Sir Owen says the statues are lightweight and taunts the other two. Ozan attempts to move a statue, and Ariane wisely decides not to when Ozan got himself hurt trying to do so. It might be worth telling the other two characters to "wait" out of the way. Otherwise they can get in the way of the moving statue. Once the puzzle is solved, three doors would be unlocked, leading to three more rooms. There is an agility puzzle room to the North, the pickaxe room to the east and Guardian Room #3 to the south.
Pickaxe room
Enter the eastern room where there will be three mysterious shades. Grab the pickaxe (You will need to go back to the Guard Room and mine some ore with the pickaxe). Go back to the statue room.
Agility puzzle room
Enter the northern room. Use Ozan to move through the obstacles. Pick up the broken longsword lying on the ground. It crumbles to rust at your touch, leaving nothing but some ore. Then go back to the statue room.
Guardian room #3
Enter the southern room, and kill the two rangers and the warrior with Ariane.
Pikkupstix room
Talk to Pikkupstix. If the rooms back to the starting room are cleared, tell him to leave. Pick up the gold crescent key. Head back to the room with the potato farming guard. (One room west of the statue room.) Use the pickaxe to mine the rock. Head one more room to the west to unlock the gold crescent door.
Confronting Carn
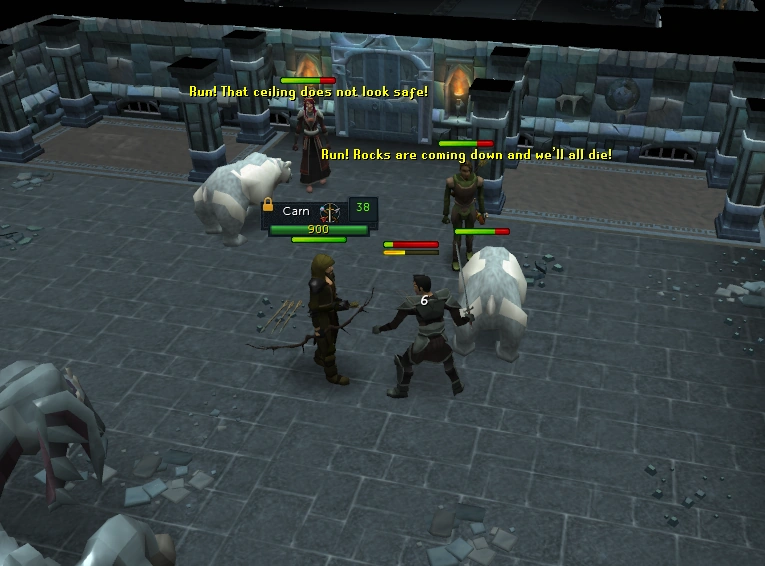

The heroes fighting Carn
After unlocking the door, attempt to enter. The player will have to choose three times which character speaks with Carn. The choices only affect the dialogue, not the outcome. Enter the room, and attack the two arctic bears. You will need to kill the two animals first before being able to damage Carn. The hypnotised behemoth will begin dropping rocks from the ceiling. This can be avoided by standing the characters in the safe spots indicated by the pillars and rugs on the floor.
Ending the saga
Once Carn is defeated, choose any of the characters to end the saga. Skaldrun will then give the player their reward, the Three's Company book. Upon reading the book, it will disappear and the player will gain some experience.
Reward
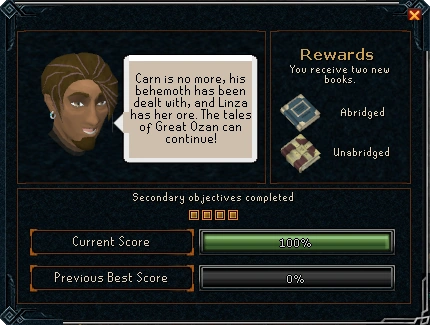
Abridged
An abridged book, which when read gives:
- 750 Dungeoneering experience
- 75 Dungeoneering tokens
Unabridged
For 100% score (all of the secondary objectives), as well as the abridged book reward, an unabridged book, which when read gives:
Re-playability
The saga is always re-playable regardless of the completion percentage, with a maximum reward of 224 dungeoneering tokens. However, the player will only receive the Abriged/Unabriged rewards the first time that 100% of the objectives are completed.
first time a day gives 224 dungeoneering tokens. second time a day gives 179 dungeoneering tokens.
Tips
When having to face others in combat, use Ariane, as she deals much more damage from her different spells than Owen or Ozan. She can use the Fire Bolt spell, dealing up to 300 damage compared to the usual 30 damage from the others.
Trivia
- In the first few days of release, a very dangerous bug was found which gave the player over 3 billion coins in smuggled runes per hour, this was fixed at an unknown date.
- The door guard is a reference to the Black Knight from Monty Python and the Holy Grail.
- After passing the door guard that is growing potatoes, there will occasionally be an explosion that knocks him down. He will then exclaim "How can potatoes even explode?"
- The name Three's Company is likely based on the saying: "Two is company, three is a crowd."
- The title may also be a reference to a late 70s television show of the same name, although the show's name was probably a reference to the above saying.
- The title also bears similarities to a chapter in J.R.R. Tolkien's "The Lord of the Rings" called "Three is Company." The name was again likely a reference to the above saying.
- Inter-character dialogue, between Ozan and Ariane, makes reference to several titles including the Star Trek movie 'The Wrath of Khan'.
- The examine option of the arctic bears are 'Crikey! Look at the size of those teeth!' which may be a reference to Steve Irwin, who made the term famous.
- No experience is gained at all during the saga, including attacking monsters and NPCs, making it safe for pures of any kind to do (note that there are a few glitches that may cause experience gain, so be careful.)
- It is possible to fail this saga and complete it at once. if you kill Carn but leave at least one bear alive, while one character deals with the behemoth the other two will still be fighting the bear. If one dies fighting it then you will get a chatbox message saying you failed but you will still complete the saga successfully.
- When clicking the home teleport in your spellbook, once you have teleported, you seem to have the animation of walking off a lodestone.
- When any of the characters is at low health, their chat head appears to be saying, "I don't want to die!"
- Due to an update, characters could no longer use abilities without using the appropriate weapon (i.e., Magic abilities require a staff/wand.) For Magic, the same applied to all spells. This made Ariane unplayable - however, she would still cast spells when not controlled. This was later fixed and she could use spells and abilities without a weapon.
- While in the statue room, if one of your allies is standing in the way, the message "One of you allies is stood in the way." A simple workaround is to place them off the movable statues platforms and have them wait until you are finished.
- The three signature heroes have access to a few abilities, but for unknown reasons, Owen's abilities never seem to hit.
- The gatestone system this saga uses is still the old gatestone system.
- While prayers cannot be activated during the saga, they can be activated prior to talking to Skaldrun and will remain active. Additionally, switching characters will fulling replenish prayer points.
|