[[File:Cutting the Blisterwood Tree.png|thumb|274px|Getting logs from the Blisterwood Tree]]
[[File:Cutting the Blisterwood Tree.png|thumb|274px|Getting logs from the Blisterwood Tree]]
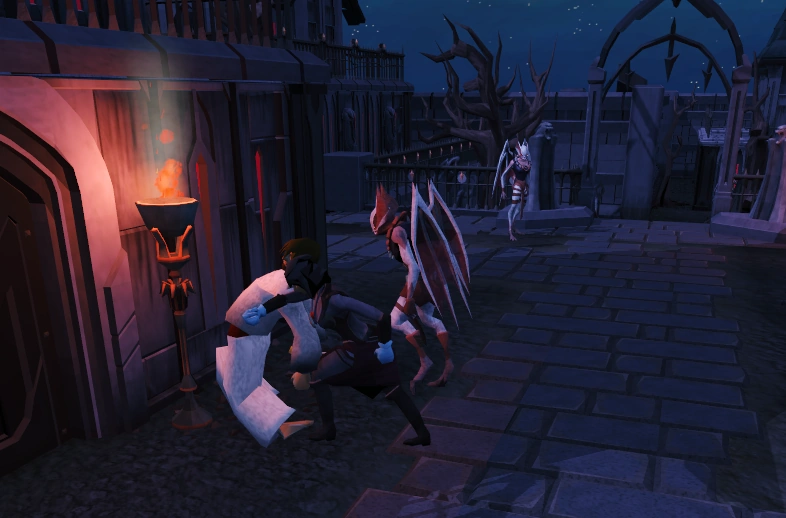
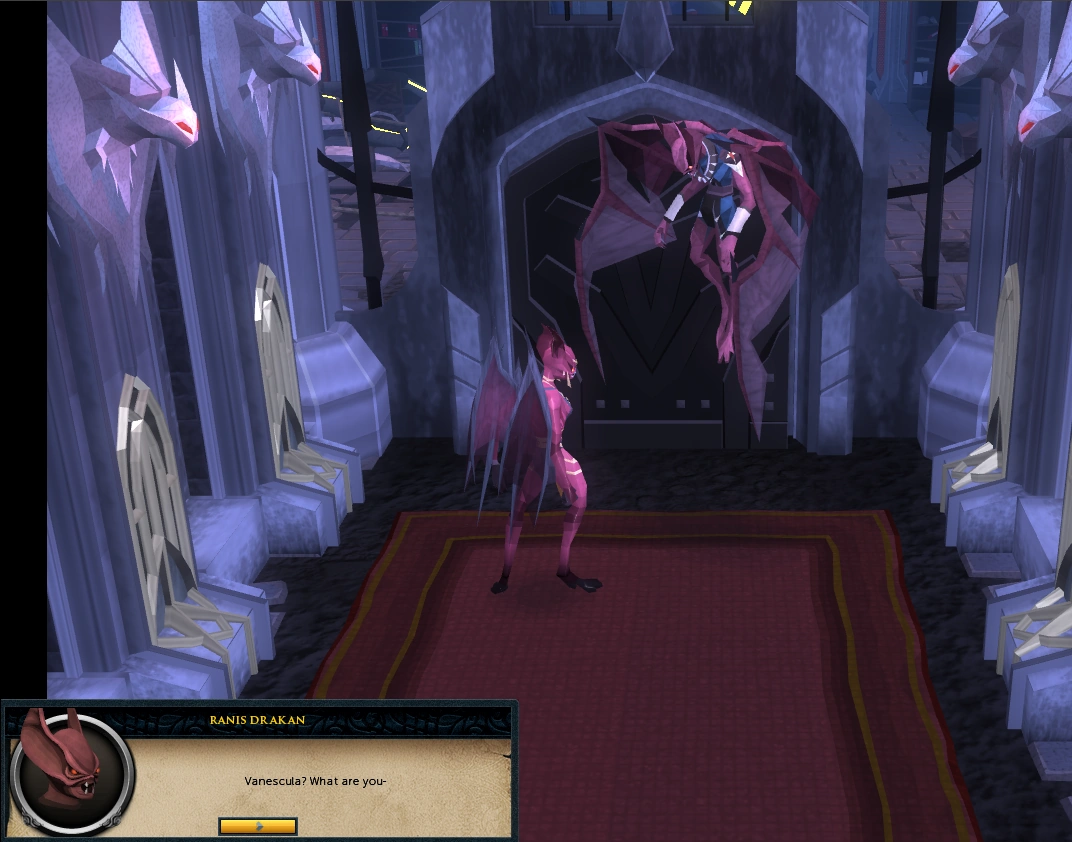
Ranis will stop you as you run towards the doors. He will question you as to whether you think Vanescula, whom you pledged allegiance to, is more important than he is. He will demand that you pledge fealty to him as well. When you do so, the bloodmark will cause you pain. Ranis dismisses you but warns you that he'll be watching.
Ranis will stop you as you run towards the doors. He will question you as to whether you think Vanescula, whom you pledged allegiance to, is more important than he is. He will demand that you pledge fealty to him as well. When you do so, the bloodmark will cause you pain. Ranis dismisses you but warns you that he'll be watching.
+
+
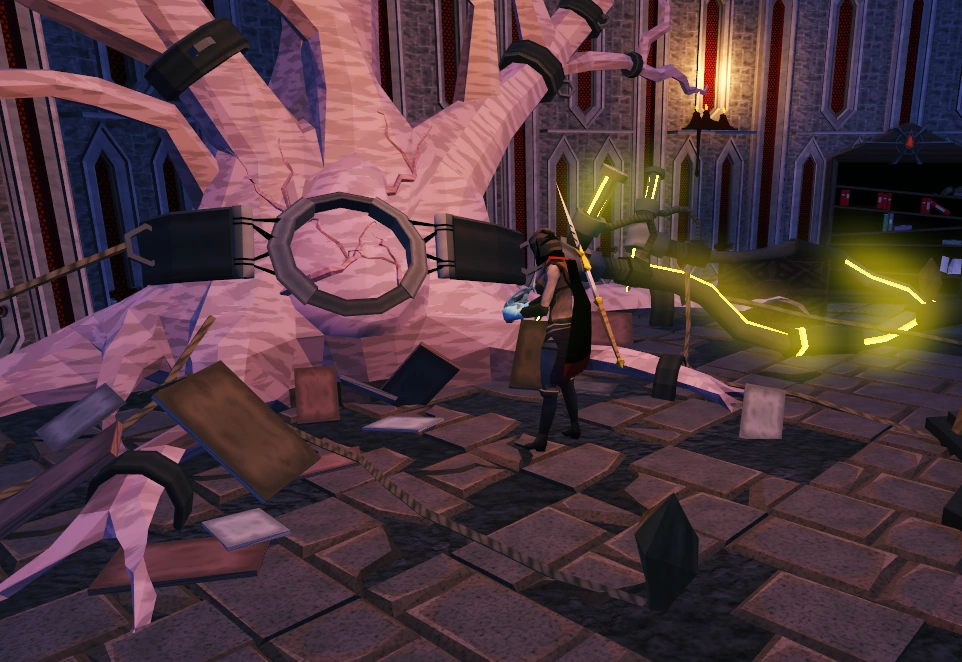
'''Note:''' Before you start this, you may want to make sure your lighting detail is on low or the glowing circles could be too bright and hard to see.
Check the health of the Blisterwood tree. You're told that the tree needs to be given sequences of energy in the correct order. The first sequence is water, then light, then nutrition.
Check the health of the Blisterwood tree. You're told that the tree needs to be given sequences of energy in the correct order. The first sequence is water, then light, then nutrition.
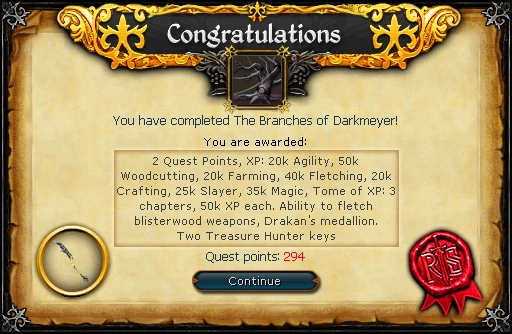
The Branches of Darkmeyer is the sequel to Legacy of Seergaze and the fifth instalment in the Myreque quest series. It is a master quest, with requirements around level 60-70, much higher than the previous quests' requirements, which are around level 30-40. During the quest, the vampyre city of Darkmeyer is accessed to find the Blisterwood Tree, which can harm vampyres and has been sealed off by Lord Drakan. Meanwhile, Vanstrom Klause is tasked to destroy the entire Myreque and is eager to do so. An important subplot in this quest is Safalaan's history and origin. The Branches of Darkmeyer has raised the official Slayer and Woodcutting level requirements for the quest point cape.
Dark, feral shapes have been seen stalking the outskirts of Burgh de Rott with terrible, unnatural swiftness, and rumours abound that Vanstrom Klause himself is at large once more. Veliaf and the rest of the Myreque have taken note of these ill signs and fear an imminent attack. Safalaan has been pre-occupied of late and, outnumbered and ill-equipped as they are, the Myreque must turn to you for assistance once again.
To do this, you must enter the baroque streets of Darkmeyer; the vampyre city. With help from an unexpected source, you must infiltrate the upper echelons of vampyric society to locate the last remaining blisterwood tree, which lies heavily guarded in the city’s dark heart and whose branches are the bane of even the most powerful Vyrewatch.
Once you have done so, you’ll be able to create weapons that will end this looming threat before all is lost, and will put the Myreque in a better position to end their war once and for all. You may defeat the foe that lurks in the shadows, and the rewards may be great, including experience tomes, new weapons and an item that teleports its bearer to the Barrows, among other places, but will the end really justify the means?
Speak to Veliaf Hurtz under the pub in Burgh de Rott. He will tell you that he needs help with Vanstrom Klause and the Vyrewatch, who are becoming stronger while the Myreque grow weaker. He explains the situation that the Myreque and Burgh de Rott are in; the supply routes to Meiyerditch have been cut off and the vyrewatch have discovered Burgh de Rott. They have even abducted Marius and brutally murdered him. Ask what you can do to help (this starts the quest). Veliaf will say he feels terrible about asking you, but he will explain that Cornelius (the town's banker) saw a shadowy figure digging south of the bank a few nights before, and that an entrance to something was unearthed there. No one has been down yet due to the danger, but it needs exploring. Veliaf believes that the mysterious figure was Vanstrom and that he might still be in the tunnels. He asks you to go down and explore, and to defeat Vanstrom if you find him.
A strange tunnel
Where the cave entrance leads to.
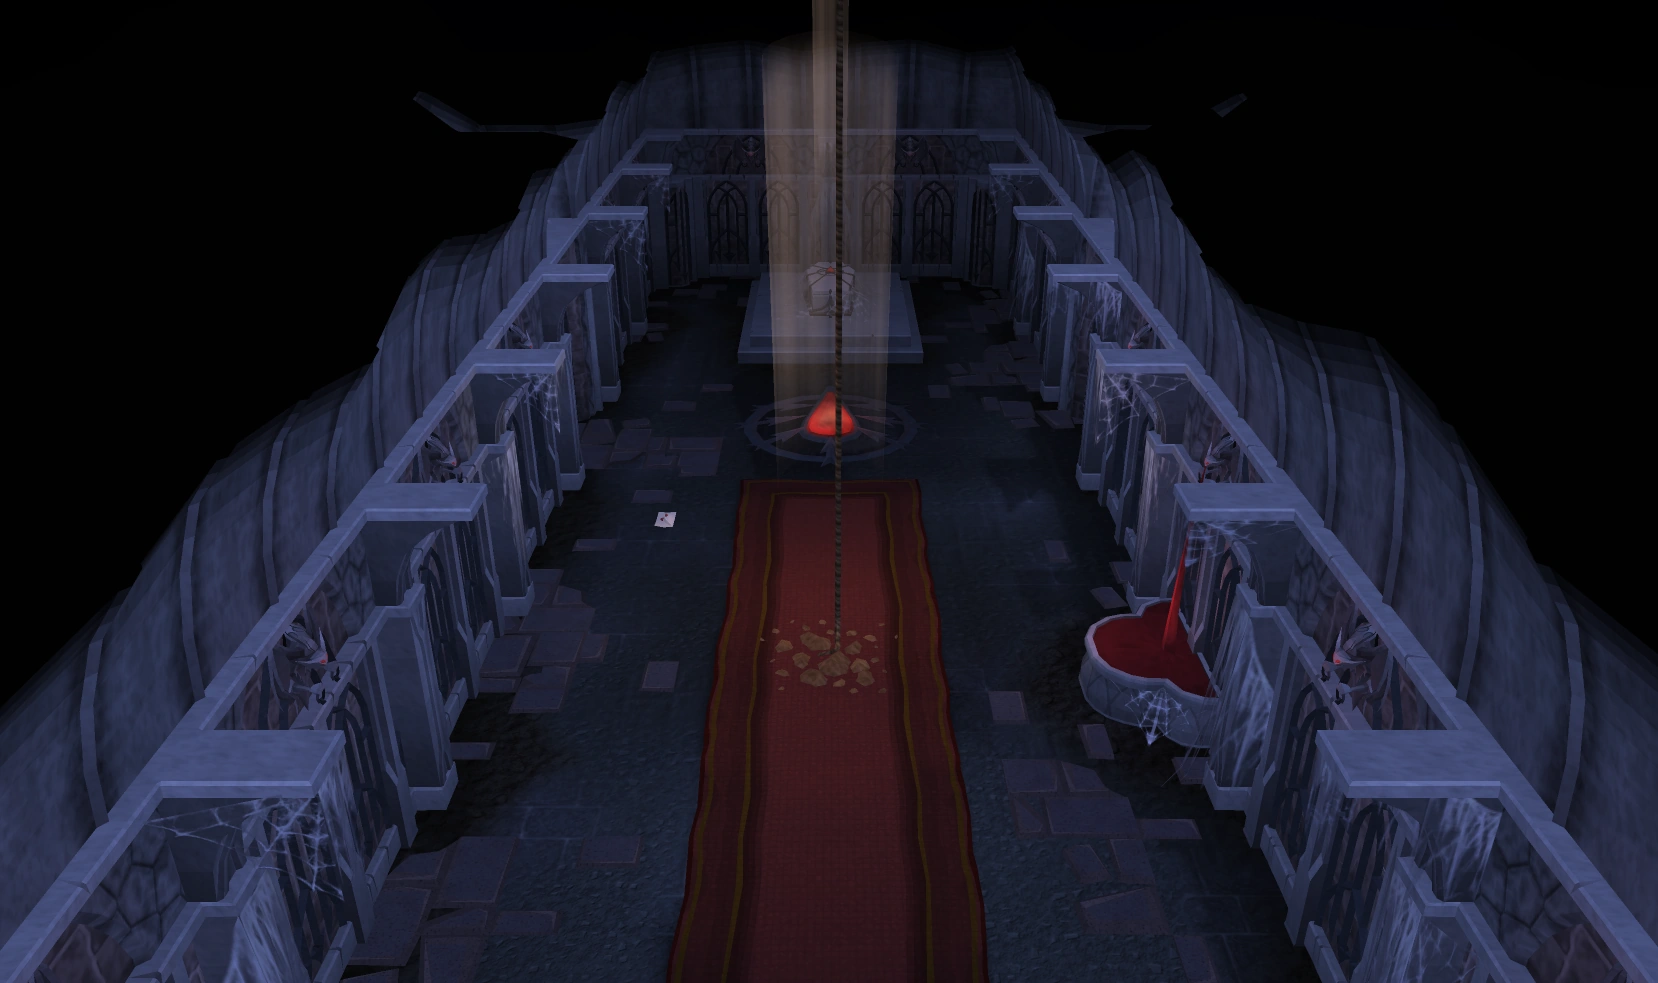
Go to the dungeon entrance south of the bank and climb down. You will find yourself in a tunnel with a rope to the surface, a coffin, a blood drop symbol on the floor, a letter, a decaying tome and a fountain of blood. Pick up the letter. It's addressed to Safalaan Hallow, from someone called "V", who knew Safalaan's parents and Safalaan as a child. They mention that they have answers that Safalaan seeks and to meet him in the clearing in the middle of sector four. There also is a decaying tome lying in the corner, with two readable pages. They are stained with blood making some pages unreadable, although one page mentions the Icyene.
The ancient, decaying book.
Inspect the coffin, and a small amount of blood will be spilt, dealing 10 lifepoints of damage. In it is a medallion with an orange symbol similar to that on the floor.
Note: You can use the medallion to teleport to the Meiyerditch Dungeon and Burgh de Rott. The medallion has ten charges and can be recharged by dipping it in the pool of blood, but teleporting to a destination close to you (that is, if you are in Burgh de Rott or the Sanguinesti Region) takes no charge. The pool of blood is inside the cave just south of the bank of Burgh de Rott.
Report back to Veliaf. If you mention the medallion to him he will tell you that it is the symbol of Drakan and is of vampyric origin. He doubts that it was placed there by Vanstrom as it is old and dusty. He refuses to take it from you, calling it evil. You will then show him the letter. Veliaf will say it must have been placed there by Vanstrom as it is too clean to have been there long. He thinks that by noticing Vanstrom going into the cave, they might have ruined his plan to pretend to be a Meiyerditch citizen. Veliaf thinks that the plan is too subtle for Vanstrom, and suggests that you take the letter to Safalaan. He tells you it is too dangerous to enter Meiyerditch the usual way and gives you a teletab to take them straight to Safalaan. Before sending you he will warn you that Safalaan has been preoccupied and not himself lately. If you agreed to the teletab, you will be taken straight to the Meiyerditch Myreque hideout.
Unexpected help
Safalaan reading the letter.
Speak to Safalaan at the north end of the hideout. He will ask how you got there and say the supply runners haven't been getting through from Burgh de Rott.
Tell him about the medallion. He will ask where you got it from. You will tell him about the cave and what Veliaf said about it. When you show it to him, he will say it feels familiar and ask to take it from you. You will be shown handing it to him, where it will glow in his hands. He says he added a destination to it; the Meiyerditch Myreque hideout. He doesn't know how he was able to alter a vampyric artefact, and asks you to take it away from him.
Ask him what the vampyres have been doing and he will explain that tithes have been increased and any citizen unable to meet them is taken away to an unknown location, and that rogue vyrewatch have even been appearing and snatching healthier citizens. He claims that they seem restless and they're not following tithing orders.
Tell Safalaan you have a letter for him. He will ask where from and you will explain the happenings in Burgh de Rott. He will take the letter from you and read it. Ask him what he thinks and he will express disbelief and ask if you're sure it was Vanstrom. You will repeat what you were told about the night the cave was uncovered. Safalaan is dubious, as the letter speaks of his parents, experiences and his visions.
Go through the dialogue options. Safalaan will explain that he doesn't remember much about his past, including being young or how old he is. He has also been having visions, and he feels that there is some greater power in him ready to be released, for good or bad.
Ask what you should do. Safalaan says he will have to meet the letter's sender. He thinks Vanstrom must know something, and that if he was truly after Burgh de Rott he would have simply attacked. You mention that it might be a trap and Safalaan agrees. He says they can't give Vanstrom what he wants, but they must still find out what is going on. He decides to send you in his place. He sends Vertida Sefalatis and Mekritus A'hara with you, and advises you to look from a window to the north of the clearing (which is west of the base) before meeting the contact.
The route to accessing Darkmeyer (blue) and the meeting spot (red) starting from the Meiyerditch Lab
Traversing Meiyerditch
Travel to the meeting spot; exit the base, go through the wall to the north and climb up the stairs. Jump the floorboards to the west and go down the ladder. Open the door, exit and go west a bit, then south at the barricade. Enter the building and open the door there in the room with the portrait. Climb up the ladder.
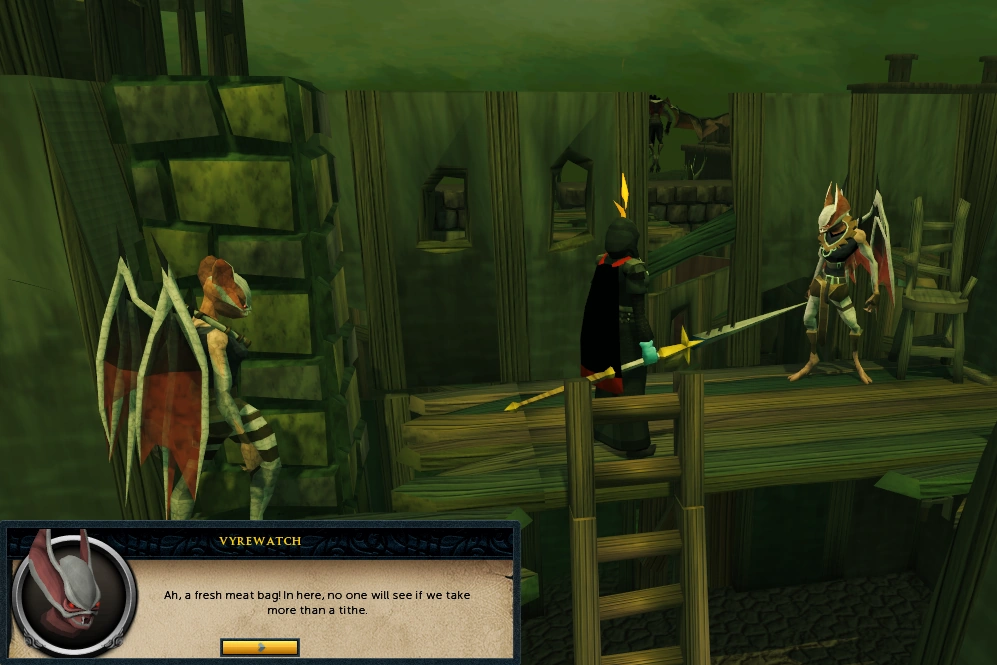
The rogue Vyrewatch
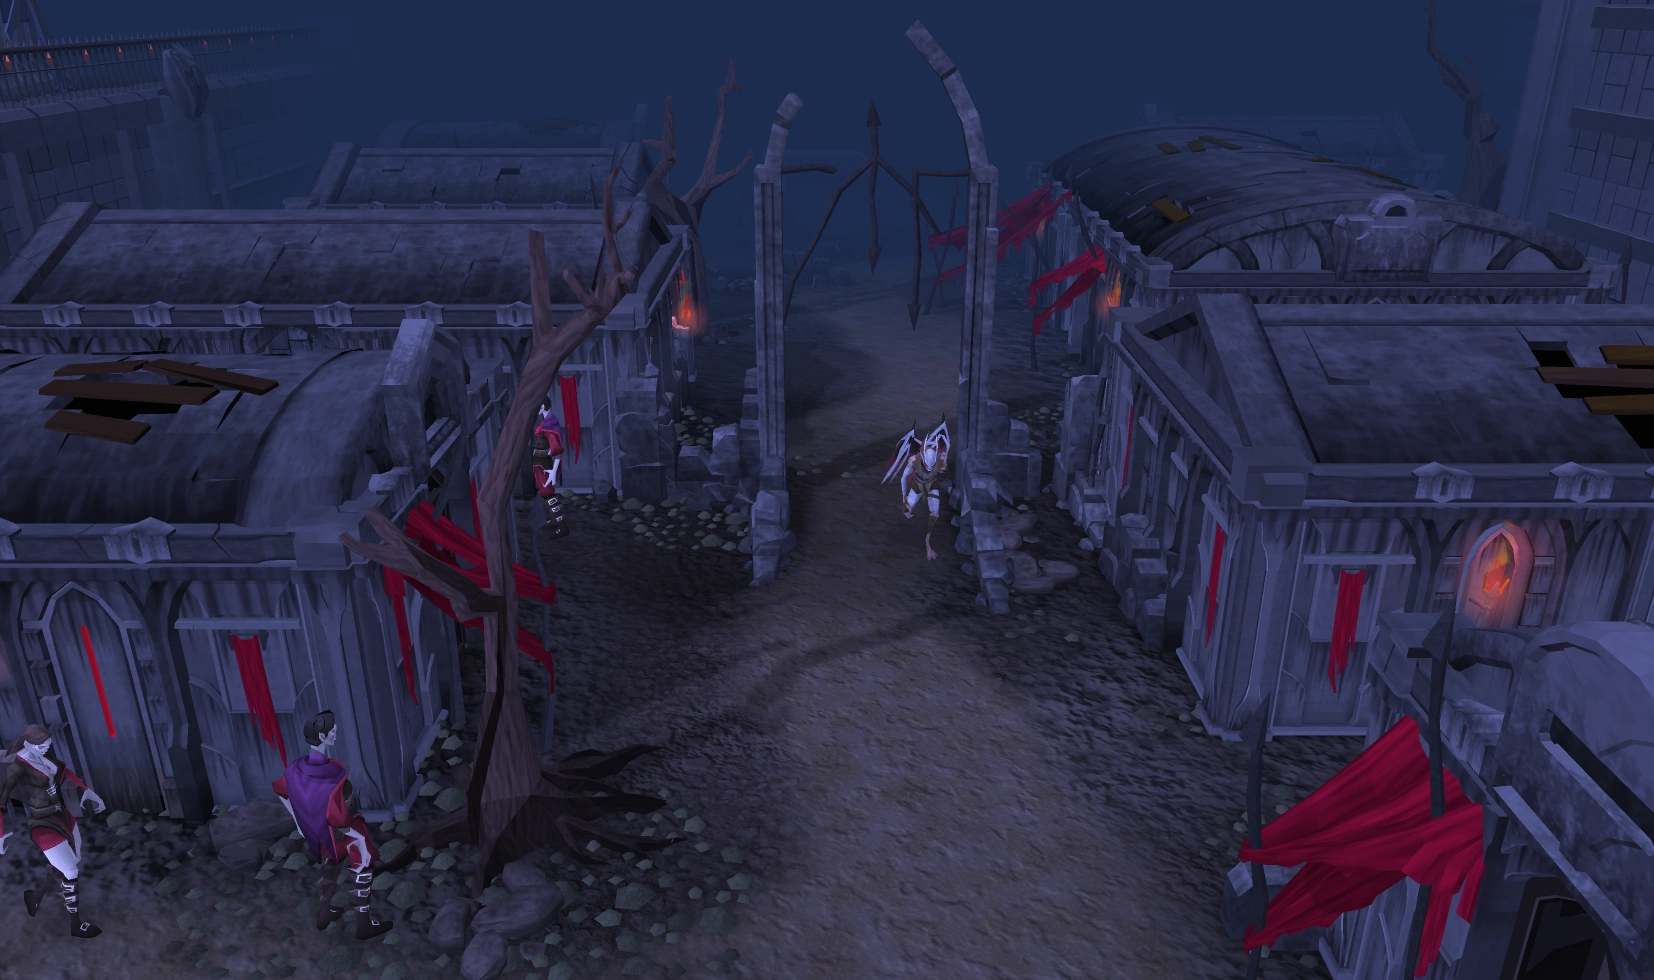
At this point, you will run into two of the rogue vyrewatch Safalaan described. The first wants to take more than a tithe from you, but the second tells it to wait and says that you are "the one". The other agrees, calling you fresh and full of blood, and says that you'll "have a worse time with her". You ask them what they're talking about, but they fly off. Now jump over the wall to the building to the west and climb down the ladder. Open the door, exit and close the door. Now go north and west around the next building. Enter it and go east, where Vertida will be standing.
Speak to Vertida and he will tell you that Mekritus is upstairs and that the wall beside him can be climbed to reach him. Climb up the wall and speak to Mekritus. Mekritus explains that the window overlooks the meeting place and can be used to check whether the coast is clear. He and Vertida will flank around to give ground support. Click the white sickle logo on the ground to spy. A cutscene will play, showing Vertida and Mekritus in position when the informant comes out of a building: it's a crying, young girl called Nessie. Go downstairs and speak to Nessie.
Meeting the Contact
Attacking Vanescula.
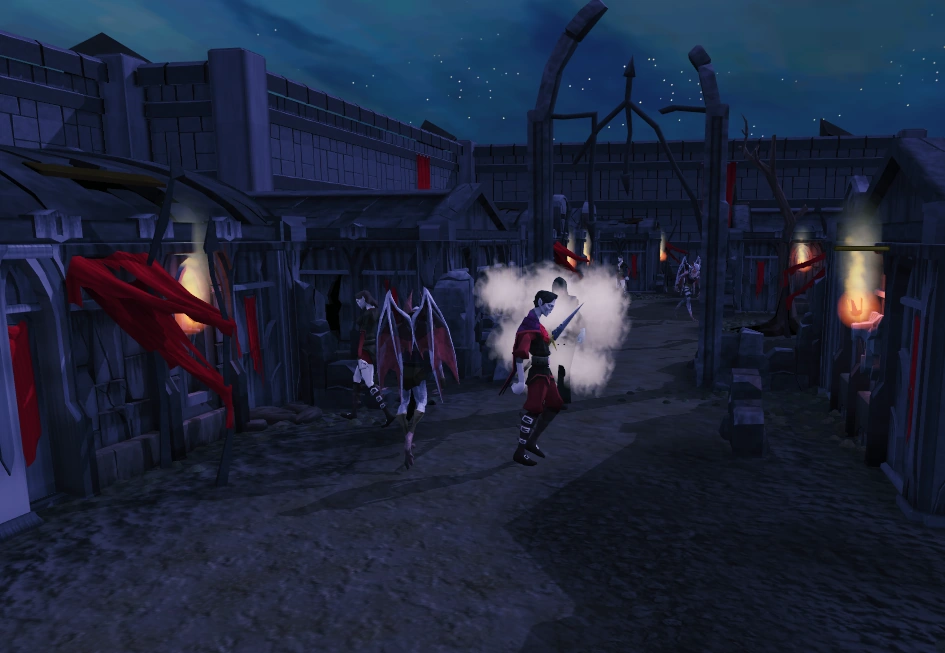
Nessie says she saw you in the window and asks why it took you so long to come down, claiming the vyrewatch could have got her. She claims she knows your name because you're the great hero of the Myreque. When asked, she explains that she's lost and a scary vampyre, Vanstrom, told her to stay there. You say he's the worst vampyre besides Drakan, but she laughs and says his power is nothing compared to hers. She then transforms into Vanescula Drakan. Vertida yells for you to attack. Do so and she will counter with what looks like a ring of smoke that throws you backwards and teleports your Myreque companions away.
You will then have an option to talk to Vanescula. She will tell you to calm down and that she's not there to fight, and that you wouldn't be a challenge anyway (You may have to back away until out of sight of Vanescula before you can leave combat posture.) When questioned, she says she's there to help. She planted the letter in Burgh de Rott (and is insulted about being mistaken for Vanstrom). She knows about Safalaan but says any information about him is between them alone.
Vanescula knows about the Myreque's dream of defeating Drakan and freeing Meiyerditch. She sees no reason why that shouldn't happen, but thinks that the Myreque aren't doing a good job by themselves. According to Vanescula, she will help the Myreque because she feels that Lowerniel Drakan is no longer a good leader, and he's spending more and more time shut in his castle obsessing over a rock. He hasn't noticed the influx of the Mercenary Protocol, the threats from Misthalin or even the recent infighting amongst the vyrewatch, and Vanescula thinks he is a blind fool who is letting the vampyric society fall apart. Moreover, she is also bored.
Vanescula tells you about the Blisterwood tree
Vanescula cannot kill Drakan herself because she needs to command the respect of the vyrelords (although she claims to be able to do it easily). She claims that discoveries made through the study of Haemalchemy mean that vampyres could survive without blood and so the citizens of Meiyerditch could be freed if she was leader. Vanescula says you should trust her because she hasn't killed you yet, and because she has claimed you as her personal blood tithe, so none of the Vyrewatch will tithe you as you travel through Meiyerditch.
She also tells you about the vampyre city Darkmeyer, "where your greatest weapon lies". She tells you about the Blisterwood Tree, the mere touch of which harms vampyres, which could make a weapon more potent than the Ivandis flail (which she claims is merely a stick to the higher ranked vampyres) if it could be chopped from and the logs carved. She will give you a written offer for you to give to Safalaan.
To Darkmeyer
Use the medallion to teleport back to the Meiyerditch hideout with the letter Vanescula gives you. Take it to Safalaan, who will be worried about you. He will be excited over the contents of the letter; Vanescula knows about his past, a thing which has always been a mystery to him. You ask him to focus on Vanescula's promises about helping them. Safalaan will tell you to do as Vanescula has suggested. He tells you to speak to Vertida for advice as he will be busy pondering on the letter.
Speak to Vertida. He is wary about trusting both Vanescula and Safalaan, as Safalaan hasn't been himself lately. He thinks Safalaan is so desperate for information that he isn't thinking clearly and is too quick to trust. He tells you about the huge walls of Darkmeyer and how dangerous the city is and that it is impossible to enter, except by using a drainage gate along the uppermost wall in eastern Meiyerditch that you may be able to climb under to access Darkmeyer. He suggests taking some smoke bombs from the storeroom and a hatchet to cut the tree. He also reminds you to look for seeds to grow their own tree.
Take the 30 smoke bombs from a crate west of the exit ladder. The fastest and easiest way to reach the drainage gate that leads to Darkmeyer is to use the medallion to teleport to the Meiyerditch Laboratories. From Meiyerditch Laboratories, go up the stairs, through the slashed tapestry, and out of the building. From here run south-west along the diamond building (clockwise) and just run north until you reach the drainage grate.
If you don't have your medallion, you can walk to Darkmeyer by heading out of the Myreque base, up the stairs and across into the next building. Leave this building and run through the building directly to the north. Turn right, then run north. Once past the fish shop, turn left, and run north to the drainage gate.
The first tier of Darkmeyer.
Vanescula will meet you on the other side of the drainage gate. She tells you the tree is guarded in the upper tier of Darkmeyer and that the Darkmeyer vyrewatch are more independent than the Meiyerditch ones. Vanescula advises you to use the smoke bombs to find a disguise to fool the juvinates, but to avoid the vyrewatch who will be able to smell you. She says to come back to her once you have a disguise, and she gives you a needle and some thread to alter your disguise to fit.
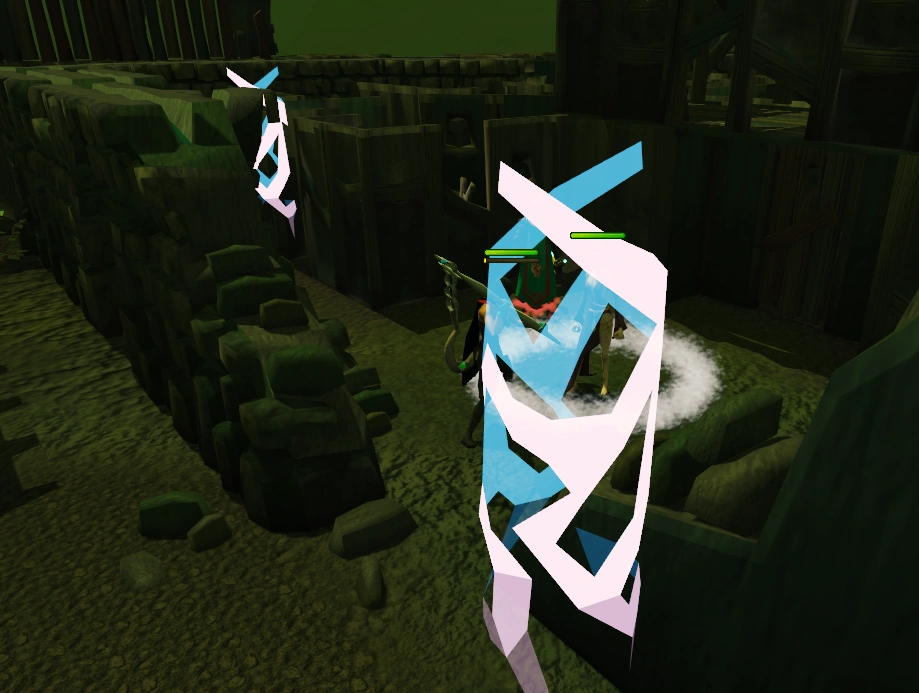
Using the smoke bombs to evade the vyres.
Use the smoke bombs only when out of sight of the Vampyre juvinates. Do not go near Vyrewatch. Search chests inside buildings (marked in yellow rectangles in the map below) to find clothing. If caught you will be teleported back to Vanescula. (Although it is possible to combat the juvinates, it is difficult to initiate combat and is probably not worth it.) Try to get to a building before your smoke shroud vanishes. Once in a building, immediately close the door and move to the back of the building. This will keep any vampyres outside who were on their way to teleport you away, though they may wait until you re-emerge and teleport you away in any case. Look for Vyrewatch or Juvinates that match your movements, as they will try to catch you as you leave. If you do spot a Vyrewatch or a Juvinate that is waiting for you, you can exit to the lobby and they will move on.
Once you've found, fixed and equipped all four pieces of the outfit (hood, torso, trousers and boots) your title will change to Vyreling and the Vampyres will be a bit nicer, at least not throwing you out. Return to Vanescula. She will cover your human scent with her own and explain how to get to the blisterwood tree.
(Error In the Picture Below: The Hood piece at the bottom yellow square is in the south chest, not the north.)
To get to the Arboretum with the tree you need to be a respected Vampyre. To do this you must raise your status in Darkmeyer. Head north east through the low-tier to reach the middle-tier, where Vanescula will be waiting for you. You will be asked what your name is by Sentinel Mortshade or Sanguinus Varnis. Make one up from the options given. This will be your Vampyre name.
Talk to the named Vampyres to get tasks from them. Completing these earns rating. When half of the rating bar is full you can enter the upper section and you can access the Arboretum when it is three-quarters full.
Tasks include:
Middle tier
Vandalising posters put up by Vyrelords and ladies. This task is given by Sanguinus Varnis.
Terrorising Maria Gadderanks. Do not terrorize her too much if you plan to free her later.
Using the Angry, Laugh, Stomp or Trick emotes a few times next to Maria Gadderanks (also possible after she has been freed) - zombie walk and zombie dance emotes also seem to work.
Talking to Valentina Kaust; drink the vial of blood she gives you, then select any of the options. Warning: Drinking the blood damages you for half your health. You can instead take the blood, decide not to drink it. Click on it to drink, then click no. Say that you are already full from drinking blood. You will still gain reputation.
Recapture bloodveld younglings (after talking to Grigan Kaninus). These vanish for long periods of time, so they can appear in places you've already checked (some can be found on lower tier).
Talk to Sentinel Gorthaur (or Sentinel Mortshade or Sentinel Draemus) about citizens in Meiyerditch, the Myreque and Burgh de Rott (three conversations). They will not talk to you until your status bar is 50% full.
Subsequently talking to the Tithe master about the tither (found in the building to the west). If you choose to let him go this time you get 13 status points, and if you choose to lie and order his death you will get 24 status points.
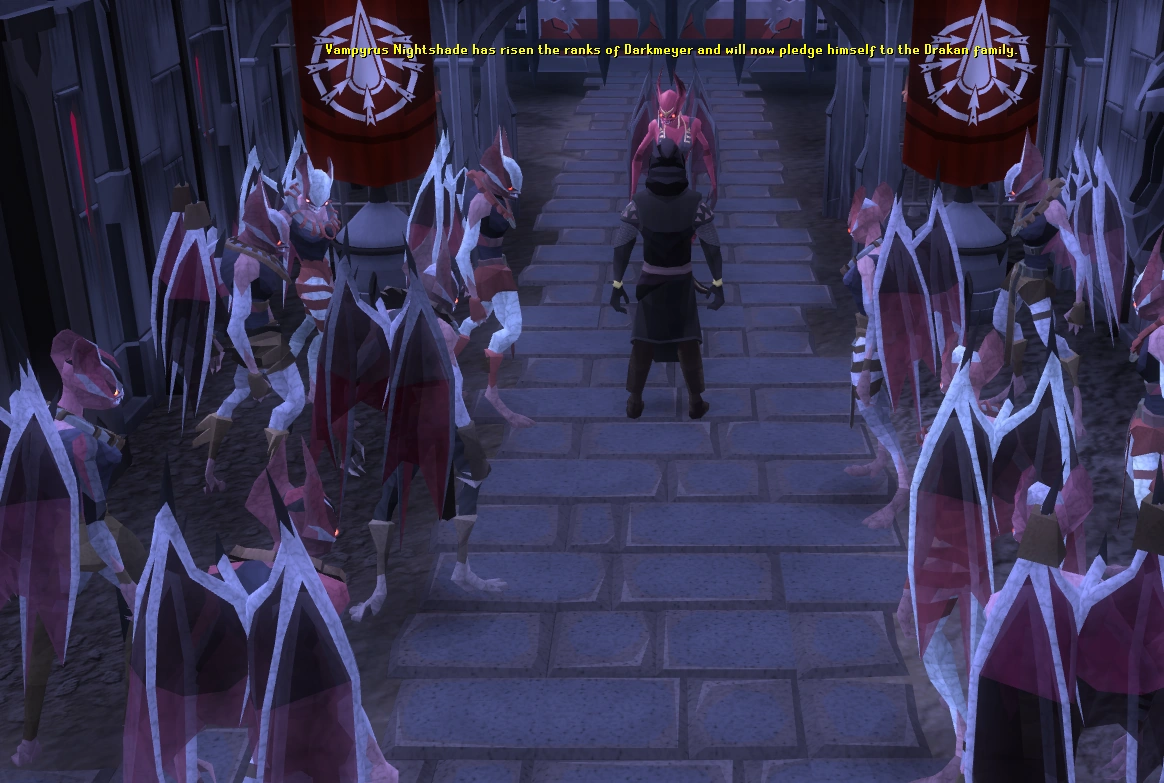
Speak to Vanescula Drakan to pledge allegiance to the Drakan family.
If you do not wish to kill the citizens, you must tell the guard so during your dialogue with him. Otherwise, you will have no choice but to kill them in order to complete the quest.
If you refuse to kill the citizens despite the ease of this status gain, the guard will instead ask you to go and get him some blood from the Darkmeyer blood trader. Remember the blood types he asks for. The trader will initially refuse as you haven't got any money. He will instead ask you to recover money for him from a werewolf. The werewolf is in fact either the male or female Canifis settler located in the lowest tier of Darkmeyer. You will need Wolfbane dagger (use it on either Canifis settler) to persuade him or her to give you Darkmeyer notes. Trade with the Darkmeyer blood trader and get the blood types the guard requested. Return to the guard to gain status.
Note: THIS CAN BE REPEATED FOR MORE STATUS BY TALKING TO THE JAIL GUARDS AGAIN (if they won't talk to you, try finishing all of the other tasks and talking to Vanescula Drakan again. She should suggest it. When she does, try again).
Talk to any upper tier sentinel and discuss your opinion of Vanstrom Klause.
Talk to a Sentinel and discuss your opinion of Lord Drakan.
Notes:
You will get a message in your chatbox when you have enough status for upper-tier Vampyres to acknowledge you. If you try to go up the steps to the upper tier too soon, you will be teleported back to the bottom of the steps.
Once you have enough status you can free Maria Gadderanks . However, she cannot be freed if she has been terrorised too much. If you want to free her, make sure you do not terrorise her too much before gaining access to the upper tier. To free her, make sure the guard is out of the building (or kill him), close the door, remove your disguise and break the lock. Equip your disguise again before leaving.
If you acquired Darkmeyer notes from the Settler before talking to the guard, you must destroy the notes and obtain new ones, or the Blood Trader will not accept them.
The Arboretum
Once you have enough status speak to Vanescula and she will tell you to enter the Arboretum. She will warn you once again to watch for Ranis.
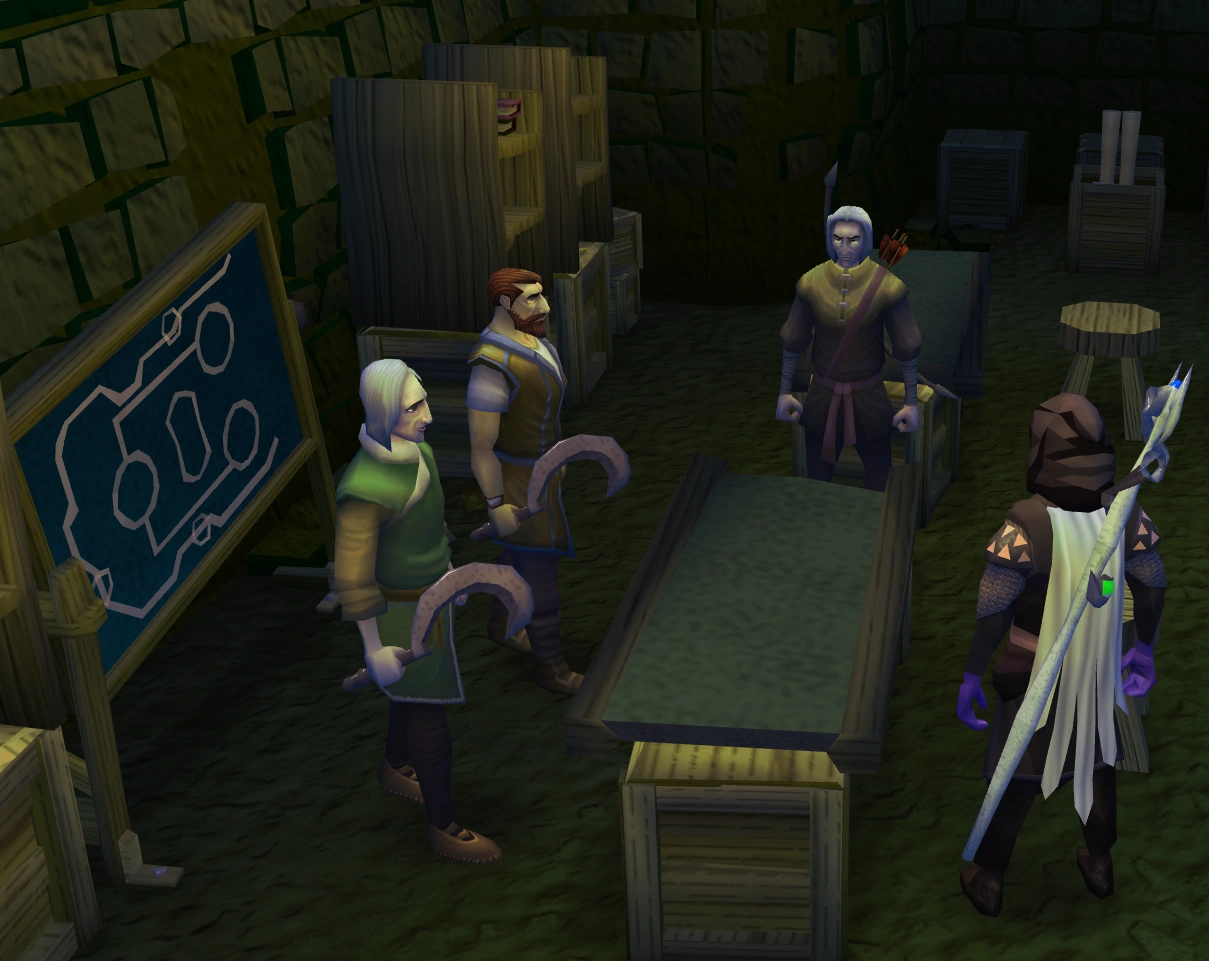
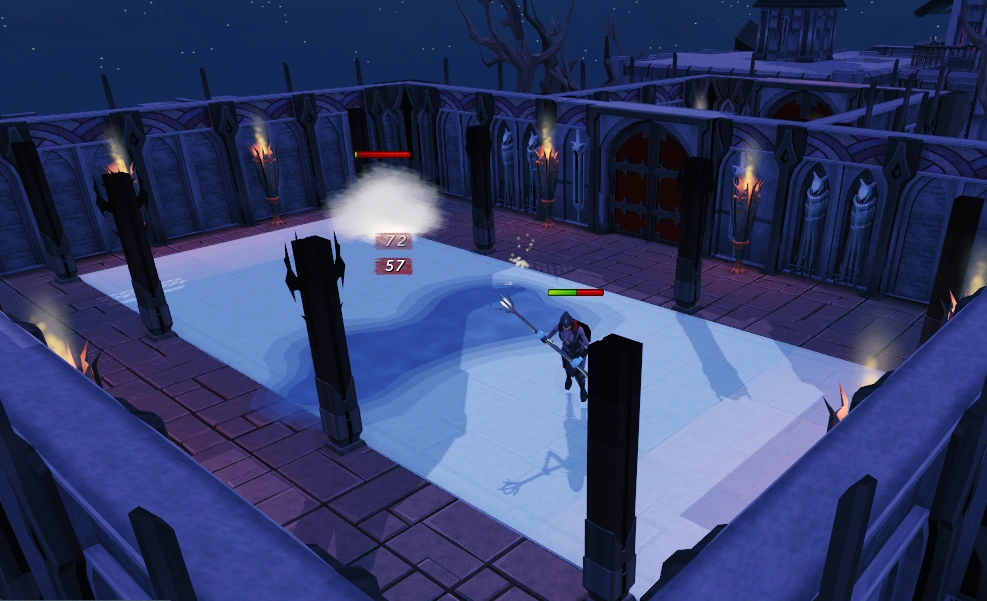
Getting logs from the Blisterwood Tree
Ranis will stop you as you run towards the doors. He will question you as to whether you think Vanescula, whom you pledged allegiance to, is more important than he is. He will demand that you pledge fealty to him as well. When you do so, the bloodmark will cause you pain. Ranis dismisses you but warns you that he'll be watching.
Note: Before you start this, you may want to make sure your lighting detail is on low or the glowing circles could be too bright and hard to see.
Check the health of the Blisterwood tree. You're told that the tree needs to be given sequences of energy in the correct order. The first sequence is water, then light, then nutrition.
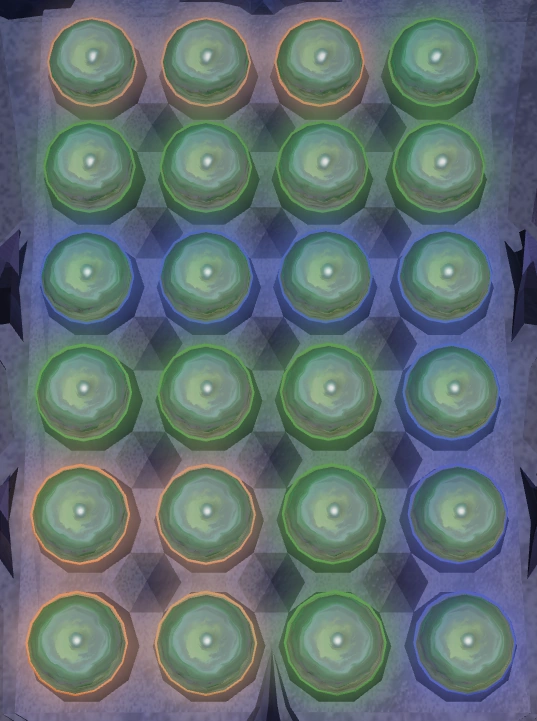
Pull the lever on the machine. Several glowing circles will fill the first three rows of the tray next to the lever. You must get it so each row contains one of each colour, starting from the top. The circles are moved by clicking on the bottom left one of a group of four, which will rotate the four circles clockwise. There are 4 sets of circles, bottom left, top left, bottom right and top right, each one in a group of four. Align the circles so that:
The first solution
Water
-
Water
-
Water
-
Water
Light
-
Light
-
Light
-
Light
Nutrition
-
Nutrition
-
Nutrition
-
Nutrition
Pull the lever and check the tree again.
This time the tree needs nutrition, water, light, nutrition. Pull the lever again to get more circles, which are moved in the same manner as before. Align the spheres so that:
The second solution
Nutrition
-
Nutrition
-
Nutrition
-
Nutrition
Water
-
Water
-
Water
-
Water
Light
-
Light
-
Light
-
Light
Nutrition
-
Nutrition
-
Nutrition
-
Nutrition
Check the tree a third time. The instructions are more complex this time; no water can touch another water, or nutrition another nutrition, diagonally, vertically or horizontally. Water and nutrition may touch each other and light may touch anything. One solution is as follows:
The third solution
Nutrition
-
Water
-
Nutrition
-
Water
Light
-
Light
-
Light
-
Light
Water
-
Nutrition
-
Water
-
Nutrition
Light
-
Light
-
Light
-
Light
For the fourth and last infusion of energy, light and water may not touch in any way, light can touch light, water can touch water and nutrition can touch anything. One solution is:
Another solution
Water
-
Water
-
Water
-
Water
Water
-
Water
-
Water
-
Nutrition
Nutrition
-
Nutrition
-
Nutrition
-
Nutrition
Light
-
Light
-
Light
-
Light
Nutrition
-
Light
-
Light
-
Nutrition
Light
-
Nutrition
-
Nutrition
-
Nutrition
Vanescula about to kill Ranis.
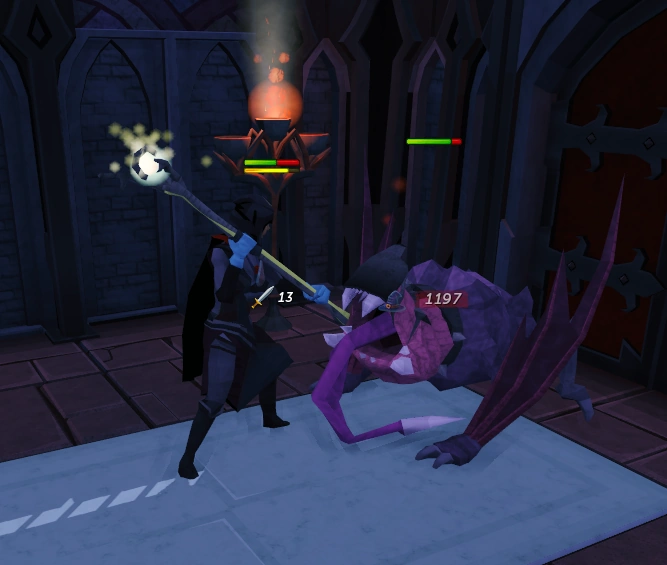
You can now chop the Blisterwood Tree. This will attract the attention of Ranis. After you've chopped three logs in a row, he will demand that you come out of the Arboretum, while changing to his vyre form. Vanescula will come over in her vyre form and Ranis will tell her that he doesn't think you're really one of them. The screen fades to black and Ranis' corpse is shown on the floor with Vanescula standing nearby.
Leave the Arboretum and speak to Vanescula (you can chop more Blisterwood logs first, if you wish; they can be used to make additional stakes). She says she'll blame the death of Ranis on you (meaning the Myreque), but that it had to be done; he would have exposed you otherwise. She also says that the tree produces no seeds, and that Vanstrom knows where the Myreque hideout in Meiyerditch is. She demands the medallion off you. She restores its full potential and hands it back to you, adding a teleport back to Darkmeyer and the Barrows to it. She will teleport you away, to just outside Darkmeyer to bring you in safety while she explains what happened to the vampyres.
Emergency status
Vertida calls an emergency meeting.
Go back to the Myreque base. You can use the medallion to teleport to Meiyerditch to appear there (will not use a charge because it's close). Speak to Vertida to find out that Safalaan has been missing since shortly after you left for Darkmeyer.
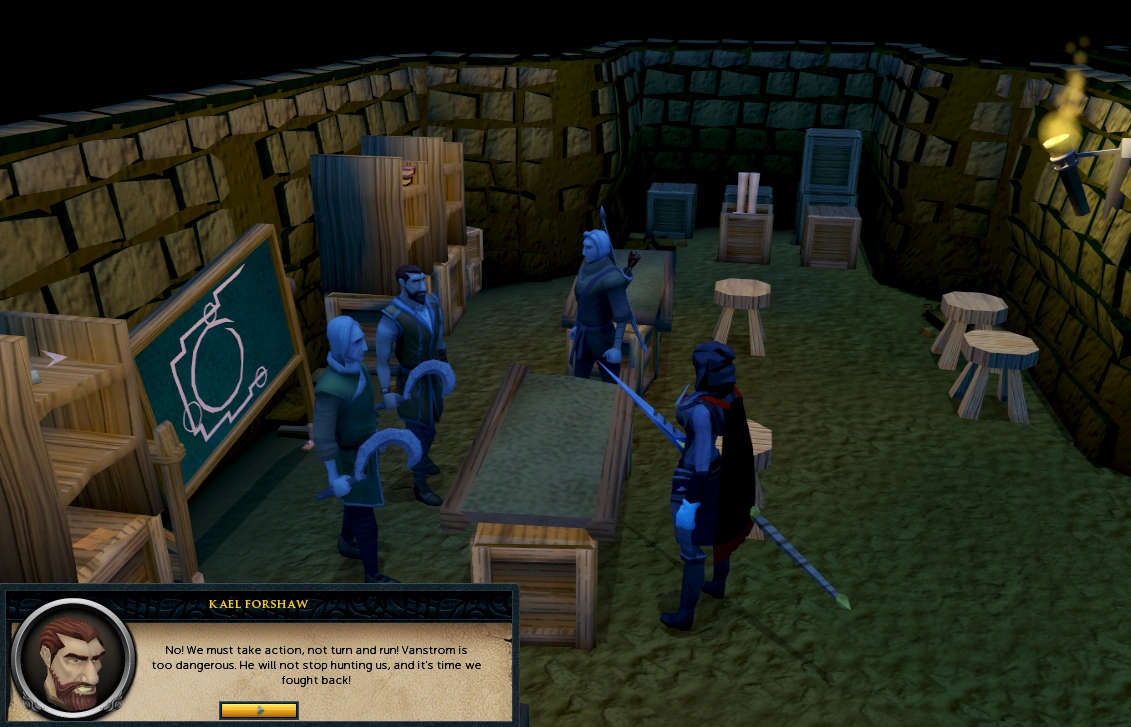
Vertida calls a meeting to discuss what you've discovered. Kael remains suspicious of Vanescula throughout the meeting. You inform the Myreque that Vanstrom knows the location of the base. Vertida calls the Myreque to evacuate. Kael and Mekritus say that they're tired of running and hiding and wish to fight. Vertida agrees with the majority and says they must take the fight to Vanstrom and enter Darkmeyer. It is decided that because you're recognised amongst the vyre ranks as a respected member of vampyre society, you must go alone.
NOTE: If you wish to complete the hard Morytania task "Raising the Stakes", you must fletch the polearm outside of the Myreque base as the base is not considered part of Morytania.
Speak to Vertida to learn how to make blisterwood weapons. He advises you to make one for each combat style, and to get two silver sickles from Kael. Only if you do not have a knife in your tool-belt he will offer you a knife. Use it on the a set of blisterwood logs you collected and make a blisterwood polearm, a staff and some stakes. You have to make all three weapons, otherwise attempting to enter the final boss house will result in a message saying, "This looks too dangerous."
You will also be given a bottle of holy water which he says will be of use against a vampyre's mist form and the bloodveld minions Vanstrom is known to make use of. He also suggests you ask the other Myreque for advice on fighting Vanstrom. Kael can tell you about Vanstrom's darkness attack, which he once witnessed being used on a vampyre juvinate. Mekritus will warn you that Vanstrom will turn into mist when severely weakened.
A player fighting Harold the bloodveld.
Teleport back to Darkmeyer and bank with the Darkmeyer Treasury bank chest. Make sure to have a super potion set, extreme set or overloads, lots of food (preferably rocktails - and many of them), your best armour, the holy water and Drakan's medallion. Something to restore run energy is highly recommended, but not always necessary at higher agility levels (or if the player visits the Oo'glog springs beforehand). A spirit terrorbird and scrolls is very helpful as it can also carry more food. If you wish you may speak to Vanescula again on your way to Vanstrom's house (look for the biggest house), which is just south east of her.
Once you enter the house you will be attacked by Harold, a level 140 Bloodveld pet. This fight should be no trouble for you if you have decent armour and combat stats. To defeat him, you must throw the holy water given to you by Vertida over him. It is advisable to take a better weapon than the blisterwood polearm to defeat Harold first, and then go back to the bank and get more supplies. A good weapon may also be useful later for the bloodveld summoned by Vanstrom. If you die in the house you keep both your medallion and the Darkmeyer disguise, which means that you can easily teleport back to your gravestone, which will be just outside the house. This makes death only a "minor" issue. There is also an altar in the city if needed.
The disguise doesn't need to be brought for this battle. Equip your best armour at Burgh de Rott bank, so that you start with full life points. Ranging armour is a good choice, since it gives some protection against Vanstrom's magic attacks, while you can attack with the blisterwood stakes (cut extra logs if needed so that you have about 100 stakes, or fewer if you use Ava's accumulator or similar). Then teleport back to Darkmeyer and if you run straight to Vanstrom's house you will take only minor damage from Vyrewatch.
Go through the metal door at the other end of the entrance hall and Vanstrom will be waiting. He will tell you that he wants to kill Safalaan as he is half-Icyene with considerable powers, and thank you for previous events such as bringing him to the Myreque hideout and rebuilding Burgh de Rott. He then attacks you. Make sure to equip your armour and drink your potions before entering the room.
The Battle with Vanstrom
Due to an update, this article may be out of date.
Reason: 17 June updates You can help improve this page by editing it.
Locked in battle with Klause.
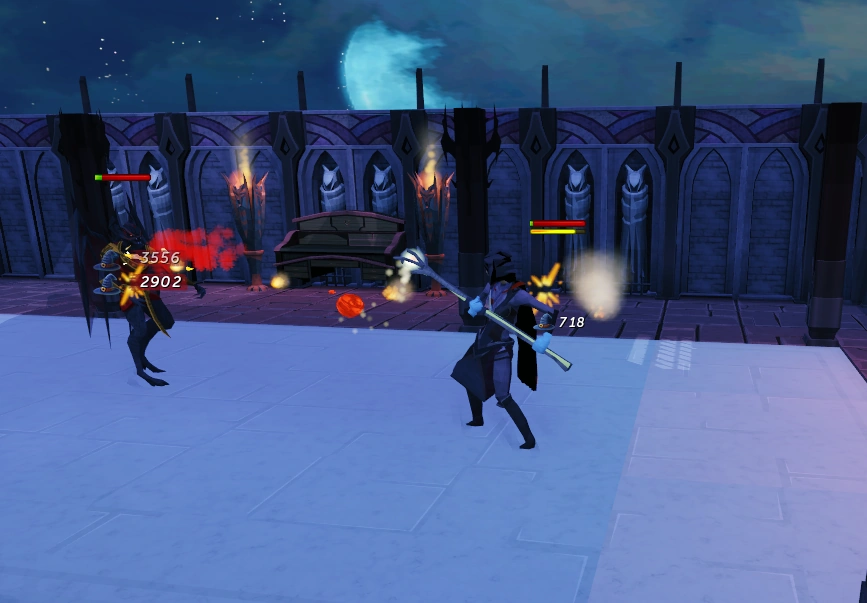
After the aforementioned dialogue, Vanstrom will attack you in his human form. Attack him with your chosen weapon, preferably the Blisterwood polearm. After a few hits he will transform into his vampyric form and become much more powerful. Vanstrom's vampyric form is level 140.
Players that have at least level 80+ in a combat stat, and the consistent use of abilities, shouldn't find the fight very difficult.
Continue attacking Vanstrom with your chosen weapon, with Protection against/Deflect Melee on, to reduce the damage of his melee attacks. Protection against/Deflect Magic works against Vanstrom's distance attacks. Vanstrom uses melee attacks when possible and otherwise magical, red energy balls; both styles are capable of hitting around 250 life points. Vanstrom also has an arsenal of deadly special attacks, which he will constantly use during the fight at random.
The Darkmeyer disguise and Drakan's medallion are always kept upon death, so reaching your gravestone shouldn't be a problem. Your grave will appear just outside Vanstrom's house.
(Optional) Instead of food, bring Saradomin Brews and Super Restore potions. Drink 1 dose of Super Restore for every 3 doses of Saradomin Brew, and match your potion count.
Overloads or other combat-boosting potions or flasks can help hit Vanstrom accurately.
A good idea is to use the Darkmeyer bank to deposit your Darkmeyer clothes, saving inventory space for food. This will cause the vyres to become aggressive, although it shouldn't be a problem. After getting everything you need, simply run to Vanstrom's house to the south. Keep in mind however that should you die, you will need to retrieve your Darkmeyer clothes if you wish to reach your gravestone without being hassled by the vyres.
A beast of burden Summoning familiar for extra inventory spaces. The recommended ones being a pack yak, war tortoise or spirit terrorbird. A fighting familiar could work as well.
Don't forget an appropriate aura if you have one. Surefooted will reduce the need for other methods of restoring run energy.
Consider wearing armour pieces that have high magical damage soaking percentages; they can absorb a lot of damage if you happen to get hit by Vanstrom's special attacks.
Consider using Salt-water spring prior to the fight, as you required to be moving quite a lot during the fight.
Your preferred ring. A Tokkul-Zo is well-rounded for whichever method of combat you use.
Ranged
Ranged armour to switch to after entering the house.
Once again, wear your best armour, preferably Black dragonhide armour, Royal dragonhide armor, Karil's armour or Armadyl armour, along with an amulet, cape and pair of boots with good defence bonuses, as described in the melee set-up above. With the appropriate ranged level, this approach could possibly be much easier than the melee method.
Should you not be confident in the amount of runes you bring, bring an additional polearm as a back-up.
Any magic-boosting ring.
Special attacks
In addition to his magic and melee attacks, Vanstrom has a number of special attacks which he will commonly use against you. Protection prayers have no effect against these special attacks.
"Stare into the darkness!"
When Vanstrom moves to the centre of the room and yells, "Stare into the darkness!", you should do the exact opposite and run to a wall facing away from Vanstrom or be hit for up to 4000 damage. This damage is reduced if faced the opposite direction and running. You must also turn the camera to face away from him. There is very little time to react to this, probably just over a second, so be on guard. Because of this, you may want to turn your camera angle to face Vanstrom's back, so that if he does use this technique, you don't have to worry about turning your camera angle and just focus on turning your character away. It should be noted that this attack can be mitigated if you can move your camera around with your mouse. To do this, simply hold down the scroll wheel button and move your mouse around. This is a lot faster than using the arrow keys.
One way to handle this special is fighting him near the centre (if you are using melee), with your back facing the door where you entered from. As soon as he says his special, run to the door and when you stop, heal and wait. Sometimes this avoids all damage, and sometimes you will be hit only for 500-1000 damage, instead of the usual 4000. If you stay with this method, this avoids you trying to run both or other ways as sometimes he will use it again right after he finishes this special giving you little to no time to get to the opposite wall, and you will be hit even higher the closer you are to him. If not using the door tactic, you will have to react very quickly to which way he is facing, so sticking with one spot usually guarantees a 50/50 chance he will face your way and all you have to do is heal.
"Let the blood consume you!"
Vanstrom will teleport you into the middle of the room and spawn a ball of blood under you when he yells "Let the blood consume you!". Run away from the spot you are standing on or be hit for high damage. If you can manage to lure Vanstrom to this spot, he will take the damage.
Vanstrom will also follow up with a melee attack. As you run from the blood spot Vanstrom will chase you and strike at least once with a melee attack. As you are running if you quickly switch to protect/deflect melee you can reduce this damage considerably. It is advised to switch back to protect/deflect magic afterwards.
Like the darkness special attack, quickly run to a corner of the room and heal. Most of the time this avoids all damage and if you are unlucky you will be hit for the reduced damage which is usually around 500-1000 (this only happens if you didn't go there quick enough). Just make sure to heal so your health is over 5000, as when completely unavoided, this attack is capable of hitting very high, up to 6000.
This can be one of the most deadly attacks as Vanstrom may spam attacks one after the other with no time to heal between. A sequence of four or more attacks can kill a player with 99 Constitution with a life points boost.
"Come, fiends, and aid your master!"
During the fight on a few occasions Vanstrom will run to the centre of the room and yell out "Come, fiends, and aid your master!", which summons 2 small bloodveld leechers who will heal him if not killed quickly. They are relatively weak and have only 1500 lifepoints. They move slowly and spawn in the opposite sides of the room from each other. Try hitting them once, or get their attention to prevent Vanstrom from healing if they get too close. Should they reach him, they will die and heal Vanstrom. Note that he keeps attacking you normally while you are busy dispatching the bloodveld.
It's possible to win without killing the bloodveld, you will just need to do some extra damage to compensate for their healing.
Blood bombardment
At several points during the fight Vanstrom will launch himself into the air and throw balls under you similar to the blood pool attack that can hit for high damage (up to 4000+ but usually around 2000). He will throw a bomb approximately once every 2 or 3 seconds. In addition, he will occasionally freeze you to the spot. This only lasts for a split second. Quickly click somewhere else on the floor. The bomb will damage you if it explodes under or one square adjacent to you (the latter does not reduce damage). Vanstrom will not throw bombs for a second or two when he starts flying, giving you some time to start running. To avoid damage, run in a circle around Vanstrom until he lands. Vanstrom will be flying in one spot, occasionally moving to another. You will deal heavy damage (often over 5000) to Vanstrom when attacking in the air, by both melee and ranged blisterwood weapons, making this a great opportunity to deal quick damage and shorten the battle.
If trying to attack Vanstrom during the Blood Bombardment attack, make sure that you never stand still - immediately after clicking to attack, continue to run your pattern avoiding the Blood bombs. It is very easy if done correctly, you take no damage if you keep moving.
Do not run back into Harold's room to try to escape the blood bombardment. Vanstrom can still launch these attacks against you in Harold's room, even though the door is closed.
Vapour form
Vanstrom's vapour form.
When Vanstrom is low on health he will turn into vapour, akin to mist and become immune to attacks. At this point he will stop running and move at a normal speed. You need to lure the mist at least partially into the tiled area in the centre of the room. The mist will be reluctant to move directly, you will need to stand inside of it to spark movement. Then throw the holy water with left-click, which will form a large pool of water in the middle. So long as Vanstrom is above the water, he will be damaged. If you get too close to him, he will use quick magic-based attacks on you but the damage is much lower, around 60 usually, hitting once every game tick. Note that a pool of water only lasts for a few seconds and must be constantly renewed. Repeat this until he loses all of his life points.
Finishing up in Darkmeyer
Vanstrom exploding
Vanescula dealing with the bloodveld.
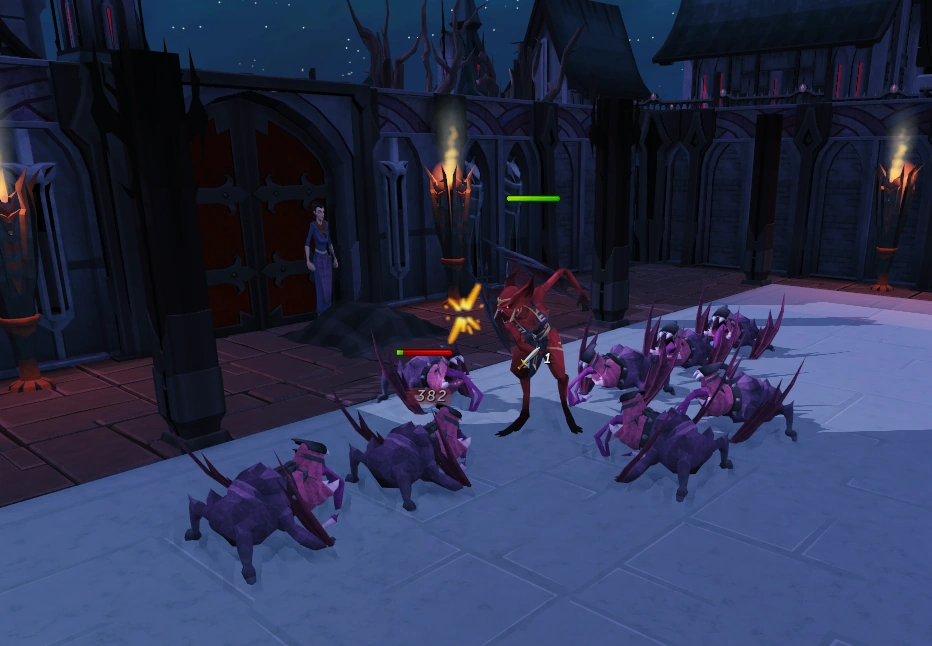
Upon Vanstrom's death he will exclaim "You have me, but I won't be going down alone!" in the middle of the room, fall to his knee and explode, hitting you for a near death damaging amount of lifepoints while also summoning eight level 140 bloodveld guardians around him.
Note: If you were wearing a ring of life and were automatically teleported out at this stage in the fight, you simply have to return to the room to continue where you left off.
You will faint because of the damage, but luckily Vanescula and Sarius will enter the room. While Sarius protects you, you will take control of Vanescula to kill the bloodveld guardians. They will attack but never damage Vanescula since she is a vampyre. You cannot attack them directly, only through the attack style menu using a series of special attacks; Dart deals high damage to all bloodveld lined up, Shadow stalk deals very high damage to one bloodveld and Shriek deals average damage to all nearby bloodveld.
It is recommended to use the Shriek attack repeatedly as soon as it recharges. Once the bloodveld are defeated, Vanescula will blow up Vanstrom's desk to destroy his information on the Myreque. She says that you must be brought back to Meiyerditch when Sarius comments that she can do it for she knows the location of the Myreque hideout because her father Mauritys used to be a Myreque member. Vanescula will be angry at first but then praise Sarius for her courage. Sarius will take the unconscious you to the Myreque hideout in Meiyerditch, where you will wake up next to Mekritus.
Reporting back
Vanescula destroys Vanstroms desk.
Go to Vertida and speak to him. He will congratulate you on defeating Vanstrom, and will show a cutscene where Safalaan leaves Meiyerditch, when he is stopped by several Vyrewatch. Vanescula shows up and sends them away. Safalaan tells her that he is heeding her warning; she assures him that once he returns from his task they can "begin". Vertida sends you to see Veliaf in the basement of the pub in Burgh de Rott as there is nothing of value in Meiyerditch with which you can be rewarded.
Teleport to Burgh de Rott with your medallion, go to the Myreque hideout under the ruined pub in Burgh de Rott, and talk to Veliaf. Explain to him that you've killed Vanstrom Klause to which Veliaf responds that Vanstrom's and Ranis' deaths have put the Myreque into greater danger for the vampyres now consider them an actual threat. He reconsiders, and says that they may be closer than ever to destroying Drakan with two of his strongest vampyres gone.
The RuneScape homepage banner after the quest's release.
On the day of release, the spoiler read: The spoilers demand nutrition, light, nutrition and then water. Come back tomorrow once we've figured out what that means.
When you talk to the sentinel and it asks your name, one possibility is 'Tytn', which is the name of the Jagex Moderator who had been developing the Myreque series until leaving Jagex and Mod Ana taking over.
One of the surname options is 'Lugosi', the last name of Bela Lugosi, the famous actor who played Dracula in the original namesake movie.
One of the first name options is 'Natalidae', referring to the Natalidae family of bats.
One of the first name options is 'Pipistrelle', referring to the Pipistrelle family of bats.
The name of the blood-tither in Darkmeyer is "Helsing", a reference to the fictional Abraham Van Helsing, Dracula's nemesis.
The quests Noticeboard icon.
Completing the quest yields, "I worked with Vanescula to infiltrate Darkmeyer and create new weapons to harm the vampyres, before defeating Vanstrom. The Myreque were happy, but are worried about their future." in the player's Adventurer's Log.
Prior to the release of this quest, sectors four and five of Meiyerditch were inaccessible.
There are several right-click options on the player's body as they control Vanescula:
Talk-to <player name> (level: n), with the response of <Player name> doesn't look up to talking right now.
Follow <player name> (level: n), with the response of Vanescula does not follow humans.
Trade <player name> (level: n), with the response of <Player name> doesn't look up to trading right now.
Drink-blood <player name> (level: n), with the response of Vanescula is not interested in doing this.
Examine <player name> (level: n), with the response of This feels somewhat like an out-of-body experience.


")

