This guide will cover how to create maps using GIMP. If you are not familiar with GIMP you can find out how to download it and learn how to use its basic features here.
Plain maps[]
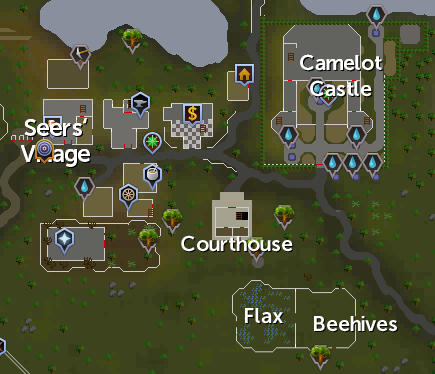
Capturing an image of an area on the world map is easy. Simply open the world map and take a printscreen: map images should be taken at 100% zoom with the "you are here" marker turned off.
If an area is not available on the world map, such as player-owned port or certain non-ground floor areas (such as the Grand Tree), expand your minimap (L to unlock interface, then drag to resize), orientate the map north by clicking on the compass, zoom all the way out, this zoom level is the same as 100% zoom on the world map. Take the printscreen as normal. You will then have to use the tools detailed below to select and remove NPC markers (Yellow dots), objects (Red dots) and players (white dots). However, it should be noted that the world map is preferable over the minimap, if available. Not only because it shows clearer images, but as the editor, there is less effort on your part if you can take an image from the world map.
After you have taken the image you should crop it so that it only includes the area you want a map of. Maps do not require transparency.
The map is now ready to upload. If creating a new image you should use the format File:<area name> map.png.
Add the map to pages (see here for how to do this in VisualEditor or here for how to do this in Source Mode, if you have switched from the default editor).
Location maps[]
When you to show the position of a specific thing, e.g. an NPC or dungeon’s entrance, you should use a marker to indicate the location. A standard blue marker is used to mark up these kind of maps: you can save a copy of it from here.
- After capturing the map as before, crop it to a 250x250px square area. While using the Rectangle Select Tool the size of your selection will be shown at the bottom to GIMP.
")
")
- Drag your saved blue square into GIMP; it will be added as a new layer on top of the map.
- Use the Move Tool set to Move the active layer to drag the square so that it is centered on the correct location.
")
")
- Merge the visible layers and save the map.
- Upload the map to the wiki. If creating a new image you should use the format File:<thing name> location.png.
- Add the map to pages (see here for how to do this in Source Mode or here for how to do this in VisualEditor, if you have not switched from the default editor).
See also[]
- Want some more help?
- Ask for help with this topic on the article's talk page.
- Ask for general editing help at RuneScape:User help.
- Request help from an administrator at RuneScape:Administrative requests if you need help which requires an administrator's tools.
- Chat to other editors in our Discord channel.
| Articles | |
| Images |
|
| Advanced |
|
| Community |
|