m (→Maps of the pyramid: Removed. No longer necessary with new overview map.) Tag: sourceedit |
mNo edit summary |
||
| (124 intermediate revisions by 75 users not shown) | |||
| Line 1: | Line 1: | ||
| + | {{External|os}} |
||
| − | {{Otheruses|def=no|other uses|PP}} |
||
| + | {{Dangerous|minigame}} |
||
| − | {{cleanup}} |
||
| + | {{Official world|p2p=64|unofficial=yes}} |
||
| − | {{Dangerous minigame}} |
||
| + | {{Infobox minigame |
||
| − | [[File:Worlds Icon.png|20px]] ''The unofficial world for this minigame is world 64.'' |
||
| − | [[File: |
+ | |image = [[File:Pyramid plunder.png|300px]] |
| + | |release = [[17 July]] [[2006]] |
||
| − | {{Relativelocation |
||
| − | | |
+ | |update = Pyramid Plunder |
| + | |members = Yes |
||
| − | |north = [[Kharidian Desert]] |
||
| − | | |
+ | |location = [[Sophanem]] |
| + | |players = 1 |
||
| − | |south = [[Unknown]] |
||
| − | | |
+ | |skills = [[Thieving]] |
| + | |currency = None |
||
| + | |thaler = No |
||
| + | |hiscores = No |
||
| + | |tutorial = No |
||
| + | |custodian = [[Guardian Mummy]] |
||
| + | |music = [[Tomb Raider]] |
||
| + | |developer = |
||
}} |
}} |
||
| + | [[File:Mg pyramidplunder.jpg|left]] |
||
| − | [[File:Pyramid plunder.png|thumb|right|The Pyramid Plunder Pyramid]] |
||
| − | '''Pyramid Plunder''' is a [[Thieving]] [[minigame]] located in the city of [[Sophanem]] at the far southern reaches of the [[Kharidian Desert]]. |
+ | '''Pyramid Plunder''' is a [[Thieving]] [[minigame]] located in the city of [[Sophanem]] at the far southern reaches of the [[Kharidian Desert]]. Inside Sophanem, the [[Jalsavrah Pyramid]] can be found with four ''anonymous looking doors''; access to the minigame can be found behind one of the doors, guarded by the [[Guardian mummy]]. |
| + | During the minigame, the player has five minutes to plunder the contents of Jalsavrah. The pyramid consists of eight rooms, each requiring progressively higher Thieving levels to enter and loot. Artefacts pillaged from the rooms range from [[ivory comb]]s to [[jewelled diamond statuette]]s, with the most valuable artefacts found deepest in the pyramid. |
||
| − | ==Requirements and recommendations== |
||
| − | ===Requirements=== |
||
| − | *Access to the city of Sophanem |
||
| − | **Started [[File:Quest map icon.png]] [[Icthlarin's Little Helper]] <u>'''or'''</u> [[Pharaoh's sceptre]] (can be used to avoid the quest requirement) |
||
| − | *Level 21 [[File:Thieving-icon.png]] Thieving |
||
| + | Rarely, players may find a [[Pharaoh's sceptre]] within a grand gold chest or within a sarcophagus inside Jalsvarah. A [[sceptre of the gods]] can very rarely be plundered from the engraved sarcophagus in the 8th room, requiring 91 Thieving to access and 75 [[Runecrafting]] to pry it open. Pieces of the rare [[Black ibis outfit]] can be found within the urns or sarcophagi with the pyramid. |
||
| − | ===Recommended=== |
||
| − | *Completion of [[File:Thieving-icon.png]][[Contact!]], for access to the bank in Sophanem |
||
| − | *Level 91 Thieving (or higher) for maximum experience from this minigame |
||
| − | *A [[File:Quest map icon.png]][[Pharaoh's sceptre]] (or [[Sceptre of the gods]]) will significantly reduce the amount of down time between each run, and enough artefacts will easily be recovered for recharging |
||
| − | *Completion of [[The Feud]], for reduced [[magic carpet]] ride fee, or a [[Ring of Charos (a)]] (not required with a sceptre) |
||
| − | *Completed [[Desert Tasks|Desert Hard Tasks]] for double teleport charges on sceptres (6 and 20 respectively) and reduced chance of [[Scarabs]] and [[Mummies]] spawning. |
||
| − | == |
+ | ==Requirements== |
| + | * Access to the city of Sophanem |
||
| − | [[File:Jalsavrah.png|thumb|Where's my mummy?]] |
||
| + | ** Having started the quest [[Icthlarin's Little Helper]], or teleporting to [[Jalsavrah Pyramid|Jalsavrah]] via a [[Pharaoh's sceptre]] |
||
| − | [[File:Jalsavrah chamber.png|thumb|An example of a chamber]] |
||
| + | * {{skillclickpic|Thieving|21}} Thieving |
||
| − | *Teleport to '''Jalsavrah''' using the [[Pharaoh's sceptre]]. This can be done before starting [[Icthlarin's Little Helper]]. Sceptre of the Gods teleport also works. |
||
| − | *Use [[Ring of slaying]] to teleport to Sumona in [[Pollnivneach]], and from there to Sophanem. |
||
| − | *Take the [[magic carpet]] from [[Shantay Pass]] to [[Pollnivneach]], and from there to Sophanem. Players can get to the Shantay Pass quickly by |
||
| − | **Using the [[Lodestone Network]] to teleport to [[Al Kharid]] . |
||
| − | **Using the [[Ring of duelling]] teleport to [[Al Kharid duel arena]] . |
||
| − | **Using the [[Broomstick]] teleport to the [[Sorceress's Garden]] in Al Kharid. |
||
| − | *Teleport to Pollnivneach, then walk or take the magic carpet to Sophanem. |
||
| − | **Teleport to a Player-owned house in Pollnivneach |
||
| − | **Teleport to Pollniveach using a chipped house teleport tablet from the [[Love story]] quest |
||
| − | **Use the [[Ring of slaying]] to teleport to [[Sumona]] in Pollnivneach |
||
| − | **Teleport to the Bandit camp lodestone ([[Desert Treasure]] quest required) and walk to Pollnivneach |
||
| − | *Teleport using the [[Camulet]] and walk the remaining distance. |
||
| + | ===Recommendations=== |
||
| − | ==Equipment== |
||
| + | * Completion of the quest [[Contact!]]; unlocks access to the bank within Sophanem |
||
| − | The only truly necessary item is food, unless the player is planning to teleport after each round to bank and return to the pyramid with the [[Pharaoh's sceptre]]. (However a healing familiar can make food less of a necessity.) |
||
| + | * Completion of the quest [[The Feud]]; reduced [[magic carpet]] fees |
||
| + | * Completion of the quest [[The Light Within]]; unlocks [[Crystal Mask]] and [[Light Form]] |
||
| + | * A [[Pharaoh's sceptre]] or [[Sceptre of the gods]]; unlocks teleports to the [[Guardian mummy]] |
||
| + | * Completion of the hard [[Desert Tasks]]; doubles teleport charges on sceptres and reduced chance of [[Scarabs]] and [[Mummies]] spawning |
||
| + | ==Quick guide== |
||
| − | ===Useful items and techniques=== |
||
| + | Teleport to [[Al Kharid]], and use the magic carpet network to get to [[Sophanem]]. Speak with [[Tarik (Sophanem)|Tarik]] south of the Jalsavrah Pyramid near the northern gates of the city. He'll explain the pyramid, the dangers within, and explain the collection and selling of artefacts to [[Simon Templeton]]. |
||
| − | The [[Black Ibis]] outfit '''DOES''' provide bonus experience here, following an [[Update:Patch Notes (11 December 2013)|update]]. |
||
| + | Quick guide: |
||
| − | ====Health==== |
||
| + | |||
| − | {| class="wikitable" |
||
| + | #Wear as many of the [[#Equipment|given items]] as possible, and carry food and a weapon. |
||
| + | #Travel to the northern pyramid in [[Sophanem]]. |
||
| + | #Enter one of the "anonymous looking doors" on the pyramid until you find the [[Guardian mummy]]. |
||
| + | #Right-click the [[Guardian mummy]] and Start-minigame (or talk to him if its your first time). |
||
| + | #The game is divided into rooms, where the XP gains increase the deeper you go. |
||
| + | #Since players have only 5 minutes to loot, it is recommended that players run through all the rooms except the last one or two rooms that they can do at their level. |
||
| + | #Loot as much as you can in the 5 minutes that you are given. |
||
| + | |||
| + | When you enter a room: |
||
| + | #Pass the Spear trap at the entrance. |
||
| + | #To loot, simply click on the urns, and optionally the [[Grand gold chest]] and [[Sarcophagus]]. |
||
| + | #To move to the next room, move your cursor along the walls and Pick-lock on all the doors until you find the entrance to the next room. |
||
| + | |||
| + | ==Plundering== |
||
| + | [[File:Pyramid plunder room.png|left]] |
||
| + | As soon as the player starts the minigame a timer will appear on screen. Players have five minutes to plunder as many artefacts from the pyramid as they can before the timer is depleted and the Guardian mummy teleports the player out. |
||
| + | |||
| + | Inside Jalsavrah, the player will find a room that contains the door through which they entered, a speartrap, urns, a golden chest, a sarcophagus, an exit door, and four doors leading to the next room, of which three leads to a dead end. There are eight rooms in total, the first requiring 21 or higher Thieving to enter. Each subsequent room requires ten more levels than the previous room, with the final room requiring 91 or higher Thieving. |
||
| + | |||
| + | ===Urns=== |
||
| + | [[File:Jalsavrah chamber.png|thumb|A chamber inside the pyramid.]] |
||
| + | [[File:Urns.png|right|150px]] |
||
| + | Each room inside Jalsavrah has 13 urns, with the exception of room 3 which only has 12 urns. Players may choose to search or check urns. |
||
| + | |||
| + | Checking an urn will check for traps. On successful checks, player will find a snake inside the urn. It may then be charmed if the player has a [[snake charm]] allowing the player to search the urn for artefacts without fear of activating a trap. |
||
| + | |||
| + | Both searching from and checking urns earn the player Thieving experience, but charming snakes will not. If charming snakes, experience awarded from successfully looting an artefact will be reduced by 33%. Unless charmed, a snake may bite the player, [[poison]]ing them. |
||
| + | |||
| + | Searching is much slower than stealing, and the rewards from urns are generally poorer than from the golden chest and sarcophagus. Rewards also get better the further one ventures into the pyramid. |
||
| + | |||
| + | The [[Menaphyrite]] gem may be obtained rarely while looting urns. |
||
| + | |||
| + | ===Grand golden chests=== |
||
| + | [[File:Grand Golden Chest.png|right|150px]] |
||
| + | In the centre of each room the player can find golden chest. Looting the chest will award the player with higher value artefacts than they would find the urns nearby. A [[Pharaoh's sceptre]] may rarely be obtained from golden chests; if a sceptre is found, the [[Guardian mummy]] will appear and escort the player out of the pyramid, ending their plunder. |
||
| + | |||
| + | Occasionally the chest may contain an aggressive level 112 [[scarab swarm]], which attack extremely quick and poison. Scarab swarms will not follow players to the next room of the pyramid. Chests are often saved until everything else in the room has been looted, as scarabs can slow down the process of looting urns. |
||
| + | |||
| + | ===Pharaoh's sarcophagus=== |
||
| + | [[File:Pharaoh's Sarcophagus.png|right|150px]] |
||
| + | A sarcophagus can be found in each room of the pyramid. Opening sarcophagi awards the player with [[Strength]] experience and artefacts, with higher value artefacts and experience obtained deeper within the pyramid. |
||
| + | |||
| + | Opening sarcophagi can take a fair amount of time, and may awaken a level 70 [[Mummy (Sophanem)|mummy]]. Players can open the sarcophagus if being attacked without interruption. |
||
| + | |||
| + | There is a chance that [[Jenifurr]] will appear when opening this sarcophagus. She belongs to the [[Cats of Menaphos]]. |
||
| + | |||
| + | {{Clear|left}} |
||
| + | ===Engraved sarcophagus=== |
||
| + | [[File:Engraved sarcophagus.png|right|50px]] |
||
| + | Located in the eighth room, the engraved sarcophagus requires 91 Thieving and 75 [[Runecrafting]] to loot. When opened, the player has a chance of receiving a [[jewelled diamond statuette]], a [[pharaoh's sceptre]], a [[sceptre of the gods]], or a [[black ibis outfit]] piece. |
||
| + | |||
| + | Opening the engraved sarcophagus awards [[Runecrafting]] experience. Just like with the other sarcophagi, players may awaken a [[Mummy (Sophanem)|mummy]] upon opening. |
||
| + | |||
| + | ===Spear traps=== |
||
| + | [[File:Spear Trap.png|thumb|150px|A spear trap can be seen within the wall.]] |
||
| + | The corridor to each room will contain a spear trap, taking up two [[game square]]s on each of the walls. Clicking on either of the closest squares will attempt to deactivate the trap, allowing the player to pass by unharmed if successful. |
||
| + | |||
| + | Players will be damaged by the spears if they attempt to walk into the room without deactivating the trap, fail to disarm the trap, or click on either of the farther squares. |
||
| + | |||
| + | ===Tomb doors=== |
||
| + | [[File:Tomb Door.png|thumb|150px|Faint signs of a door can be seen behind worn paint.]] |
||
| + | Four locked tomb doors are hidden in the walls of each room, only one of which leads to the next room. Players must successfully unlock the tomb doors until the correct one is found, allowing them to reach the next room. |
||
| + | |||
| + | Successfully unlocking a tomb door awards some Thieving experience. A [[lockpick]] or [[hair clip]] will significantly reduce the chance of the player failing to unlock the door, at the cost of halving the experience gained. |
||
| + | |||
| + | [[File:Exit Entrance Door.png|thumb|150px|A quick escape from the dangers within.]] |
||
| + | The door leading to the next room will change each time a player joins the minigame. It is possible for groups of players to play the minigame together and quickly search all doors in a room at the same time. The other players can then follow the player who found the correct door. |
||
| + | |||
| + | ===Exit doors=== |
||
| + | Each room has an exit door, allowing for a quick escape via the right-click menu. Monsters will not follow players through the doors. |
||
| + | |||
| + | ===Damage=== |
||
| + | Failing obstacle and trap attempts will result in the player taking damage; the minimum a player will take from failing to loot urns is 50 damage. Damage is scaled, based the players maximum life points, increasing in damage as the player progresses deeper in the pyramid. |
||
| + | |||
| + | :{|class="wikitable align-center-1 align-right-2" |
||
| + | ! Room number !! Damage values |
||
|- |
|- |
||
| + | | 1 || 1% of maximum life points |
||
| − | ! Image |
||
| − | ! Object |
||
| − | ! Explanation |
||
|- |
|- |
||
| + | | 2 || 1% of maximum life points |
||
| − | | {{plinkp|Phoenix necklace}} |
||
| − | | [[Phoenix necklace]] |
||
| − | | Heals by 30% of maximum if the player's [[life points]] drop below 20% of the maximum (can be considered '''risky''') |
||
|- |
|- |
||
| + | | 3 || 1% of maximum life points |
||
| − | | [[File:Food cursor.png]] |
||
| − | | [[Food]] |
||
| − | | [[Monkfish]] and [[Shark]]s are recommended unless you have a better healing method. [[Lobster]]s can be used if you have a bunyip or other healing familiar. '''Teleporting to bank is fastest and free healing method.''' |
||
|- |
|- |
||
| + | | 4 || 1% of maximum life points |
||
| − | |[[File:Summoning-icon.png|link=Summoning familiar]] |
||
| − | |[[Summoning familiar]] |
||
| − | |A [[Void spinner]], [[Bunyip]] or a [[Unicorn stallion]] can also prove beneficial, as they restore player's life points with either their special move or their primary effect. The special move of a [[Magpie]] (level 47 [[Summoning]]) or an [[Abyssal lurker]] (level 62 [[Summoning]]) gives temporary boosts of 2 and 4 [[Thieving]] levels, respectively. Players should use the special move in the last room that they are able to enter. Players should note that the special move will '''not''' give temporary access to a pyramid level above the character's current Thieving level. |
||
|- |
|- |
||
| + | | 5 || 1.5% of maximum life points |
||
| − | |{{plinkp|Anti-poison totem}} |
||
| − | |[[Anti-poison totem]] |
||
| − | |A Dungeoneering reward held in the off-hand slot which provides immunity to being poisoned (note that this effect does not cure or heal a player who is already poisoned previous to equipping the totem). This item requires 60 [[Defence]], 70 [[Herblore]], and 60 [[Dungeoneering]] to wield. It may be bought from the [[Rewards Trader]] for 44,000 [[Dungeoneering tokens]]. |
||
| − | * If you do not have the tokens for an Anti-poison totem another option is to use the Prayer book and holy symbol from the great brain robbery quest. |
||
|- |
|- |
||
| + | | 6 || 1.5% of maximum life points |
||
| − | |[[File:Exoskeleton headband.png]] |
||
| − | |[[Trahaearn exoskeleton set]] |
||
| − | |A reward from the [[Plague's End]] quest, it gives a 25% chance to nullify damage received when looting urns. It has no defensive bonuses. |
||
|- |
|- |
||
| + | | 7 || 2% of maximum life points |
||
| − | |[[File:Warpriest of Saradomin helm.png]] [[File:Warpriest of Zamorak helm.png]] |
||
| − | |[[Warpriest armour|Warpriest armour (Saradomin or Zamorak)]] |
||
| − | |This armour provides a small chance to negate most of the damage received from a failure. It may be used if the player has not completed Plague's End. Note that the Armadyl and Bandos warpriest armours do not have this effect. |
||
|- |
|- |
||
| + | | 8 || 3% of maximum life points |
||
| − | |[[File:Bank logo detail.png]] |
||
| − | |[[Bank]] |
||
| − | |If all else fails, you can always use the bank located just east of the pyramid. You regenerate health within seconds of climbing down the ladder. This is very helpful and can cut all costs and or prayer usage down to its minimum. |
||
|} |
|} |
||
| + | ==Strategies== |
||
| − | ====Teleports and other items==== |
||
| + | [[File:Pyramid Plunder map.png|thumb|A map of the pyramid chambers. (click to view a larger version)]] |
||
| − | {| class="wikitable" |
||
| + | It is generally recommended for players to search urns in only the two highest level rooms they can access; to maximise experience rates the player should attempt to loot every urn in their highest accessible room, and as many urns from the second highest room as time would allow. Players using this method should always be aware of their time spent in the pyramid; it is advisable to move on to the last room after half of their time is remaining. |
||
| + | |||
| + | When the player is in their highest level room and time is running out, prioritise looting the golden chest for a chance at better rewards. If the player still has time remaining after, resume plundering urns until kicked out. |
||
| + | |||
| + | After completion of [[The Light Within]] quest players can use of the [[Crystal Mask]] spell in conjunction with the [[Light Form]] [[prayer]] to reduce the rate of failing when checking and searching urns significantly. Wearing [[Prayer items|Prayer boosting items]] and drinking a [[Prayer renewal]] potion will allow the player to do multiple trips into the pyramid without the need of banking, or recharging their Prayer points. |
||
| + | |||
| + | ===Healing=== |
||
| + | Unless the player plans to teleport to a bank after each pyramid plunder, food or a healing familiar is the only item necessary to play the minigame for extended periods of time. It is possible for mid-to-high levelled players to make it through several rounds without needing to heal. The equipment below is needed to withstand the damage from monsters and [[poison]] during a plundering trip. If the player wishes to reduce banking time, one full inventory of food and potions can last from four to sixteen games depending on how often the player consumes the items. To save time, it is best to eat in between games unless absolutely necessary. |
||
| + | |||
| + | {| class="wikitable align-center-1 align-center-2" |
||
|- |
|- |
||
| − | ! Image |
+ | ! Image !! Object !! Explanation |
| − | ! Method |
||
| − | ! Explanation |
||
|- |
|- |
||
| + | | {{plinkp|Food|pic=Food cursor}} |
||
| − | |[[File:Enhanced_excalibur.png]] |
||
| − | |[[ |
+ | | [[Food]] |
| + | | [[Monkfish]] or [[shark]]s are recommended unless the player has a better healing method. Banking is the quickest and cheapest healing method. |
||
| − | |The [[enhanced excalibur]] is useful if activated while equipped. It will heal over time and raise your [[Defence]] level. |
||
|- |
|- |
||
| + | | {{plinkp|Enhanced Excalibur}} |
||
| − | |[[File:Sceptre of the gods.png]] [[File:Pharaoh's sceptre.png|link=Pharaohs_sceptre]] |
||
| + | | [[Enhanced Excalibur]] |
||
| − | |[[Sceptre of the gods]] or [[Pharaoh's sceptre]] |
||
| + | | The [[Enhanced Excalibur]] will heal the player for 20% of their [[Life point]]s over 20 seconds when activated; 40% over 40 seconds if the elite [[Seers' Village Tasks]] are complete. It can be activated via right-click, even if not equipped. |
||
| − | |Either is strongly recommended for more experience. After finishing the 5 minute run, the player may use the Jalsavrah teleport with either sceptre to teleport directly to the minigame's start, making it the best way to reach the minigame. Sceptre of the Gods holds more charges, but it can only be obtained through Pyramid Plunder. |
||
|- |
|- |
||
| + | | {{plinkp|Phoenix necklace}} |
||
| − | |[[File:Dragonstone ring.png|link=Ring of wealth]] |
||
| − | |[[ |
+ | | [[Phoenix necklace]] |
| + | | Heals the player for 30% of their maximum [[life point]]s if the player's health drops below 20%. |
||
| − | |'''Highly recommended!''' While wearing this ring, the chance of getting [[Pharaoh's sceptre]] and [[Jewelled golden statuette]]s during the minigame is increased. In addition it can also be used to teleport to the [[Grand Exchange]] for banking. |
||
|- |
|- |
||
| + | | {{plinkp|Summoning familiar|pic=Summoning-icon}} |
||
| − | |[[File:Emerald ring.png|link=Ring of duelling]] |
||
| − | |[[ |
+ | | [[Summoning familiar]] |
| + | | A [[void spinner]], [[bunyip]], or a [[unicorn stallion]] can be used to restore life points via special move or primary effects. |
||
| − | |Ring of dueling can teleport to a bank to save some time if you want to achieve the best exp/h. |
||
|- |
|- |
||
| + | | {{plinkp|Bank|pic=Bank logo detail}} |
||
| − | |[[File:TokKul-Zo.png|link=TokKul-Zo]] |
||
| − | |[[ |
+ | | [[Bank]]s |
| + | | If all else fails, the player can always use the bank located just east of the pyramid (after [[Contact!]].) Health regenerates within seconds of climbing down the ladder. This is very helpful and can cut all costs and or prayer usage down to its minimum. |
||
| − | |Similar to Ring of dueling with unlimited teleportation charges. It is a significant item to risk losing, though. |
||
| + | |} |
||
| + | |||
| + | ===Equipment=== |
||
| + | {| class="wikitable align-center-1 align-center-2" |
||
|- |
|- |
||
| + | | {{plinkp|Anti-poison totem}} |
||
| − | |[[File:Skull of Remembrance.png]] |
||
| − | |[[ |
+ | | [[Anti-poison totem]] |
| + | | Held in the off-hand or worn in the pocket slot, this provides immunity to [[poison]]; requires 60 [[Defence]], 70 [[Herblore]], and 60 [[Dungeoneering]] to wield. Bought from [[Marmaros]] for 44,000 [[Dungeoneering tokens]] |
||
| − | |Similar to the Ring of dueling with unlimited teleports directly to a healing bank. Removes the need to bring food. |
||
|- |
|- |
||
| + | | {{plinkp|Warpriest of Saradomin armour|pic=Warpriest of Saradomin helm}} {{plinkp|Warpriest of Zamorak armour|pic=Warpriest of Zamorak helm}} |
||
| − | |[[File:Desert amulet 3.png|link=Desert amulet 3]] |
||
| + | | [[Warpriest armour|Saradomin or Zamorak warpriest armour]] |
||
| − | |[[Desert amulet 3]] or [[Desert amulet 4|4]] |
||
| + | | This armour provides a small chance to negate most of the damage received from a failure. Armadyl, Bandos, and Tuska warpriest armours do not have this effect. |
||
| − | |Provides an unlimited teleport near a bank, has decent defensive stats, and is automatically kept on death should you die. Once obtained (not required to be worn), it also reduces the chance of Mummies & Scarabs spawning and doubles charges on the [[Pharaoh's sceptre]] and [[Sceptre of the gods]]. |
||
|- |
|- |
||
| + | | {{plinkp|Black ibis outfit|pic=Black ibis mask}} |
||
| − | |[[File:Ectophial.png|link=Ectophial]] |
||
| − | |[[ |
+ | | [[Black ibis outfit]] |
| + | | A very rare outfit, the pieces of which can be obtained by looting urns and sarcophagi. Each of the 4 pieces boost Thieving experience by 1%; the complete set boosts an additional percent, totaling 5%. |
||
| − | |For emergency escape if [[life points]] run low. Players with good armour, high [[Defence]], or plenty of food should not need this. |
||
|- |
|- |
||
| + | | {{plinkp|Trahaearn exoskeleton set|pic=Exoskeleton headband}} |
||
| − | |[[File:Ardougne cloak 3.png|link=Ardougne cloak 3]] |
||
| + | | [[Trahaearn exoskeleton set]] |
||
| − | |[[Ardougne cloak 3]] or [[Ardougne cloak 4|4]] |
||
| + | | A reward from the [[Plague's End]] quest, it gives a 25% chance to nullify damage received when looting urns. The set provides bonus experience if the Black ibis outfit is owned. |
||
| − | |This cape improves a player's Thieving abilities. It has '''not''' been confirmed whether it works in Pyramid Plunder, but wearing it will not hurt. It also offers a good Prayer bonus as well as the ability to teleport to the [[Monastery (Kandarin)|Monastery]] south of [[Ardougne]] to recharge Prayer points if necessary. The teleport may also be used to leave if the player finished his/her final room. |
||
|- |
|- |
||
| + | | {{plinkp|[[Master camouflage outfit]]|pic=Master camouflage head}} |
||
| − | |[[File:Legendary five-finger discount aura.png|link=Legendary five-finger discount|30px]] > [[File:Supreme five-finger discount aura.png|link=Supreme five-finger discount|30px]] > [[File:Master five-finger discount aura.png|link=Master five-finger discount|30px]] > [[File:Greater five-finger discount aura.png|link=Greater five-finger discount|30px]] > [[File:Five-finger discount aura.png|link=Five-finger discount|30px]] |
||
| + | | [[Master camouflage outfit]] |
||
| − | |[[Five-finger discount]] |
||
| + | | An outfit crafted through [[Invention]], the outfit and the sets that make it up offer a 5–7% increased chance of not being bitten by snakes, an increased chance to pass doors, and an increased chance of finding Ibis clothing and additional Sceptres of the gods. Camouflage outfits retain the abilities of both Black ibis and Exoskeleton sets if owned by the player. |
||
| − | |Increases chances of successful thieving +15% for Tier 5; +10% for Tier 4; +7% for Tier 3; +5% for Tier 2 and +3% for Tier 1. They all last for 1 hour; recharge takes 3 hours. |
||
|} |
|} |
||
| + | ===Helpful items=== |
||
| − | The equipment above is needed to withstand the damage from monsters and [[poison]] during a plundering trip. If the player wishes to reduce banking time, one full inventory of food and potions can last from four to sixteen games depending on how often the player consumes the items. To save time, it is best to eat in between games unless absolutely necessary. To reach level 99 Thieving by playing Pyramid Plunder, the player will need roughly 3,000 Lobsters and 500 Antipoisons. |
||
| + | {| class="wikitable align-center-1 align-center-2" |
||
| − | |||
| − | Quick banking can be achieved by using the [[Ring of duelling]], the [[Ring of kinship]], or the [[TokKul-Zo]] to teleport to [[Castle Wars]], [[Daemonheim]], or [[TzHaar City]], respectively. All have banks nearby. Afterward, the player should use the Pharaoh's sceptre to return to the pyramid the quickest. If you have completed the [[Contact!]] quest, use of the bank in [[Sophanem]] is another option. There is also a summoning obelisk along the east wall of the city (outside the city) for a quick summoning recharge and an altar just southwest of the pyramid. |
||
| − | |||
| − | ==Getting started== |
||
| − | [[File:Pyramid plunder room.png|left]][[File:Guardian mummy.png|thumbnail|right|Talk to the [[Guardian mummy]] to start Pyramid Plunder]] |
||
| − | Travel to Sophanem. If you haven't played the game before, talk to [[Tarik (Sophanem)|Tarik]] outside the pyramid near the northern gates of the city. Then, attempt to enter the pyramid on one of its four sides. If the room is empty, leave and try another entrance. (Regardless of the entrance you used, you will always exit next to the northern entrance.) Inside one of the entrances, you will find the [[Guardian mummy]]. If you haven't played the game before, you must talk to it to gain access to the inner rooms. In later runs, you can start by simply right clicking the Guardian mummy and selecting the "Start minigame" option. |
||
| − | |||
| − | The Guardian mummy changes rooms every 15 minutes, so once you find the correct entrance you can keep using it for a number of trips before it changes. |
||
| − | |||
| − | The mummy may occasionally punch you as you try to enter the pyramid, which stuns you and does a little damage. This only happens at the entrance to the room containing the mummy. |
||
| − | |||
| − | As soon as you start the minigame, a timer will start on your screen. You have five minutes to loot as much treasure from the pyramid as you can. |
||
| − | |||
| − | Once inside, you will find a room that contains the door through which you entered the room, a speartrap, urns, a golden chest, a sarcophagus, an exit door, and four doors leading to the next room, of which only one works. There are eight rooms in total, the first requiring 21 or higher [[thieving]] to enter. Each subsequent room requires ten more levels than the previous room, with the final room requiring 91 or higher [[thieving]]. |
||
| − | |||
| − | {{clear}} |
||
| − | |||
| − | ==Inside the pyramid== |
||
| − | {{obsolete|Damage values are off, so are poison damage values, if not poison part in general}} |
||
| − | === Loot === |
||
| − | {| class="wikitable" |
||
| − | !Image |
||
| − | !Objects |
||
| − | !Information |
||
|- |
|- |
||
| + | ! Image !! Method !! Explanation |
||
| − | |[[File:Urns.png|200px|Urns as seen in Pyramid Plunder.]] |
||
| − | |'''Urns''' |
||
| − | |Each room has 13 urns, except for Room 3 which only has 12 urns. You can choose to steal from an urn or check it for snakes first. If you check for snakes, a snake will appear out of the urn and may then be charmed if you have a snake charm, this will however halve the experience gained. Both checking and stealing from urns earn thieving experience, but charming does not. Unless charmed, a snake may bite for small damage (starting around 20 at the lowest level and increasing to about 80 at the highest level). There is also a chance of being poisoned by the snakebite, but since the life points updates, the poison level does not appear to have been updated, and therefore the poison damage is very small (less than 10) and can be mostly ignored. Searching is much slower than stealing, and the rewards from urns are generally poorer than from the golden chest and sarcophagus. Rewards also get better the further you get into the pyramid. |
||
|- |
|- |
||
| + | | {{plinkp|Sceptre of the gods}} |
||
| − | |[[File:Grand Golden Chest.png|200px|The Gold Chest in the centre of every room, it is 1 of 2 objects the that has a possibly of looting a [[Pharaoh's Sceptre]] from, the other being the Sarcophagus.]] |
||
| + | | [[Sceptre of the gods]] |
||
| − | |'''Grand Golden Chest''' |
||
| + | | Having the Sceptre equip will offer more urns to be looted, and increase the players odds of finding pieces of Black Ibis. |
||
| − | |The centre of each room has a golden chest. The best loot is in these chests, but they occasionally contain level 112 [[Scarab swarm]]s which hit extremely fast and can poison an unprotected player. (The poison starts at 38, so use an anti-poison potion to negate this). A swarm only has 2500 life points so using a dragon weapon will dispose of them quickly. The [[Pharaoh's Sceptre]] can only be obtained from the golden chest and the sarcophagus. Opening a chest is very fast, so players seeking treasure find it worth checking all chests on the way to the highest level room. (Players seeking thieving experience should instead concentrate on the urns in the next-highest and highest level rooms they can reach, as urns yield more experience than chests. Skipping all but the final two chests a player can access provides a combination of fast experience and an adequate chance at receiving a Sceptre.) When searching for the door to the next level, a [[Scarab swarm]] will not do too much damage and could be ignored. A swarm triggered by an earlier player will just wait at the door the player exited to the next room, thereby showing you which door you should use (unless the doors have been reset after the player left the room). Chests are often saved until everything else in the room has been looted, as scarabs can slow down the process of looting urns. |
||
|- |
|- |
||
| + | | {{plinkp|Ring of wealth}} |
||
| − | |[[File:Pharaoh's Sarcophagus.png|200px|The Sarcophagus is 1 of 2 objects the that has a possibly of looting a [[Pharaoh's Sceptre]] from, the other being the Gold Chest.]] |
||
| + | | [[Luck|Luck items]] |
||
| − | |'''Sarcophagus''' |
||
| + | | Highly recommended, while wearing the luck items the player's chance of finding a [[Pharaoh's sceptre]], [[Black ibis outfit]] and [[Jewelled golden statuette]]s is increased. |
||
| − | |Each room has a sarcophagus. There is fairly good loot in these, but opening these gains you [[Strength]] experience instead of [[Thieving]]. You may awaken a level 100 [[Mummy]]. Opening a sarcophagus takes a fair amount of time, which needs to be considered in your Pyramid Plunder strategy. You can open the sarcophagus even if another monster, like a scarab swarm, is attacking you; despite the time it takes to open the sarcophagus the monster's attacks do not interrupt the opening. Most high-level thieves do not consider these worthwhile to open, as they consume time and have only a potential benefit of a [[Pharaoh's Sceptre]]. However, if you have finished the rest of your room and still have a few seconds left (more likely if you are mid-levelled) it may be worth it to open it anyway. |
||
|- |
|- |
||
| + | | {{plinkp|Lockpick}} |
||
| − | |[[File:Engraved sarcophagus.png|120px|Engraved Sarcophagus as seen in Pyramid Plunder]] |
||
| + | | [[Lockpick]] |
||
| − | |'''Engraved sarcophagus''' |
||
| + | | Highly recommend, with a lockpick in the players inventory the players chance to fail unlocking a tomb door is significantly reduced. Alternatively, players who have completed the quest [[King's Ransom]] may use [[Hair clip]] also works. |
||
| − | |Located in the eighth room, the Engraved Sarcophagus requires 91 thieving and 75 runecrafting to loot. When opened, it gives you a chance of receiving jewelled and regular loot, the [[Pharaoh's Sceptre]], the [[Sceptre of the gods]], or a [[Black Ibis outfit]] piece. Opening an Engraved sarcophagus gives you runecrafting experience instead of strength experience like the regular Sarcophagus does. You may also awaken a level 70 mummy when attempting to loot this. |
||
| + | |- |
||
| + | | {{plinkp|Snake charm}} |
||
| + | | [[Snake charm]] |
||
| + | | Can be used to distract the snakes that reside in the urns. |
||
| + | |- |
||
| + | | {{plinkp|Desert amulet 3}}{{plinkp|Desert amulet 4}} |
||
| + | | [[Desert amulet 3]] or [[Desert amulet 4|4]] |
||
| + | | Once obtained (not required to be worn), it reduces the chance of Mummies & Scarabs spawning, and doubles charges on the pharaoh's sceptre and sceptre of the gods. |
||
| + | |- |
||
| + | | {{plinkp|Summoning familiar|pic=Summoning-icon}} |
||
| + | | [[Summoning familiar]] |
||
| + | | The special move of a [[Magpie]] (level 47 [[Summoning]]) or an [[Abyssal lurker]] (level 62 [[Summoning]]) gives temporary boosts of 2 and 4 Thieving levels, respectively. Players should use the special move in the last room that they are able to enter. The special move will '''not''' give temporary access to a pyramid level above the character's current Thieving level. |
||
| + | |- |
||
| + | | {{plinkp|Five-finger discount aura}} |
||
| + | | [[Five-finger discount]] |
||
| + | | Increases chances of successfully looting urns, lasting for 1 hour; recharge takes 3 hours. |
||
| + | |- |
||
| + | | {{plinkp|Crystal Mask}}{{plinkp|Light Form}} |
||
| + | | [[Crystal Mask]] and [[Light Form]] |
||
| + | | Greatly reduces chances to get caught, almost to 0%. Supplies to keep up Prayer points will need to be brought along if not banking or recharging prayer at an [[altar]]. |
||
|} |
|} |
||
| − | === |
+ | ===Teleports=== |
| + | Quick banking can be achieved by using a [[ring of duelling]], [[ring of kinship]], or [[TokKul-Zo]] to teleport to nearby banks at [[Castle Wars]], [[Daemonheim]], or [[TzHaar City]] respectively. After, a [[Pharaoh's sceptre]] or [[Sceptre of the gods]] to return to the pyramid if possible. If the player has completed the [[Contact!]] quest, use of the bank in Sophanem is another option. A summoning obelisk can be found along the east wall outside Sophanem, and an altar just southwest of the pyramid. |
||
{| class="wikitable" |
{| class="wikitable" |
||
| − | !Image |
||
| − | !Objects |
||
| − | !Information |
||
|- |
|- |
||
| + | ! Image |
||
| − | |[[File:Spear Trap.png|200px|The Speartrap on the wall of entrance to every room.]] |
||
| + | ! Method |
||
| − | |'''Speartrap''' |
||
| + | ! Explanation |
||
| − | |The entrance corridor to each room has a spear trap, which takes up two squares in each of the two walls. Click on either of the two closest squares to attempt to deactivate the trap. You will be hit with 10-40 damage if you fail, if you attempt to walk into the room without trying to deactivate it, or if you click on either of the farther squares. |
||
|- |
|- |
||
| + | | {{plinkp|Sceptre of the gods}}{{plinkp|Pharaoh's sceptre}} |
||
| − | |[[File:Exit Entrance Door.png|200px| The '''Exit''' and '''Entrance''']] |
||
| + | | [[Sceptre of the gods]] or [[Pharaoh's sceptre]] |
||
| − | |'''Exit''' / '''Entrance Door''' |
||
| + | | Highly recommended, after completing a Pyramid Plunder round the player may use the Jalsavrah teleport to teleport directly to the starting room, making it the best way to reach the minigame. |
||
| − | |Each room has an exit door on each floor, allowing for fast exit from the entire pyramid but this can be interrupted by scarabs or a mummy. The door from which you entered a room may also be used like the exit door. You must pass the spear trap again and can fail it. This door can be useful, however, if you are seeking to escape the attacks of scarab swarms or mummies. Their attacks will interrupt your attempts to leave by the exit door. However, the monsters will not follow you through the spear trap, so you are safe once you pass the trap. The monsters' attacks do not interrupt your attempt to pass the speartrap, since this is a single-click operation. |
||
|- |
|- |
||
| + | | {{plinkp|Ring of duelling}} |
||
| − | |[[File:Tomb Door.png|200px|The Picklockable Tomb Door.]] |
||
| + | | [[Ring of dueling]] |
||
| − | |'''Tomb Door''' |
||
| + | | Teleporting to [[Castle Wars]] places the player near a bank. |
||
| − | |There are four doors per room which you can use to try to reach the next room. Only one of the doors actually connects to the next room, and the other three are dead ends. So, you must check each door until you find the correct one. You can fail to open a door, in which case you can try again. You receive some thieving experience for opening each door. The door to the next room changes periodically (each time any player on the current world begins a new game of Pyramid Plunder). The door thus remains the same for all players on the world for short periods of time. Hence, it is possible for a group of players to play together, quickly searching all the doors in a room. The other players can then follow the player who found the correct door. Sometimes, the doors will reset while you're opening them, and you may find that all four are dead ends. In this case, check them all again. |
||
| + | |- |
||
| + | | {{plinkp|TokKul-Zo}} |
||
| + | | [[Tokkul-zo]] |
||
| + | | Similar to Ring of dueling, but with unlimited teleportation charges. A [[summoning obelisk]] and bank can be found in the ''Main Plaza''. |
||
| + | |- |
||
| + | | {{plinkp|Skull of Remembrance}} |
||
| + | | [[Skull of Remembrance]] |
||
| + | | Provides an unlimited teleport near a bank. |
||
| + | |- |
||
| + | | {{plinkp|Desert amulet 3}}{{plinkp|Desert amulet 4}} |
||
| + | | [[Desert amulet 3]] or [[Desert amulet 4|4]] |
||
| + | | Provides an unlimited teleport near a bank; is kept on death, should the player die. |
||
| + | |- |
||
| + | | {{plinkp|Ectophial}} |
||
| + | | [[Emergency teleport]] |
||
| + | | An emergency escape if life points run low. Players with good armour, high Defence, or plenty of food should not need this. |
||
| + | |- |
||
| + | | {{plinkp|Ardougne cloak 3}}{{plinkp|Ardougne cloak 4}} |
||
| + | | [[Ardougne cloak 3]] or [[Ardougne cloak 4|4]] |
||
| + | | Offers a high Prayer bonus and unlimited teleports to the [[Ardougne Monastery]] to recharge Prayer points. |
||
|} |
|} |
||
| − | Some players try and pass through all the doors to make it to the highest room they can use and then thieve everything in that room, but this leaves all but the slowest players with much wasted time, and is not efficient for experience. Experience increases from each thievable object further into the Pyramid. |
||
| − | [[File:Pyramid plunder map.png|thumb|200px|A map of the pyramid chambers.]] |
||
| − | The method generally recommended by experienced thieves is to thieve about half of the urns from the second highest level room you can get to and thieving all of the urns in the final room. However, players using this method should be careful that they do not use too much time on the second highest room. It is advisable to move on after slightly less than half of your time is remaining. It is still quicker to check the urns before looting them, as you will waste far less time failing. Before moving on, check for snakes on the half you haven't looted for some additional quick experience. |
||
| + | ===Tips=== |
||
| − | When in your final room, watch the time you have remaining. If time is about to run out and you haven't thieved everything in the room, leave off thieving the urns and steal from the chest (avoid the sarcophagus - it's a waste of time and experience), for better rewards and a quick final action. If you still have time left after this, you can resume thieving the urns. (If a monster appears from the sarcophagus or chest, the [[Protect from Melee]] prayer, if you have it, makes it easy for you to thieve the remaining urns. Keep auto-retaliate off so that you do not turn to fight while trying to loot the urns.) |
||
| + | * While using Thieving boosts can make looting easier, they will '''not''' allow players to reach a room above their Thieving level; e.g. being level 90 and boosting to 91 will not allow players in the final room. |
||
| + | * [[Scarab swarms]] will only target the player who triggered them. They will ignore other players, allowing players to safely pass them without getting attacked. |
||
| + | * Sometimes players may open all four doors in the room to finding dead ends; this happens when another player enters the minigame, causing the tomb doors to shift. Recheck the tomb doors again to find the correct path. |
||
| + | * The correct Tomb Door advancing to the next room and the Anonymous looking door leading to the mummy is the same for all players. So players may follow another player or utilise teamwork for the correct path. |
||
| + | * Only Grand golden chests and Engraved sarcophagus may contain the [[pharaoh's sceptre]]. |
||
| − | == |
+ | ==Rewards== |
| + | [[File:Jewelled diamond statuette detail old.png|left|40px]] |
||
| − | This minigame is one of the fastest ways to gain thieving experience in ''RuneScape'' at level 91 and above. It is the most common method to attain 99 Thieving. (Blackjacking the coshing volunteers at the [[Thieves' Guild]] gives the safest and easiest experience, at 84k-96k experience per hour. Most do not use this method, however, partially because it requires training in quick clicking the 'loot' option, it gives no reward, such as coins, other than experience). |
||
| + | [[File:Pharaoh's sceptre teleport.gif|thumb|150px|A player teleporting with the Pharaoh's sceptre.]] |
||
| − | At 61 thieving, 80k experience can be gained in an hour, and even more at higher levels. At 91 or higher thieving, a max of around 300k experience per hour is possible with sceptre of the gods. It is possible for a player to search the chests in all rooms, successfully search all urns in the two highest level rooms. A typical player with 61 Thieving will gain the following experience in 5 minutes: |
||
| + | When looting urns, sarcophagi, and chests, players will find various artefacts which may be sold on the [[Grand Exchange]], or traded to [[Simon Templeton]] for [[coins]]. After completion of the quest [[Dealing with Scabaras]], Simon will purchase [[note]]d artefacts from the player. |
||
| − | *540 (chests) |
||
| − | *1200 (6 urns in level 4) |
||
| − | *3900 (13 urns in level 5) |
||
| − | *270 (opening doors to next level, 540 if not using a lock pick) |
||
| − | |||
| − | This adds up to 5910 every 5 minutes or to approximately 70k experience in one hour as players have to refuel time to time in bank. Higher experience rates require players to search more urns at level 4 or to replace chest searching with searching more urns at level 4. |
||
| + | {{Clear|left}} |
||
| − | Level 81+ [[Thieving]] yields 180k per hour experience when the 71 room is half looted and half checked, and the 81 room is entirely looted, looting no sarcophagi and only the chests in 71 and 81. |
||
| + | :{| class="wikitable" style="text-align:center;" |
||
| − | |||
| + | |+ Simon Templeton's offer |
||
| − | The strategy should be to get to the room before your "level" and check and loot half of the urns, open the chest, and check the other half of urns. Then, move to your maximum room and check and loot all urns, then open the chest. If you find you still have time at the end, open more urns in your second-highest room for future runs. Note that the experience from checking and searching adds up when both steps are performed. When the check step is ignored, players get more damage, but can use the check and charm time to search more urns yielding more overall thieving experience. If the search option is successfully performed before checking, players will still get all of the experience they would have if they had both checked and searched (ex. a Room 3 Urn yields 150 experience when being only searched). Note that the experience received when using a lockpick on a door is halved. |
||
| − | |||
| − | Level 91+ Thieving can yield around 260-265k experience per hour and around 300k experience per hour when using a [[Sceptre of the Gods]], however 200-230k experience per hour is a more realistic figure in practice. |
||
| − | |||
| − | *Minimum 50 damage, Damage from failing urns. |
||
| − | |||
| − | Room 1: 1% of your max hp<br />Room 2: 1% of your hp<br />Room 3: 1% of your hp<br />Room 4: 1% of your hp<br />Room 5: 1.5% of your hp<br />Room 6: 1.5% of your hp<br />Room 7: 2% of your hp<br />Room 8: 3% of your max hp |
||
| − | |||
| − | |||
| − | |||
| − | === Thieving experience === |
||
| − | |||
| − | {| class="wikitable" width="100%" |
||
|- |
|- |
||
| + | ! Type !! Ivory !! Pottery !! Stone !! Gold !! Jewelled<br />Golden !! Jewelled<br />Diamond |
||
| − | !Min. thief |
||
| − | !Room |
||
| − | !Check urn |
||
| − | !Search urn<ref>Numbers in parentheses are thieving experience if snake charming is used. Note that the experience gained with charming is only about 2/3rds the experience if charming is not used.</ref> |
||
| − | !Gold chest<ref>No experience is gained from a chest if a [[Scarab swarm]] is found.</ref> |
||
| − | !Sarcophagus<ref>The sarcophagi do not give [[Thieving]] experience, but give [[Strength]] instead. Unless you are solely looking for Pharaoh's Sceptres or Black Ibis thieving garments, it is advised not to open these because 1) They slow you down and 2) The mummies can attack you or any other players passing by, which can easily be nullified by wearing good armour (Run energy is not ever noticeably drained below 95% in this minigame).</ref> |
||
| − | !Engraved sarcophagus<ref>The engraved sarcophagus does not give thieving experience, but gives [[Runecrafting]] instead. There is only one engraved sarcophagus in the pyramid, in room 8.</ref> |
||
| − | !Door<ref>Numbers in parentheses are thieving experience if a lock pick (or hair pin) is used. Note that the experience gained with a lock pick is only 1/2 the experience if a lock pick is not used.</ref> |
||
| − | !Trap |
||
|- |
|- |
||
| + | | Comb |
||
| − | |Level 21 |
||
| + | | {{plink|Ivory comb|txt=50}} |
||
| − | |#1 |
||
| + | | {{Na}} || {{Na}} || {{Na}} || {{Na}} || {{Na}} |
||
| − | |20 |
||
| − | |60 (40) |
||
| − | |40 |
||
| − | |0 (20 str) |
||
| − | |NA |
||
| − | |40 (20) |
||
| − | |10 |
||
|- |
|- |
||
| + | | Seal || {{Na}} || {{Na}} || {{plink|Stone seal|txt=150}} || {{plink|Gold seal|txt=750}} || {{Na}} || {{Na}} |
||
| − | |Level 31 |
||
| − | |#2 |
||
| − | |30 |
||
| − | |90 (60) |
||
| − | |60 |
||
| − | |0 (30 str) |
||
| − | |NA |
||
| − | |60 (30) |
||
| − | |10 |
||
|- |
|- |
||
| + | | Scarab || {{Na}} || {{plink|Pottery scarab|txt=75}} || {{plink|Stone scarab|txt=175}} || {{plink|Golden scarab|txt=1,000}} || {{Na}} || {{Na}} |
||
| − | |Level 41 |
||
| − | |#3 |
||
| − | |50 |
||
| − | |150 (100) |
||
| − | |100 |
||
| − | |0 (50 str) |
||
| − | |NA |
||
| − | |100 (50) |
||
| − | |10 |
||
|- |
|- |
||
| + | | Statuette || {{Na}} || {{plink|Pottery statuette|txt=100}} || {{plink|Stone statuette|txt=200}} || {{plink|Golden statuette|txt=1,250}} || {{plink|Jewelled golden statuette|txt=7,500}} || {{plink|Jewelled diamond statuette|txt=12,500}} |
||
| − | |Level 51 |
||
| − | | |
+ | |} |
| + | :{| class="wikitable" style="text-align:center;" |
||
| − | |70 |
||
| + | |+ Grand Exchange value |
||
| − | |215 (140) |
||
| − | |140 |
||
| − | |0 (70 str) |
||
| − | |NA |
||
| − | |140 (70) |
||
| − | |10 |
||
|- |
|- |
||
| + | ! Type !! Ivory !! Pottery !! Stone !! Gold !! Jewelled<br />Golden !! Jewelled<br />Diamond |
||
| − | |Level 61 |
||
| − | |#5 |
||
| − | |100 |
||
| − | |300 (200) |
||
| − | |200 |
||
| − | |0 (100 str) |
||
| − | |NA |
||
| − | |200 (100) |
||
| − | |10 |
||
|- |
|- |
||
| + | | Comb || {{plink|Ivory comb|txt={{NoCoins|{{GEP|Ivory comb}}}}}} || {{Na}} || {{Na}} || {{Na}} || {{Na}} || {{Na}} |
||
| − | |Level 71 |
||
| − | |#6 |
||
| − | |150 |
||
| − | |450 (300) |
||
| − | |300 |
||
| − | |0 (150 str) |
||
| − | |NA |
||
| − | |300 (150) |
||
| − | |10 |
||
|- |
|- |
||
| + | | Seal |
||
| − | |Level 81 |
||
| + | | {{Na}} || {{Na}} || {{plink|Stone seal|txt={{NoCoins|{{GEP|Stone seal}}}}}} || {{plink|Gold seal|txt={{NoCoins|{{GEP|Gold seal}}}}}} || {{Na}} || {{Na}} |
||
| − | |#7 |
||
| − | |225 |
||
| − | |675 (450) |
||
| − | |450 |
||
| − | |0 (225 str) |
||
| − | |NA |
||
| − | |450 (225) |
||
| − | |10 |
||
|- |
|- |
||
| + | | Scarab || {{Na}} || {{plink|Pottery scarab|txt={{NoCoins|{{GEP|Pottery scarab}}}}}} || {{plink|Stone scarab|txt={{NoCoins|{{GEP|Stone scarab}}}}}} || {{plink|Golden scarab|txt={{NoCoins|{{GEP|Golden scarab}}}}}} || {{Na}} || {{Na}} |
||
| − | |Level 91 |
||
| − | | |
+ | |- |
| + | | Statuette || {{Na}} || {{plink|Pottery statuette|txt={{NoCoins|{{GEP|Pottery statuette}}}}}} || {{plink|Stone statuette|txt={{NoCoins|{{GEP|Stone statuette}}}}}} || {{plink|Golden statuette|txt={{NoCoins|{{GEP|Golden statuette}}}}}} || {{plink|Jewelled golden statuette|txt={{NoCoins|{{GEP|Jewelled golden statuette}}}}}} || {{Na}} |
||
| − | |275 |
||
| − | |825 (550) |
||
| − | |550 |
||
| − | |0 (275 str) |
||
| − | |0 (275 rc) |
||
| − | |N/A (N/A) |
||
| − | |10 |
||
|} |
|} |
||
| − | <references /> |
||
| + | [[File:Sceptre of the gods detail.png|thumb|100px|The [[Sceptre of the gods]]]] |
||
| − | Pyramid Plunder is enhanced by having other people in the room to give clues about which doors to open. A Pyramid Plunder Guild operates on World 64. Unfortunately a world that is ''too'' busy can work against you, because the dead ends behind doors change every time a player begins a new game. In addition, players who let out the mummy reduce XP rates for all players. |
||
| + | Occasionally, players may also find the [[Pharaoh's sceptre]] in one of the Grand Gold Chests or Sarcophagi, worth {{NoCoins|{{GEP|Pharaoh's sceptre (3)}}}} coins. The chance of finding a sceptre is 0.1% (or 1/1000) if the player does not spawn a mummy or scarab swarm, and the chance is better in higher rooms.<ref>[http://i.imgur.com/dkcMQY9.png Mod Ash's clarification on sceptre chance]</ref> Immediately after finding a sceptre the player will be expelled from the pyramid. Players inside the pyramid will see an ''Annoyed guardian mummy'' standing beside the chest in each room when this happens, and will announce the fact. |
||
| + | Players may also find a [[Sceptre of the gods]] inside the engraved sarcophagus. It has the same uses as a Pharaoh's sceptre, but with 10 teleport charges (20 with completion of hard Desert tasks), and when equipped grants players a greater chance of finding black ibis clothes. |
||
| − | ==Rewards== |
||
| − | [[File:Pottery statuette detail.png|left|50px|A [[Pottery statuette]] a common reward from Pyramid Plunder.]] [[File:Sceptre Teleport.gif|frame|right|A player using the Sceptre's teleport.]] |
||
| − | When you loot the urns, sarcophagi and chests you will find various trinkets that you can trade in for [[Coins]] at [[Simon Templeton]] at the [[Agility Pyramid]] not far from [[Sophanem]]. Players can use a hole in the wall behind the bank in Sophanem to get to Simon Templeton even faster. Fastest of all, if you have a [[Pharaoh's Sceptre]] its Jaleustrophos teleport brings you right to Simon. To really speed your ability to cash in artefacts, there is an optional reward after you've done [[Dealing with Scabaras]] that will allow you to bring [[Simon Templeton]] noted artefacts. |
||
| + | ===Black ibis outfit=== |
||
| − | An August 2012 update made it possible to trade noted gold artefacts to Simon Templeton. This makes the Tok Ring/Sceptre method a good way to collect the artefacts for sale. |
||
| + | [[File:Black ibis mask chathead (male).png|left]] |
||
| + | [[File:Black Ibis outfit equipped.png|thumb|100px|A player wearing the [[Black ibis outfit]].]] |
||
| + | Rarely when looting urns and sarcophagi within Pyramid Plunder, players may receive a piece of the [[Black ibis outfit]]. When wearing pieces of this outfit the player will gain additional Thieving experience, up to 5% when wearing the whole set. Wielding a [[Sceptre of the gods]] will increase the drop rate of outfit pieces. If the player finds a piece of black ibis with a full inventory, the equipment will replace an artefact in their inventory. If an artefact cannot be replaced, the piece of equipment will fall to the ground. |
||
| + | ===Other=== |
||
| − | Below is a table showing what each item is worth in coins, with the [[Grand Exchange]] values between brackets. |
||
| + | Upon looting an urn, sarcophagus or chest, a cat named [[Jenifurr]] may spawn. After completing [[The Jack of Spades]] and speaking to [[assistant librarian Subotai]], she may be registered in the [[Menaphos journal]], and talked to as well. The gemstone [[menaphyrite]] may be rarely looted from urns. One may uncommonly receive a small [[Menaphite gift offering]] as well. |
||
| + | ===Experience rates=== |
||
| − | {| class="wikitable" style="text-align:center;" width="70%" |
||
| + | {| class="wikitable align-center-1 align-right-2" |
||
| − | !Type |
||
| − | !Ivory |
||
| − | !Pottery |
||
| − | !Stone |
||
| − | !Gold |
||
| − | !Jewelled<br />golden |
||
| − | !Jewelled<br />diamond |
||
|- |
|- |
||
| + | ! {{Skillclickpic|Thieving}} Level |
||
| − | |Combs |
||
| + | ! Experience per hour |
||
| − | |[[File:Ivory comb.png|link=Ivory comb]] [[Ivory comb|50]] ({{GEP|Ivory comb}}) |
||
| − | | -- |
||
| − | | -- |
||
| − | | -- |
||
| − | | -- |
||
| − | | -- |
||
|- |
|- |
||
| + | | 21 |
||
| − | |Seals |
||
| − | | |
+ | | 17,000 |
| − | | -- |
||
| − | |[[File:Stone seal.png|link=Stone seal]] [[Stone seal|150]] ({{GEP|Stone seal}}) |
||
| − | |[[File:Gold seal.png|link=Gold seal]] [[Gold seal|750]] ({{GEP|Gold seal}}) |
||
| − | | -- |
||
| − | | -- |
||
|- |
|- |
||
| + | | 31 |
||
| − | |Scarabs |
||
| − | | |
+ | | 20,000 |
| − | |[[File:Pottery scarab.png|link=Pottery scarab]] [[Pottery scarab|75]] ({{GEP|Pottery scarab}}) |
||
| − | |[[File:Stone scarab.png|link=Stone scarab]] [[Stone scarab|175]] ({{GEP|Stone scarab}}) |
||
| − | |[[File:Golden scarab.png|link=Golden scarab]] [[Golden scarab|1000]] ({{GEP|Golden scarab}}) |
||
| − | | -- |
||
| − | | -- |
||
|- |
|- |
||
| + | | 51 |
||
| − | |Statuettes |
||
| − | | |
+ | | 54,000 |
| + | |- |
||
| − | |[[File:Pottery statuette.png|link=Pottery statuette]] [[Pottery statuette|100]] ({{GEP|Pottery statuette}}) |
||
| + | | 61 |
||
| − | |[[File:Stone statuette.png|link=Stone statuette]] [[Stone statuette|200]] ({{GEP|Stone statuette}}) |
||
| + | | 71,000 |
||
| − | |[[File:Golden statuette.png|link=Golden statuette]] [[Golden statuette|1250]] ({{GEP|Golden statuette}}) |
||
| + | |- |
||
| − | |[[File:Jewelled golden statuette.png|link=Jewelled golden statuette]] [[Jewelled golden statuette|7500]] ({{GEP|Jewelled golden statuette}}) |
||
| + | | 71 |
||
| − | |[[File:Jewelled diamond statuette.png|link=Jewelled diamond statuette]] [[Jewelled diamond statuette|12500]] (Not tradeable) |
||
| + | | 100,000–118,000 |
||
| + | |- |
||
| + | | 81 |
||
| + | | 158,000 |
||
| + | |- |
||
| + | | 99 |
||
| + | | 195,000–241,000<ref>A player with level 99 Thieving may gain around 241,000 experience an hour from playing Pyramid Plunder while using a [[Trahaearn exoskeleton set]], [[Black ibis]], [[abyssal lurker]] familiars, an [[Ardougne cloak 4]] and the [[legendary five-finger discount aura]].</ref> |
||
|} |
|} |
||
| + | ==Experience table== |
||
| − | {{GEHeader}} |
||
| + | {| class="wikitable align-center-1" style="text-align:right;" |
||
| − | {{GEItem|Pharaoh's sceptre (3)|view=price}} |
||
| + | |- |
||
| − | {{GETableEnd}} |
||
| + | ! {{skillclickpic|Thieving}} Level |
||
| + | ! Room |
||
| + | ! {{skillclickpic|Thieving}} Check urn |
||
| + | ! {{skillclickpic|Thieving}} Search urn<ref>Numbers in parentheses are thieving experience if snake charming is used. The experience gained with charming is only about 2/3rds the experience if charming is not used.</ref> |
||
| + | ! {{skillclickpic|Thieving}} Gold chest<ref>No experience is gained from a chest if a scarab swarm is found.</ref> |
||
| + | ! {{skillclickpic|Strength}} Sarcophagus<ref>The sarcophagi do not give Thieving experience, but give Strength instead. Unless players are looking for pharaoh's sceptres or black ibis thieving garments, it may be advised not to open these because they are considerably slower to open than other containers and may spawn an aggressive mummy.</ref> |
||
| + | ! {{skillclickpic|Thieving}} Door<ref>Numbers in parentheses are thieving experience if a lock pick (or hair pin) is used. The experience gained with a lock pick is only 1/2 the experience if a lock pick is not used.</ref> |
||
| + | ! {{skillclickpic|Thieving}} Traps |
||
| + | |- |
||
| + | | 21 |
||
| + | | #1 |
||
| + | | 20 |
||
| + | | 60 (40) |
||
| + | | 40 |
||
| + | | 20 |
||
| + | | 40 (20) |
||
| + | | 10 |
||
| + | |- |
||
| + | | 31 |
||
| + | | #2 |
||
| + | | 30 |
||
| + | | 90 (60) |
||
| + | | 60 |
||
| + | | 30 |
||
| + | | 60 (30) |
||
| + | | 10 |
||
| + | |- |
||
| + | | 41 |
||
| + | | #3 |
||
| + | | 50 |
||
| + | | 150 (100) |
||
| + | | 100 |
||
| + | | 50 |
||
| + | | 100 (50) |
||
| + | | 10 |
||
| + | |- |
||
| + | | 51 |
||
| + | | #4 |
||
| + | | 70 |
||
| + | | 215 (140) |
||
| + | | 140 |
||
| + | | 70 |
||
| + | | 140 (70) |
||
| + | | 10 |
||
| + | |- |
||
| + | | 61 |
||
| + | | #5 |
||
| + | | 100 |
||
| + | | 300 (200) |
||
| + | | 200 |
||
| + | | 100 |
||
| + | | 200 (100) |
||
| + | | 10 |
||
| + | |- |
||
| + | | 71 |
||
| + | | #6 |
||
| + | | 150 |
||
| + | | 450 (300) |
||
| + | | 300 |
||
| + | | 150 |
||
| + | | 300 (150) |
||
| + | | 10 |
||
| + | |- |
||
| + | | 81 |
||
| + | | #7 |
||
| + | | 225 |
||
| + | | 675 (450) |
||
| + | | 450 |
||
| + | | 225 |
||
| + | | 450 (225) |
||
| + | | 10 |
||
| + | |- |
||
| + | | 91 |
||
| + | | #8 |
||
| + | | 275 |
||
| + | | 825 (550) |
||
| + | | 550 |
||
| + | | 275 |
||
| + | | {{NA}} |
||
| + | | 10 |
||
| + | |} |
||
| + | ==Achievement== |
||
| − | You may also find a [[Pharaoh's Sceptre]] in one of the Grand Gold Chests or Sarcophagi. Immediately after finding a Pharaoh's Sceptre, a player receiving a sceptre from a chest or sarcophagus will be expelled from the pyramid, but other players will remain inside. The players left inside the pyramid will see an "Annoyed guardian mummy" standing beside the chest in all rooms who shouts at the players. Previously, all players used to be expelled from the pyramid and all the chests, urns and sarcophagi are reset and a new sceptre is placed in one at random. One can also receive a [[Sceptre of the gods]] ([[File:Sceptre of the gods.png]]), but only from looting a sarcophagus in the eighth room, which requires 91 Thieving and 75 Runecrafting. It has the same uses as a Pharaoh's sceptre, but with 10 teleport charges (20 with completion of hard [[Desert tasks]]) and, when wielding it, you have a greater chance of finding Black Ibis clothes. |
||
| + | * {{Achievement|Careful, There Are Snakes|20|Loot 20 urns in a single run of Pyramid Plunder without disturbing a snake.}} |
||
| − | |||
| − | ===Black Ibis outfit=== |
||
| − | By looting urns and sarcophagi, there is a slim chance to receive a piece of [[Black Ibis outfit]]. When wearing pieces of this outfit while performing any thieving activity (except for [[Blackjacking]]), some bonus xp is received, up to 5% of the normal xp when wearing the whole set. The pieces are rare, but the chances are increased when wielding a sceptre of the gods. The bonus ''does'' stack with other boosts or benefits, such as an [[Ardougne cloak]]. |
||
| − | |||
| − | ==Tips== |
||
| − | *While using Thieving boosts can make looting easier, they will '''not''' allow you to reach a room above your level (e.g. being level 90 and boosting to 91 will not allow you in the final room). |
||
| − | *[[Scarab swarm]]s will only target the player who triggered them. They will ignore other players, allowing players to safely pass them without getting attacked. |
||
| − | *Sometimes you may open all four doors in the room, only to find all of them are dead ends. This can happen when another player on the world starts the game, as the door connections are changed when this occurs. Just go back and recheck the other doors in the room and you will find the correct one. (The doors will still be open, but you can recheck them anyway.) |
||
| − | *Players who have completed Contact! can use the bank located at the north east corner of Sophanem (below the ladder). This can be used instead of teleporting back & forth from a bank. |
||
| − | *With the pharaoh's sceptre a fast way to train is using a bank teleport (Castle Wars with a [[ring of duelling]] or Edgeville bank with an [[amulet of glory]] recommended) after every pyramid plunder run, then simply bank all items, take out the sceptre and a super antipoison potion (taking a sip here and banking the rest gives 1 more free inventory slot) and teleport back into the pyramid. When the sceptre has only 1 teleport left also take 12 stone items with you to recharge it when you arrive at the mummy. |
||
| − | *Carry a sceptre at all times. Then you can use it to teleport to the mummy to begin the next round instantly instead of searching for the correct door to enter the pyramid. This will allow for more experience per hour. |
||
| − | *If a snake bites you while searching an urn repeatedly click the urn until you receive experience successfully. |
||
==Trivia== |
==Trivia== |
||
| + | [[File:Pyramid plunder eye of horus.png|thumb|right|140px|The eye of horus]] |
||
| − | *When examining the Grand Gold Chest, it will say "Anyone lost an ark?" This is an allusion to the movie ''[[wikipedia:Raiders of the Lost Ark|Raiders of the Lost Ark]]'' which uses the account of the Biblical Ark as its main storyline. After looting and examining it you will receive the message "Phew, no evil ghosts in there". This is an allusion to the same movie. Another possibility is that "Anyone lost an ark?" could also allude to the Biblical Ark of the Covenant which held the 10 Commandments. |
||
| + | * In the entry area of some tombs, including the first, fourth, and fifth ones, there is what appears to be an {{Wp|Eye of Horus}}, a real-life {{Wp|Egyptian hieroglyph}}. The entrance to Sophanem also has an Eye of Horus. |
||
| − | [[File:Pyramid plunder eye of horus.png|140px|thumb|right|The eye of horus.]] |
||
| + | * When examining the Grand Gold Chest, it will say "Anyone lost an ark?" This is an allusion to the movie ''{{Wp|Raiders of the Lost Ark}}'' which uses the account of the Biblical Ark as its main storyline. After looting, the examine text reads "Phew, no evil ghosts in there". This is an allusion to the same movie. |
||
| − | *In the entry area of some tombs, including the first, fourth, and fifth ones, there is what appears to be an [[Wikipedia:Eye of horus|Eye of Horus]], a real-life [[Wikipedia:Egyptian hieroglyphs|Egyptian hieroglyph]]. The entrance to Sophanem also has an Eye of Horus. |
||
| + | * Previously, when a player found a [[Pharaoh's sceptre]] all players would be expelled from the pyramid. |
||
| − | *Prior to an update on [[7 November]] [[2014]], [[Mummy|Mummies]] would first target the player who triggered them but could and often would attack other players, too. Opening sarcophagi and not killing the mummy that spawned was generally frowned upon. They are now only aggressive to the player who opens its sarcophagus. |
||
| + | * Prior to an update on [[7 November]] [[2014]], [[Mummy|Mummies]] would first target the player who triggered them but could and often would attack other players, too. Opening sarcophagi and not killing the mummy that spawned was generally frowned upon. They are now only aggressive to the player who opens its sarcophagus. |
||
| + | ==References== |
||
| − | {{Pyramid Plunder}} |
||
| − | {{ |
+ | {{reflist}} |
| − | {{minigames}} |
||
| + | {{Pyramid Plunder}} |
||
| + | {{Minigames}} |
||
| + | {{Dungeons}} |
||
[[fr:Le Pillage de Pyramide]] |
[[fr:Le Pillage de Pyramide]] |
||
[[nl:Pyramid Plunder]] |
[[nl:Pyramid Plunder]] |
||
[[fi:Pyramid Plunder]] |
[[fi:Pyramid Plunder]] |
||
| + | [[pt:Pilhagem à Pirâmide]] |
||
[[Category:Thieving]] |
[[Category:Thieving]] |
||
[[Category:Kharidian Desert]] |
[[Category:Kharidian Desert]] |
||
| + | [[Category:Sophanem]] |
||
Latest revision as of 19:30, 3 March 2019
| |
| Release date | 17 July 2006 (Update) |
|---|---|
| Members | Yes |
| Location | Sophanem |
| Participants | 1 |
| Skills involved | Thieving |
| Reward currency | None |
| In spotlight rotation | No |
| Hiscores | No |
| Tutorial | No |
| Custodians | Guardian Mummy |
| Music unlocked | Tomb Raider |
| Developers | Unknown edit |

Pyramid Plunder is a Thieving minigame located in the city of Sophanem at the far southern reaches of the Kharidian Desert. Inside Sophanem, the Jalsavrah Pyramid can be found with four anonymous looking doors; access to the minigame can be found behind one of the doors, guarded by the Guardian mummy.
During the minigame, the player has five minutes to plunder the contents of Jalsavrah. The pyramid consists of eight rooms, each requiring progressively higher Thieving levels to enter and loot. Artefacts pillaged from the rooms range from ivory combs to jewelled diamond statuettes, with the most valuable artefacts found deepest in the pyramid.
Rarely, players may find a Pharaoh's sceptre within a grand gold chest or within a sarcophagus inside Jalsvarah. A sceptre of the gods can very rarely be plundered from the engraved sarcophagus in the 8th room, requiring 91 Thieving to access and 75 Runecrafting to pry it open. Pieces of the rare Black ibis outfit can be found within the urns or sarcophagi with the pyramid.
Requirements
- Access to the city of Sophanem
- Having started the quest Icthlarin's Little Helper, or teleporting to Jalsavrah via a Pharaoh's sceptre
- 21
 Thieving
Recommendations
- Completion of the quest Contact!; unlocks access to the bank within Sophanem
- Completion of the quest The Feud; reduced magic carpet fees
- Completion of the quest The Light Within; unlocks Crystal Mask and Light Form
- A Pharaoh's sceptre or Sceptre of the gods; unlocks teleports to the Guardian mummy
- Completion of the hard Desert Tasks; doubles teleport charges on sceptres and reduced chance of Scarabs and Mummies spawning
Quick guide
Teleport to Al Kharid, and use the magic carpet network to get to Sophanem. Speak with Tarik south of the Jalsavrah Pyramid near the northern gates of the city. He'll explain the pyramid, the dangers within, and explain the collection and selling of artefacts to Simon Templeton.
Quick guide:
- Wear as many of the given items as possible, and carry food and a weapon.
- Travel to the northern pyramid in Sophanem.
- Enter one of the "anonymous looking doors" on the pyramid until you find the Guardian mummy.
- Right-click the Guardian mummy and Start-minigame (or talk to him if its your first time).
- The game is divided into rooms, where the XP gains increase the deeper you go.
- Since players have only 5 minutes to loot, it is recommended that players run through all the rooms except the last one or two rooms that they can do at their level.
- Loot as much as you can in the 5 minutes that you are given.
When you enter a room:
- Pass the Spear trap at the entrance.
- To loot, simply click on the urns, and optionally the Grand gold chest and Sarcophagus.
- To move to the next room, move your cursor along the walls and Pick-lock on all the doors until you find the entrance to the next room.
Plundering

As soon as the player starts the minigame a timer will appear on screen. Players have five minutes to plunder as many artefacts from the pyramid as they can before the timer is depleted and the Guardian mummy teleports the player out.
Inside Jalsavrah, the player will find a room that contains the door through which they entered, a speartrap, urns, a golden chest, a sarcophagus, an exit door, and four doors leading to the next room, of which three leads to a dead end. There are eight rooms in total, the first requiring 21 or higher Thieving to enter. Each subsequent room requires ten more levels than the previous room, with the final room requiring 91 or higher Thieving.
Urns

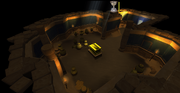
A chamber inside the pyramid.
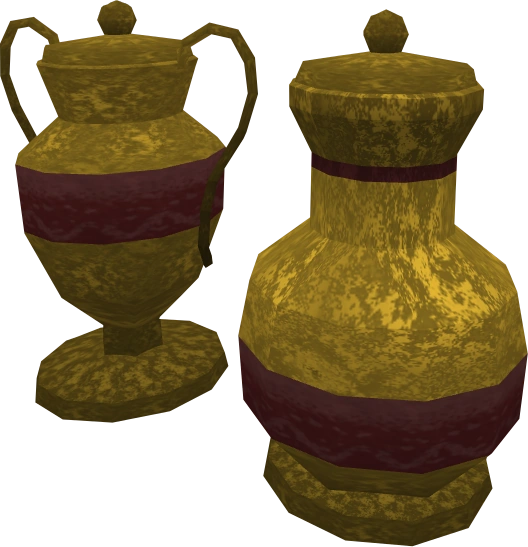
Each room inside Jalsavrah has 13 urns, with the exception of room 3 which only has 12 urns. Players may choose to search or check urns.
Checking an urn will check for traps. On successful checks, player will find a snake inside the urn. It may then be charmed if the player has a snake charm allowing the player to search the urn for artefacts without fear of activating a trap.
Both searching from and checking urns earn the player Thieving experience, but charming snakes will not. If charming snakes, experience awarded from successfully looting an artefact will be reduced by 33%. Unless charmed, a snake may bite the player, poisoning them.
Searching is much slower than stealing, and the rewards from urns are generally poorer than from the golden chest and sarcophagus. Rewards also get better the further one ventures into the pyramid.
The Menaphyrite gem may be obtained rarely while looting urns.
Grand golden chests
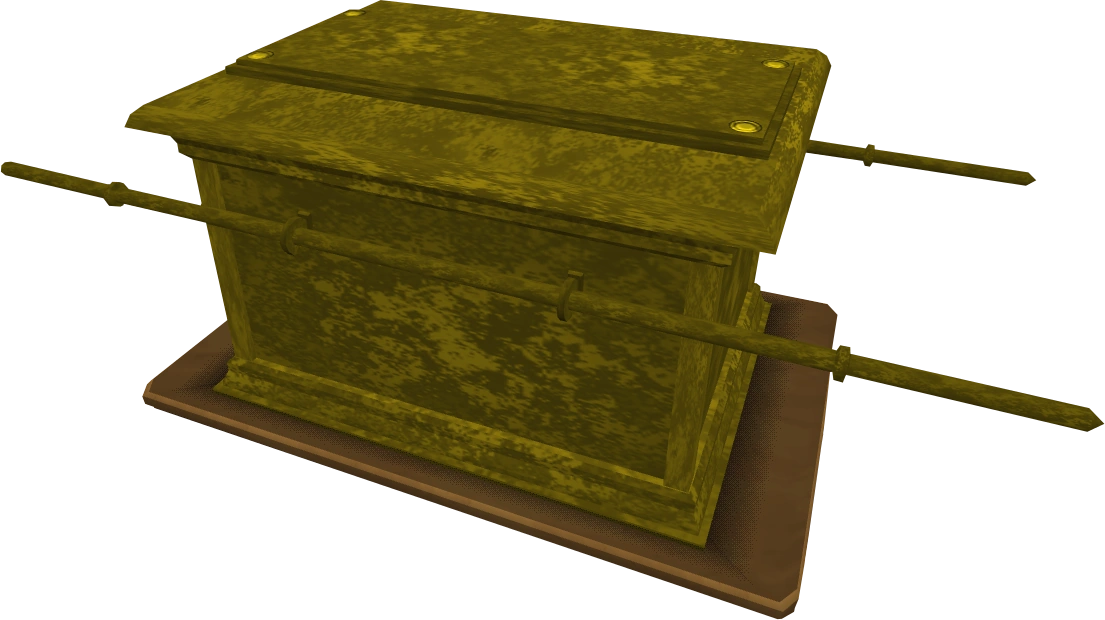
In the centre of each room the player can find golden chest. Looting the chest will award the player with higher value artefacts than they would find the urns nearby. A Pharaoh's sceptre may rarely be obtained from golden chests; if a sceptre is found, the Guardian mummy will appear and escort the player out of the pyramid, ending their plunder.
Occasionally the chest may contain an aggressive level 112 scarab swarm, which attack extremely quick and poison. Scarab swarms will not follow players to the next room of the pyramid. Chests are often saved until everything else in the room has been looted, as scarabs can slow down the process of looting urns.
Pharaoh's sarcophagus
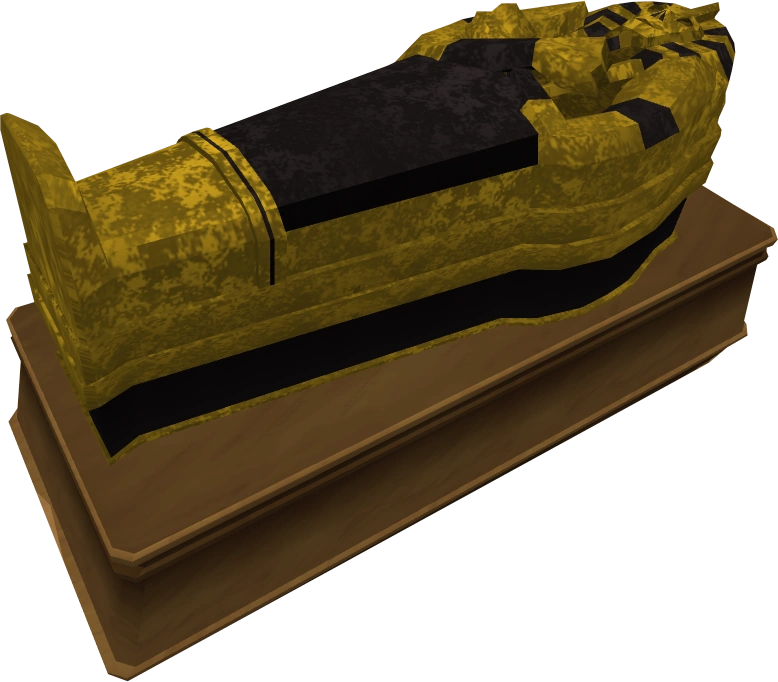
A sarcophagus can be found in each room of the pyramid. Opening sarcophagi awards the player with Strength experience and artefacts, with higher value artefacts and experience obtained deeper within the pyramid.
Opening sarcophagi can take a fair amount of time, and may awaken a level 70 mummy. Players can open the sarcophagus if being attacked without interruption.
There is a chance that Jenifurr will appear when opening this sarcophagus. She belongs to the Cats of Menaphos.
Engraved sarcophagus
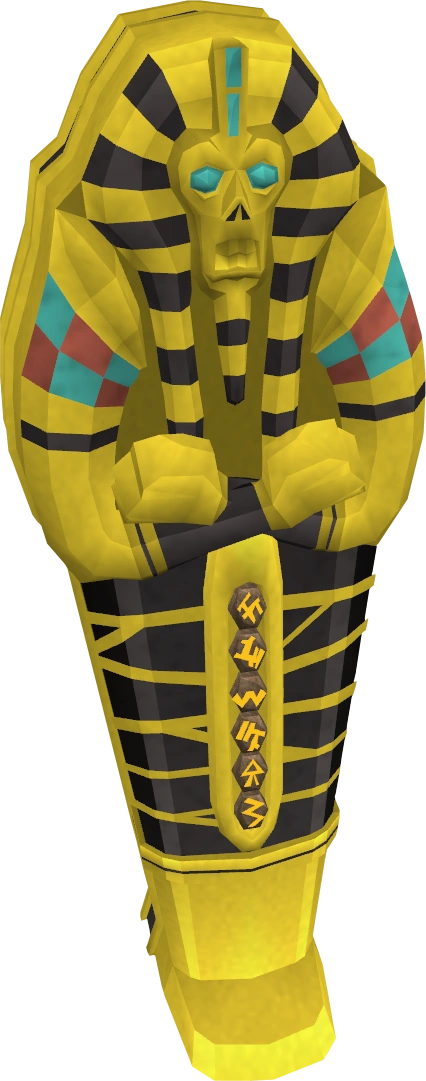
Located in the eighth room, the engraved sarcophagus requires 91 Thieving and 75 Runecrafting to loot. When opened, the player has a chance of receiving a jewelled diamond statuette, a pharaoh's sceptre, a sceptre of the gods, or a black ibis outfit piece.
Opening the engraved sarcophagus awards Runecrafting experience. Just like with the other sarcophagi, players may awaken a mummy upon opening.
Spear traps
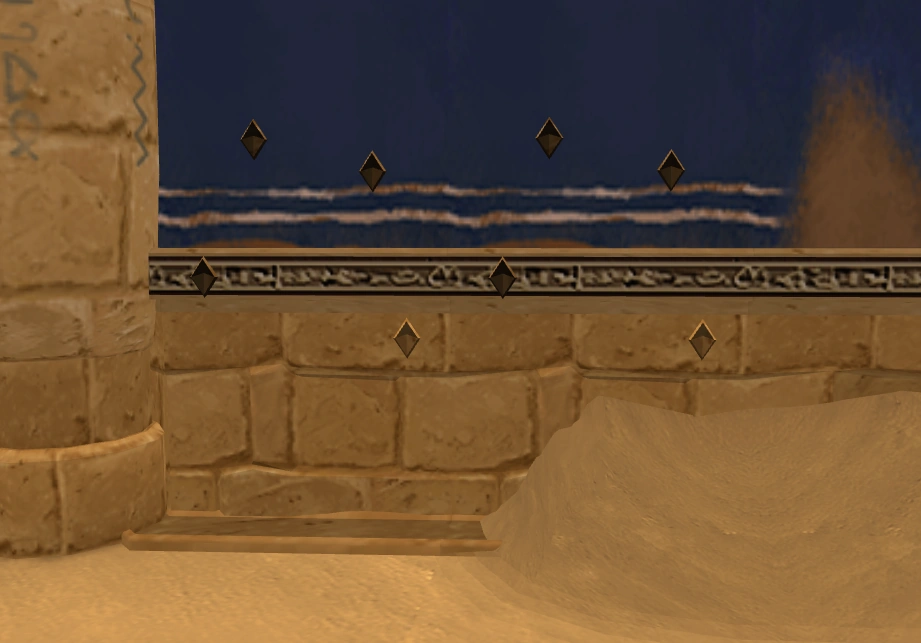

A spear trap can be seen within the wall.
The corridor to each room will contain a spear trap, taking up two game squares on each of the walls. Clicking on either of the closest squares will attempt to deactivate the trap, allowing the player to pass by unharmed if successful.
Players will be damaged by the spears if they attempt to walk into the room without deactivating the trap, fail to disarm the trap, or click on either of the farther squares.
Tomb doors
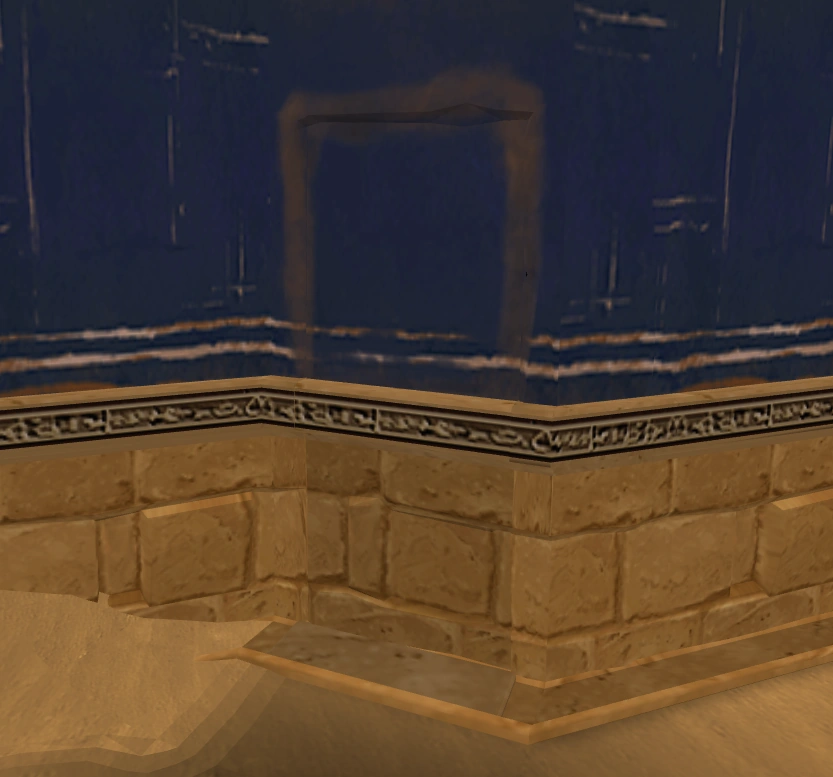
Faint signs of a door can be seen behind worn paint.
Four locked tomb doors are hidden in the walls of each room, only one of which leads to the next room. Players must successfully unlock the tomb doors until the correct one is found, allowing them to reach the next room.
Successfully unlocking a tomb door awards some Thieving experience. A lockpick or hair clip will significantly reduce the chance of the player failing to unlock the door, at the cost of halving the experience gained.
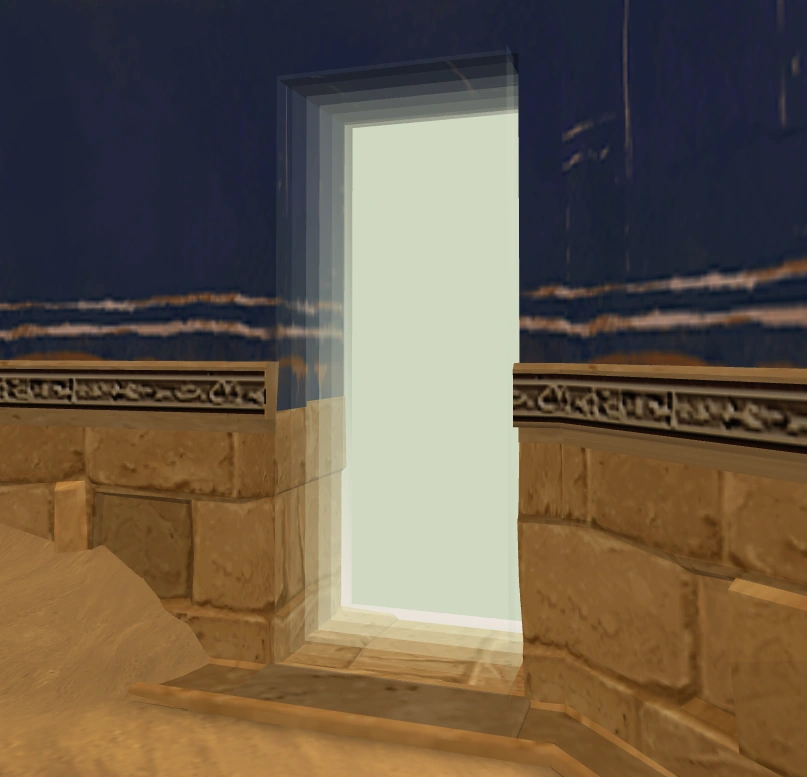

A quick escape from the dangers within.
The door leading to the next room will change each time a player joins the minigame. It is possible for groups of players to play the minigame together and quickly search all doors in a room at the same time. The other players can then follow the player who found the correct door.
Exit doors
Each room has an exit door, allowing for a quick escape via the right-click menu. Monsters will not follow players through the doors.
Damage
Failing obstacle and trap attempts will result in the player taking damage; the minimum a player will take from failing to loot urns is 50 damage. Damage is scaled, based the players maximum life points, increasing in damage as the player progresses deeper in the pyramid.
Room number Damage values 1 1% of maximum life points 2 1% of maximum life points 3 1% of maximum life points 4 1% of maximum life points 5 1.5% of maximum life points 6 1.5% of maximum life points 7 2% of maximum life points 8 3% of maximum life points
Strategies
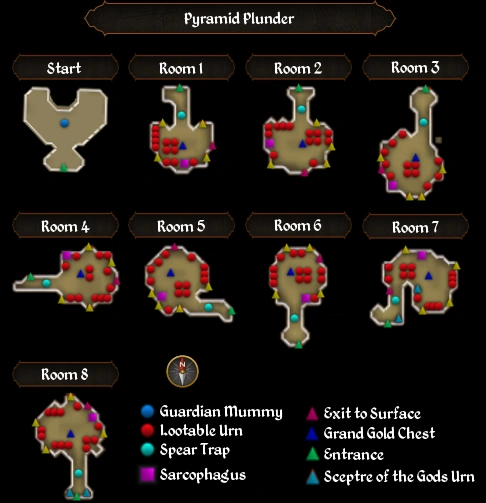
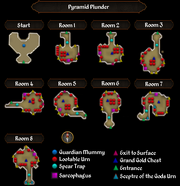
A map of the pyramid chambers. (click to view a larger version)
It is generally recommended for players to search urns in only the two highest level rooms they can access; to maximise experience rates the player should attempt to loot every urn in their highest accessible room, and as many urns from the second highest room as time would allow. Players using this method should always be aware of their time spent in the pyramid; it is advisable to move on to the last room after half of their time is remaining.
When the player is in their highest level room and time is running out, prioritise looting the golden chest for a chance at better rewards. If the player still has time remaining after, resume plundering urns until kicked out.
After completion of The Light Within quest players can use of the Crystal Mask spell in conjunction with the Light Form prayer to reduce the rate of failing when checking and searching urns significantly. Wearing Prayer boosting items and drinking a Prayer renewal potion will allow the player to do multiple trips into the pyramid without the need of banking, or recharging their Prayer points.
Healing
Unless the player plans to teleport to a bank after each pyramid plunder, food or a healing familiar is the only item necessary to play the minigame for extended periods of time. It is possible for mid-to-high levelled players to make it through several rounds without needing to heal. The equipment below is needed to withstand the damage from monsters and poison during a plundering trip. If the player wishes to reduce banking time, one full inventory of food and potions can last from four to sixteen games depending on how often the player consumes the items. To save time, it is best to eat in between games unless absolutely necessary.
| Image | Object | Explanation |
|---|---|---|
| Food | Monkfish or sharks are recommended unless the player has a better healing method. Banking is the quickest and cheapest healing method. | |
| Enhanced Excalibur | The Enhanced Excalibur will heal the player for 20% of their Life points over 20 seconds when activated; 40% over 40 seconds if the elite Seers' Village Tasks are complete. It can be activated via right-click, even if not equipped. | |
| Phoenix necklace | Heals the player for 30% of their maximum life points if the player's health drops below 20%. | |
| Summoning familiar | A void spinner, bunyip, or a unicorn stallion can be used to restore life points via special move or primary effects. | |
| Banks | If all else fails, the player can always use the bank located just east of the pyramid (after Contact!.) Health regenerates within seconds of climbing down the ladder. This is very helpful and can cut all costs and or prayer usage down to its minimum. |
Equipment
| Anti-poison totem | Held in the off-hand or worn in the pocket slot, this provides immunity to poison; requires 60 Defence, 70 Herblore, and 60 Dungeoneering to wield. Bought from Marmaros for 44,000 Dungeoneering tokens | |
| Saradomin or Zamorak warpriest armour | This armour provides a small chance to negate most of the damage received from a failure. Armadyl, Bandos, and Tuska warpriest armours do not have this effect. | |
| Black ibis outfit | A very rare outfit, the pieces of which can be obtained by looting urns and sarcophagi. Each of the 4 pieces boost Thieving experience by 1%; the complete set boosts an additional percent, totaling 5%. | |
| Trahaearn exoskeleton set | A reward from the Plague's End quest, it gives a 25% chance to nullify damage received when looting urns. The set provides bonus experience if the Black ibis outfit is owned. | |
| Master camouflage outfit | An outfit crafted through Invention, the outfit and the sets that make it up offer a 5–7% increased chance of not being bitten by snakes, an increased chance to pass doors, and an increased chance of finding Ibis clothing and additional Sceptres of the gods. Camouflage outfits retain the abilities of both Black ibis and Exoskeleton sets if owned by the player. |
Helpful items
| Image | Method | Explanation |
|---|---|---|
| Sceptre of the gods | Having the Sceptre equip will offer more urns to be looted, and increase the players odds of finding pieces of Black Ibis. | |
| Luck items | Highly recommended, while wearing the luck items the player's chance of finding a Pharaoh's sceptre, Black ibis outfit and Jewelled golden statuettes is increased. | |
| Lockpick | Highly recommend, with a lockpick in the players inventory the players chance to fail unlocking a tomb door is significantly reduced. Alternatively, players who have completed the quest King's Ransom may use Hair clip also works. | |
| Snake charm | Can be used to distract the snakes that reside in the urns. | |
| Desert amulet 3 or 4 | Once obtained (not required to be worn), it reduces the chance of Mummies & Scarabs spawning, and doubles charges on the pharaoh's sceptre and sceptre of the gods. | |
| Summoning familiar | The special move of a Magpie (level 47 Summoning) or an Abyssal lurker (level 62 Summoning) gives temporary boosts of 2 and 4 Thieving levels, respectively. Players should use the special move in the last room that they are able to enter. The special move will not give temporary access to a pyramid level above the character's current Thieving level. | |
| Five-finger discount | Increases chances of successfully looting urns, lasting for 1 hour; recharge takes 3 hours. | |
| Crystal Mask and Light Form | Greatly reduces chances to get caught, almost to 0%. Supplies to keep up Prayer points will need to be brought along if not banking or recharging prayer at an altar. |
Teleports
Quick banking can be achieved by using a ring of duelling, ring of kinship, or TokKul-Zo to teleport to nearby banks at Castle Wars, Daemonheim, or TzHaar City respectively. After, a Pharaoh's sceptre or Sceptre of the gods to return to the pyramid if possible. If the player has completed the Contact! quest, use of the bank in Sophanem is another option. A summoning obelisk can be found along the east wall outside Sophanem, and an altar just southwest of the pyramid.
| Image | Method | Explanation |
|---|---|---|
| Sceptre of the gods or Pharaoh's sceptre | Highly recommended, after completing a Pyramid Plunder round the player may use the Jalsavrah teleport to teleport directly to the starting room, making it the best way to reach the minigame. | |
| Ring of dueling | Teleporting to Castle Wars places the player near a bank. | |
| Tokkul-zo | Similar to Ring of dueling, but with unlimited teleportation charges. A summoning obelisk and bank can be found in the Main Plaza. | |
| Skull of Remembrance | Provides an unlimited teleport near a bank. | |
| Desert amulet 3 or 4 | Provides an unlimited teleport near a bank; is kept on death, should the player die. | |
| Emergency teleport | An emergency escape if life points run low. Players with good armour, high Defence, or plenty of food should not need this. | |
| Ardougne cloak 3 or 4 | Offers a high Prayer bonus and unlimited teleports to the Ardougne Monastery to recharge Prayer points. |
Tips
- While using Thieving boosts can make looting easier, they will not allow players to reach a room above their Thieving level; e.g. being level 90 and boosting to 91 will not allow players in the final room.
- Scarab swarms will only target the player who triggered them. They will ignore other players, allowing players to safely pass them without getting attacked.
- Sometimes players may open all four doors in the room to finding dead ends; this happens when another player enters the minigame, causing the tomb doors to shift. Recheck the tomb doors again to find the correct path.
- The correct Tomb Door advancing to the next room and the Anonymous looking door leading to the mummy is the same for all players. So players may follow another player or utilise teamwork for the correct path.
- Only Grand golden chests and Engraved sarcophagus may contain the pharaoh's sceptre.
Rewards


A player teleporting with the Pharaoh's sceptre.
When looting urns, sarcophagi, and chests, players will find various artefacts which may be sold on the Grand Exchange, or traded to Simon Templeton for coins. After completion of the quest Dealing with Scabaras, Simon will purchase noted artefacts from the player.
Simon Templeton's offer Type Ivory Pottery Stone Gold Jewelled
GoldenJewelled
DiamondComb 50
N/A N/A N/A N/A N/A Seal N/A N/A 150 750N/A N/A Scarab N/A 75 175 1,000N/A N/A Statuette N/A 100 200 1,250 7,500 12,500
Grand Exchange value Type Ivory Pottery Stone Gold Jewelled
GoldenJewelled
DiamondComb 2,658N/A N/A N/A N/A N/A Seal N/A N/A 151 1,330N/A N/A Scarab N/A 224 166 1,298N/A N/A Statuette N/A 96 193 2,769 27,838N/A
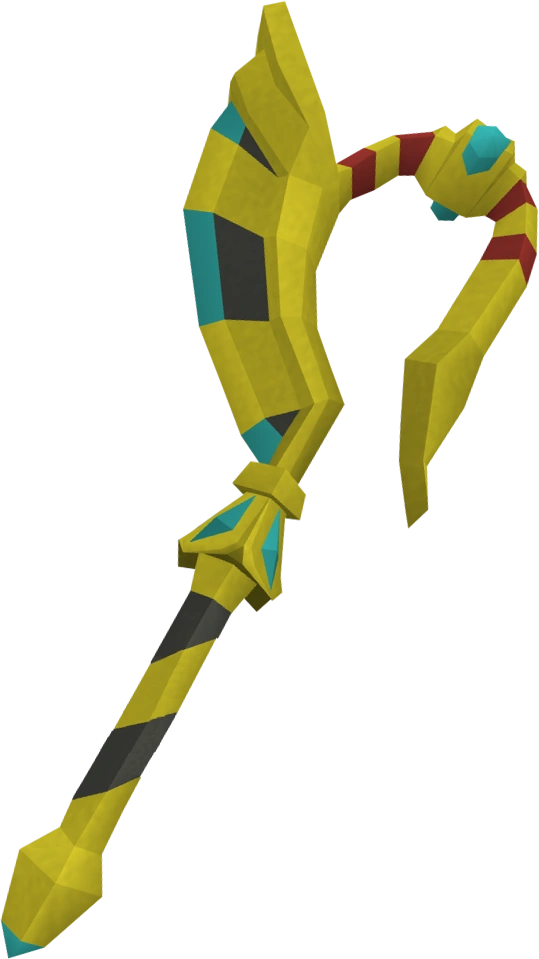

Occasionally, players may also find the Pharaoh's sceptre in one of the Grand Gold Chests or Sarcophagi, worth 1,806,744 coins. The chance of finding a sceptre is 0.1% (or 1/1000) if the player does not spawn a mummy or scarab swarm, and the chance is better in higher rooms.[1] Immediately after finding a sceptre the player will be expelled from the pyramid. Players inside the pyramid will see an Annoyed guardian mummy standing beside the chest in each room when this happens, and will announce the fact.
Players may also find a Sceptre of the gods inside the engraved sarcophagus. It has the same uses as a Pharaoh's sceptre, but with 10 teleport charges (20 with completion of hard Desert tasks), and when equipped grants players a greater chance of finding black ibis clothes.
Black ibis outfit

A player wearing the Black ibis outfit.
Rarely when looting urns and sarcophagi within Pyramid Plunder, players may receive a piece of the Black ibis outfit. When wearing pieces of this outfit the player will gain additional Thieving experience, up to 5% when wearing the whole set. Wielding a Sceptre of the gods will increase the drop rate of outfit pieces. If the player finds a piece of black ibis with a full inventory, the equipment will replace an artefact in their inventory. If an artefact cannot be replaced, the piece of equipment will fall to the ground.
Other
Upon looting an urn, sarcophagus or chest, a cat named Jenifurr may spawn. After completing The Jack of Spades and speaking to assistant librarian Subotai, she may be registered in the Menaphos journal, and talked to as well. The gemstone menaphyrite may be rarely looted from urns. One may uncommonly receive a small Menaphite gift offering as well.
Experience rates
| Experience per hour | |
|---|---|
| 21 | 17,000 |
| 31 | 20,000 |
| 51 | 54,000 |
| 61 | 71,000 |
| 71 | 100,000–118,000 |
| 81 | 158,000 |
| 99 | 195,000–241,000[2] |
Experience table
| Room | |||||||
|---|---|---|---|---|---|---|---|
| 21 | #1 | 20 | 60 (40) | 40 | 20 | 40 (20) | 10 |
| 31 | #2 | 30 | 90 (60) | 60 | 30 | 60 (30) | 10 |
| 41 | #3 | 50 | 150 (100) | 100 | 50 | 100 (50) | 10 |
| 51 | #4 | 70 | 215 (140) | 140 | 70 | 140 (70) | 10 |
| 61 | #5 | 100 | 300 (200) | 200 | 100 | 200 (100) | 10 |
| 71 | #6 | 150 | 450 (300) | 300 | 150 | 300 (150) | 10 |
| 81 | #7 | 225 | 675 (450) | 450 | 225 | 450 (225) | 10 |
| 91 | #8 | 275 | 825 (550) | 550 | 275 | N/A | 10 |
Achievement
- Careful, There Are Snakes ( 20) - Loot 20 urns in a single run of Pyramid Plunder without disturbing a snake.
Trivia
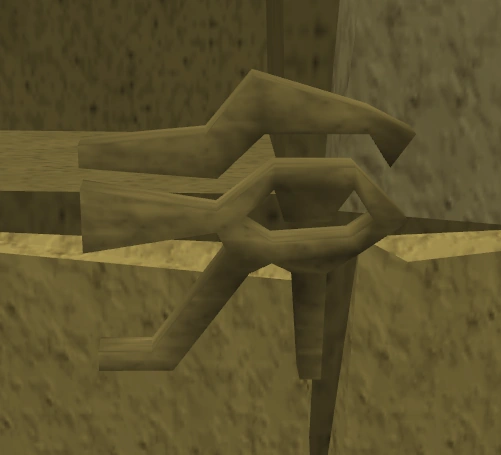

The eye of horus
- In the entry area of some tombs, including the first, fourth, and fifth ones, there is what appears to be an Eye of Horus, a real-life Egyptian hieroglyph. The entrance to Sophanem also has an Eye of Horus.
- When examining the Grand Gold Chest, it will say "Anyone lost an ark?" This is an allusion to the movie Raiders of the Lost Ark which uses the account of the Biblical Ark as its main storyline. After looting, the examine text reads "Phew, no evil ghosts in there". This is an allusion to the same movie.
- Previously, when a player found a Pharaoh's sceptre all players would be expelled from the pyramid.
- Prior to an update on 7 November 2014, Mummies would first target the player who triggered them but could and often would attack other players, too. Opening sarcophagi and not killing the mummy that spawned was generally frowned upon. They are now only aggressive to the player who opens its sarcophagus.
References
| Team | |
| Solo |
|
| PvP |
|
| Removed |
|
| Asgarnia |
|
| Kandarin |
|
| Karamja |
|
| Kharidian Desert |
|
| Misthalin |
|
| Morytania |
|
| Fremennik Province |
|
| Feldip Hills |
|
| Wilderness |
|
| Troll Country & The North |
|
| Keldagrim |
|
| Tirannwn & Galarpos |
|
| Elite dungeons |
|
| Others |
|