Nomad's Requiem is a Grandmaster quest, featuring an investigation into the activities of Nomad, the creator of Soul Wars. At the time of its release, the final boss fight was considered to be the hardest of any quest in the game, a title which some consider it still holds.
The dark underbelly of Soul Wars is visible to anyone who looks hard enough: souls are collected and filtered through a giant obelisk; avatars of both nature and destruction are called into being and then slaughtered; a single man benefits from the exploits of dozens of adventurers.
Zimberfizz is aware of this, and has also noted a change in Nomad. He's been spending more and more time in his tent, and Zimberfizz wants you to investigate just what Nomad is up to.
Having very high (75+) stats in all combat disciplines, unless you're particularly good at combat. Use high defence armour when fighting Nomad. A shield is highly recommended.
Items required
Items from the tool belt are not listed unless they do not work or are not automatically added.
NOTE: An amount of Ascendancy mines from the Dominion Towercan hurt Nomad for 2000 life points of damage. As such, if one has the time and has tried to battle him before but failed, it may be worth bringing some of them. Beware though as they do not appear at your gravestone at death. But since you respawn next to your gravestone, it is advised to make them one of the three kept items.
Nomad (Level 699) (you will respawn very close to your gravestone if you die during this fight)
Zimberfizz' Suspicions
To start the quest, speak with Zimberfizz at Soul Wars. He will comment that Nomad is being sneaky at night, coming out of his tent all sparkly. He suspects Nomad is up to some evil schemes. Agree to help. He will ask to investigate Nomad's tent, who will interrupt the conversation and then teleport away for "some business to attend". Afterwards, inspect Nomad's tent and you will discover a trapdoor. Climb down to see a cut-scene.
Nomad's Temple
Nomad will approach three characters from While Guthix Sleeps, an Elite Dark Mage, warrior and ranger, who are angry at him. Nomad comments on them, saying he had expected some stronger people. Then, the provoked warrior will approach Nomad and hit him, although he does no damage. Nomad laughs and kills the man with a strike of his staff. The mage is scared and wants to back out, although Nomad also prepares a spell to kill him. The mage starts to pray, but Nomad easily hits through the prayer. The enraged ranger says that the "master" will not be happy with Nomad's treachery and sets off, although he is frozen by Nomad, who also starts to load a powerful spell. The ranger fires a few arrows but before any damage can be done, Nomad unleashes his spell that hits almost 1000 damage on the ranger, who dies. Nomad comments on the easiness of the fight and starts to depart.
Nomad meets his opponents.
Nomad kills the elite warrior.
Nomad kills the elite mage.
Nomad freezes the elite ranger.
Nomad kills the elite ranger.
Talk to Nomad, initially he thinks you are an assassin. He will warn you not to return again and forget what you have seen, or you will not get out of the temple. He then teleports away.
Optionally return and talk to Zimberfizz, and he will tell you to return to Nomad's Temple and thwart whatever evil scheme Nomad is up to.
Down there, you must find a way to enter the arcane doorway (the white gateway) in the main room. This is done by disabling the power source for both cables.
Water Channel Rooms
The second pillar must be pushed to get the water flowing.
This is one working combination, but it is not the only one.
Go in the south-west room. Here, water must be directed to flow a certain way by moving pillars. However, water must first be sent to this room. (If you move the pillars before directing water to this room, the pillars reset when you leave the room.) Beware of the aggressive Spectral attendants in this room. The pattern found on the top of each pillar shows which water channels are opened.
Note that any defeated attendants will not respawn (but they will respawn if you log off), and it is extremely recommended to defeat them, at least on the bottom floor (where you spend the longest duration). To defeat them, it is advised you use Protect from Melee or safe-spot-range/maging (by trapping them behind a drain).
Go up the ladder in the south-east part of the room. Pull both levers. Beware of the spectral attendants in this room. Note that there is mineable rubble, but that the flow does not need to pass into that chamber until the below puzzle is completed.
Go up the ladder in the north-east part of the room and push both pillars so that they cover the drains. Again, beware of the spectral attendants in this room.
Go down to the middle floor and check that water is flowing to the south channel in the room. If it is not, work the levers until it is.
Go down to the bottom room to begin the puzzle. The aim of the puzzle is to have all 3 streams at the northern end (flowing into the machine) activated. The number of open channels feeding the flowers does not matter. There may be other ways to solve the waterflow problem, but if you put all the "+" pillars in the three spots near the machine you will have an easier time solving the puzzle.
The shapes on the top of each pillar shows the direction of the waFile:Trap.png
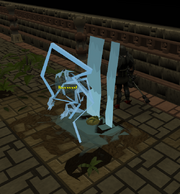
Trap for all creatures
ter flow beneath it. Use this to determine which direction a given pillars will allow the water to flow. When you get the 'Yes, the device looks to be out of order now' message in the chatbox then you have disabled the device.
You can trap all the creatures, on the bottom floor, by getting them to follow you and luring round the device at the north of the room. This saves prayer if you are unable to kill them.
Solution to the waterflow puzzle
Centre, west statue - push east.
North, west statue - push south.
North, centre statue - push west.
North, east statue - push west.
Centre, east statue - push north.
South, east statue - push north.
South, centre statue - push east.
Centre, centre statue - push south.
North, centre statue - push south.
North, east statue - push west.
Centre, east statue - push north.
South, east statue - push north.
South, centre statue - push east.
South, west statue - push east.
Centre, west statue - push south.
North, west statue - push south.
North, centre statue - push west.
North, east statue - push west.
Centre, east statue - push north.
South, east statue - push north.
Elemental Creature Power Room
A player luring an elemental creature under the waterfall and killing it.
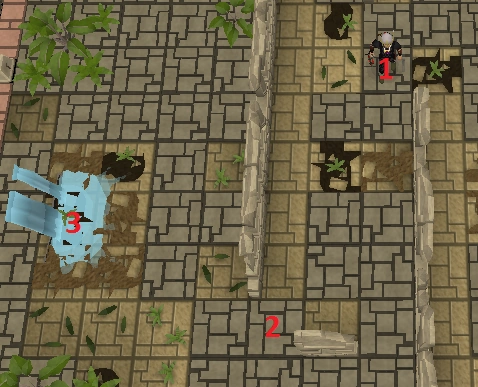
Go back to the middle (2nd) floor in the Water Channel rooms (south west door in the entrance).
Mine the rubble next to the east channel. Pull the south lever once to change the water flow to the east channel. This will cause a waterfall to form in the southeast room—it is no longer needed in the south-west room because the machine is broken.
Note: If there is only a trickle of water coming out of the ceiling in the south-east room, you have not worked the levers correctly.
Go to the southeast room and get several pieces of elemental fuel out of the fuel hopper. The Spectral tenders in this room are not aggressive, unlike the spectral attendants in the other rooms. If you do not have room, bank your food - it is not needed here.
The suggested spots to drop the Elemental fuel.
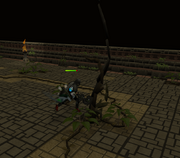
Use the fuel ("place elemental fuel") to lure three elemental creatures out of the device in the room and onto the water flowing out of the ceiling. Only one creature can be lured at time. To lure a creature, place a piece of fuel on the floor near the machine. As it comes out and eats it, place another piece of fuel nearer the waterfall. You can easily space the food 4 squares apart - even diagonally. Continue luring the creature until you can place a piece of fuel right in the waterfall itself (right click the waterfall's square and choose 'Walk here' to get there) or simply place a piece of fuel on the other side of the waterfall. The water destroys the creature. If a creature eats a piece of fuel before you place the next piece, you have only 2–3 seconds to place the fuel before it gives up and returns to the device. In this case, you must begin again with another creature. Be aware that the creatures try to move in straight lines to the fuel, so obstacles like walls between the fuel and the creature will cause the creature to get stuck. Repeat this procedure until all three creatures are destroyed.
Return to the room with the arcane door and go through the door. In this new room, there is another arcane door to the north, again protected by two power cables that must be turned off. Beware of the aggressive Spectral worshippers in this area.
Sentient Vines Tunnels
One of the four roots that must be destroyed.
A problem on your way.
The Decaying Avatar attacks!
Go west and go through a door in the west wall. Go west down a corridor until you come to the first room. Beware of the aggressive Spectral cultivators in this area. A set of animated roots guard the power device, preventing you from getting to it. If you try to attack the roots, you discover that they are unassailable when bunched like this. You must find a way to unbunch them.
Continue west following the vines on the floor. Beware of the spectral cultivators. In four places, find and destroy the individual roots that stick up from the ground. You hear a loud roar when you destroy the fourth root.
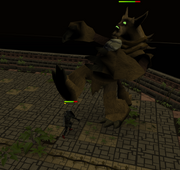
Return to the room with the power device. A level 98 Decaying avatar has appeared there. Kill it (some strategies can be found here). When fighting the avatar, it will try to heal using roots that grow from the floor during the battle. Destroy the root before it can eat it and it won't heal. If it eats a root, it heals to full health, prolonging the battle. (The first root appears when the avatar reaches 3/4 life points, the second at 1/2, and the third at 1/4.) Don't worry too much if the avatar does get to the roots; after the third root, no more appear. The roots appear in the following order: NW, SE and NE of the room. A good tip would be to position yourself in between the area the root will appear and the avatar when fighting him. This way you have a good chance to melee the root and destroy it before the avatar gets to it. When the avatar is killed, the waving roots disappear and the power device is automatically damaged. Another good tip would be to use the Protect from Melee or Deflect Melee prayer and use enchanted ruby bolts, since that can deal up to 2000 damage. Since the avatar does not hit through prayer, one only has to bring prayer potions and simple melee gear to defeat the avatar. If using a cannon, you can position yourself so the avatar stands directly overtop the cannon, that way it will constantly be hit by cannonfire. Players with higher combat levels shouldn't have too much trouble with the avatar, although it's advised to still come prepared. If using ranged or mage you can use the smaller tunnels to safespot the decaying avatar.
If you leave the fight before killing the avatar (for example, by teleporting out of the temple), you will have to start the fight from the beginning again, but you won't have to destroy the four roots to get the avatar to appear. However, if you log out of the game in the avatar arena, it resets and you have to destroy all the roots again to face the avatar.
Smoke Room
Items to bring for the next section: any magic weapon; e.g. a wand or staff, fire runes, also make sure to bring equipment with a high prayer bonus (if you plan to use Piety), and possibly food/restore potions (if you are not using Piety). Although it may be a good idea to bring food and restore potions anyway, just in case your prayer runs out. A prayer potion or two may also help. If not using Piety, your stats will be rapidly drained, and you may be unable to ignite the barrels due to your magic being drained below level 75.
Return to the arcane door area and go east. At the doorway in the east wall, talk to the dying knight and then search his body when he dies. You get a clue about being pious, which means the Piety prayer will help you in the next room, so high prayer boosting gear is recommended.
If you want to use Piety here, make sure your prayer book is set to normal. Now turn on Piety (optional but highly recommended) and enter the east room. Without Piety activated, the haze in the east room drains ten life points as well as prayer and other stats, every half-second. A facemask does not protect you, but Piety prevents damage and stat drain. You may want to change your graphics settings to safe mode, as it can be highly difficult to see in HD.
Making a bridge out of Stone slabs.
The western part of the room contains several aggressive Corruption beasts, and Protect from Melee or Deflect Melee will help reduce the damage from their attacks. You do not have to kill the beasts, but each one you kill 'uplifts your spirit' which fully recharges your prayer points.
Collect the 5 stone slabs scattered throughout the room and build a bridge across the central pool, at the point where two slabs are already in the pool. Jump to the furthest slab, then left-click ("Place slab") on the slabs in your inventory.
Using a fire spell on a barrel, causing an explosion which destroys the machine.
When the bridge is built, cross to the eastern part of the room. No beasts are here, so turn off your protection prayer. Use the right-click option Ignite on one of the explosive barrels to detonate them and destroy the machine (previously it was necessary to cast fire wave on the barrels.) You must still have runes for a fire spell in order to ignite the barrels. Some of the spirits surrounding the main chamber drop runes for the spell, should you forget to bring your own.
Return to the arcane door area. You can now enter the next arcane doorway and face Nomad. If you are not ready, go stock up first.
The Ultimate Showdown!
If you die, you respawn at Soul Wars, with your gravestone appearing in one of the graveyards on the island. This allows you to bring expensive items, as death is not a problem.
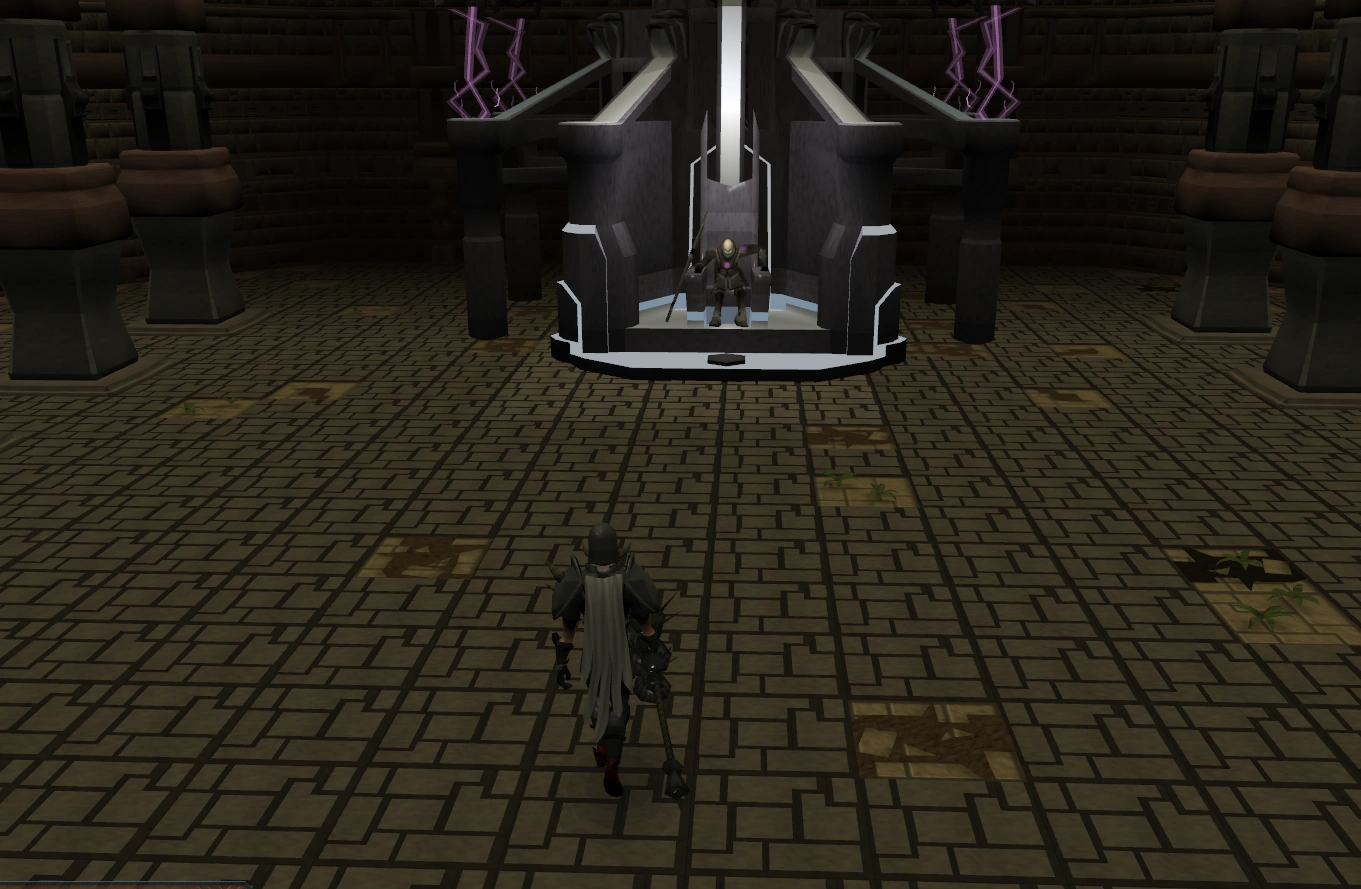
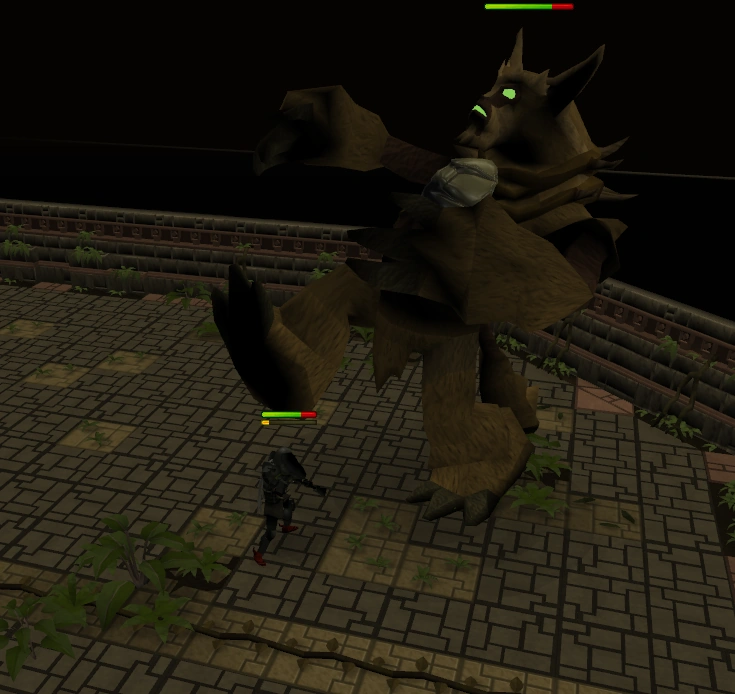
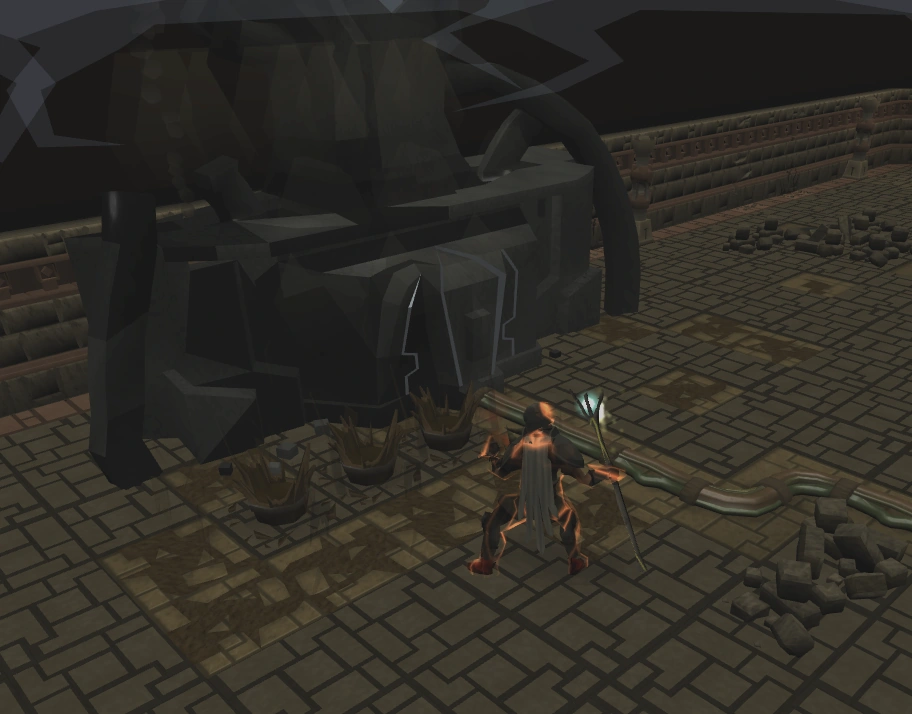
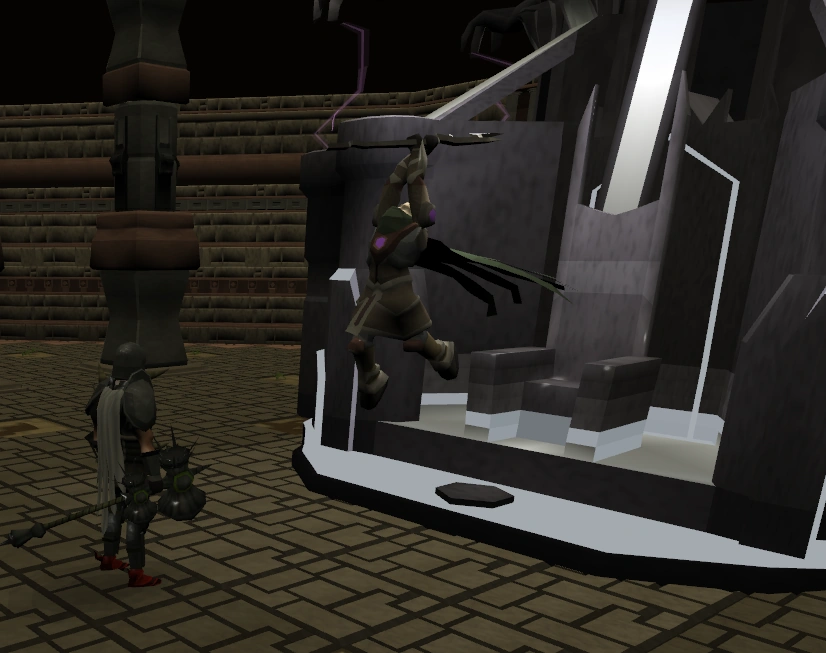
Enter the doorway. You will approach Nomad, who is sitting on an immense throne. He will be surprised that you have come anyway. You can ask him what the throne's purpose is, and he will explain that it channels the soul power from the soul fragments put into the Obelisk into himself, in order to give him enough power to defeat his former master, whose identity Nomad will not tell, as he thinks you already know it. He tells you that, now you know this, you must die, and he attacks you.
He attacks with class-less, but magic-based attacks which are unblockable by prayer or curse and often hit in the 300s to 500s.
He also has a number of special attacks. In the first, he puts flame vortices around you, which deal quite a bit of damage when stepped on.
Next, he will clone himself and all the clones will attack you. Find the real Nomad to continue the fight.
When he warns you cannot hide from him, he fires a spell at you that hits for 3000 damage, but can be soaked or fully absorbed by a pillar.
The battle with Nomad, Scourge of Souls.
Finally, he may teleport you to the middle of the room and commence charging a spell for several seconds. Once fully charged, the spell will deal your maximum health in damage, and must be negated using resonance or other methods. You can use freedom to move, but the spell will still hit you even if you go behind a pillar.
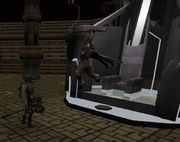
In the end, Nomad will slash at you with rapid melee attacks. Like with the Decaying Avatar, players with high leveled combat stats shouldn't have too much trouble with the fight, as long as they have a constant source of healing. It is still advised to come prepared.
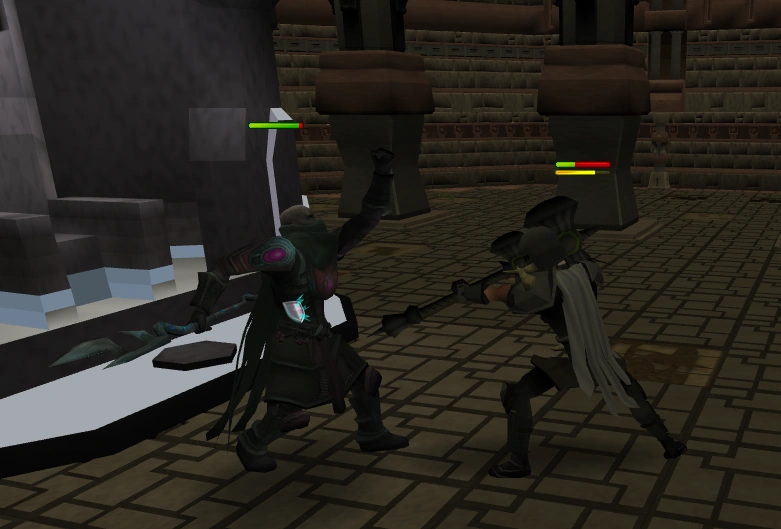
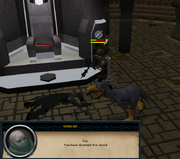
Nomad is defeated!
Kill Nomad, who says you have doomed the world upon his death, and leave the Temple. If you happen to die at the same time as Nomad, it will still count as a success. However, he does not say "You... You have doomed this world."
Very Important Note:When Nomad gets close to berserker mode, which is the second time he gets down to 25% health, you must be near his throne. If you are hiding behind a pillar or come out from behind the pillar and keep attacking, he will call you a coward and teleport near the throne and restore back to 100% health.
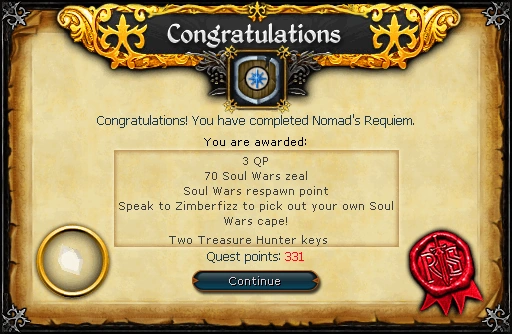
Nomad's Requiem
You will appear outside Nomad's tent. Talk to Zimberfizz and tell him Nomad is dead. He will not believe it and follow you to his body. You will even kick the head to make sure he is dead. Zimberfizz is content, puts on a new outfit and the two of you leave. However, as you walk out, Nomad stands up and teleports away!
Showing Zimberfizz Nomad's body.
Zimberfizz gains some new attire, and explains his plans for Soul Wars.
Elite: "Sun Shade" (Nomad and the Decaying Avatar need to be killed in the dominion tower)
Transcript
This article on a quest has an associated dialogue page. Click here for a transcript of possible conversations encountered throughout the quest.
Sequel
Although Mod Mark stated earlier that Nomad's Requiem would not have a sequel and the purpose of the quest was purely to have a very hard boss fight, Mod Rathe, the quests's developer, had since confirmed that there would in fact be a sequel, although his main priority at the moment was the Evolution of Combat. After its release in autumn 2012, work on the next Nomad quest may have commenced, although possibly not by Mod Rathe himself. Mod Rathe said the quest is to be less of a combat quest and focus more on Nomad's story and background. It is likely to be grandmaster.
Trivia
Unlisted music track
The unlisted music track that plays when Nomad dispatches the Elite Dark troops.
While in the Smoke room, when you click on the slab you are standing on, your character will do a pirouette and say 'Ta-da!'.
After completing the quest, the 'Quest complete' text in the Adventurer's Log reads: I foiled Nomad's secret plans behind Soul Wars, leaving the battleground in the hands of Zimberfizz.
The floors of temple dungeon are shaped in the characters G, O and D, so in one word GOD. Mod Osborne has said that this is related to what Nomad's overall motive for building the Soul Obelisk was.
Combat tactics
Nomad has no weakness, so all methods of attack are equally effective.
Ruby bolts (e) have a chance of hitting 20% of the target's remaining life points. When Nomad goes berserk, he will be at 1/4 his full life points. Therefore, the maximum damage that ruby bolts (e) can deal is 750, but the chance of the special activating is not very high. Diamond bolts (e) have a higher chance of activating and lowering Nomad's defence to ranged attacks, which is more useful since it doesn't hurt you in the process like the Ruby bolts (e) do.
Ganodermic armour and the Eagle-Eye Kiteshield can be a big help as they lessen the damage his Disintegrate special deals, allowing you to save some food for the rest of the fight.
It was once possible to avoid Nomad's most powerful attack (Disintegrate). After Nomad's clones had disappeared and he resumed normal attacks, the player could run south towards the exit door. As Nomad was launching his sixth attack after the clones had disappeared, attempting to exit through the door would result in the message, "And where do you think you are going?" The player would then be teleported back to the centre of the arena. If this were done correctly, Nomad would say, "Face me!" before launching more regular attacks (restarting the cycle). This technique was removed on 20 December 2010.
On 1 October, 2012, the Deck of Fate cards, was a gift to members who had been subscribed for August and September 2012. It contained the Deathtouched dart, an item that will instantly kill almost any monster in the game. Up until 1 January 2013, the Dart could be used on Nomad in this quest, dealing to him a lethal dose of 10,000 range damage and ending the battle.
It is possible to evade Nomad's two most powerful attacks, Soul Blast (where he says you cannot hide) and Disintegrate (where he freezes you), by using the ultimate ability Barricade or the basic ability Resonance. Prior to an update, Resonance could also be used to heal off of the attacks.
A bug currently exists where in the room where you are supposed to ignite the barrels, the player is unable to use Fire Wave on the barrels, even if they have the correct runes for the spell, effectively making the quest impossible to complete. As of July 10, 2013, this bug has been somewhat fixed. There is a left-click "Ignite Barrel" option on the barrels. If clicked with the appropriate runes (or not, currently unknown), they should explode. A player account on the aforementioned date clicked the "Ignite Barrel" option with an air battlestaff and four fire runes in their inventory and the barrels exploded, with the fire runes still remaining in the player's inventory after the explosion. It is unknown if the glitch has been fixed yet, but this method has worked.
A bug existed that allowed Nomad to be killed without retaliating or using any of his special attacks by using a Spirit Kyatt. This allowed many low levels that would not have been able to defeat Nomad normally to complete the quest. This has been fixed.
A rare glitch causes your familiar to disappear during the cut-scene before you fight Nomad. The next familiar you summon would have all of the items you lost. For example, if you had 18 brews in your war tortoise and lost it, summoning a Terror bird would have 18 brews even though it only holds 12.
There is currently a glitch with Nomad that causes him to say "Face me!" even if you are in attacking range. This most commonly occurs immediately after he restores his life points to half, and may be fixed by simply attacking him and having him retaliate.
There is currently a glitch that causes Nomad to completely disappear from the battleground, it's known to happen when hiding behind a pillar between special moves. There is no way to fix this, all that can be done is leaving through the arcane doorway or logging out.
Cultural references
The herring and other items in the explorer's bag are a reference to the idiom, "a red herring".


")
")
")
")
")


.png)


")
")
")
")
")