(→Trivia) |
(Added additional details to where the necklace is, since there was nothing in the hollow of the tree to the south, but the necklace was to the west of the corpse, near the hill coming up, south of the chapel and right next to some stairs leading up.) Tag: Visual edit |
||
| (125 intermediate revisions by 74 users not shown) | |||
| Line 2: | Line 2: | ||
{{Infobox Quest |
{{Infobox Quest |
||
|name = Missing, Presumed Death |
|name = Missing, Presumed Death |
||
| − | |image = [[File:Missing, Presumed Death.png| |
+ | |image = [[File:Missing, Presumed Death.png|200px]] |
|release = [[15 October]] [[2013]] |
|release = [[15 October]] [[2013]] |
||
|update = Missing, Presumed Death |
|update = Missing, Presumed Death |
||
| − | |members = |
+ | |members = No |
| − | |series = [[Mahjarrat quest series|Mahjarrat]] |
+ | |series = [[Mahjarrat quest series|Mahjarrat]]<br />[[Sliske quest series|Sliske]]<br />[[God quest series|God]]<br />[[Dragonkin quest series|Dragonkin]] |
|difficulty = Novice |
|difficulty = Novice |
||
|length = Medium |
|length = Medium |
||
| Line 19: | Line 19: | ||
==Official description== |
==Official description== |
||
| − | {{ |
+ | {{Quote|When a group of Saradominist monks are slaughtered by an unknown assailant you are asked by the only survivor - a monk who is extremely traumatised - to find the killer and bring them to justice. But there's more to this puzzle than meets the eye, starting with the souls of the dead monks being trapped in their bodies...}} |
==Walkthrough== |
==Walkthrough== |
||
{{Quest details |
{{Quest details |
||
| ⚫ | |||
|start = Speak to [[Brother Samwell]] in [[Silvarea]], west of [[Paterdomus]]. |
|start = Speak to [[Brother Samwell]] in [[Silvarea]], west of [[Paterdomus]]. |
||
| − | |members = |
+ | |members = No |
|difficulty = Novice |
|difficulty = Novice |
||
| − | |length = Medium |
+ | |length = Medium to Long |
| + | |requirements = |
||
| − | + | '''None''', although completion of the following quests are '''highly recommended''' for full storyline comprehension and additional dialogue: |
|
| − | |items=None |
||
| + | {{Questreq|Full:Missing, Presumed Death|1}} |
||
| − | '''Recommended:''' |
||
| + | |recommended = |
||
* Combat equipment |
* Combat equipment |
||
| − | * [[Wicked |
+ | * [[Wicked hood]], to teleport to the Wizards' Tower, or activated [[Draynor]] [[lodestone]], or [[Traveller's necklace]] |
| + | * [[Digsite pendant]], [[Lumber Yard Teleport]], or Earth Altar teleport using the Wicked Hood, to get to [[Brother Samwell]] faster |
||
| ⚫ | |||
| + | * [[Bonesack(e)]] teleports directly to the odd old man, but only once per week |
||
| − | *11 [[Wight]]s (level 10) |
||
| ⚫ | |||
| − | |icon = Missing,_Presumed_Death_icon.png |
||
| + | * 11 [[Wight (Missing, Presumed Death)|Wights]], [[Wight ranger (Missing, Presumed Death)|Wight rangers]], and [[Wight footsoldier (Missing, Presumed Death)|Wight footsoldiers]] |
||
}} |
}} |
||
===Murders in Silvarea=== |
===Murders in Silvarea=== |
||
| + | [[File:Brother Samwell chathead.png|left]] |
||
| − | + | To start the quest, speak to [[Brother Samwell]] in the mountain pass of [[Silvarea]], located west of [[Paterdomus]] and east of [[Varrock]]. After you calm him down, he hands you an [[Investigator's notebook (Missing, Presumed Death)|investigation notebook]]. |
|
| − | |||
| − | Investigate the three slaughtered monks, tree with an arrow stuck in it and the nearby plant to find all the core clues. Searching a plant nearby yields a [[lost ring]]. Talk to the south west slaughtered monk to gain an additional clue. |
||
| − | |||
| − | '''NOTE: '''Sometimes, not all the pieces register as "found". Destroy the problem item and find it again, if this happens. |
||
| + | There are three core clues. Investigate the torso of the dead monk in the northeast, a plant a little further east to find a [[lost ring]], and a tree to the southwest with an arrow stuck in it. An additional clue is found by listening to the trapped soul of the monk to the southwest. If not all pieces register as "found", destroy the problem item and find it again. |
||
| − | Return to Brother Samwell. |
||
| − | + | Return to Brother Samwell, who asks you to find a witness. Go up the hill to the [[Odd Old Man]]. In order to get him to talk, persuade him two times, then threaten him. He will say that he saw an elf, and after the monks were murdered, a tall, hooded figure making off to the east, who seemed to be taller than the elf and wearing darker clothes. |
|
| − | + | Return to Brother Samwell again and select any of the chat options. It won't matter who you pick to accuse, as you will be investigating further. |
|
| − | Next, follow the crystals to the east. These crystals are small and blue; they may not appear on low detail. The trail leads up the steps and off towards the beacon. Upon coming to the end of the trail, |
+ | Next, follow the crystals to the east. These crystals are small and blue; they may not appear on low detail. The trail leads up the steps and off towards the beacon. Upon coming to the end of the trail, search the dead elf there to find a core clue in her hands, and an additional clue by listening to her soul. Afterward, investigate the plant to the west of the body, near the stairs going up to another building, south of the chapel, to find a necklace, the clothing on the fence to the south-east of the body, and the bench further south-east to find a letter. Talk to [[Blaze Sharpeye]] at the beacon by threatening him twice then persuading him for more information. Return to Brother Samwell. |
| − | Go to the [[ |
+ | Go to the [[Wizards' Tower]] south of [[Draynor]] and talk to [[Wizard Valina]] (at the front entrance). Show her the clues, then ask her about elves, Saradominist wizards, and teleportation. If you accuse her of covering up for wizards for a more thorough explanation, she claims that it is neither elves nor wizards who did the crime — this is not necessary to proceed with the quest. |
| − | [[File:Fighting with Icthlarin.png|thumb|Fighting the Wights with Icthlarin by your side |
+ | [[File:Fighting with Icthlarin.png|thumb|Fighting the Wights with Icthlarin by your side]] |
[[File:Icthlarin chathead.png|left]] |
[[File:Icthlarin chathead.png|left]] |
||
| − | Return to Brother Samwell and tell him what was learned. Select the option about a "Clear conclusion." Choose any option to discuss a possible suspect, but none of the clues address the trapped souls. [[Icthlarin]] communicates with |
+ | Return to Brother Samwell and tell him what was learned. Select the option about a "Clear conclusion." Choose any option to discuss a possible suspect, but none of the clues address the trapped souls. [[Icthlarin]] communicates with you telepathically and appears. Go through all his dialogue options to learn about Death's disappearance and their work. At this point, 4 wights attack. Their life points vary depending on your level. Icthlarin will battle them alongside you with [[magic]], but you will have to finish them off yourself as he can only weaken them to 2 life points. |
| − | After defeating the wights, the last one you kill drops an [[invitation box]]. The box, left by the killer [[Sliske]], invites Icthlarin to attend his ascension. Ichthlarin debates going |
+ | After defeating the wights, the last one you kill drops an [[invitation box]]. The box, left by the killer [[Sliske]], invites Icthlarin to attend his ascension. Ichthlarin debates going but decides to do so after dealing with the dead monks. Open the invitation box to be transported to the [[Empyrean Citadel]]. |
| − | ===The |
+ | ===The Empyrean Citadel=== |
[[File:Sliske's Grand Ascendancy Gathering.png|thumb|The followers of the gods gather outside the citadel.|left]] |
[[File:Sliske's Grand Ascendancy Gathering.png|thumb|The followers of the gods gather outside the citadel.|left]] |
||
| − | Upon arriving at the citadel, there are representatives of the gods standing outside a set of doors guarded by the [[Barrows |
+ | Upon arriving at the citadel, there are representatives of the gods standing outside a set of doors guarded by the [[Barrows brothers]]. You may talk to any of them for some interesting, but inconsequential, dialogue. Speak with Icthlarin and tell him you wish to enter the citadel. |
| − | The Zamorakian Mahjarrat are present, who tell you that [[Zamorak]] is threatening to disown the Mahjarrat after they failed to attend the [[Battle of Lumbridge]], and [[Zemouregal]] expresses a desire to claim godhood for himself. [[Commander Zilyana]] and [[Ilfeen]] can be found arguing over the murders of Saradominists and Serenists earlier in the quest, to which you have an option to tell them about the truth about what Sliske did or side with one of them. Depending on your choice in [[The World Wakes]], Zilyana will either believe you if you tell the truth or continue to argue with Ilfeen. |
+ | The Zamorakian Mahjarrat are present, who tell you that [[Zamorak]] is threatening to disown the Mahjarrat after they failed to attend the [[Battle of Lumbridge]], and [[Zemouregal]] expresses a desire to claim godhood for himself. [[Commander Zilyana]] and [[Ilfeen]] can be found arguing over the murders of Saradominists and Serenists earlier in the quest, to which you have an option to tell them about the truth about what [[Sliske]] did or side with one of them. Depending on your choice in [[The World Wakes]], [[Zilyana]] will either believe you if you tell the truth or continue to argue with Ilfeen. |
| − | The Zarosian Mahjarrat are also present, with [[Azzanadra]] still fully believing that Sliske is Zarosian, while [[Wahisietel]] continues to doubt his true motives, and calls Azzanadra a fool for trusting him. [[Kharshai]] is there trying to quell the contact between the two bands of Mahjarrat, while [[K'ril Tsutsaroth]], [[General Graardor]], [[Flight Killisa]] and [[Flockleader Geerin]] are there to serve their respective gods. |
+ | The Zarosian Mahjarrat are also present, with [[Azzanadra]] still fully believing that Sliske is Zarosian, while [[Wahisietel]] continues to doubt his true motives, and calls [[Azzanadra]] a fool for trusting him. [[Kharshai]] is there trying to quell the contact between the two bands of [[Mahjarrat]], while [[K'ril Tsutsaroth]], [[General Graardor]], [[Flight Killisa]] and [[Flockleader Geerin]] are there to serve their respective gods. |
| − | When you are finished, talk to Icthlarin to proceed, who will enter through the main door, evoking anger from Zemouregal, who then tries to enter himself, only to be repelled by Sliske's shadow magic. |
+ | When you are finished, talk to [[Icthlarin]] to proceed, who will enter through the main door, evoking anger from Zemouregal, who then tries to enter himself, only to be repelled by Sliske's shadow magic. |
===The Maze=== |
===The Maze=== |
||
[[File:Armadyl chathead.png|left]] |
[[File:Armadyl chathead.png|left]] |
||
| − | Enter the door to the west then head north to the window to witness a cutscene of [[Saradomin]], [[Zamorak]], [[Bandos]] and [[Armadyl]] arguing. [[Icthlarin]] enters and tries to unite them to no avail. |
+ | Enter the door to the west then head north to the window to witness a cutscene of [[Saradomin]], [[Zamorak]], [[Bandos]], and [[Armadyl]] arguing. [[Icthlarin]] enters and tries to unite them to no avail. |
[[File:Empyrean Maze.png|thumb|Navigating through Sliske's maze.]] |
[[File:Empyrean Maze.png|thumb|Navigating through Sliske's maze.]] |
||
| − | Once the cutscene is over, head |
+ | Once the cutscene is over, head to the southwest corner to find a storage crate, which you can search to find a note revealing that [[Sliske]] is planning to experiment on the [[Barrows brothers]] in the [[Shadow Realm]]. Continue out the south east window, jumping over the gap, running over the planks, jumping down the rocks then up the rocks to enter the western window. Climb through the obstacle, then head outside. You'll find another storage crate here, which reveals an invitation list, listing all of the gods as invited, and listing you and [[Death]] as "other mischief makers." Head to the northern door to proceed. |
===Attack of the Wights=== |
===Attack of the Wights=== |
||
| − | [[File:Fighting Sliske's wights.png|thumb|Fighting Sliske's army of Wights |
+ | [[File:Fighting Sliske's wights.png|thumb|left|Fighting Sliske's army of Wights]] |
| − | Enter the northern room and you will find a [[wight footsoldier]] in the shadows, and a Sliske Mask will warn you to turn on the lights before you start the fight. Follow its advice and pull all three levers in the room, as this will reveal some light in the room which makes the wights vulnerable, as you can only harm them while they are standing in these spots. You may have to lure each wight into the light in order to kill it. |
+ | Enter the northern room and you will find a [[Wight footsoldier (Missing, Presumed Death)|wight footsoldier]] in the shadows, and a Sliske Mask will warn you to turn on the lights before you start the fight. Follow its advice and pull all three levers in the room, as this will reveal some light in the room which makes the wights vulnerable, as you can only harm them while they are standing in these spots. You may have to lure each wight into the light in order to kill it. |
| − | After killing the first wight footsoldier, two |
+ | After killing the first wight footsoldier, two [[Wight ranger (Missing, Presumed Death)|wight rangers]] will appear, and on their death, 4 wight footsoldiers. Once all the wights are dead, go to the eastern window to view a cutscene of the gods, discussing why they are here. [[Zamorak]] reveals that he attended to see another of his kind ascend, [[Armadyl]] came to try and reclaim his citadel, [[Bandos]] came because [[Sliske]] promised there would be a war, and [[Saradomin]] came due to wishing to confront [[Seren]] about the attack on the monks. [[Icthlarin]] reveals that the attack was a set up by Sliske, and reveals that he came due to Sliske kidnapping Death, which causes Bandos and [[Zamorak]] to mock him. |
After finishing the cutscene, go through the door to the north. If you die in the battle, you have to restart the waves; however, the lights stay on. |
After finishing the cutscene, go through the door to the north. If you die in the battle, you have to restart the waves; however, the lights stay on. |
||
===The Shadow/Light Chamber=== |
===The Shadow/Light Chamber=== |
||
| − | [[File:Shadow caster solution.png|thumb|The solution to the puzzle |
+ | [[File:Shadow caster solution.png|thumb|The solution to the puzzle]] |
[[File:Sliske TWW chathead.png|left]] |
[[File:Sliske TWW chathead.png|left]] |
||
You will encounter a room with two sentient masks on a viewing panel, a cheerful mask named Light and a depressed mask named Shadow, who will tell you that they are in charge of the puzzle involving the lights and shadows. |
You will encounter a room with two sentient masks on a viewing panel, a cheerful mask named Light and a depressed mask named Shadow, who will tell you that they are in charge of the puzzle involving the lights and shadows. |
||
| Line 94: | Line 94: | ||
===The Statue of Death=== |
===The Statue of Death=== |
||
| − | In the next room, you will |
+ | In the next room, you will initially appear to see [[Death]], but on getting closer, it will be revealed to be a simple statue. Talk to the [[Statue of Death]], and it will promise that it will give you Death, or at the very least "a gift worthy for the gods themselves" if you solve his riddles. |
| − | For each of the riddles, the answer can be found in the form of an item in one of the chests next to him. The item then must then be placed on the |
+ | For each of the riddles, the answer can be found in the form of an item in one of the chests next to him. The item then must then be placed on the Answer Plinth next to him. An additional chest will open with each riddle. |
{| class="wikitable" |
{| class="wikitable" |
||
| Line 106: | Line 106: | ||
|- |
|- |
||
|I can build castles, that melt in the rain, but I trickle down, as the seconds drain. |
|I can build castles, that melt in the rain, but I trickle down, as the seconds drain. |
||
| − | |[[ |
+ | |[[Sand (Missing, Presumed Death)|Sand]] |
|[[File:Sand_(Missing,_Presumed_Death).png|center]] |
|[[File:Sand_(Missing,_Presumed_Death).png|center]] |
||
|First chest |
|First chest |
||
|- |
|- |
||
|I can fall from the sky, but I cannot climb higher, I spring with no legs, I run but don't tire. |
|I can fall from the sky, but I cannot climb higher, I spring with no legs, I run but don't tire. |
||
| − | |[[ |
+ | |[[Water (Missing, Presumed Death)|Water]] |
|[[File:Water_(Missing,_Presumed_Death).png|center]] |
|[[File:Water_(Missing,_Presumed_Death).png|center]] |
||
|Second chest |
|Second chest |
||
|- |
|- |
||
|Glass can't create me, but stone and steel do, I'm made by the sun, but out of its view, I can be tiny, and also be vast, in the shape of my maker, like a spell I am cast. |
|Glass can't create me, but stone and steel do, I'm made by the sun, but out of its view, I can be tiny, and also be vast, in the shape of my maker, like a spell I am cast. |
||
| − | |[[Shadow (Missing, |
+ | |[[Shadow (Missing, Presumed Death)|Shadow]] |
|[[File:Shadow_(Missing,_Presumed_Death).png|center]] |
|[[File:Shadow_(Missing,_Presumed_Death).png|center]] |
||
|Second chest |
|Second chest |
||
|} |
|} |
||
| − | After solving the last riddle, you receive an invitation to Sliske's ascension, and the statue will reveal that he told a "little white lie" about giving you |
+ | After solving the last riddle, you receive an invitation to Sliske's ascension, and the statue will reveal that he told a "little white lie" about giving you Death. Go to the window to see the gods arguing once again, who eventually proceed to threaten to kill Sliske, causing him to reveal [[Death]] and the [[Dragonkin]] [[Strisath]] in the cages next to him, threatening to kill Death and release Strisath if he is attacked. Leave by the southern door and jump off the drop down the drain. |
===On the Edge of War=== |
===On the Edge of War=== |
||
| − | [[File:Sliske's Grand Ascendancy.png|thumb|left|The gods at Sliske's 'ascension' |
+ | [[File:Sliske's Grand Ascendancy.png|thumb|left|The gods at Sliske's 'ascension']] |
| − | Speak to one of the Barrows brothers to get inside the main room. Once inside, and after some dialogue that is dependant on which, if any, [[God Emissary]] you have supported, and Sliske announces a contest: whoever kills the most gods will be awarded the [[Stone of Jas]], which he reveals he obtained by luring Strisath into the Shadow Realm in order to capture him and claim the Staff of Armadyl, before proceeding to use it to track his connection to the stone, which he found in one of five locations, depending on which number you chose during [[Ritual of the Mahjarrat]]. |
+ | Speak to one of the Barrows brothers to get inside the main room. Once inside, and after some dialogue that is dependant on which, if any, [[God Emissary]] you have supported, and [[Sliske]] announces a contest: whoever kills the most gods will be awarded the [[Stone of Jas]], which he reveals he obtained by luring [[Strisath]] into the Shadow Realm in order to capture him and claim the Staff of [[Armadyl]], before proceeding to use it to track his connection to the stone, which he found in one of five locations, depending on which number you chose during [[Ritual of the Mahjarrat]]. |
| − | [[File:Strisath's attack.png|thumb|Strisath goes on a rampage. |
+ | [[File:Strisath's attack.png|thumb|Strisath goes on a rampage.]] |
| − | After you make a decision as to whether to trust Sliske |
+ | After you make a decision as to whether to trust Sliske and state which god you plan to side with, Sliske sets the [[dragonkin]] loose (which goes on a rampage) and throws the key to Death's cage at you. Icthlarin puts up a shield to protect you from the dragonkin's attacks while you get to Death. The Gods quickly flee from Strisath, and he will soon begin attacking you and Icthlarin. If Icthlarin's shield is destroyed, he will die, and the sequence will start over. |
| − | To rescue Death, head west and stamp out the flames until you get to his cage. Free him and return to Icthlarin. Talk to him and Icthlarin's shield will disappear, causing Death to call his Scythe and teleport himself, Icthlarin and you |
+ | To rescue [[Death]], head west and stamp out the flames until you get to his cage (you may need to increase your graphics settings if you cannot see the flames). Free him and return to [[Icthlarin]]. Talk to him and Icthlarin's shield will disappear, causing Death to call his Scythe and teleport himself, Icthlarin and you to safety just before one of Strisath's fireballs hits you. |
<gallery> |
<gallery> |
||
Sliske and Strisath.png|Sliske unleashes the dragonkin, Strisath. |
Sliske and Strisath.png|Sliske unleashes the dragonkin, Strisath. |
||
Sliske attacks.png|Sliske attacks Icthlarin. |
Sliske attacks.png|Sliske attacks Icthlarin. |
||
| − | Death escapes.png|Death teleports |
+ | Death escapes.png|Death teleports you and Icthlarin away, just in time to avoid Strisath's fireball. |
</gallery> |
</gallery> |
||
===Finishing Up=== |
===Finishing Up=== |
||
[[File:Death chathead.png|left]] |
[[File:Death chathead.png|left]] |
||
| − | You will arrive back in [[Silvarea]], by Brother Samwell, and Death and Icthlarin will thank you for freeing Death, and also warn you that another God War will soon begin, with both the gods and mortals wishing to claim the Stone of Jas for themselves. Samwell will be saddened that Sliske was not brought to justice due to his actions against his brothers, although Death quickly reassures him that he will take their souls to the afterlife so they can rest in peace. |
+ | You will arrive back in [[Silvarea]], by [[Brother Samwell]], and [[Death]] and [[Icthlarin]] will thank you for freeing Death, and also warn you that another God War will soon begin, with both the gods and mortals wishing to claim the [[Stone of Jas]] for themselves. Samwell will be saddened that [[Sliske]] was not brought to justice due to his actions against his brothers, although Death quickly reassures him that he will take their souls to the afterlife so they can rest in peace. |
| − | With his brothers souls at rest, Samwell thanks you for your assistance and rewards you. |
+ | With his brothers' souls at rest, Samwell thanks you for your assistance and rewards you. |
''Congratulations, quest complete!'' |
''Congratulations, quest complete!'' |
||
==Rewards== |
==Rewards== |
||
| + | {{Quest rewards |
||
| ⚫ | |||
| + | |name = Missing, Presumed Death |
||
| − | *2 [[Quest points]] |
||
| + | |qp = 2 |
||
| − | *[[Prayer lamp]], granting 500 Prayer experience |
||
| + | |rewards = |
||
| − | *[[Agility lamp]], granting 1000 Agility experience |
||
| + | * {{Skill XP|Prayer|500}} [[Prayer lamp|lamp]] |
||
| − | *[[Combat lamp (1500XP)]], granting 1500 experience in a chosen combat skill |
||
| + | * {{Skill XP|Agility|1000}} [[Agility lamp|lamp]] |
||
| ⚫ | |||
| + | * {{Skill XP|Combat|1500}} [[Combat lamp (Missing, Presumed Death)|lamp]] |
||
| ⚫ | |||
| ⚫ | |||
| ⚫ | |||
| ⚫ | |||
| − | * {{Universal quest reward}} |
||
| ⚫ | |||
| + | |post quest = |
||
| ⚫ | |||
| + | * {{Skill XP|Thieving|50000}} [[Thieving lamp|lamp]] (requires 75 {{Skill clickpic|Thieving}}; temporary skill boosts will '''not''' work) |
||
| + | * {{Skill XP|Constitution|50000}} [[Constitution lamp|lamp]] (requires 75 {{Skill clickpic|Constitution}}) |
||
| ⚫ | |||
| + | * 30 untradeable [[Barrows amulet (Missing, Presumed Death)|barrows amulets]] (requires {{Skill clickpic|Combat|80+}} to obtain). |
||
| ⚫ | |||
| ⚫ | |||
| + | |music = |
||
| ⚫ | |||
| ⚫ | |||
| ⚫ | |||
| ⚫ | |||
| ⚫ | |||
| ⚫ | |||
| + | }} |
||
| + | ==Achievement== |
||
| − | ===Additional rewards=== |
||
| + | * {{Achievement|I Presume These Rewards Are Mine, Death?|20|Claim all rewards from the statue of Death after the 'Missing, Presumed Death' quest.}} |
||
| ⚫ | |||
| − | *[[Thieving lamp]], granting 50,000 Thieving experience (requires 75 Thieving; '''not''' able to use temporary skill boosts) |
||
| − | *[[Constitution lamp]], granting 50,000 Constitution experience (requires 75 Constitution) |
||
| ⚫ | |||
| − | *30 [[Barrows amulet]]s |
||
| ⚫ | |||
| ⚫ | |||
| − | |||
| − | All lamps are claimed at once and can not be banked. They can not be recovered, if destroyed. |
||
| − | |||
| − | <gallery> |
||
| ⚫ | |||
| ⚫ | |||
| − | </gallery> |
||
| − | |||
| − | ==Music unlocked== |
||
| ⚫ | |||
| ⚫ | |||
| ⚫ | |||
| ⚫ | |||
| ⚫ | |||
| ⚫ | |||
==Required for completing == |
==Required for completing == |
||
| + | * [[Dishonour among Thieves]] |
||
| ⚫ | |||
| + | * [[Kindred Spirits]] |
||
| + | * [[Mahjarrat Memories]] |
||
| + | * [[The Mighty Fall]] |
||
* [[One of a Kind]] |
* [[One of a Kind]] |
||
| + | |||
| ⚫ | |||
==Post-quest FAQ== |
==Post-quest FAQ== |
||
* [http://www.webcitation.org/6Kaa5KHAm Missing, Presumed Death - FAQ] |
* [http://www.webcitation.org/6Kaa5KHAm Missing, Presumed Death - FAQ] |
||
==Transcript== |
==Transcript== |
||
| − | {{ |
+ | {{Hasdialogue|quest}} |
==Gallery== |
==Gallery== |
||
<gallery captionalign="center" widths="184"> |
<gallery captionalign="center" widths="184"> |
||
| ⚫ | |||
| ⚫ | |||
| + | Missing, Presumed Death banner.jpg |
||
Mpd banner.png|Another [[head banner]] used. |
Mpd banner.png|Another [[head banner]] used. |
||
</gallery> |
</gallery> |
||
==Trivia== |
==Trivia== |
||
| − | [[File:Missing,_Presumed_Death_banner.jpg|centre|border|700px]] |
||
* The quest's title is a pun on the phrase "missing, presumed dead," which was used in times of war when someone was missing in battle, no body having been identified. |
* The quest's title is a pun on the phrase "missing, presumed dead," which was used in times of war when someone was missing in battle, no body having been identified. |
||
* "Final answer" the confirmation choice in the riddle game is a reference to the television show "Who Wants to be a Millionaire?". |
* "Final answer" the confirmation choice in the riddle game is a reference to the television show "Who Wants to be a Millionaire?". |
||
* Sliske's dialogue "Are you sitting comfortably?" is a reference to the old BBC children's radio show "Listen with Mother". |
* Sliske's dialogue "Are you sitting comfortably?" is a reference to the old BBC children's radio show "Listen with Mother". |
||
* A purple aura could be seen over Zaros' podium, indicating that the Empty Lord was fully aware of what was happening. Azzanadra additionally says that Zaros is 'ever-present'. |
* A purple aura could be seen over Zaros' podium, indicating that the Empty Lord was fully aware of what was happening. Azzanadra additionally says that Zaros is 'ever-present'. |
||
| − | * If you have revived [[Hazeel]] and/or released [[Kharshai]], they will be present at the citadel. Hazeel will take [[General Khazard|Khazard |
+ | * If you have revived [[Hazeel]] and/or released [[Kharshai]], they will be present at the citadel. Hazeel will take [[General Khazard|Khazard's]] place, though. |
| − | * The talking masks in the first puzzle room occasionally say things that break the fourth wall, such as referring the puzzle as novice difficulty |
+ | * The talking masks in the first puzzle room occasionally say things that break the fourth wall, such as referring to the puzzle as novice difficulty or accusing you of using a walkthrough, amongst others. |
* [[Relomia]], the Emissary of Sliske, can be seen on the walkway to the second puzzle room on one of the floating rocks in the distance. She seems to have arrived to see Sliske. |
* [[Relomia]], the Emissary of Sliske, can be seen on the walkway to the second puzzle room on one of the floating rocks in the distance. She seems to have arrived to see Sliske. |
||
| − | * Upon completion of the quest the Adventure's Log states: ''I saved Death from Sliske, after hearing him announce that he would give the Stone of Jas to the person that could kill the most gods.'' |
+ | * Upon completion of the quest, the Adventure's Log states: ''I saved Death from Sliske, after hearing him announce that he would give the Stone of Jas to the person that could kill the most gods.'' |
| − | * After completion of the quest, additional dialogue is available with Brassica Prime (who can be found in the throne-room), Azzanadra and Wahisietel, involving the current state of Sliske and the Stone of Jas. |
+ | * After completion of the quest, additional dialogue is available with Brassica Prime (who can be found on a [[Podium (Missing, Presumed Death)|podium]] in the throne-room), Azzanadra and Wahisietel, involving the current state of Sliske and the Stone of Jas. |
| ⚫ | * Although initially, the throne room remained closed after the completion of Missing, Presumed Death, both the purple aura floating above Zaros' pedestal and Brassica Prime were visible from the outside. It has since opened up. Zaros' aura is no longer present, but Brassica Prime remains; he claims he likes the way the cushion feels on his leaves. |
||
| − | * This is the third quest in which dead Saradominist hermits are seen, and the second of them to be investigated. |
||
| + | * The symbols on the empty platforms seem to indicate that several other gods were invited but did not attend. These were Zaros (who did not physically attend), Seren, Marimbo and, ironically, Guthix. |
||
| ⚫ | * Although |
||
{{Missing, Presumed Death}} |
{{Missing, Presumed Death}} |
||
| + | {{Mahjarrat quest series}} |
||
| + | {{Sliske Series}} |
||
| + | {{God series}} |
||
| + | {{Dragonkin quests}} |
||
| + | {{F2P Quests}} |
||
[[pt:Desaparecido, Morte Presumida]] |
[[pt:Desaparecido, Morte Presumida]] |
||
[[es:Desaparecido y dado por muerto]] |
[[es:Desaparecido y dado por muerto]] |
||
| − | [[Category: |
+ | [[Category:Free-to-play quests]] |
| − | [[Category:Wikia Game Guides quests]] |
||
Latest revision as of 00:58, 17 June 2019
| |||||||||||||||||||||||||
| Also called | MPD | ||||||||||||||||||||||||
|---|---|---|---|---|---|---|---|---|---|---|---|---|---|---|---|---|---|---|---|---|---|---|---|---|---|
| Release date | 15 October 2013 (Update) | ||||||||||||||||||||||||
| Members | No | ||||||||||||||||||||||||
| Voice Over | Yes | ||||||||||||||||||||||||
| Official difficulty | Novice | ||||||||||||||||||||||||
| Quest series | Mahjarrat Sliske God Dragonkin | ||||||||||||||||||||||||
| Age | Sixth Age | ||||||||||||||||||||||||
| |||||||||||||||||||||||||
Missing, Presumed Death is a quest that features Death, who has gone missing, and the Menaphite god of the dead, Icthlarin, who is attempting to take over his role until he is found. The quest starts in Silvarea, west of Paterdomus, where some monks have been murdered, their souls unable to pass on due to Death's disappearance.
It also involves the Mahjarrat Sliske, revealing how he obtained the Staff of Armadyl from the Dragonkin prior to the assassination of Guthix.
Official description
When a group of Saradominist monks are slaughtered by an unknown assailant you are asked by the only survivor - a monk who is extremely traumatised - to find the killer and bring them to justice. But there's more to this puzzle than meets the eye, starting with the souls of the dead monks being trapped in their bodies...
Walkthrough
| Start point | |||
|---|---|---|---|
| Member requirement | |||
| Official difficulty | |||
| Official length | Medium to Long | ||
| Requirements | Skill requirements are not boostable unless marked with a [B] for boostable.
None, although completion of the following quests are highly recommended for full storyline comprehension and additional dialogue:
| ||
| Items required | Items from the tool belt are not listed unless they do not work or are not automatically added.
| ||
| Recommended |
| ||
| Enemies to defeat |
|
Murders in Silvarea

To start the quest, speak to Brother Samwell in the mountain pass of Silvarea, located west of Paterdomus and east of Varrock. After you calm him down, he hands you an investigation notebook.
There are three core clues. Investigate the torso of the dead monk in the northeast, a plant a little further east to find a lost ring, and a tree to the southwest with an arrow stuck in it. An additional clue is found by listening to the trapped soul of the monk to the southwest. If not all pieces register as "found", destroy the problem item and find it again.
Return to Brother Samwell, who asks you to find a witness. Go up the hill to the Odd Old Man. In order to get him to talk, persuade him two times, then threaten him. He will say that he saw an elf, and after the monks were murdered, a tall, hooded figure making off to the east, who seemed to be taller than the elf and wearing darker clothes.
Return to Brother Samwell again and select any of the chat options. It won't matter who you pick to accuse, as you will be investigating further.
Next, follow the crystals to the east. These crystals are small and blue; they may not appear on low detail. The trail leads up the steps and off towards the beacon. Upon coming to the end of the trail, search the dead elf there to find a core clue in her hands, and an additional clue by listening to her soul. Afterward, investigate the plant to the west of the body, near the stairs going up to another building, south of the chapel, to find a necklace, the clothing on the fence to the south-east of the body, and the bench further south-east to find a letter. Talk to Blaze Sharpeye at the beacon by threatening him twice then persuading him for more information. Return to Brother Samwell.
Go to the Wizards' Tower south of Draynor and talk to Wizard Valina (at the front entrance). Show her the clues, then ask her about elves, Saradominist wizards, and teleportation. If you accuse her of covering up for wizards for a more thorough explanation, she claims that it is neither elves nor wizards who did the crime — this is not necessary to proceed with the quest.

Fighting the Wights with Icthlarin by your side

Return to Brother Samwell and tell him what was learned. Select the option about a "Clear conclusion." Choose any option to discuss a possible suspect, but none of the clues address the trapped souls. Icthlarin communicates with you telepathically and appears. Go through all his dialogue options to learn about Death's disappearance and their work. At this point, 4 wights attack. Their life points vary depending on your level. Icthlarin will battle them alongside you with magic, but you will have to finish them off yourself as he can only weaken them to 2 life points.
After defeating the wights, the last one you kill drops an invitation box. The box, left by the killer Sliske, invites Icthlarin to attend his ascension. Ichthlarin debates going but decides to do so after dealing with the dead monks. Open the invitation box to be transported to the Empyrean Citadel.
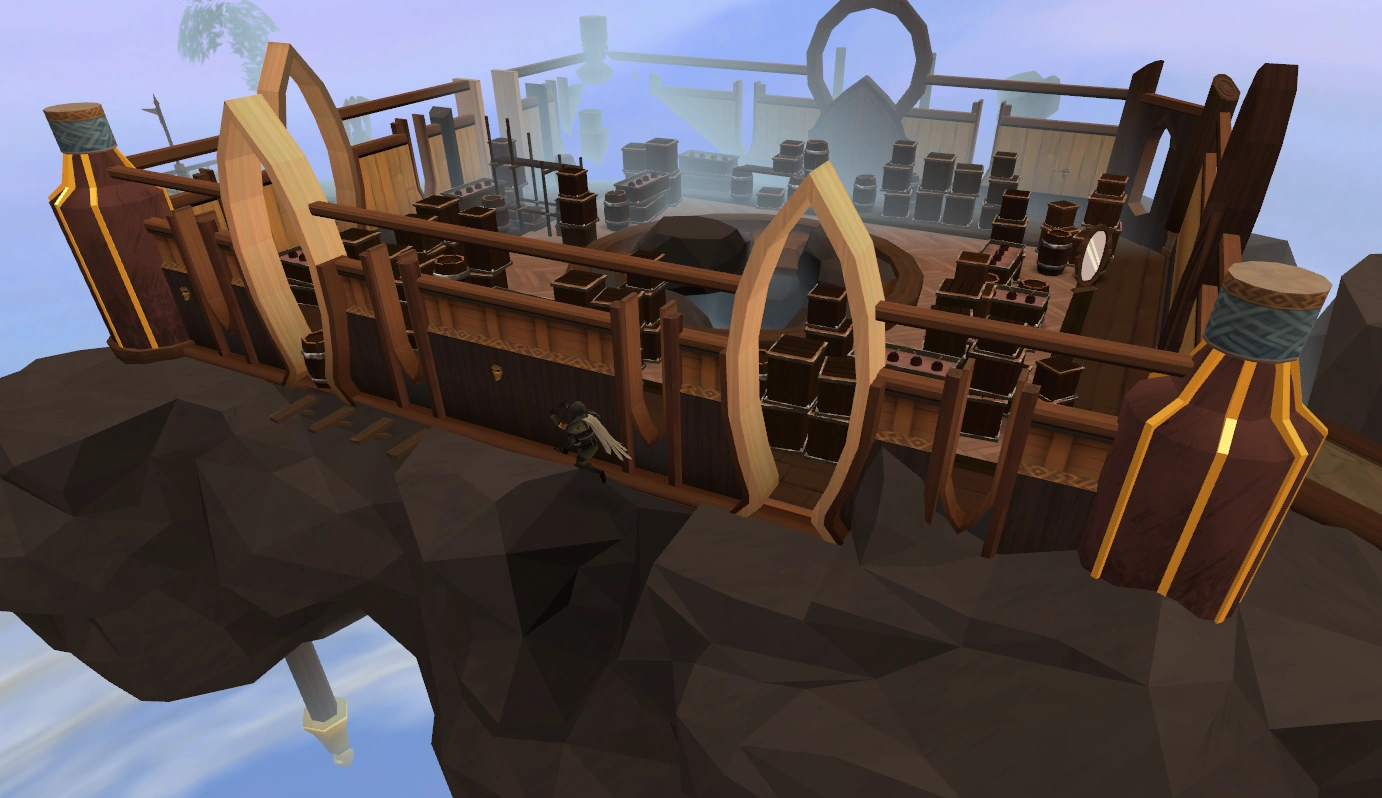
The Empyrean Citadel
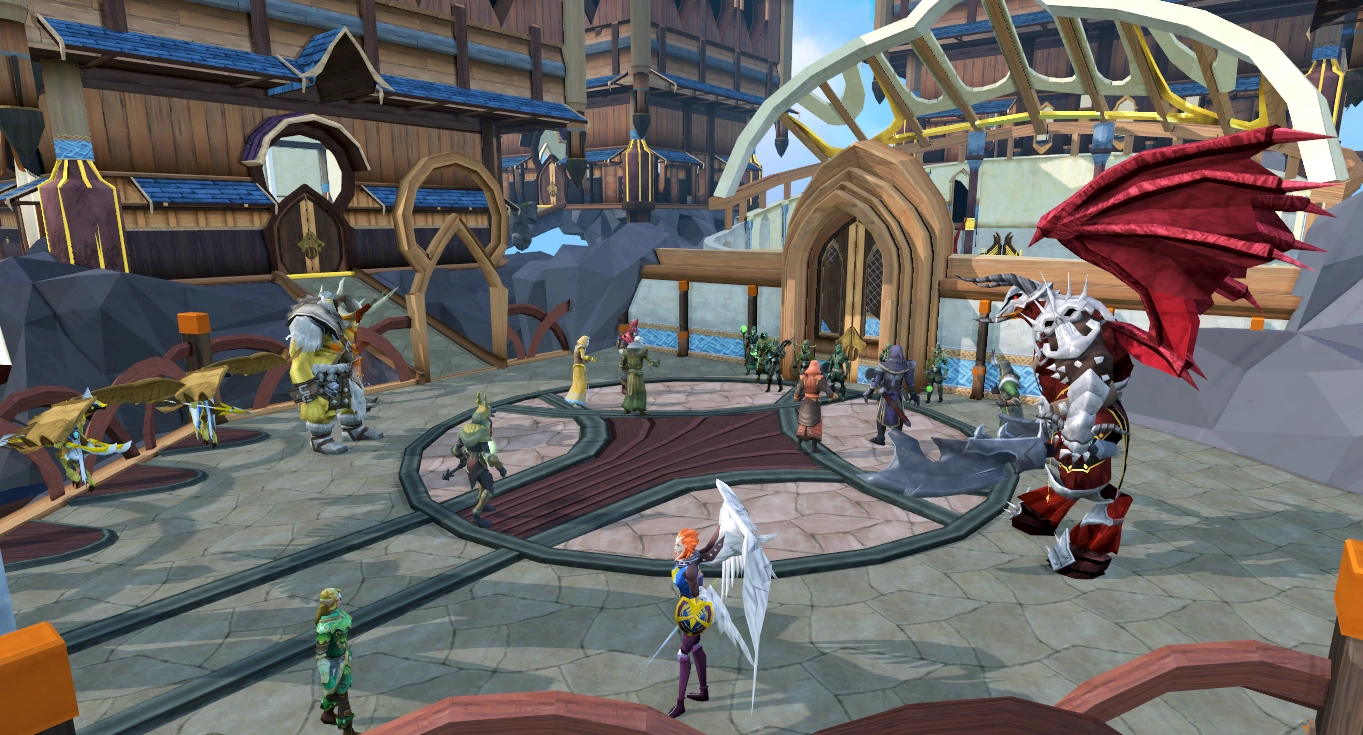
The followers of the gods gather outside the citadel.
Upon arriving at the citadel, there are representatives of the gods standing outside a set of doors guarded by the Barrows brothers. You may talk to any of them for some interesting, but inconsequential, dialogue. Speak with Icthlarin and tell him you wish to enter the citadel.
The Zamorakian Mahjarrat are present, who tell you that Zamorak is threatening to disown the Mahjarrat after they failed to attend the Battle of Lumbridge, and Zemouregal expresses a desire to claim godhood for himself. Commander Zilyana and Ilfeen can be found arguing over the murders of Saradominists and Serenists earlier in the quest, to which you have an option to tell them about the truth about what Sliske did or side with one of them. Depending on your choice in The World Wakes, Zilyana will either believe you if you tell the truth or continue to argue with Ilfeen.
The Zarosian Mahjarrat are also present, with Azzanadra still fully believing that Sliske is Zarosian, while Wahisietel continues to doubt his true motives, and calls Azzanadra a fool for trusting him. Kharshai is there trying to quell the contact between the two bands of Mahjarrat, while K'ril Tsutsaroth, General Graardor, Flight Killisa and Flockleader Geerin are there to serve their respective gods.
When you are finished, talk to Icthlarin to proceed, who will enter through the main door, evoking anger from Zemouregal, who then tries to enter himself, only to be repelled by Sliske's shadow magic.
The Maze

Enter the door to the west then head north to the window to witness a cutscene of Saradomin, Zamorak, Bandos, and Armadyl arguing. Icthlarin enters and tries to unite them to no avail.
Navigating through Sliske's maze.
Once the cutscene is over, head to the southwest corner to find a storage crate, which you can search to find a note revealing that Sliske is planning to experiment on the Barrows brothers in the Shadow Realm. Continue out the south east window, jumping over the gap, running over the planks, jumping down the rocks then up the rocks to enter the western window. Climb through the obstacle, then head outside. You'll find another storage crate here, which reveals an invitation list, listing all of the gods as invited, and listing you and Death as "other mischief makers." Head to the northern door to proceed.
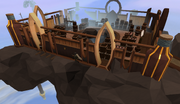
Attack of the Wights

Fighting Sliske's army of Wights
Enter the northern room and you will find a wight footsoldier in the shadows, and a Sliske Mask will warn you to turn on the lights before you start the fight. Follow its advice and pull all three levers in the room, as this will reveal some light in the room which makes the wights vulnerable, as you can only harm them while they are standing in these spots. You may have to lure each wight into the light in order to kill it.
After killing the first wight footsoldier, two wight rangers will appear, and on their death, 4 wight footsoldiers. Once all the wights are dead, go to the eastern window to view a cutscene of the gods, discussing why they are here. Zamorak reveals that he attended to see another of his kind ascend, Armadyl came to try and reclaim his citadel, Bandos came because Sliske promised there would be a war, and Saradomin came due to wishing to confront Seren about the attack on the monks. Icthlarin reveals that the attack was a set up by Sliske, and reveals that he came due to Sliske kidnapping Death, which causes Bandos and Zamorak to mock him.
After finishing the cutscene, go through the door to the north. If you die in the battle, you have to restart the waves; however, the lights stay on.
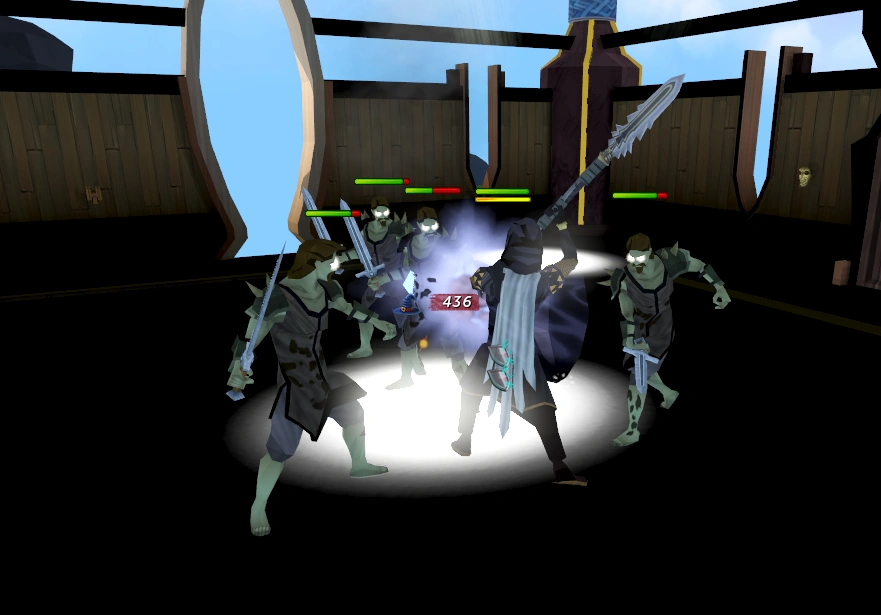
The Shadow/Light Chamber
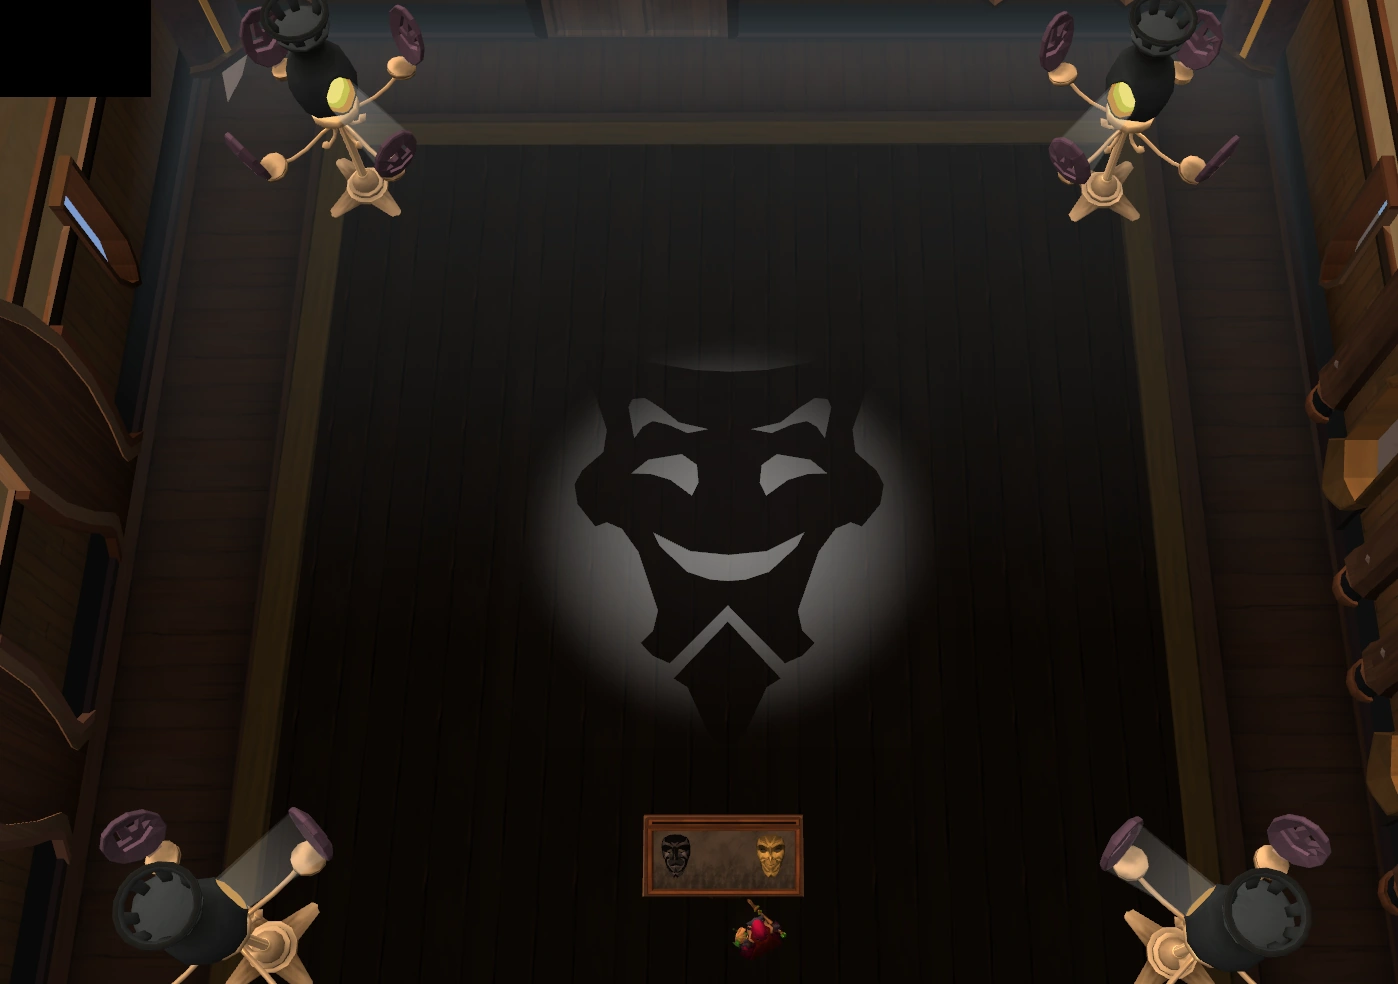
The solution to the puzzle

You will encounter a room with two sentient masks on a viewing panel, a cheerful mask named Light and a depressed mask named Shadow, who will tell you that they are in charge of the puzzle involving the lights and shadows.

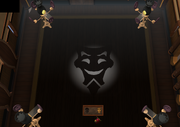
Sliske makes his grand entrance.
Clicking on the panel yields an interface in which you need to rotate the shadow casters to project an image on the floor. Rotate the bottom-left machine once, the top-left one twice, the top-right one three times and the bottom-right machine once, which will reveal a shadow of Sliske's symbol. Go to the window to view a cutscene of Sliske's arrival, and then continue through the door to the east.
The Statue of Death
In the next room, you will initially appear to see Death, but on getting closer, it will be revealed to be a simple statue. Talk to the Statue of Death, and it will promise that it will give you Death, or at the very least "a gift worthy for the gods themselves" if you solve his riddles.
For each of the riddles, the answer can be found in the form of an item in one of the chests next to him. The item then must then be placed on the Answer Plinth next to him. An additional chest will open with each riddle.
| Riddle | Solution | Picture | Location |
|---|---|---|---|
| I can build castles, that melt in the rain, but I trickle down, as the seconds drain. | Sand | First chest | |
| I can fall from the sky, but I cannot climb higher, I spring with no legs, I run but don't tire. | Water | Second chest | |
| Glass can't create me, but stone and steel do, I'm made by the sun, but out of its view, I can be tiny, and also be vast, in the shape of my maker, like a spell I am cast. | Shadow | Second chest |
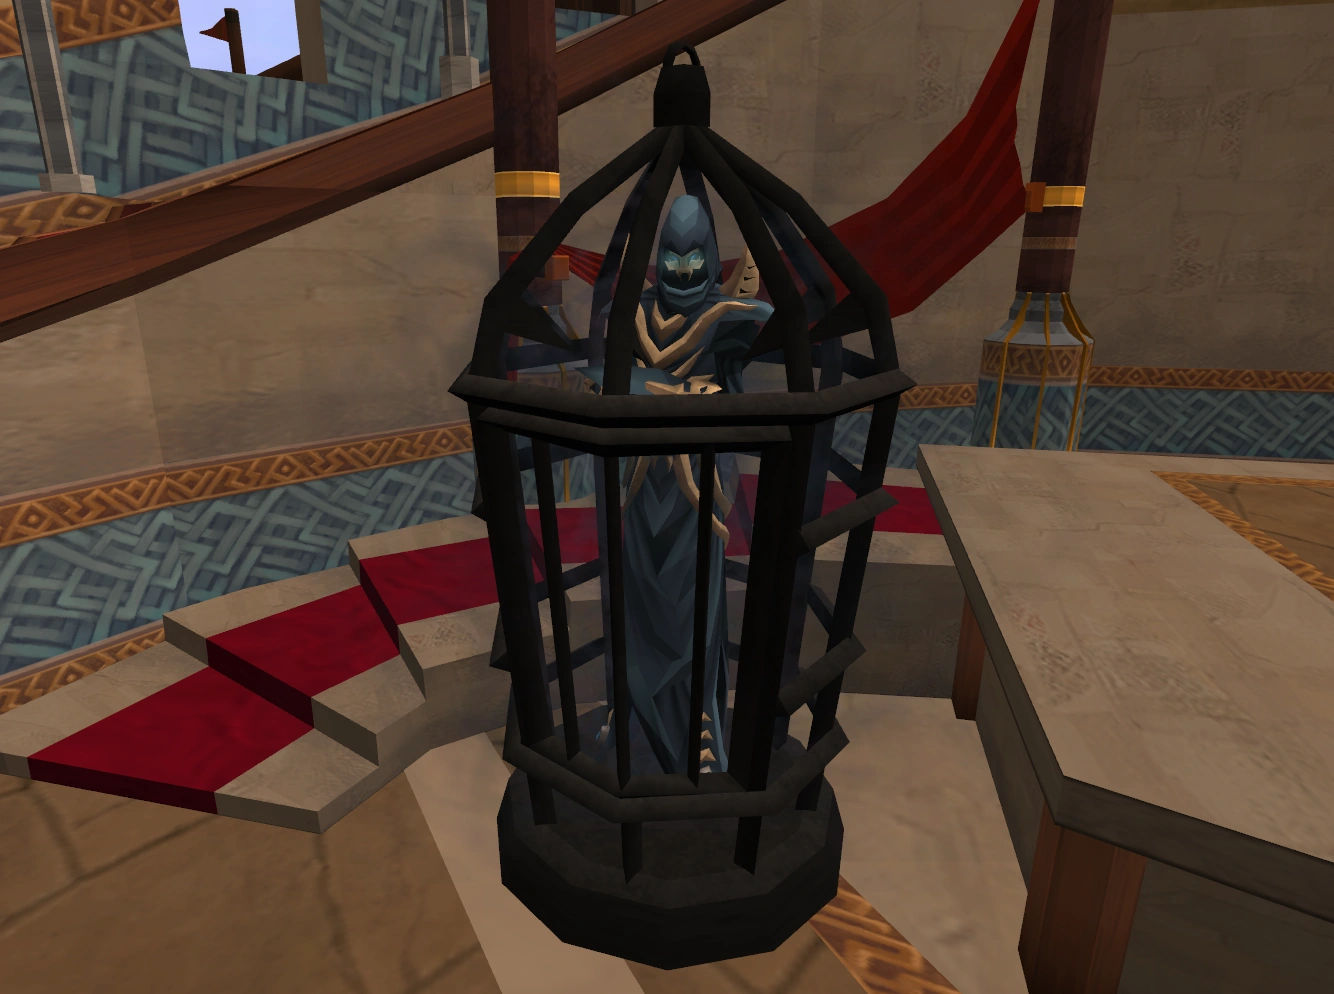
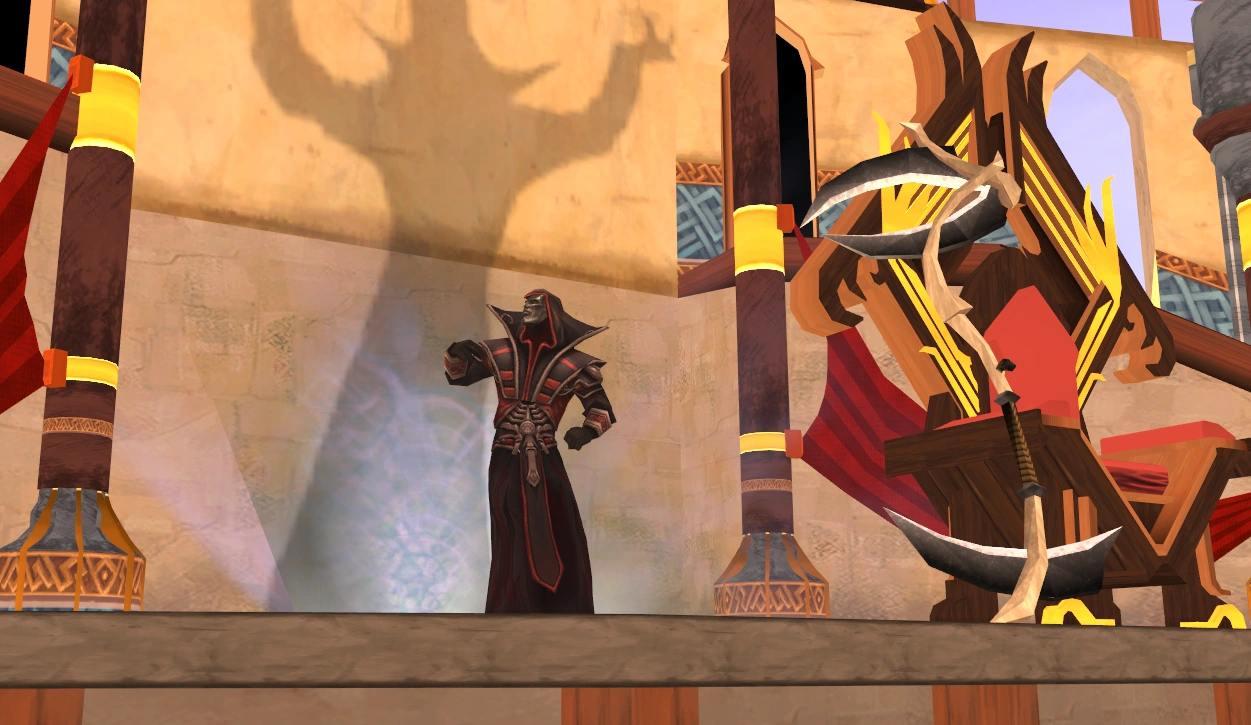
After solving the last riddle, you receive an invitation to Sliske's ascension, and the statue will reveal that he told a "little white lie" about giving you Death. Go to the window to see the gods arguing once again, who eventually proceed to threaten to kill Sliske, causing him to reveal Death and the Dragonkin Strisath in the cages next to him, threatening to kill Death and release Strisath if he is attacked. Leave by the southern door and jump off the drop down the drain.
On the Edge of War
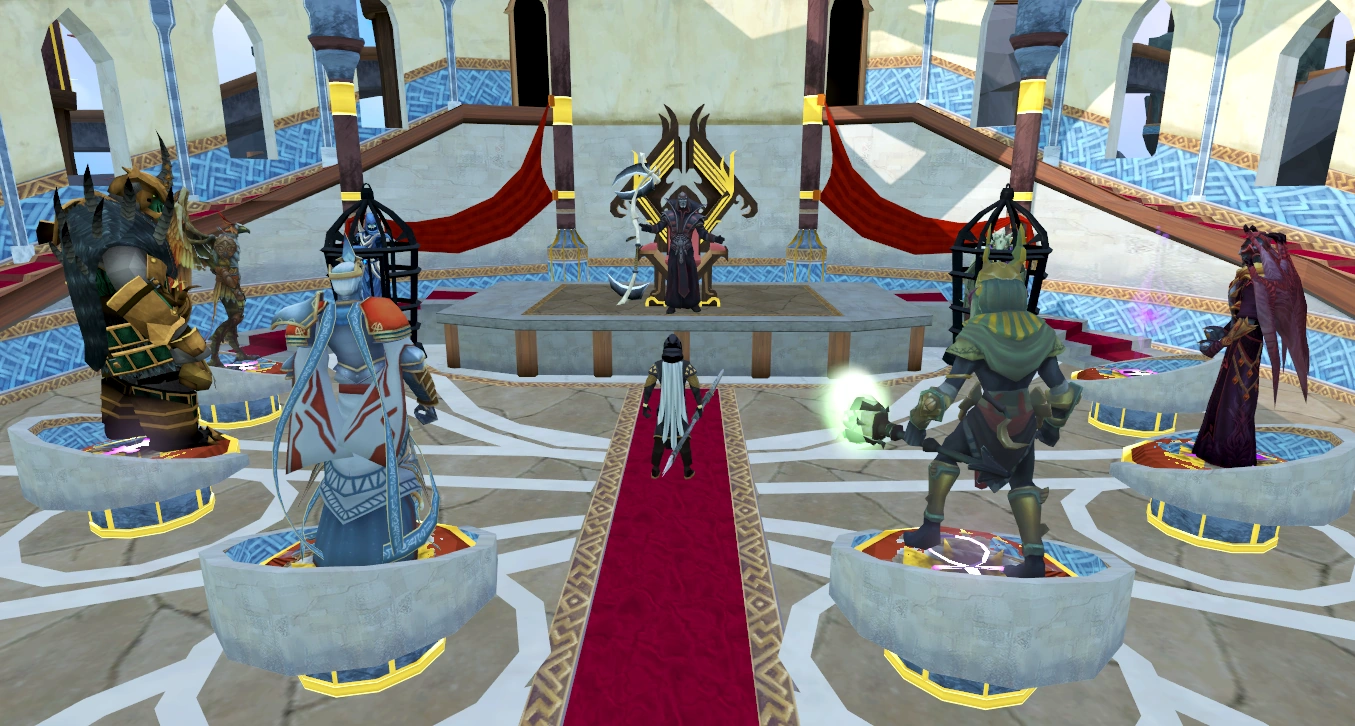

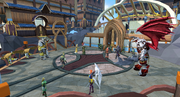
The gods at Sliske's 'ascension'
Speak to one of the Barrows brothers to get inside the main room. Once inside, and after some dialogue that is dependant on which, if any, God Emissary you have supported, and Sliske announces a contest: whoever kills the most gods will be awarded the Stone of Jas, which he reveals he obtained by luring Strisath into the Shadow Realm in order to capture him and claim the Staff of Armadyl, before proceeding to use it to track his connection to the stone, which he found in one of five locations, depending on which number you chose during Ritual of the Mahjarrat.

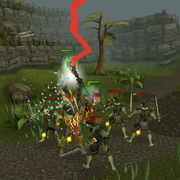
Strisath goes on a rampage.
After you make a decision as to whether to trust Sliske and state which god you plan to side with, Sliske sets the dragonkin loose (which goes on a rampage) and throws the key to Death's cage at you. Icthlarin puts up a shield to protect you from the dragonkin's attacks while you get to Death. The Gods quickly flee from Strisath, and he will soon begin attacking you and Icthlarin. If Icthlarin's shield is destroyed, he will die, and the sequence will start over.
To rescue Death, head west and stamp out the flames until you get to his cage (you may need to increase your graphics settings if you cannot see the flames). Free him and return to Icthlarin. Talk to him and Icthlarin's shield will disappear, causing Death to call his Scythe and teleport himself, Icthlarin and you to safety just before one of Strisath's fireballs hits you.
")
")
")
Finishing Up

You will arrive back in Silvarea, by Brother Samwell, and Death and Icthlarin will thank you for freeing Death, and also warn you that another God War will soon begin, with both the gods and mortals wishing to claim the Stone of Jas for themselves. Samwell will be saddened that Sliske was not brought to justice due to his actions against his brothers, although Death quickly reassures him that he will take their souls to the afterlife so they can rest in peace.
With his brothers' souls at rest, Samwell thanks you for your assistance and rewards you.
Congratulations, quest complete!
Rewards
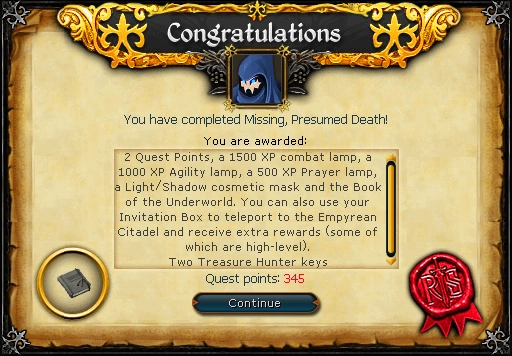
- 2 quest points
- 500
 experience lamp
 - 1,000 experience lamp
- 1,500 experience lamp
- Mask of Sliske, Light/Mask of Sliske, Shadow cosmetic headgears
- Book of the underworld
- Invitation box, used to teleport to the Empyrean Citadel
- 2 Treasure Hunter keys and 2 Hearts of Ice
- Additional rewards/activities
After completion of the quest, one can return to the Empyrean Citadel and talk to the statue to gain extra rewards if you meet the requirements, which cannot be boosted. These rewards are:
- 50,000 experience lamp (requires 75 ; temporary skill boosts will not work)
- 50,000 experience lamp (requires 75 )
- 30,000 experience Antique lamp used in a chosen skill that is at least level 75.
- 30 untradeable barrows amulets (requires 80+ to obtain).
- Two new death animations
If you do not have the required level to claim a lamp, the Statue of Death will withhold that lamp and you will receive a message stating that you cannot claim the lamp. Moreover, all lamps are claimed at once and, as with most experience lamps in the game, they cannot be banked.
- Music unlocked
Achievement
- I Presume These Rewards Are Mine, Death? ( 20) - Claim all rewards from the statue of Death after the 'Missing, Presumed Death' quest.
Required for completing
- Dishonour among Thieves
- Fate of the Gods
- Kindred Spirits
- Mahjarrat Memories
- The Mighty Fall
- One of a Kind
Post-quest FAQ
Transcript
Gallery
.gif "Death animation (Icthlarin).gif (521 KB)")
.gif "Death animation (Death).gif (931 KB)")
")
")
Trivia
- The quest's title is a pun on the phrase "missing, presumed dead," which was used in times of war when someone was missing in battle, no body having been identified.
- "Final answer" the confirmation choice in the riddle game is a reference to the television show "Who Wants to be a Millionaire?".
- Sliske's dialogue "Are you sitting comfortably?" is a reference to the old BBC children's radio show "Listen with Mother".
- A purple aura could be seen over Zaros' podium, indicating that the Empty Lord was fully aware of what was happening. Azzanadra additionally says that Zaros is 'ever-present'.
- If you have revived Hazeel and/or released Kharshai, they will be present at the citadel. Hazeel will take Khazard's place, though.
- The talking masks in the first puzzle room occasionally say things that break the fourth wall, such as referring to the puzzle as novice difficulty or accusing you of using a walkthrough, amongst others.
- Relomia, the Emissary of Sliske, can be seen on the walkway to the second puzzle room on one of the floating rocks in the distance. She seems to have arrived to see Sliske.
- Upon completion of the quest, the Adventure's Log states: I saved Death from Sliske, after hearing him announce that he would give the Stone of Jas to the person that could kill the most gods.
- After completion of the quest, additional dialogue is available with Brassica Prime (who can be found on a podium in the throne-room), Azzanadra and Wahisietel, involving the current state of Sliske and the Stone of Jas.
- Although initially, the throne room remained closed after the completion of Missing, Presumed Death, both the purple aura floating above Zaros' pedestal and Brassica Prime were visible from the outside. It has since opened up. Zaros' aura is no longer present, but Brassica Prime remains; he claims he likes the way the cushion feels on his leaves.
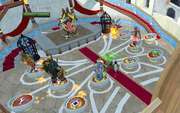
- The symbols on the empty platforms seem to indicate that several other gods were invited but did not attend. These were Zaros (who did not physically attend), Seren, Marimbo and, ironically, Guthix.
| Mysteries of the Mahjarrat | |||||
| Rise of Lucien |
| ||||
| Return of Zaros |
| ||||
| Arrav |
| ||||
| Sliske |
| ||||
| Related quests |
| ||||
| Related miniquests |
| ||||
| Lores and Histories |
| ||||
| Quest recollector |
| ||||
| Main series |
|
| Related quests |
|
| Related |
|
| Main quests |
|
| Related quests |
|
| Novice |
|
| Intermediate |
|
| Experienced |
|
| Removed or significantly changed |
|
| Italics denote that the quest was demoted to a miniquest. | |