Roles[]
- Base tank (BT) (North Tank is often backup if the base dies or is preoccupied) - Player should be focusing Yakamaru in a direction away from the rest of the team to prevent the rest of team from getting enrage stacks. The base tank can either tank at melee distance with any combat style and pray against magic or tank at a distance with ranged or magic and pray against ranged. Cycle between Resonance, Debilitate, Reflect, Devotion, Barricade, and Immortality while using Freedom as often as possible to reduce enrage stacks to minimise damage received. Wearing at least three pieces of Tempest, Primeval, or Teralith armour is suggested due to the armours' passive effect - a chance to reset defensive abilities' cooldowns, making tanking much easier. Divine, arcane, or elysian spirit shields further reduce damage received over malevolent, vengeful, or merciless shields. While using spirit shields, either use the Penance aura or bring more prayer-restoring potions to accommodate the additional prayer drain rate.
- "Md" (melee distance) base tanking requires more attention because of having to switch from praying against magic to praying against range when switching pools (Although they can Barge) and they need to run further away from exploding sharks at shark pool - recommended for experienced base tanks.
- A major benefit for md tanking is that base tanks gain a combat triangle advantage if they wear high level ranged tank armour such as Tempest armour. Although Yakamaru has a mechanic that effectively gives it 100% accuracy, any hits that would have missed will instead deal half as much damage as if they had not missed.
- A benefit from tanking in melee combat style is that if using melee gear, the base tank can use Balanced strike to heal and deal high damage. The damage done is based on the difference in percentage of current life points over maximum life points between Yakamaru and the base tank, not based on who has higher life points. The heal amount is half of this difference. For example, if Yakamauru has 100,000 health out of 1,000,000 while the base tank has 2,000 health out of 10,000 and the base tank uses balance strike, Yakamaru will heal for 500 health and the base tank will take 1,000 damage instead because Yamakaru has 10% health left while the base tank has 20% left. Thus, it is best to use this ability when the base tank is low on health at the start of a non-centre pool when it is near maximum.
- Another benefit from melee tanking is that they can use Superior Scrimshaw of Vampyrism or Scrimshaw of Vampyrism in addition to the Vampyrism aura to recover more lost life points.
- Should the poison spawn near the base tank, he should take it while the backup tank readies to voke Yakamaru after the phase ends.
- North tank (NT) - During the mirage phase, one player in magic or ranged gear will get the aggression of the sand and stun pools to prevent them from flinging projectiles at the team. It is recommended to have them using magic gear and Entangle to bind the summoned jellyfish for 24 seconds, or Ice Barrage, Binding shot, Tight bindings or bolas for 10 seconds. Wearing at least three pieces of Tempest or Primeval armour is strongly recommended because they have a chance to reset defensive abilities' cooldowns, making tanking much easier. Divine, arcane, or elysian spirit shields further reduce damage received over malevolent, vengeful, or merciless shields. While using spirit shields, either use the Penance aura or bring more prayer-restoring potions to accommodate the additional prayer drain rate. If the team is sending three to DPS the stun mirage, only one north tank is needed. The north tank should tank both stun and sand pool, in which they first tag sand pool, then provoke stun pool, followed by the Devotion ability. Following this, the north tank should provoke or stun any jellyfish attacking the DPS at stun pool. This north tank can also help the stun mirage DPS attack the stun mirage while using defensive abilities to reduce damage.
- Stun mirage DPS (stundps) - three - ideally - or two DPSers should be assigned to closing stun mirage pool at the start of mirage. The two must grab 5 planks each before mirage phase starts. On the phase before Yakamaru returns to the middle pool at 200,000 life points, do not drink an adrenaline potion when Yakamaru is lower than 500,000 life points so it can be used in mirage phase. After all the four pools have been completed and Yakamaru is at the centre pool, both DPS should be positioned between the centre pool and the stun pool. Build adrenaline to 100% before the mirage phase begins. When the stun mirage appears, immediately use Devotion, drink an Adrenaline potion, and immediately release Onslaught, ensuring cancel before risking death. It should be noted that during Mirage the blue attack only lasts for one 2,000 hit, so cancelling onslaught to run it to another player is not recommended.
- Poison tank (PT) - At 100,000 life points, Yakamaru will unleash a dangerous poison. The player performing this role will enter the spot where the poison will land and then go within melee distance of Yakamaru in order to complete the phase, which is easily done using Barge with a melee weapon switch.
- A Backup poisoner can assist as "double poison tank" during sand phase if the stun phase has not yet been completed. Due to the speed that 100,000 life points can be dealt after a stun, it's more efficient for the double poison to receive a poison debuff with the poison tank during sand phase, endure the damage, and go to melee distance from the stun pool just before the stun poison is triggered. This allows DPSers to continue dealing damage without waiting for the tank.
- The Poison Tank can click on the jellyfish that spawns near tendril pool to ensure they do not receive the blue attack while being resuscitated, as they will be flagged as out of combat with Yakamaru.
- Resuscitator (cpr) - Same role as DPS but with one more task: After every Yakamaru pool change from poison, run to the beach and save the poison tank from the insta-kill effect. This is done by filling the blue bar over their head through multiple animations. Under 20,000 life points, you should start drifting towards the beach.
- At the sand pool, the CPR is capable of surging diagonally over the middle pool to reach the poisoner without risking their death. This provides an opportunity to deal more damage during the sand phase.
- The CPR can click on the jellyfish that spawns near tendril pool to ensure they do not receive the blue attack while resuscitating, as they will be flagged as out of combat with Yakamaru. If you do get the blue attack, activate Barricade.
- Shark tag (SH10/Stag10) - The shark tank grabs 10 planks before mirage and keeps the shark mirage's aggression away from DPS while the base tank provides the "tag" role for the tendril pool. The tagger should be ready to plank the pool when needed.
- Main Stun (MS) - The Main Stun is responsible for stunning Yakamaru on the stun pool when its defence gets too high. Stunning Yakamaru periodically will hit the whole team for 1,000 damage but will drastically lower Yakamaru's defence, making the pool much faster.
- Backup Stun (BUS) - The Backup Stun is only needed if the Main Stun splashes all of their stuns. If the Main Stun splashes, the Backup Stun will stun Yakamaru so that the team doesn't need to wait for the Main Stun's stunning abilities to go off cooldown.
- (ST5) - Two players grab 5 planks each and quickly chip down the health of the mirage in the stun pool and plank the pool quickly. They then serve as normal DPS for the remainder of the fight.
- Debuffer - One magic DPS should cast the debuff spells Vulnerability and Enfeeble to increase damage dealt to Yakamaru by 10% and decrease damage received from Yakamaru by 10%, respectively. These spells only last for one minute so they need to be recast every minute. Debuff spells can miss and needs to be recast again if they do. The debuffer can also use Claws of Guthix special attack every minute.
- Jellyfish wrangler - One DPS should tag all the jellyfish during mirage utilising incite and provoke to aggravate the jellyfish onto them away from DPSers and tanks. This allows the other roles to focus their efforts on completing the pools without other threats. Jellyfish wrangler should not use stuns such as ice barrage to hold the jellyfish in place until they are close to the wrangler as they can re-aggravate onto DPSers and tanks. They should allow the jellyfish to freely attack them before running around mid pool keeping distance between them and jellies. They may now be entangled/barraged as they won't become aggressive onto someone as they are closest to the jellyfish wrangler.
- Double Poison (DBL) - As the name implies this role is an additional poison tank for the stun pool only. During the sand pool, when Yakamaru expels the poison, two players (the main poison tanker and the DBL) will take the poison. The double is expected to tank the poison until the next phase (stun pool). As the poison deals continous damage, the double should ensure their health is kept high and use anything in their capability in order to survive and give the pool to Yakamaru. Due to how the stun pool works, teams can quickly whittle down Yakamaru's health, which can make poison timing troublesome if a double was not assigned. Assigning a double shaves kill times by 30 seconds to 1 minute. This role is obsolete if Yakamaru starts the fight at the stun pool.
- DPS - Once all other roles are filled, any remaining slots should be range DPS in power armour because magic has lower DPS at Yakamaru as Asphyxiate must not be used at stun pool or stun mirage. If possible, they should be using Vengeance Group or Intercept while under the effects of Devotion. Be aware that Sand pool and Tentacle pool specs cancel and reset defensive timers, so be careful on timing or you will injure yourself. Make sure the players you cast Intercept on are receiving the same combat style of damage you are praying against or else you will take damage while Devotion is still active. A summoned jellyfish can easily kill a player Intercepting their teammates if it attacks a bunch of them at one time with its AoE melee attack. Players should bind the jellyfish immediately and Resonance the geysers or tag it and prayer switch to reduce the geyser damage. The DPS should also cast Ice Asylum if needed so a slower team does not run out of food.
Equipment[]
Ideally, all DPS players are in power armour and spreading support responsibility around. Tank gear does not have a damage boost, which, albeit its initial use, causes the team to use more supplies and extends kill time.
Like Vorago, melee can be used but is not recommended if inexperienced, as they need to constantly change prayers while running to and from pools. The summoned jellyfish and the meleefish will still be able to attack melee DPSers when bound if their main targets are the melee DPS. The melee dps also is the closest during mid-phase and likely will become their target if not voked or tagged.
An experienced melee DPS however can be useful for debuffing using Quake and Statius's warhammer.
When maging, it is required to be on either the standard spellbook to cast debuff spells on Yakamaru or the Ancient spellbook to cast Ice Barrage on summoned Jellyfish to bind them for 10 seconds. If north tanking, it is recommended to be on Ancients and be dual wielding due to 2-handed weapon's slow attack rate. Bring a Guthix staff as a weapon switch for access to the Weapon Special attack Claws of Guthix, a one minute target stacking debuff.
Rangers should be on the Lunar spells spellbook with access to Vengeance spells or Ancient Magicks spellbook with access to Intercept if pulling damage from the team or distance base tank.
Note that Vengeance spells cast from the ability bar are delayed like abilities which means they replace an adrenaline-building attack. Click the spells from the spellbook and use the ability bar as a timer for Vengeance Group and Ice Asylum cooldowns.
Rangers can use Bolas to bind Jellyfish for ten seconds.
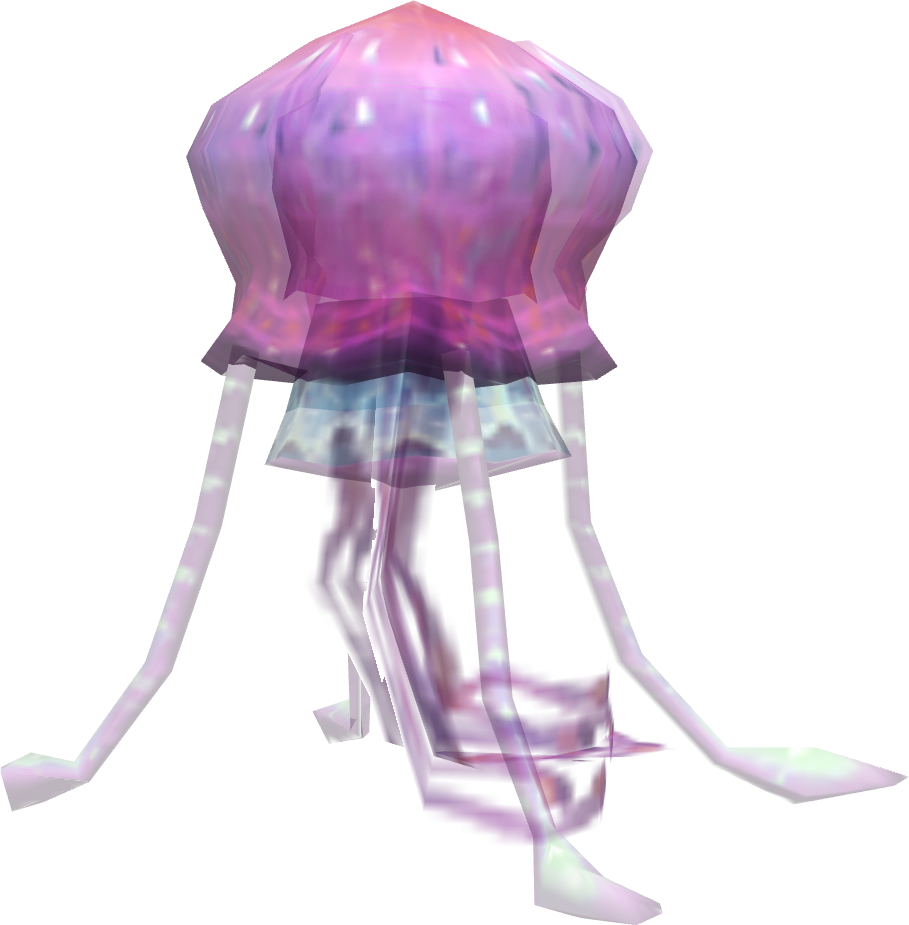
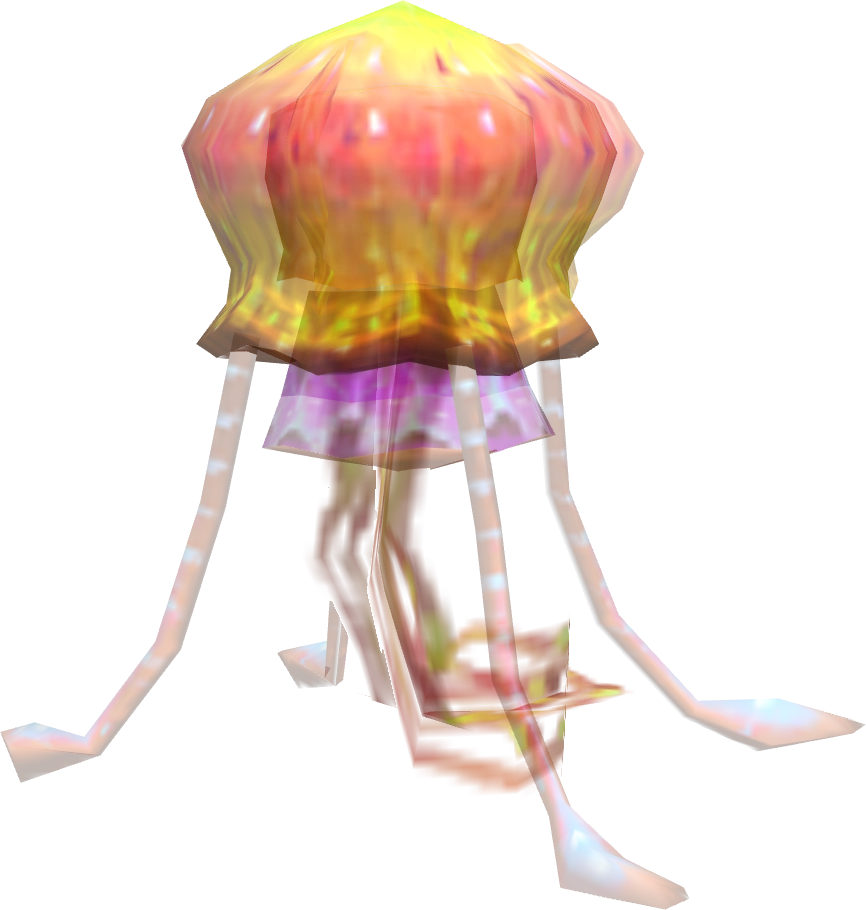
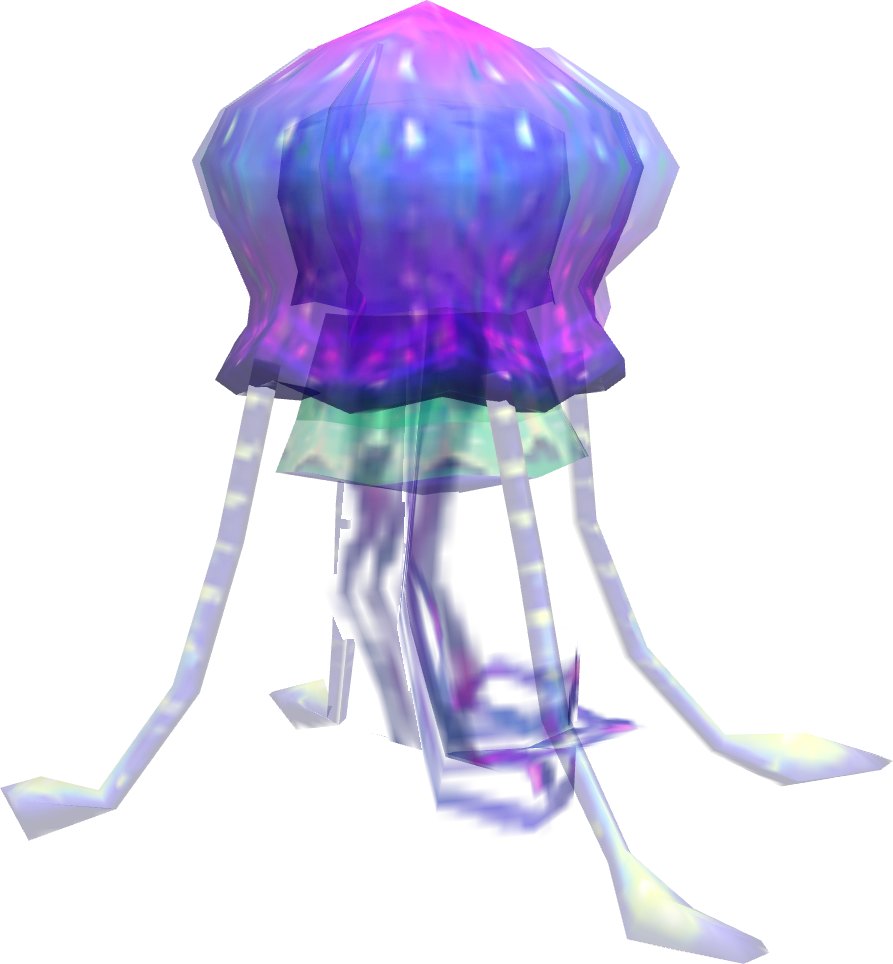
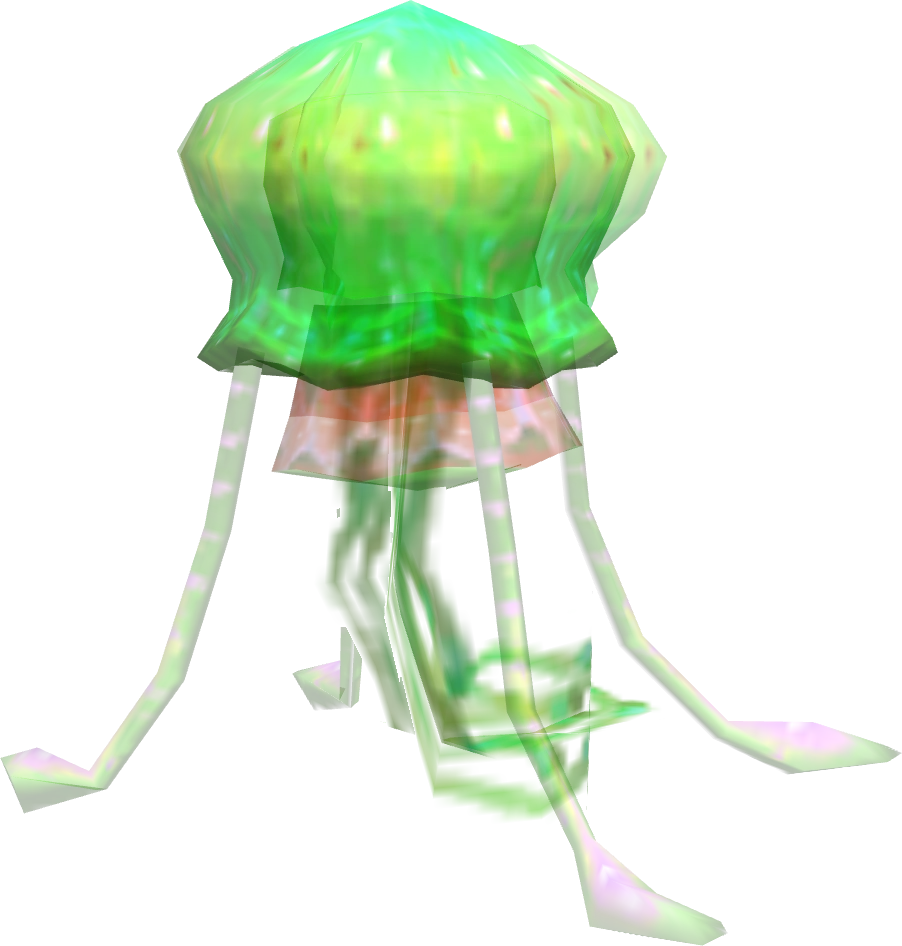
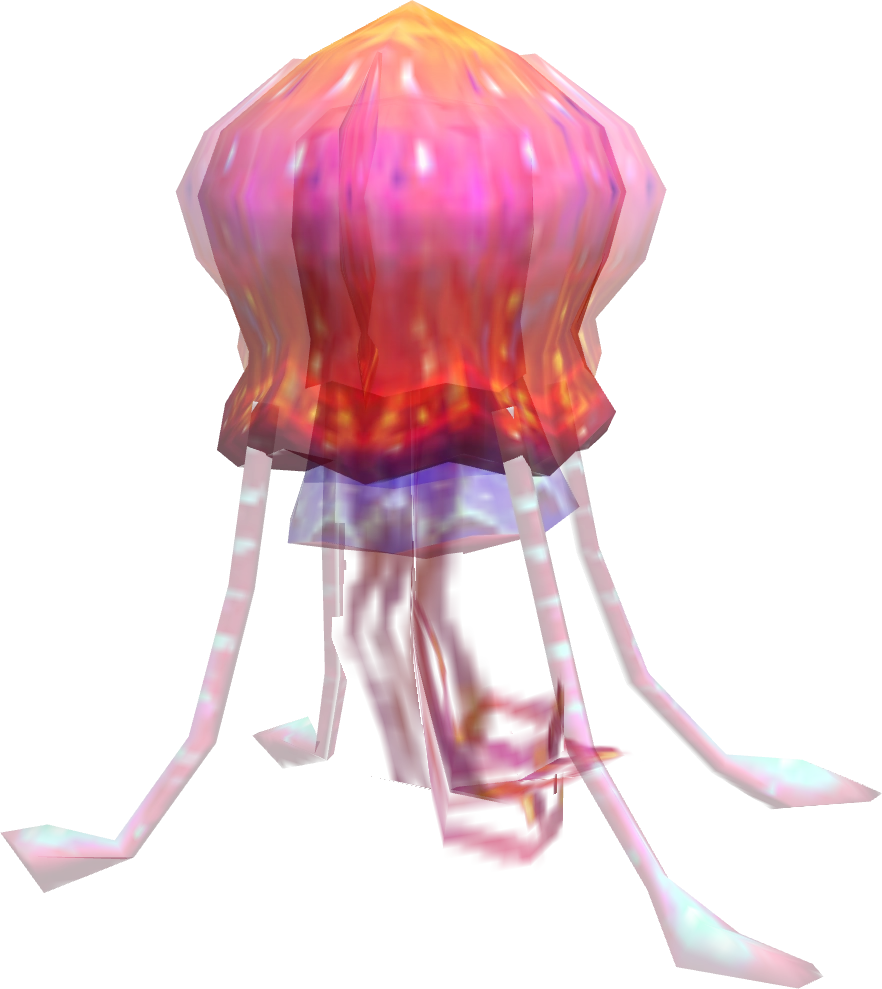
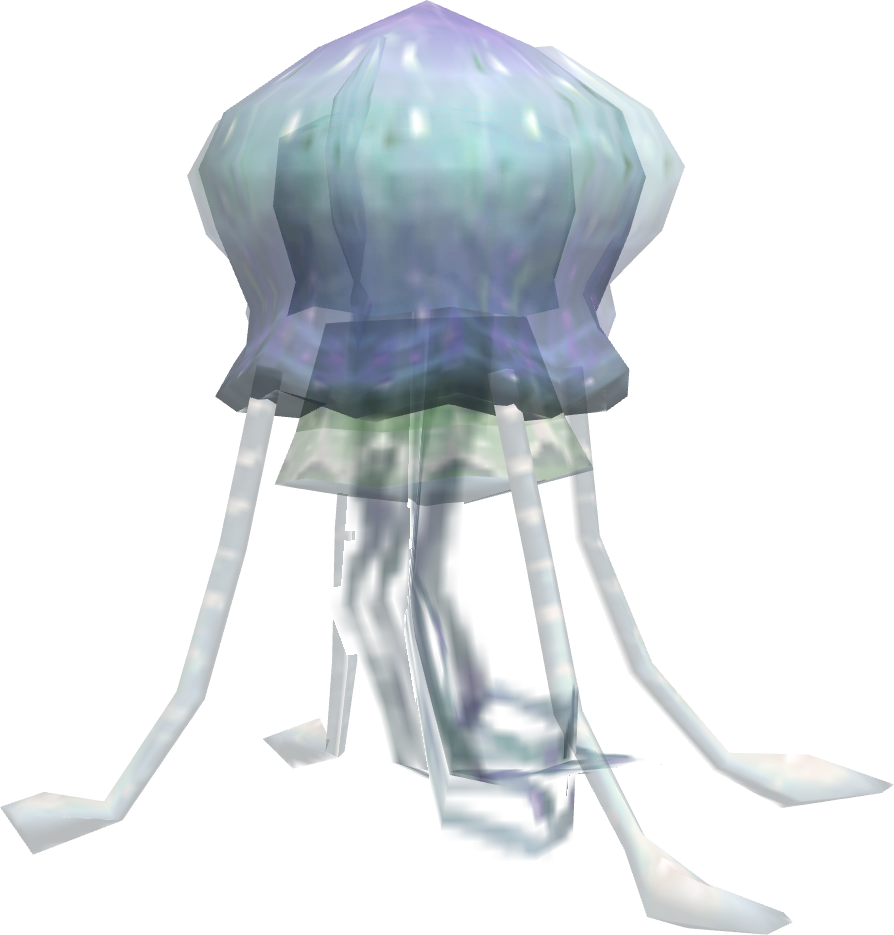
Jellyfish[]
| Durable Jellyfish | Jellyfish (Priority target) |
Magical Jellyfish | Piercing Jellyfish | Meleefish | Reflecting Jellyfish Do not attack | |
|---|---|---|---|---|---|---|
|
|
|
|
|
| |
| Uses | Magic, heals other jellyfish |
Melee | Magic | Ranged | Distance Melee | Melee |
| Weak to | Slash | Nothing (geysers as game mechanic) | Arrows | Stab | Earth spells | Crush (cannot be attacked anyway) |
These jellyfish appear in the canals and throughout the fight with Yakamaru. They should be killed after Yakamaru leaves the mid-phase as they have a very fast attack speed and deal a decent amount of damage at their target(s), easily killing teammates. Stuns temporarily stop them from attacking.
When an orange jellyfish spawns, multiple cracks appear on the ground and geysers erupt a few seconds later. The geysers deal 1500-2000 magic damage to players hit by them, but also deal 10,000 damage to the jellyfish per covered geyser. Carefully timed Resonance can be used to both heal yourself and damage the jellyfish.
Attacking jellyfish during the fight will protect the player from Yakamaru's auto attack. This allows players to:
- Utilise Soul Split when targeting jellyfish. Make sure to quickly change prayers back when the target dies.
- Tag the orange jellyfish before stepping on geysers, ideally using Binding Shot or Impact, to heal from the geyser without receiving Yakamaru's auto attacks.
Canals Puzzle[]
| Area 1 | Area 2 | Area 3 | Area 4 | Area 5 | Area 6 | |
|---|---|---|---|---|---|---|
| Special Jellyfish | 1x Durable | 1x Reflecting | N/A | N/A | N/A | 1x Durable, 1x Reflecting |
| Combat Jellyfish | 5x Random | 5x Random | 5x Random | 5x Random | 5x Random | 10x Random |

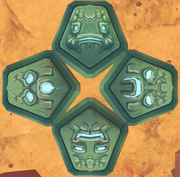
The Faces at the puzzle. North is taciturn face, east is angry face, south is happy face, west is shocked face
After entering a canal puzzle, you will be facing various Jellyfish in each island and there is a blocked water spout. The jellyfish that appear must be killed to unblock the spout, which will take you to the next skirmish. They are not aggressive. Having all players attacking one jellyfish at a time by avoiding the use of aoe ancient magicks or AoE abilities other than corruption shot and corruption blast makes killing the jellyfish much easier. Deploying dreadnips at the reflecting jellyfish can temporarily disable its reflecting damage, or having a player use the Zamorakian spear special attack can be helpful to entirely negate all of the reflecting damage. Having the whole team use both soul split and soul link helps spread out the damage and healing.
Once all jellyfish are killed, have four people from the group go back to the islands which had pressure pads. One player will hit the block by the southern bank, revealing a face. The players on the other islands must stand on the pad containing that face to unblock the canal, leading to the boss fight. A minimum of five players are needed to complete the puzzle unless one player can flip the block and immediately run to the closest island with the pressure pads.
Rebank if needed by logging out then back in if you can't use the two canal banks, then re-enter the instance.
In order to go straight to the boss fight from instance portal, all players must have dived into the arena; if one player has not dived through the waterfall yet, the whole team must complete the canal, even if the group leader sets the boss to Yakamaru. If a player forgets to dive before lobbying, any other player can remain the in canal to keep the instance's puzzle completed.
Pre-Fight[]
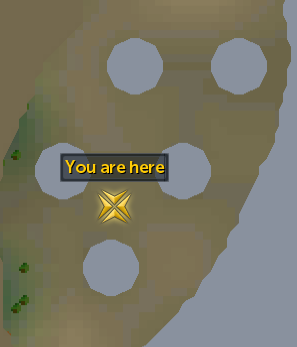

DPS position for start of fight
Before fighting Yakamaru, run NORTH if not in NXT; this way, the player will not lag when they move up to the stun pool.
Group in close proximity to other DPSers while standing in the gaps between pools as seen to the right, to allow for interceptors and group veng'ers to reach everyone. This also allows you to easily manage shark, sand, and blue effects.
The Fight[]
Yakamaru does not move for the majority of the fight; the only time it moves is when it jumps to another pool. Yakamaru will jump to another pool when its health is depleted. Each pool is a phase that gives Yakamaru different abilities, and there are 5 phases in total. Players will need to deal as much damage as possible, as the total damage needed to kill it is 5,600,000 from its phases and mirages.
Yakamaru's attacks will hit everyone in the fight within a 20x20 radius of him. It does not use melee-based attacks, but its melee-distance attack is a magic attack instead. Anyone 3 spaces or further from it will instead be hit with ranged attacks, shown as tentacles bursting from the ground and attacking the player. This means all players who attack Yakamaru will take damage from it. Thus, all players should use Debilitate or Devotion throughout the entire fight to reduce this damage. The DPS team should be standing at a distance from Yakamaru while praying range for most of the fight. Like Beastmaster Durzag, Yakamaru's accuracy is extremely high, but with high enough defence, armour, or a combat triangle advantage, its attacks can periodically miss. However, similar to Vorago's blue bomb, if Yakamaru's attacks miss, another unmissable attack will instantaneously hit the player whose damage amount appearing right below the missed hit splat. This second hit is 50% less damage than the first hit if it did not miss. Therefore, tanks should still try to wear the highest level tank armour they have and gain a combat triangle advantage by tanking Yakamaru at melee distance with ranged armour.
During the fight, Yakamaru will not let you attempt to leave the fight through lobbying. If you do so, a message will say "Yakamaru is displeased with your cowardice.", preventing you from doing so. If you are out of combat, a message will appear saying "Yakamaru is displeased with your cowardice, and throws dangerous projectiles at you!", dealing 2,000 damage to all players out of combat with it. This will mean that it is a fight to the death, although players can leave a failed kill by asking the group leader to kick them or removing themselves from the group. Players can also prevent this by using anticipate, freedom, surge, or escape to stay in combat stance if they are outside Yakamaru's attack range.
To leave the fight, you must leave the group. Press '1' after clicking the 'Leave your group' button. Do not hold down '1' as this may queue or activate an ability, thus closing the interface. An admin or leader may kick players, but don't wait for them.
For positioning, the tank should stand on the side away from the DPS group and turn Yakamaru's direction away from them or else they will also gain enrage stacks. The tank should take the side closest to the centre pool, so they can quickly return to it when one of the four outer pools is finished. The tank should not stand on the opposite side of the team unless they are trying to avoid the 2,000 damage tendrils because the team cannot conveniently cast Intercept on the base tank. The base tank should prioritise preventing or minimising damage over healing by cycling between Resonance, Debilitate, Reflect, Devotion, Barricade, and Immortality while using Freedom as often as possible to reduce enrage stacks. Always make sure there is one damage reducing or damage preventing defensive ability active at all times throughout the fight. The base tank can switch to Soul Split after using barricade to heal and switch back to praying range before it runs out. DPS'ers, which includes non-tank roles, should be in a group close enough to share Ice Asylum and Vengeance Group but away from the tank.
As soon as Yakamaru appears, attack it. Yakamaru and its mirages will cycle between the following abilities that occur after 4 auto-attacks throughout the whole fight:
- An orange jellyfish can spawn along with cracks with 50,000 life points. Players can stand on the cracks, after which a geyser will erupt out. The player will take around 1500-2000 magic damage from the geyser, but will deal 10,000 damage onto the jellyfish per different geyser players stand on. Prioritise killing these jellyfish over Yakamaru, as they are aggressive and can stack rapid AoE melee damage that can hit in the 2000s. Bind them immediately when they spawn so they cannot attack the team. Use Resonance timed correctly for a free heal, killing the jellyfish, or stun and ignore during Mirage phase. Resonance can heal off the ranged attacks from Yakamaru instead of the geyser damage if the jellyfish is not attacked, which often results in health lost. Players should attack the jellyfish once before proceeding to an empty geyser, because Yakamaru can only hit his range attacks on players targeting Yakamaru or with no target at all. After you have attacked the jellyfish, you are free to safely resonance the geyser hit. This tactic does not work if a geyser spawns within Yakamaru's magic attack range as its magic attacks can still use up Resonance even when the jellyfish is tagged. If Resonance is on cooldown while a jellyfish spawns, which can happen when Yakamaru switch pools and summons two jellyfish in a quick succession, players should attack the jellyfish once first then switch to praying magic to receive half damage or use Devotion to receive no damage. Throughout the fight, make sure that the base tank is not attacked by any jellyfish by binding and voking them. There is a limit of 10 jellyfish that can be present in the area at the same time. If this limit is reached and Yakamaru uses this special attack, no jellyfish will spawn but the geysers will.
- If there are two or more players in Yakamaru's attack range, one player it is not targeting will turn blue (similar to the water Metamorphosis ability), and must pass the effect on to another player. This is done by standing next to someone else who has not obtained it yet (this is why standing close together is helpful). If you do not pass it on to another person, you will be hit for typeless damage, starting at 1500 and increasing by 1000 for every following hit after four game ticks, until the effect is passed or until the fourth hit of 4500 damage where it disappears. After passing the effect around to 4 players, the effect will disappear. The effect does not pass between players standing on the same square. Do NOT pass the "blue" onto the base tank. If there are no players around, the player affected by the "blue" should spam eat high-healing food like rocktails or rocktail soups in conjunction with Saradomin brews to recover as much health in one tick. Simply spamming Saradomin brews will not be enough to counter the damage. Players can choose to right click and follow a player affected by this attack. This is especially useful if an important role such as the poison tank or CPR is affected at the wrong time.
- The pool-specific special attack, except for the no-stun pool where Yakamaru has none. The quicksand pool will use its quicksand attack if there are two or more players in Yakamaru's attack range, but always leaving atleast 1 player unsanded.
At all pools and mirages except the sand pool or mirage, Yakamaru's special attack rotation is jellyfish > blue > pool specific special attack. On the sand pool or its mirage, its special attack rotation is blue > jellyfish > quicksand.
When Yakamaru switches pools, its special attack rotation pattern will be randomised, which is important to note at the tendrils and quicksand pool.
Yakamaru as well as Beastmaster Durzag have enraging mechanics, where damage against you increases over time. There are up to 15 enrage stacks that Yakamaru applies to its main target as well as anyone in a 7x7 area around the main target. One stack is applied every time Yakamaru uses an auto-attack. Each stack increases damage taken by 20% per hit. Yakamaru will warn you about increased enrage three times, saying "Yakamaru's water begins to drench you," (As soon the effect is applied, thus x1.2 damage taken.) "Yakamaru's waters begin to soak through you," (Damage multiplier has reached x2, after 5 hits taken.) and "Yakamaru's waters conducts his full power." (Damage multiplier has reached x3, after 10 hits taken.). This multiplier maximises at x4 at 15 enrage stacks. Unlike Beastmaster Durzag, gaining enrage stacks from Yakamaru does not clear all active defensive abilities and put them on cooldown.
Using Freedom halves the number of enrage stacks the user currently has, rounding down. Unlike Durzag, Yakamaru does not reset his enraging mechanic when he is not focusing on that player, so the only way to decrease his stacks are by continually using Freedom whenever those messages appear. But like Durzag, Yakamaru's enrage increases faster than the base tank's or the north tanks' freedom goes off cooldown, so the base tank and the north tanks will always have some level of enrage on them.
Even if the base tank has Yakamaru facing away from the DPS team, the DPS team is still likely to get enrage stacks especially while Yakamaru switches pools, at the start of the fight, and if the DPS team attacks Yakamaru before the base tank at a new pool. The DPS team should use freedom immediately after they receive the in-game message regarding enrage stacks.
- If Freedom is on cooldown, Devotion and Debilitate can be used to temporarily reduce damage. Also, you can check your enrage stacks on the debuff bar, icon is not visible if there are no stacks.
Poison[]
When Yakamaru reaches 100,000 life points at the speciality pools, poison will spawn in a designated spot. The team should have a poison runner, someone who will use the poison to infect Yakamaru at the end of the phase. When Yakamaru shoots the poison, it will hit a 1x1 area (shown with green arrows on that spot). The poison runner has 5 seconds to reach to this location. The poison runner will then go melee distance to Yakamaru once they are poisoned (Protect Magic prayer) and the team depletes his health to 0. The poison appears near any player, including the base tank, which can make it hard for the poison tank to spot the poison. Bladed Dive is an extremely useful ability to catch the poison if it is far from the poison tank. The DPS group should stick together to allow the poison to be closer to them by standing in one square when Yakamaru reaches 200,000 life points. If the poison appears near the base tank, the base tank should take it if the poison tank does not reach it in time.
As a safeguard for the poison runner, as soon as the poison spawns, one DPS who is close to the spawned poison should run next to but not on the poison spot. If the poison runner is not on this spot when the poison is close to hitting it, this DPS should stand on it instead and take the poison in order to save the phase from being repeated. If the poison runner reaches to the poison spot at the same time or after the DPS stands on it, the DPS should immediately step out of it while the poison runner should stay on it.
A successful poison attempt should yield the message "Yakamaru is lured by the scent of your poison..." and drag them into the pool with him. That player will later end up on the shore, and must be resuscitated by a teammate or will instantly die from the poison. While that player is being resuscitated, any damage from Yakamaru will be reduced to 1 regardless of protection prayers or defences. You can still eat and drink potions while being resuscitated however, and it is advised to do so should the resuscitator become "blued" while saving you. If either the poison tank or CPR is attacked by a summoned jellyfish or gets "blued", a DPS should be stand close to them to bind or provoke the jellyfish off them or remove the "blue" from them and pass it on to other DPSers. Bear in mind that as the poison tank is being resuscitated, they can immediately attack the first jellyfish that spawns near Tendril pool and build adrenaline or kill it with thresholds.
One and only one person should take the poison unless they are preparing for the stun pool. If someone else accidentally takes the poison as well and both poisoned players go into melee distance of Yakamaru, Yakamaru will only randomly take the poison off of one of them and send them to the beach. If this happens, the other poison player will need to tank the poison damage during the next pool and go in melee distance of the next pool at 100,000 health to remove the poison while ignoring the spawned poison at that pool. This poisoned player will need to eat a lot of food, so healers should heal the team more often if two players took the poison or else the other poisoned player will run out of food later in the fight. If the base tank or a north tank takes the poison as well as another player of a different role, the other player should allow the base tank or north tank to remove the poison by not going into melee range of Yakamaru because they will need the food more than players of other roles.
If no one poisons Yakamaru while he is at the specialty pools, The message "As no one poisoned Yakamaru, it returns to the central pool to recover." will appear. Yakamaru will return to the central pool with the health he originally had (200,000, 400,000, 600,000 or 800,000) + 50,000 additional life points. No canal jellyfish will spawn if this occurs.
Phases[]
Centre pool (Start)[]
- 3 attacks
- Jellyfish
- 3 attacks
- Blue
- Repeat
This is the pool that Yakamaru is waiting for players in. The designated tank should shatter the barrier, starting the fight. Dreadnips are useful for added damage to Yakamaru, but will not stun any of the pools except the no-stun pool.
After Yakamaru 200,000 life points while in the starting pool, he will go to the next phase by jumping to one of the pools. The first pool is randomly chosen, but the others will be chosen in a clockwise rotation based on the previous pool.
If Yakamaru is killed without being poisoned at the end of phases, Yakamaru will return here, then players must redo the pool that he was just in until he is poisoned.
| Base Tank |
|---|
| The tank should stand east of the pool to allow others to respond to jellyfish, while not being too far away to not surge to the the next pool. Use Resonance or Barge on phasing. |
| DPS |
|---|
| Everyone else should be standing to the west, but close together, while praying against ranged attacks. Tag and stun jellyfish while running to Resonance geysers. |


Southern-most pool (Tentacles)[]
- 4 attacks
- Jellyfish
- 4 attacks
- Blue
- 4 attacks
- Tentacle special attack
- Repeat
During this phase, Yakamaru has access to two tentacle abilities that are used at the same time.
- The first one, which is a group of bunched up tentacles, is used against his current target and deals rapid hits of 2000 per game tick for players near it, which will kill them easily. The target should be prepared to run or take heavy damage from them. This attack can be easily seen as Yakamaru will lower its head onto its main target, rather than using regular attacks, but the attack has already been released when it does so.
- The other tentacle ability will choke the top 5 DPSers, dealing small but increasing damage starting at around 200 per 2 game ticks. The tentacle also binds players and clears/resets defensive abilities. Affected players will be freed when enough damage has been done on Yakamaru. If the tentacle effect is somehow left uncleared, it can deal very high damage. If the 2000 damage tentacle attack targeted the top 5 DPSers but they were first choked by the choking tentacle attack, they will only take damage from the latter.
When Yakamaru or its mirage just spawned at the tendril pool, there is a chance that they will use its 2000 damage tentacle attack on the closest player, catching the team off guard and possibility killing some of them. To prevent this, the DPS team should let the base tank attack Yakamaru first so it will not be targeting any DPSer.
If Yakamaru or its mirage does not use its tendrils as its next special attack after the tendril pool phase begins, they will use the tendril special attack 5 auto-attacks after the "blue" special attack. A DPS should immediately call out in public chat when the "blue" is released so the base tank can count the auto-attacks and predict when the tendrils will appear. If the base tank cannot see the "blued" player, they can also tell when it is out when they see Yakamaru raises its head but does not spit anything out.
Deal damage to Yakamaru while avoiding his special attacks until the end of the phase, where like all phases, poison will spawn. The person who is contaminated by running into the 1x1 target area must then run melee distance to Yakamaru, infecting it.
Yakamaru will return to the centre pool.
| Base Tank |
|---|
| If the base tank doesn't provoke Yakamaru or its mirage at the beginning of the tendril pool, Yakamaru can use its tendril attack immediately at the closest player as its next special attack rotation. To counter this, run around when the pool spawns until you know where the rotation is at. When the "blue" is out, count the kills, as four auto attacks after the blue, the tendril special attack will occur. Right when Yakamaru is about to do the special attack, use the Escape or Surge ability. If done correctly, the tendrils will appear behind the tank's path and tank will completely avoid all damage. Another way of dealing with tendrils is to use barricade or immortality when they are expected to spawn. |
| DPS |
|---|
| Ensure high health before pool start in case some teammates provoke tendril attack and be ready to run if the Base has not voked. Continue to deal damage while standing in a close area (For the benefit of Vengeance Group, keeping the jellyfish spawn in attack range, and allowing for quick clearing of blues). Resonate geysers as usual and phase pool. |
| Poison Tank |
|---|
| If you suspect that the tentacles are about to appear near 100,000 health, ensure to not be one of the top 5 dps as it will prevent running to capture poison. Run or Barge to melee distance. |
| CPR |
|---|
| Under 50,000 health prepare to rescue poison tank by the beach. |
Centre pool (Poison)[]

Resuscitating ally at the beach.
- Resumes rotation from where middle pool ended last
- 3 attacks
- Jellyfish
- 3 attacks
- Blue
- Repeat
Yakamaru leaves this pool after 200,000 life points lost. If it was successfully poisoned, it will run to the next phase (Pool clockwise from the last pool). If you defeated Yakamaru before he was poisoned, the pool that he was just in will need to be fought again. If unpoisoned from the last phase, he will return back to the pool with health when he went to that pool + 50,000 (so on first pool he would have 850,000 life points if he wasn't poisoned).
After every successful phase Yakamaru will return to this pool and summon multiple jellyfish encountered in the canal puzzle. Each group always contains 3 combat canal jellyfish (one of all types) and one support jellyfish (durable/reflect). The support jellyfish rotate after every successful phase, the first spawn being random.
While poisoned, Yakamaru will take double damage from all attacks as well as dealing more damage to all players. The poison is removed if Yakamaru is damaged enough to be forced into the next pool, a canal jellyfish touches him, or a durable/reflecting jellyfish is killed.
During the phase, five planks appear on the south-eastern coast (20 planks total when all pools have been defeated).
Strategically, this mid-phase should be completed as quickly as possible, unless it leads into mirage. The shorter attack rotation means more orange jellyfish spawn which significantly slows the fight.
| Base Tank |
|---|
| If the base tank tanks at melee distance, switch to praying range, Barge to the centre pool immediately, and switch back to praying magic when at melee distance of the centre pool, and Provoke Yakamaru. At max enrage stacks, when poisoned and if not praying correctly, Yakamaru can hit over 8,500 damage per hit. As a safeguard from switching prayers at the wrong time, just before Yakamaru switches pools, the base tank should eat to full health. Another safeguard is to not use Resonance and use Preparation when Yakamaru is at 200,000*n life points. Use Resonance when Yakamaru returns to the centre pool without switching to praying range so the base tank receives a powerful heal instead of a powerful hit. Just make sure the base tank is at melee distance after Resonance is used or switch to praying range. |
| DPS |
|---|
| It is common for most teams to ignore the jellyfish and get Yakamaru to the next phase as quickly as possible, with the only exceptions being when sand or mirage phase is next. Except for those cases prioritise phasing Yakamaru before returning to the jellyfish. DPSers should Onslaught the centre pool or fire thresholds to end the mid-phase, then afterwards Soul Split the jellyfish not attacking them. Players with plank roles should loot planks for Mirage phase. |
| CPR |
|---|
| The resuscitator should save the poison tank on the beach and be in combat via defensive abilities if Yakamaru is not attacking them, as they can go out of combat and be hit with projectiles for 2,000 while saving the poison tank. Players with plank roles should loot planks for Mirage phase. |
South-western pool (Sharknado)[]
- 4 attacks
- Jellyfish
- 4 attacks
- Blue
- 4 attacks
- Sharknado special attack
- Repeat
During this phase, Yakamaru has the ability to create sharknados. This can be easily seen, as the whirlpool around Yakamaru will grow larger and have sharks circling around it. After several attacks, Yakamaru will release the sharks in a circle, which will drop onto the floor and then explode, dealing 2100-2400 typeless damage per shark. If you Surge or Escape before the sharks appear on the ground, they will appear on the tile where the player Surged or Escaped to. The sharks are solid objects, so players should avoid Surging or Escaping too early or teammates will be hurt by their damage.
It is possible to fish the sharknado pool, which will reduce the amount of sharks but is NOT RECOMMENDED as you will be forced to go within melee distance and the risk of sharknado is nonexistent with experience. It is possible to kick the sharks away after they have landed but it is not recommended unless there is only one within hit range.
Immediately after the sharks explode, an orange jellyfish will spawn.
Deal damage to Yakamaru while avoiding his special attacks until the end of the phase, where like all phases, poison will spawn.
Yakamaru will return to the centre pool.
| Base Tank |
|---|
| The base tank should use barricade when the sharks are launched. If it is on cooldown, run, surge or escape away from the pool, pray range if melee tanking. Return to the pool when the sharks exploded and pray magic if melee tanking. Do not tank the sharks with immortality because the sharks do not explode at the same time. One shark can activate immortality and save the base tank's life but the other ones that explode a tick or two later can kill the base tank. A better alternative to this method for those tanking at a distance is to stand as far as possible, such as at the south-west corner of sand pool, and then kick away the shark that would deal damage to you. This method allows you to save your barricade and/or use it in other situations. |
| DPS |
|---|
| Be careful with tight group placement, ideally using a "Death dot" of standing on one square. Otherwise, too many sharks will land in range of players making it too inconvenient to fish them and requiring players to run out of attack range. Continue to deal damage while standing in a close area (For the benefit of Vengeance Group, keeping the jellyfish spawn in attack range, and allowing for quick clearing of blues and sharks). Resonate geysers as usual and phase pool. |
| Poison Tank |
|---|
| Be very careful with DPS on Yakamaru. If he is near 150,000 life points and a sharknado is about to be launched, be ready to use Barricade to tank the sharks while focusing on taking poison. Run or Barge to melee distance. |
| CPR |
|---|
| Under 50,000 health prepare to rescue poison tank by the beach. |
North-western pool (Sand)[]
- 4 attacks
- Blue
- 4 attacks
- Jellyfish
- 4 attacks
- Sand special attack
- Repeat
In this phase, 5 auto-attacks after the summoned jellyfish, Yakamaru dampens the ground around him, causing all but two players within 20 squares to be stuck in the sand, clearing defensive abilities, and putting them on cooldown. A message will appear for two people not affected by the ability saying "Yakamaru drags your team into quicksand! Free them before they drown!". There is no warning message for players affected by the quicksand, so affected players will already know when they have been grounded. Each player starts out at a random level and will need to be freed; at the lowest level, if they are not saved by that point, will be instantly killed. Signs/portents of life/death will still activate. Players can determine how deeply quicksanded they and other players are by seeing how deep they are stuck in the sand.
All defensive abilities active on the player not including Freedom and Anticipation will reset, except Shield Dome as a spell is not and can be activated while sanded. Right after resonating the geyser, you can cast it on Yakamaru to lessen damage while other abilities are on cooldown.
Deal damage to Yakamaru while beating his special attacks until the end of the phase, where like all phases, poison will spawn. As Yakamaru pauses attacks during the quicksand special attack, buried players can easily Soul Split some quick heals without prayer flicking.
Yakamaru will return to the centre pool.
| Base Tank |
|---|
| The tank can and is likely to be sanded. If melee distance tanking, protect/deflect range when out of their melee range and switch back to protect/deflect magic when returning back to melee range. The base tank should not use Immortality and try to "die" for a heal after a jellyfish spawns as the quicksand attack will clear it. Instead use Anticipation to apply a debuff, and free other players as needed. |
| DPS |
|---|
| Players are advised to stand in a rectangle formation to easily see who is stuck in the sand and have a partner free them PROMPTLY, so more people can focus on DPS. Spam "F" for "Free" in the public chat until you are free to make it easier for the freed members of the team to locate trapped members. Try to save players who are nearby first and make sure to rescue the base tank once enough DPS players can manage the local group. Players should spread out after jellyfish to avoid standing on one square, as players on the same square will be dragged to a random new one, possibly out of attack range. Continue to deal damage while standing in a close area (For the benefit of Vengeance Group, keeping the jellyfish spawn in attack range, and allowing for quick clearing of blues). Resonate geysers as usual and phase pool. Be careful if a quicksand attack is about to occur when Yakamaru is near 100,000 life points or death, as the main poison tank may be grounded and be unable to reach the poison. It is better to get off than allow for sanding during poison fall or phasing of the pool. |
| Poison Tank |
|---|
| Run or Barge to melee distance to poison Yakamaru. Be careful if a quicksand attack is about to occur when Yakamaru is near 100,000 life points or death, as you may be grounded and be unable to reach the poison or dragged to beach while cpr is sanded. |
| CPR |
|---|
| Under 50,000 health prepare to rescue poison tank by the beach. |
| DBL |
|---|
| Grab the poison but do not move MD to yakamaru. |
North-eastern pool (No-stun)[]
- 6 attacks
- Jellyfish
- 7 attacks
- Blue
- Repeat
During this phase, Yakamaru gradually gains a damage reduction effect, until he is completely immune to damage. He will also be weak to a certain combat style (this is indicated by the colour of Yakamaru's helmet), which will partially bypass this effect. Stunning Yakamaru with a stun ability resets this damage reduction but will reflect damage back to the entire team within its attack range.
Abilities that count as stuns are: Asphyxiate, Deep Impact, Horror, Impact, Shock, Rout, Tight Bindings, Binding Shot, Demoralise, Destroy, Stomp, Forceful Backhand, Backhand, Kick. Dreadnips can stun/stall Yakamaru but they don't trigger the pool's mechanics. Dominion gloves bind, not stun the target and are thus safe to use during this phase.
A designated stunner must be set before starting the fight or this phase will be hard to pass through. The player who stuns is often the base tank, but many teams opt to use a DPSer instead, as they are likely to be using accuracy auras and the base tank will often have lowered stats from brews. Stuns are not to be used outside certain circumstances, as any stuns will cause Yakamaru to reflect damage back to the whole team. After enough time has passed, the designated player will use a simple stun. Prior to stunning, the player should tell the team that they are about to stun. It is possible for the stun to miss, so if the designated stunner misses, they should let the team know so that someone else can stun.
The damage dealt when stunning Yakamaru depends on how high his damage reduction is. The higher it is, the less damage he will reflect back onto the team. When hit with a stun, Yakamaru will deal anywhere from 1000 to 5000, 1000 being when his damage reduction is very high and 5000 when he has no damage reduction at all. If two players hit Yakamaru with a stun when his damage reduction is high, the team will be dealt with 6000 damage; 1000 from the first stun, then 5000 from the other. Do not stun often to reduce his damage reduction or the team can take a lot of damage.
An exception to the aforementioned rule is for channelled stun abilities like Asphyxiate, and Destroy. Players should not use these abilities at stun pool at all, as they can easily kill everyone on the team.
After each stun, players should use all their threshold abilities (excluding stuns), as after being stunned, all damage towards Yakamaru will increase greatly where thresholds that normally hit 4,000 damage can increase up to 10,000 without using any damage boosters. Rapid Fire is highly effective, and Soul Split can be used to heal a lot of life points right after the pool has been stunned. the base tank as well as the DPS can also use Sacrifice right after stunning to heal a large amount of health. However, the designated stunner can miss, so a backup stunner is helpful to avoid multiple players from stunning at one time.
Unless a double poison tank was assigned, players should tone down on their damage output after Yakamaru reaches 150,000 health as it is very easy to deal far more damage than its health suggests and force a repeat of this pool.
Yakamaru will return to the centre pool.
| Base Tank |
|---|
| Continue to tank as usual, without need to run around. This is a good pool to prayer flick to gain heals after stuns. |
| DPS |
|---|
| If a backup poison has not taken poison for the pool, it is your responsibility to not rush damage below 100,000 health before the poison tank is in place. Be smart and allow the poison tank to complete his role. Continue to deal damage while standing in a close area (For the benefit of Vengeance Group, keeping the jellyfish spawn in attack range, and allowing for quick clearing of blues). Resonate geysers as usual and phase pool. |
| Poison Tank |
|---|
| Be very careful with DPS on Yakamaru. If he is near 100,000 life points and there is no actively taken poison, call players to "Slow" or "Slow dps" before focusing on taking poison. Run or Barge to melee distance. |
| DBL |
|---|
| The player may choose to stay md while praying protect from mage throughout the pool. Ranged armour may prove a combat triangle advantage here. If not throughout the phase it is essential to MD when yakamaru is at 100,000 health. |
| CPR |
|---|
| Under 50,000 health prepare to rescue poison tank by the beach. |
Mirage phase[]
After all five phases are done and Yakamaru has been damaged to 50,000 life points at the centre pool, it will create mirages of itself on all but the starting pool. Each mirage only has 150,000 life points. The ideal placements of roles are as folows:
- Base tank taking aggression of tendril/tentacle mirage standing east of the pool
- DPS roles standing between shark pool and tendril/tentacle pool
- Shark mirage tag standing south of the pool ready to fill tendril as needed
- North tank standing between centre and sand pool, ready to voke north pools and manage jellyfish/blue
- Stun DPSers southeast of the stun pool next to each other but close enough for north tank to assist.
- Jelly wrangler is not needed before jellyfish spawn, and thus should be contributing as DPS or Stun DPS role until needed
Use damage boosting abilities such as Sunshine and Death's Swiftness either when Yakamaru is nearing the 50,000 life point mark or on the tendril mirage when it appears. Any spawned jellyfish should be voked by the wrangler and should be run around the middle pool. Stunning them will cause them to eventually attack dps instead of the Wrangler.
If any number of the mirage images are left out of combat, a message will say "As a mirage was left out of combat, it flings dangerous projectiles at the group!", dealing 2,000 damage per mirage left out of combat to all players in the arena. This damage increases by 2,000 damage every 10 seconds a mirage remains out of combat. This can be fatal when combined with damage from standard jellyfish, so the north tank(s) and shark tag come into play to aggro the mirages on them, so they do not fling projectiles at them.
Teams start with the Stun DPS on northern pool who kill and close it with planks while simultaneously the rest of the DPS on shark pool who kill it (joined by the stun dps after theyre done) and the shark tag planks it, then move to the tendrils pool, then the sand pool. The benefit for starting with the shark pool over the tendril pool is that the base tank will be able to tank easier because they can get caught by the choking tentacles that will protect it from the 2k tendrils special attack and Yakamaru will not use any auto-attacks while the base tank remains choked. The base tank here will just need to eat up from the low amount of damage the choking tentacles deal versus the higher amount of damage from Yakamaru's auto-attacks.
As soon as the tendril pool or sand pool mirage's health bar is depleted (not the real Yakamaru, shown in the top bar), go to melee distance and spam click the pool instantly, otherwise the mirage will return with full health and it has to be defeated again. The team has five seconds to close the pool. The tentacle and sand pools are blocked with sand, requiring no items. Planks obtained during the fights can be applied in one click to the sharknado and stun pools, making it beneficial for only two players to carry 10 planks each while other players surge and DPS. To block, it is recommended to get within melee distance of the mirage at 30,000 life points and pray magic (all players for sand pools, only those with planks for plank pools).
The mirages' health bars is not shown as the large health bar that Yakamaru has. The mirages' health bar is the same as all other monsters' health bar. Considering the mirages are very tall, it may be hard for players to see the mirages' health bar if it is locked in place on top of them and players are standing at a distance from the mirages or are running away from jellyfish, making them late or not at all going into melee distance of the pool when the mirages are low in health. Consider unlocking the health bar so players can see how much health the mirages have.
If a player dies with planks in their inventory, their planks will be dropped on the spot where they died. Anyone who died with planks should immediately announce in group chat that they have died and where the dropped planks are in the arena or else the team may fail to close the shark or stun mirage pools or may need to spend a lot of time searching for the missing planks.
As all phase effects are active at once, make sure to stay aware of sharks when killing tendril pool, be ready to save your team at sand mirage, and no one but the stunner or the backup stunner must use stuns at the stun mirage.
Note: During the quicksand phase, make sure that no one is stuck in the ground before depleting Yakamaru's health bar, since they will be unable to move and unable to block the pool, reducing the amount of players that can block the pool. If the sand mirage is low in health and just summoned a jellyfish, stop DPSing and wait for it to use its quicksand. Save the team from quicksand, kill the mirage and close the pool. If the sand mirage's health is depleted when the team is sanded, prioritise saving the team over filling the pool with sand as it is very unlikely the pool will be closed without the rest of the team and some sanded team members may die making killing the sand mirage again much harder.
The sand pool will not use its quicksand special attack and both the sand and stun pool will not use its "blue" special attack if there is only one or two players in its attack range. But if the rest of the team comes to the sand pool, the sand pool north tank can be stuck in quicksand on the north side and the team may not notice them and save them. The sand pool north tank should immediately move the south side after the rest of the team begins to attack the sand mirage. If you are not fast enough, spam a letter or a short word in public chat and hope a DPS or the stun pool north tank comes and saves you.
ANY ROLES THAT DIE should immediately announce in group chat that what the role was so that the team can quickly send a backup to the proper place.
After the pools have been blocked, Yakamaru will return to the centre pool with 50,000 life points left. Once he is killed, the fight is over. Any present jellyfish in the arena will also die off. Claim your loot (if you are eligible) from the pool and either leave the group or use the water pool east of the starting pool to leave.
| Base Tank |
|---|
| Continue to tank as usual, starting with a voke of tendril pool and continuing clockwise after your pool is cleared. Be ready to not stand too far from DPS when tanking sand pool. |
| North Tank |
|---|
| Before mirage phase starts, stand close to sand pool. When the mirage appears, switch to your shield, shield ability bar, an amulet of souls for its +10% damage reduction to protection or deflect prayers, and a charged healer's insignia for its +5% healing effect that also affects Saradomin brews; tag the mirage you are assigned to get it aggro on you, provoke stun pool, and use Devotion first to reduce damage, then run to the north side of the pool, keeping out of melee distance while praying range. After Devotion wears off, use Reflect next. Use Freedom to reduce enrage stacks when you see a message that you have gained a stack. However, the mirage gains enrage stacks faster than freedom goes off cooldown, so north tanks will always have some level of enrage. Prioritise Devotion or Immortality subsequently as the mirage's attacks grow stronger from enrage stacks. Use Preparation immediately after using Resonance. Wearing at least three pieces of tempest or primeval armour is very helpful while north tanking because they have a chance to reset defensive abilities. An advanced tactic that can be used is to switch to soul split after using Barricade to heal and switch back to praying range before it runs out. Watch your prayer points especially when you are using a divine, elysian, or arcane spirit shield with penance and keep them high. The mirages can hit in the 6000s per hit at higher enrage stacks without praying. Cycle between damage reducing defensives until the rest of your team arrives at your pool and the base tank provokes the mirage off you. Switch to your dual-wield or two-handed weapon and ability bar and start DPSing while continuing to lower enrage stacks with freedom. One common but deadly mistake that inexperienced north tanks make is that they get themselves stuck in a cycle of always needing to heal themselves as the mirage hits them for 2000-3000s damage per hit through prayers while running from the jellyfish. This is because they do not have time to use freedom and do not have enough adrenaline to use damage reducing defensive abilities because eating food lowers it below 50% and running from the jellyfish does not build adrenaline. They have to run from the jellyfish since they do not have time to bind them while they are constantly eating. To avoid this vicious cycle, always keep your health full throughout your north tanking phase. As soon as you see your health is not full, drink Saradomin brews until full. Eat other types of food like rocktails or rocktail soup only when you experience a quick drop in your life points because food will lower your adrenaline while brews do not. Bind your brews and food to a easily accessible key on your keyboard so you can eat while moving around. Always make sure you have some damage reducing defensive ability active while north tanking to keep the mirage's damage in the 1000s. Keep your adrenaline at least 50% so you will be ready to use a debilitate or reflect. Do so by quickly binding the jellyfish as soon as they start moving and stand far from them so you can have more time attacking the mirage and building adrenaline and less time running around. If using revolution while north tanking, players cannot cast entangles either from the spellbook or from the action bar because the revolution skips the spell and proceed to using the next ability off cooldown. Players on revolution need to stop using abilities for a second or two before they can cast entangles. Do so by walking one step from your current location and pause for one or two seconds before casting entangles. If north tanks feel overwhelmed with damage with north tanking, they can run outside of their mirages' attack range and heal up. But do not be outside of it for 5 seconds or the mirages will fire 2000 damage projectiles to everyone. North tanks can stand outside of their attack range for a few seconds while building adrenaline off bound jellyfish, use a defensive ability, run back in, tank a hit, and run back out again. This may be harder to do if the bound jellyfish are also close to or in this attack range boundary. Once other players arrive, make sure to stand east not north of the pool so players can free from quicksand. |
| Shark Tank |
|---|
| A short role, be ready with 10 planks and move south of the shark pool after mirage starts. Use Devotion, Resonance, and other defensives as needed. Be ready to plank the pool at low health, which means be ready to tank any sharks. After pool is planked, join DPSers on tendril pool or run east as Jelly Wrangler. |
| DPS |
|---|
| Two or three players (ST0/ST5) will run to the stun pool and close it while the remaining DPS focus on the shark pool. The ST5 players should use Devotion, Protect/Deflect Magic and stand next to the stun pool while casting Onslaught and quickly plank the pool when the mirage reaches 0 health. These players should then move to assist with the shark and/or tendril pools. The other DPS players should attack the shark pool, after which the SH10 player planks the pool and quickly clear the tendril followed by the sand pool. |
| Jelly Wrangler |
|---|
| If needed - and you should only be needed in inexperienced teams - apply Incite while attacking jellyfish with melee prayer. Do not stun the jellyfish unless they are attacking you. Stunning a jellyfish near the dps pile will cause the jellyfish to attack the dps when the stun wears off. Voke jellyfish off of other players. Wranglers tend to run jellyfish around the middle pool, as when jellyfish are stuck on the far side the wrangler is free to contribute to filling pools and freeing sanded players without bringing the jellyfish along. |
Feats Challenges[]
There are 5 special challenges that when completed award progress towards "the Daredevil" title. In order to complete the feat, the challenge described must be met AND players must finish the kill.
| Better not touch |
|---|
| This feat requires killing Yakamaru whilst all players but one remain poisoned. This is best done on the fourth pool, in which all the players will stand in one spot as Yakamaru approaches 100,000 life points, including the base tank. Be wary of special attacks, especially on the shark and tendril pools. All players will then run onto the poison spot, resulting in the whole team becoming poisoned. Only one player will then clear, usually being the north tank. The team must then complete mirage and kill Yakamaru without anyone in the raid having died, whilst everyone is still poisoned. All players should simply keep their life points maxed out at all times to ensure nothing can kill them quickly. For this feat a jellyfish wrangler is recommended to keep Jellyfish away from other players. Some teams will restart until stun pool is last, as it allows them to easily re-kill the pool if the poison is missed, and has no mechanics which will harm the players for grouping together near the poison spawn. |
| Day at the aquarium |
|---|
| To obtain this feat, Yakamaru must die whilst a reflecting jelly and durable are still alive. This means that the players must also leave an additional combat jellyfish alive with the reflecting in order to keep it alive. The first two spawns of jellyfish should be ignored, as they will not be needed for the feat. On the third phase, after the third pool, a designated player should provoke the durable jellyfish or reflecting/combat jellyfish, depending on which spawns then, and take them to the south-west corner of the arena. From there they must tank them until the end of the kill, making sure to not accidentally rewind Yakamaru. This player should be on normal prayers to prevent death via reflect, and should have a weapon that deals no damage (bolas), or have a negative accuracy. The most ideal situation defensively is to have someone in magic armour tank all three jellyfish, with a meleefish and range/melee weapon switch of any tier. Be careful with the reflect ability, but attacking the reflecting for adrenaline is also an option with any weapon, as it will not die as long as the tanker does not kill off the combat jellyfish alongside it. |
| How to make friends and influence people |
|---|
| This feat involves asphyxiating stun pool and having the entire raid survive. This feat is rather easy, due to the fact that only four total asphyxiates must hit. This means a player can main stun with asphyxiate and stun only one time with asphyxiate, four times total. An alternative to this would be having the entire team run to the southern shore, so as to be out of range of the pool and take no stun damage. Then a player in high accuracy gear asphyxiates, while another player (the base tank, or any other player) barricades and intercepts them. If neither of these methods work, have all players barricade at the same time, intercept the player asphyxiating, and ensure asphyxiate hits four times. |
| All together now |
|---|
| Considered the hardest of the raid feats, the team must take down all four mirages of Yakamaru within 10 seconds of each other. The timer for this feat starts when the first pool is filled completely, and as a result, those planking should put off planking for a few ticks. There are many strategies for completing this feat, but many of them involve four tanks, one for each pool. This includes a Stun10 tank, who will solo stun pool and close it on their own. Additionally, a jelly wrangler should keep all of the jellyfish off the DPS and tanks, to make the mirages easy to manage. Many teams may opt to use regular prayers, as reflect damage could potentially kill the mirages. One of the most common methods is to have all the DPSers start on sand pool, with the exception of potentially one at tendril to assist the base tank in breaking out of the special. Three dpsers are dedicated to the "prefilling" role, in which they are the only ones who will fill the pool when it is defeated. The maximum amount that can be filled per player per pool is three, so ideally nine out of ten of the "buckets" of sand to defeat the pool are set. The pool will then be allowed to respawn, and the DPSers will once again lower the life points of the pool to around half. They will then go to the shark mirage, lower it to about 50,000 life points, and proceed to the tendril pool. This is where some strategies may differ, as some teams prefer to prefill tendril pool as well, while others prefer to just fill it while all the DPSers are attacking it. Due to the nature of the tendril special attack, which can prevent players from dealing physical damage to Yakamaru, many teams will opt to keep all of the DPS on tendril and lower it to around 10,000-20,000 life points. At this point all the life point values for every pool should be checked, to insure they are all almost under 5,000. The signal for filling the pools should be when the Stun10 stuns their mirage. At this point, the North Tank, Stun Tank, and Shark Tank should all kill their pools with thresholds, and the DPS at tendril should fill tendril completely. Alternatives to this method may include having two DPS at one pool and three at another, and prefilling both tendril and sand using this method. This has its perks, as it frees up DPS more quickly should they need to help at other pools. The tanks during this feat should keep in mind that the reflect ability has the potential to kill their pools, as does debilitate. Low tier wands or opposite-style weapons may be recommended to allow the tanks to continue building adrenaline on their pools when they are low on health. |
| Rewind |
|---|
| The rewind feat entails killing Yakamaru twice in the same instance. This is accomplished with a durable jellyfish, which Yakamaru can consume after all of the mirages are defeated. When the durable is lured near Yakamaru after the mirages are defeated, Yakamaru will heal back to maximum life points, and the kill will start over. Players should make sure they do not kill the second durable jellyfish that spawns, and a player should tank this at the south-west corner so it does not die. Normal prayers should be used, alongside opposite-style equipment to obtain zero hit chance. The regular DPS should be mindful of AoE abilities, as they can deal significant damage to the Durable jellyfish. It may prove beneficial for several players to bring a melee weapon, as this gives them access to the Balanced Strike ability to heal the durable jellyfish should the need arise. Although a six-dose overload may be enough, it is advised players double the amount of supplies they normally take, bringing more food than they intend to use. |
| Feat name | Description | Technique |
|---|---|---|
| Better not touch | Defeat Yakamaru with all but one member of the raid still poisoned | On the last phase before mirage, the whole team should take the poison. North or base tank then is consumed by Yakamaru and the rest of the team must constantly stay high hp as they take 500-1000 poison damage every other game tick.
Note that if the non-poisoned member is killed, the feat will be lost. If any dead players remain in the group, the feat will be lost. |
| Day at the aquarium | Defeat Yakamaru with one durable jellyfish and one reflecting jellyfish still alive | Leave the jellyfish alive after they spawn after the 3rd and 4th phases. Upon the reflecting jellyfish appearing, leave one Piercing jellyfish alive, otherwise the reflecting jellyfish will be killed as a result. Lure them south so AoE abilities do not accidentally kill the remaining combat canal jellyfish or the Durable jellyfish. |
| How to make friends and influence people | Use Asphyxiate on Yakamaru's north pool and have the whole raid survive |
There are many methods for completing the Asphyxiate feat. One of the easiest methods is to have every player except the stunner and the base tank go as far south as possible, out of range of the pool. The base tank will then intercept the stunner, who will asphyxiate. Only four total asphyxiates need to hit during the course of the kill, so using asphyxiate on four separate occasions will work. |
| All together now | Defeat all four images of Yakamaru within ten seconds of one another | There should be at least one player tanking each image of Yakamaru, with shark and stun pool members carrying the planks. It is recommended to have one or two players with wands using Entangle on jellyfish. Weaken all four mirages to at most 20,000 life points before killing simultaneously. The ten second timer begins after the first pool is sealed with planks or sand.
The easiest method is to "prefill" sand and/or tendril pool by lowering the pool(s) and having three players each fill the pools three times (9/10 required fills). This reduces time from filling pools the final time. DPS group should start mirage by damaging sand, then shark and finally the tentacle pool. Stun pool members solo their pool. When everyone is ready, the stun pool should be stunned to signal the start of finishing the pools as attempting to stun delays dps. |
| Rewind | After defeating all of the images of Yakamaru, allow the consumption of a Durable Jellyfish and then kill it | When the last durable jellyfish spawns, have one player tank it all the way to the end of mirage phase. Lure it to melee distance of Yakamaru in the centre pool when mirages are dead. Doing so when Yakamru is at 50,000 or lower health will result in the whole fight being reset, so be prepared to face all four pools and mirage phase again including planking. The reset is marked by a message: "In desperation, Yakamaru sees the Durable Jellyfish and consumes it, healing him fully!"
Use Saradomin brews and defensive abilities to sustain lost life points, as supplies are most likely to be depleted. |