| |
| Release date | 1 June 2011 (Update) |
|---|---|
| Members | Yes |
| Developer | James C |
Official description[]
| “ | Thok It To 'Em is a tall tale from the perspective of Daemonheim's skillcape owner (but not wearer), Thok. Become the big lug and charge through a dungeon filled with huge beasts, all in the name of family, love and a fondness for killing creatures in surprisingly novel ways. | ” |
Development team[]
- Developer: James C
- Senior Designer: David O
- Graphics: Alex R
- Quality Assurance: Vicki M, Ian H, Daniel H, Stacey N, Liam H
- Audio: Adam B
Walkthrough[]
| Start point | |
|---|---|
| Member requirement | |
| Official difficulty | Unknown edit |
| Official length | Medium |
| Requirements | Skill requirements are not boostable unless marked with a [B] for boostable. 59 Dungeoneering, 70 Strength, access to at least floor 30 |
| Items required | Items from the tool belt are not listed unless they do not work or are not automatically added. Ring of kinship to find the scribbled notes |
| Enemies to defeat |
Stomp, Shadow-forger Ihlakhizan, Warped Gulega, Luminescent icefiend, Forgotten warrior, Forgotten ranger, Nechryael, Ramokee |
Side objectives[]
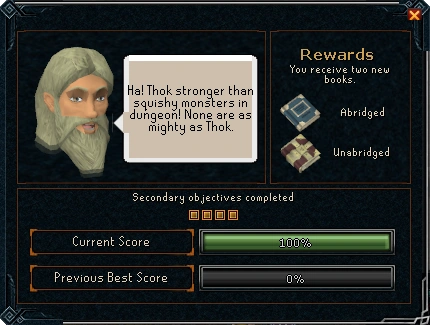
The following must be completed to reach 100% completion and receive the unabridged tome.
Defeat the following bosses and retrieve a trophy from each without ever dying. You can use all Thok's adrenaline in the fights because it recharges fully when you defeat the boss. Similarly, don't over-eat food unless you would die otherwise, as Thok heals a lot (but not fully) after defeating the boss.
- Coward with Bow, behind the Silver crescent door. To open, players must use the Silver curvy thing. Keep attacking him but move away when he teleports to avoid "Arrow rain".
- Bulky warrior, through the Crimson rectangle door. To open, players must use the Red block. Just attack normally and move out of the way if he charges.
- Armoured Cow Thing, locked behind the blue triangle door. To open, players must use the Blue pointed thing. Grab the pickaxe and destroy his armour before starting to attack him.
- Gobby Demon, in the room blocked by the Orange shield door. To open, players must use the Orange stick thing. Don't run away too far, or he'll hit you very hard, but move out of the way when he creates the portals that damage you.

The following are not required for 100%:
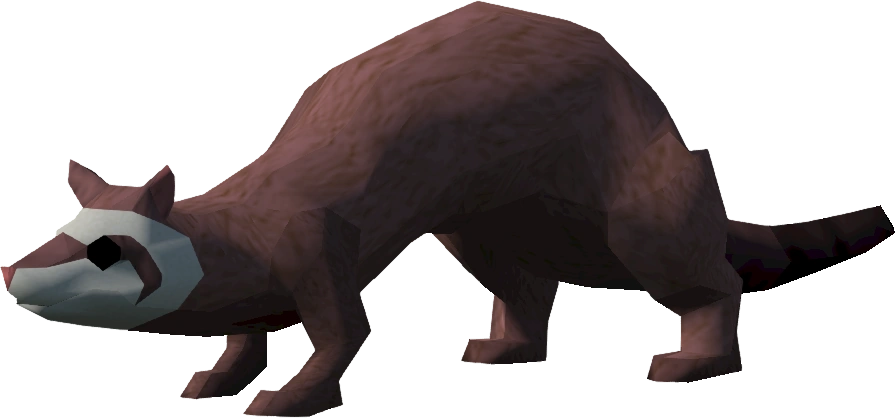
- Fish Mini-marm. Mini-marm wanders off at one point and returns with his claws dripping blood and the Ferret of Doom's head as a trophy.
- Mine the Crumbly stuff (actually Promethium ore) using Thok's forehead and attempt to smelt it.
- Craft some Body runes (Thok runes). You must use the Crunchy rune rocks on the altar.
- Farm some "Not-meat".
Unfreezing Skaldrun[]
- Skip to the next section if this has already been done.
- In order to begin, the player must first unfreeze Skaldrun.
- This can be done by entering the Frozen floors (1-11) in Daemonheim, with Complexity 2 or higher activated.
- While completing the dungeon, look for Skaldrun, who will be in any room frozen in ice.
- Kill all the monsters in the room so that the discussion with Skaldrun will not be interrupted.
- Light any type of fire adjacent to the ice or cast a fire spell on the ice.
- Talk to him. Choose each option. Once done, tell him to "Leave" and he will teleport to the surface.
Finding the memory fragment[]

- The memory fragment required to start this saga are the Scribbled Notes.
- These notes can be found during any dungeon on any of the floors between (and including) 30 and 35 on any Complexity.
- When found, touch the scribbled notes.
- Finish the dungeon or leave for the surface.
Into the saga[]
- Deposit your Ring of kinship. No items can be taken into the saga.
- Find Skaldrun located west of Thok, Master of Dungeoneering.
- Talk to him about the scribbled notes.
Thok's abilities[]
- In this saga, the player controls Thok.
- Thok heals by 250 life points by killing enemies, 1000 for bosses.
- Thok gains 25% adrenaline by killing enemies, killing a boss restores it fully.
- Thok can eat raw food, rune essence, and body runes.
Stomp[]

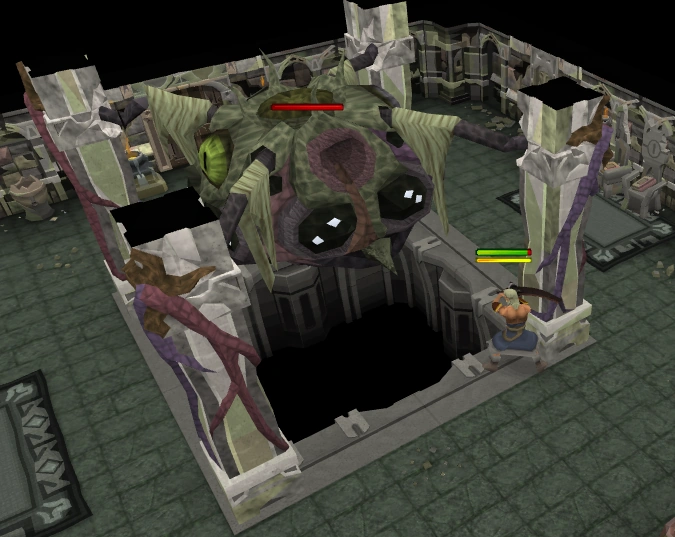
Thok fighting Stomp.
As Marmaros, you must defeat Stomp without food or prayer. Thok is there to help attack Stomp, but he doesn't help you charge the lodestones because he keeps trying to attack Stomp.
- Avoid getting damaged by the falling debris by moving away from the shadows on the ground.
- Collect a crystal to activate each lodestone to the left and right of Stomp.
- If debris falls in front of the lodestones, mine a clear path in order to activate both lodestones.
- 3 pairs of lodestones must be activated in order to defeat Stomp.
Once Stomp is defeated, you gain control of Thok. Marmaros has been injured, so you must venture deeper into Daemonheim to help him. After the fight, climb down the ladder.
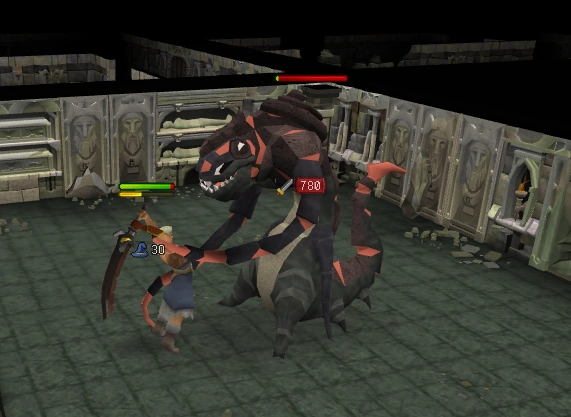
Thing with eyes[]

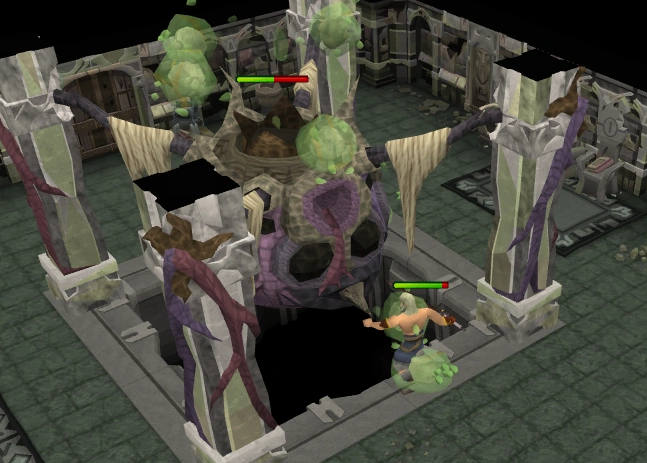
Thok attacking Thing with eyes with a special attack.
As Thok, you must defeat Thing with eyes without food or prayer. Run into the shelter of the pillars when this chatbox message appears "Eyeball thing glowing now." However, Thok is much more powerful than Marmaros and can hit over 1170. This battle should not be too difficult.
In the first room after you defeat Thing with eyes, it will appear you reach a dead end. The room has a door with a Prayer requirement level of 10 (while Thok has a prayer level of zero, and there is no prayer altar anywhere) and a silver crescent lock. Simply "Exorcise Dark Spirit", whereupon the spirit will say "You need a prayer level of 10 to exorcise this spirit". However, simply continue the conversation and Thok will order the dark spirit to go away after a brief dialogue.
Thok must navigate a small dungeon. If you simply go through the dungeon without using the keys, there will only be enemies to fight. Puzzles and extra bosses required for the unabridged version only appear behind locked doors.
Big rock room[]
The next few rooms contain several level 82 enemies. They are fairly easy to kill, and occasionally drop food.
- Kill the 2 enemies in the room and enter the door to the south.
- Go through the next door to the east.
- Pick up the Silver curvy thing in the southeast corner of the room.
- Return to the room with the Silver crescent door and prayer spirit door.
- Unlock the Silver crescent door with the key where you will encounter a Big rock.
- Charging the monolith fully will take some time since Thok uses melee. Focus on tagging the Squishy ghosts as soon as they appear so that fewer charges will be lost.
Coward with bow[]
Once the rock is fully charged, keep going through the rooms until you encounter the Coward with bow.
- The Coward with bow will teleport once he hits several different lifepoint thresholds, moving further down the spiral.
- As he teleports, run away to avoid getting bound by the arrow rain.
- Once he has been killed, run back to the room where the Silver curvy thing was found (marked by the summoning icon on the minimap).
- Next, continue through the rooms to the east, north and east again.
- Take the Red block from the floor.
- If additional food is required, Crunchy rune rocks can be acquired from the supply table.
Bulky warrior[]
- Run back through the rooms: west, south, and 2 more rooms west.
- Enter the southern door, unlocking the Red rectangle door.
- Attempt to imbue the tiles 3 times. On the third try, Thok will manage to imbue all the tiles correctly.
- Take the Blue pointed thing in the northwestern corner of the room.
- Go into the next room with the Bulky warrior. Kill him and move out of the direction he is facing if he prepares to charge.
- Once the bulky warrior has been defeated, return to the room with the summoning icon indicated on the minimap.
Armoured cow thing[]
- Unlock the Blue triangle door.
- Upon entering the room, take a pickaxe from the rock and equip it.
- Attack the Armoured cow thing until its armour is destroyed.
- Continue the fight with Thok's sword.
- After the fight, go back to the room with the supply table.
Gobby demon[]
- In the room to the north, kill the Ramokee skinweaver first, then move on to killing the other ramokees.
- Moving to the next room, talk to Thok-blocker until it allows you to enter the room.
- Pick up the Orange stick thing in the southeast corner of the room, and return to the room to the east.
- Unlock the Orange shield door to face Gobby demon.
- Thok should be able to kill the demon before any of its attacks are used. However, if portals appear on the ground, move away from them and continue attacking.
- Go back through the door, then head through the rooms all the way to the west.
Warped Gulega[]

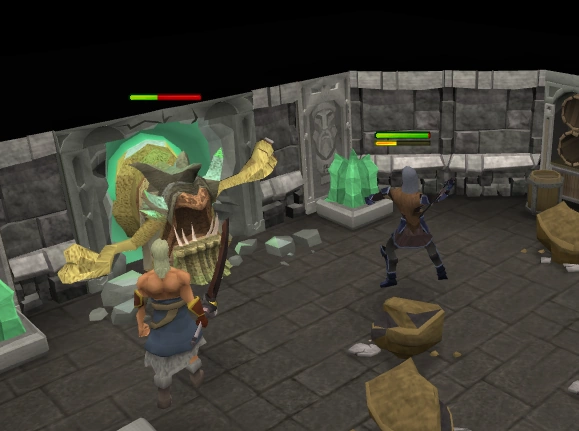
Thok fighting the Warped Gulega
You must protect the Pretty Lass from the Warped Gulega. This is not too difficult as long as you run out of the way when the Gulega surrounds you with tentacles, as he will slam you and reduce your life points to 1 otherwise.
If you are not confident of evading this attack every time, you could lure the Warped Gulega to the entrance by entering and exiting the room. From then on, you could fight it while being close enough to Pretty Lass for her to heal you. This makes it impossible to lose as she would heal about 700 life points immediately after the Warped Gulega's special attack and before its next hit. You can also counter this by finding any Cave Morays, or "Sea meat" from the Forgotten Rangers/Warriors and Nechryaels before.
Do not talk to the Pretty Lass about returning to Marmaros unless you want to finish abridged (meaning you haven't killed the rest of the bosses). If you wish to finish the unabridged version, walk away and kill the remaining bosses. After telling Pretty Lass to follow you to Marmaros, you will be instructed to get "something cold" for Marmaros.
Walking icecube[]
At this point, Pretty Lass tells you that you must find something cold for Marmaros. You will get 10 "Sea meat", and anything else that you had before the Warped Gulega.
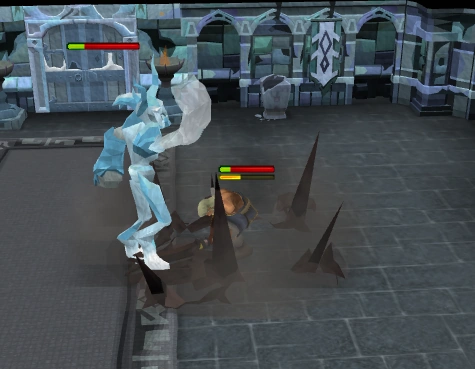

Thok fighting the Walking icecube.
Thok must now defeat the walking icecube. This time, you will have food. It is easiest to let the icicles damage you until you are nearly dead (the icicles cannot kill you), eat one sea meat (which should give enough life points to last until the next barrage of icicles), and repeat. You will use the icefiend's body as "something cold," thus concluding the abridged section.
After killing the icefiend, you are done. After killing it also, you and Marmaros are talking in the Occult Floors. Either click somewhere or listen to the conversation to end the saga.
")
")
")
")
")
Rewards[]
Abridged[]
An abridged book, which when read gives:
- 37,080
 experience
 - 3,708 Dungeoneering tokens
Unabridged[]
Together with the above rewards, an unabridged book, which when read gives:
- 75,765 experience
Re-playability[]
The saga is always re-playable regardless the completion percentage. However, the player will only receive the rewards the first time that the objectives are completed.
Transcript[]
Trivia[]
- Skaldrun gives you a thick tome for completing "Thok It To 'Em (unabridged)". When you read the reward for Thok It To 'Em (unabridged), you are presented with three options: 1. Strength; 2. Not Strength; 3. [Decide later].
- If you select 2, then Thok says, "You made mistake? You mean Strength. Thok only teach Strength. Thok is strong, no need for other skill than Strength."
- If you select 1, then you get the following message: "Thinking like Thok make you mighty" along with earning 75,765 Strength XP.
- Thok It To 'Em is a play on the popular phrase "Sock it To 'Em."
- All items and monsters are named from Thok's point of view. For example, the silver crescent key is called a silver curvy thing, the forgotten ranger is called Weakling, and the forgotten warrior is called Weaker than Thok. The only exceptions are the Warped Gulega and the Ramokee familiars.
- Players that have not fought the Warped Gulega before will unlock the music track for it during the saga, even if they don't have the dungeoneering level required to face it.
- There is currently a glitch where if your connection is interrupted or if you die before completing the saga, once it is completed with all the side objectives completed, you may only be credited for 60% instead of 100%, and be rewarded with only the abridged award.
- During the Saga, you may encounter a Frozen Figure (Skaldrun) in the dungeon, specifically in the room before you fight Coward With Bow. Nothing can be done to unfreeze him.
- The Ferret of doom is level 9001 which refers to the popular meme "It's over 9000!" from Dragonball Z.
- You can use the rune essence on the altar, creating Thok runes that grants 10% adrenaline when eaten. However, you can only make one at a time.
- Thok has furophobia, an irrational fear of ferrets.
- Mini-Marm (who Thok once called Mini-Thok) might be a reference to Mini-Me from Austin Powers.
- Completing this saga unlocks new dialogue options with Thok at Daemonheim that involve his adventures during the story.
- At the end of this saga you end up on the Occult floors.
- Skaldrun's quote "I know, of course, but I tell whichever version makes for a better story" could be a reference to the book The Life of Pi by Yann Martel.
- There is currently a glitch that allows players to unequip Thok, revealing a set of full Primal equipment being equipped.
- Har'Lakk the Riftsplitter in this saga did not receive a graphical update, while the one inside Daemonheim did.
- This saga still uses the pre-Evolution of Combat combat stats. For example, Thok's life points imply a boost from the 990 life points that resulted from 99 Hitpoints. Sea meat (cave morays) healed their pre-EOC value of 250. Monsters' and Thok's damage are also consistent with their pre-EOC values.
- Even following Mini-marm's return with the Ferret of Doom's head, Thok is still afraid/unwilling to enter the room where he encountered it previously.
|