This page lists strategies for several bosses in the Dominion Tower. For the tower in general, see Dominion Tower.
Setup[]
| 500 | |||
| 100 | 500 |
Assuming you have all boss fights unlocked, you will need the following equipment to defeat every boss.
- A magic weapon and runes to cast all four elemental spells on Chronozon and the second dagannoth mother. Runes are provided against Chronozon but not against the mother.
- Ice gloves to wear against Fareed and Flambeed. Previously one could attack them from afar without ice gloves, but after an unknown update the gloves must be worn to damage them at all.
- Because only main-handed weapons are unequipped, an alternative is to auto-attack with an off-hand, though the fight will take a long time. If you were to do this it is suggested that you use Legacy combat to do so. If you are using EoC: kill everything except Fareed/Flambeed and run around the arena until you're out of combat (switch to Legacy mode), then kill them.
- Dragonfire protection for fighting Elvarg -- however, with a high ranged or magic level one may rush Elvarg without any.
In Climber mode, one can access a bank chest before every floor, so you can replace your equipment and inventory as needed. There is no bank in Endurance or Rumble mode, however, so you must carry weapons and armour for all three combat styles. You may bring either head, body, and leg armour for each style, or a single set of hybrid armour. Though hybrid armour saves inventory space, its lower defence will make you need more food. Regardless of your choice, bring only one set of gloves and boots as any accuracy penalty is insignificant.
Though shark or rocktail are fine against most bosses, players may bring Saradomin brew and super restore potions when aiming for higher floors. In Climber mode, Saradomin brew is affected by the no-potion handicap, rather than the no-food handicap, and that the unicorn stallion falls under the no-familiar handicap. Help horns provide very efficient healing per inventory slot (at 2125 * 5 life points), though you can only earn them through gameplay.
Because several bosses drain combat stats, you will want to bring super restore potions instead of prayer potions to replenish prayer points. The super dominion medallion will reduce the need for super restore potions, by periodically boosting stats drained by either bosses or Saradomin brews.
A Large rune pouch can store up to three types of runes, or you may bring combination runes such as Dust or Mud runes. Additionally, death or blood runes can be brought to cast ice spells from the Ancient Magicks, whose binds can save you food. If you are not on the standard spellbook, it will automatically switch to it when elemental spells are required (even though combat spells from the Ancient Magicks are elemental).
Those with access to the Ancient Curses will find that Soul Split makes the Tower significantly easier, especially with Turmoil, Anguish, and Torment.
Other recommendations for Endurance and Rumble mode are:
- A beast of burden stocked with food, along with spare pouches to renew its timer.
- A shield to allow defensive abilities such as Resonance and Rejuvenate. This may as well be an anti-dragon shield or dragonfire shield.
- A unicorn stallion with scrolls, if you have level 88 Summoning. Summon the unicorn once your beast of burden is empty.
- Overloads, which are very beneficial for quicker kills, and prevents Saradomin Brews from lowering your stats. Combination overloads such as a Searing overload potion or Holy overload potion are very beneficial here.
- The super dominion medallion, which periodically boosts combat stats inside the arena.
- Sign of life or Sign of death
- Enhanced excalibur
- Penance aura or Vampyrism aura
Mode-specific strategy[]
Endurance[]
Out of all the bosses in the Tower, only a handful pose a great risk to the player, and it is these bosses that will determine the success of an Endurance run. Bring the necessary equipment to defeat every boss and, barring no mishap, you will climb as far as your food and potions will bring you. Soul Split will massively reduce the food you eat in the Tower, enough that you may only eat during the longest and toughest fights. Prayer restoration will be similar.
If you can get out of combat in the arena and log out, upon logging in you will be outside the arena, your progress saved. You will have full life points and prayer points.
With high combat stats (90+), level 90 power armour, level 90+ weapons, overload, and Soul Split, every boss in the Tower can be defeated without food, even Nomad and the chaos dwarves. Even though tank armour has better defence than power, you will want to use power armour because it allows for quicker kills, and the quicker you kill a boss, the less likely you are to use food.
Rumble[]
As you may face any boss and will have no access to a bank, your setup will be the same as for Endurance. You will fight several bosses at once -- up to four if solo, or up to ten if with four or more players.
If playing for dominion factor or kill count, Soul Split and ice spells are highly useful in healing and mitigating damage. If going for the Survivor title, you can kill the tough bosses that spawn until only weak ones are left, and then wait out the 45 minutes.
Tornadoes can spawn at any time, as can Char's walls of fire, and you must dodge them to avoid damage. Sunfreet itself can arrive to engulf the arena in fire. Lastly, four wizards can spawn on the arena's edge and will create a portal in the center, dealing 4000? damage if they are not killed in time. Because of these random events, it is wise to pay attention to the arena at all times.
Climber[]
The main strategy in Climber is to pass on the toughest handicaps for as long as possible, accepting lesser handicaps in the meantime. Handicaps are selected and awarded at the door to the next fight. When presented with a handicap, you may nudge it to the next in the list or reroll it entirely, although both have limited uses. In particular you will want to avoid No food, No potions (to allow Saradomin brew), No prayers, and No familiar.
You will be allowed to access a bank chest before you face off against each boss, so you should keep optimizing your inventory and gear.
It is advised to use this list to see what handicap you would receive if 'nudge' is pressed. A nudge will give you the handicap above the current; for example, Reduced Adrenaline would be nudged to No Ultimate Abilities.
| Icon | Handicap | Dominion factor per round |
Effects of handicap once incurred |
|---|---|---|---|
 |
Reduced Adrenaline |
-70 | You gain 20% less adrenaline from attacking. |
 |
Reduced Mage Attack | 70 | Your magic attack bonus is reduced in every match. |
 |
Slippery Fingers | 90 | Occasionally during every match your weapon becomes unequipped and goes to inventory. If your inventory is full, this handicap does nothing. Warning: When fully consumed, a dominion potion does not leave a vial behind and thus will open a slot in inventory, allowing your weapon to become unequipped. |
 |
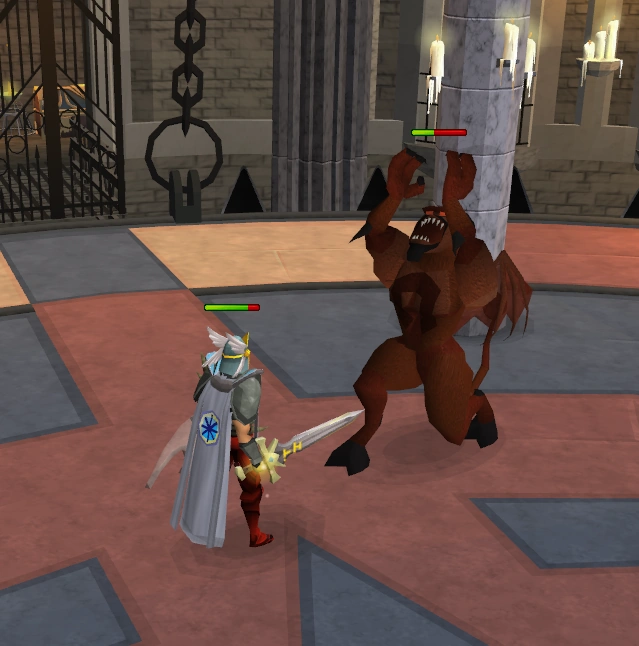
No Prayers | 130 | You are not allowed to use any prayers in battle, including Ancient Curses. You will also be blocked from using them before the battle starts, meaning you cannot deliberately drain your prayer to stop the Black Knight Guardian from healing. |
 |
Monster Stun | -190 | All foes at the beginning of the battle are stunned for a few seconds (about ten) and cannot attack or move. The Illusive is effectively immune to this handicap, as it still burrows away during the stun period and thereafter isn't stunned. Eruni will also be able to move, but not attack. This can be useful for luring her behind a pillar. |
 |
No Familiar | -60 | You cannot summon a familiar during the matches. If you already have one summoned, it is hidden and unusable during the matches. |
 |
Reduced Range Attack | 70 | Your ranged attack bonus is reduced in every match. |
 |
No Body Armour | 50 | When this is incurred, any item worn in the body armour slot is removed and sent to your bank. During matches, you cannot equip anything to the body armour slot. |
 |
Halved Life Points | -10 | Your starting health is reduced by half at the start of each match. You can thereafter heal back up to full life points. |
 |
Random Freeze | -40 | Occasionally you will become frozen and unable to move during every match. You can still attack while frozen, and you can use Freedom to break free. |
 |
Reduced Melee Defence | 50 | Your melee defence bonus is reduced in every match. |
 |
No Food | 120 | You are not allowed to eat any food during any match, including Scorpion meat. This does not include Saradomin brews, as they are classified as potions. Other means of recovery can be used, such as the Sacrifice ability, a Scrimshaw of Vampyrism, or the vampyrism aura. |
 |
No Shield | -20 | When this is incurred, if you are holding a shield or defender in your off-hand slot, it will be removed and sent to your bank. During matches, you cannot equip shields or defenders. However, this handicap does not apply to standard off-hand weapons, meaning you are still allowed to dual wield. This handicap also does not affect two-handed weapons, as they are not equipped in the shield slot. |
 |
Reduced Melee Attack | 70 | Your melee attack bonus is reduced in every match. |
 |
Life Saver | -200 | Once during each match, you are healed to full health if you reach low health. All stats, prayer points, and summoning points are restored to full. Adrenaline is reduced to 0%. This will not heal you if you are killed by poison. |
 |
No Potions | 50 | You cannot drink potions during any match. This includes dominion potions and Saradomin brews. |
 |
No Power-ups | -80 | You cannot use any dominion power-ups during any match. This includes dominion weapons but excludes the dominion medallion, dominion potions, and scorpion meat. |
 |
Reduced Ranged Defence | 10 | Your ranged defence bonus is reduced in every match. |
 |
Poison | -60 | You are poisoned at the start of each match. The damage starts at 98 life points. You can cure yourself, if you have the means to do so. If using the Poison purge Aura, the poison can be an advantage, as the aura converts poison damage into life points. If wielding an Anti-Poison Totem at the beginning of the match, you will not be poisoned at all. Also after you completed The Great Brain Robbery you can use the Prayer book (you must wear a Holy symbol ) to cure yourself from poison (however, you can't use this method with "no prayer" handicap active). |
 |
Random Daze | 110 | Occasionally during every match you become dazed, have auto-retaliate turned off, and have your combat interrupted. Simply re-attacking a foe will resume combat. |
 |
Reduced Mage Defence | 10 | Your magic defence bonus is reduced in every match. |
 |
No Ultimate Abilities | -100 | You are not allowed to use Ultimate abilities. This handicap also prevents usage of special attacks, unless fighting Sigmund or the Pest Queen, in which case the required special attacks are the only ones usable in battle. This handicap does not prevent usage of basic or threshold abilities. |
Special[]
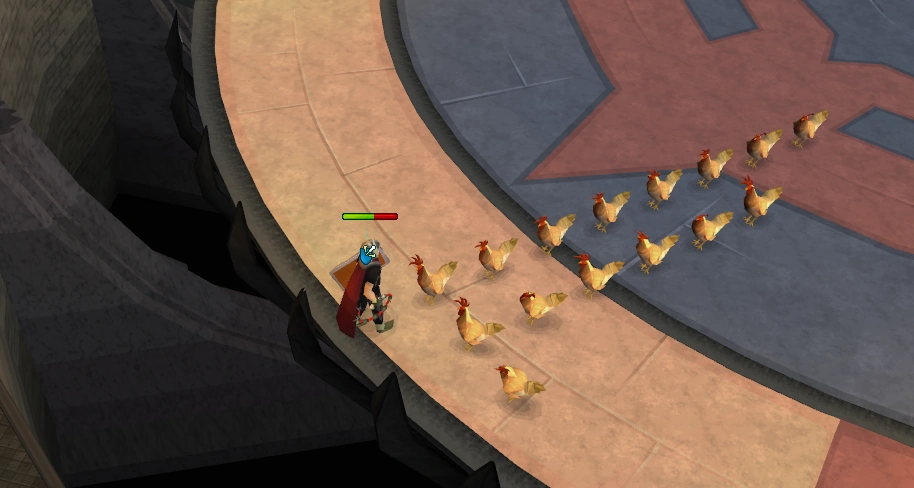
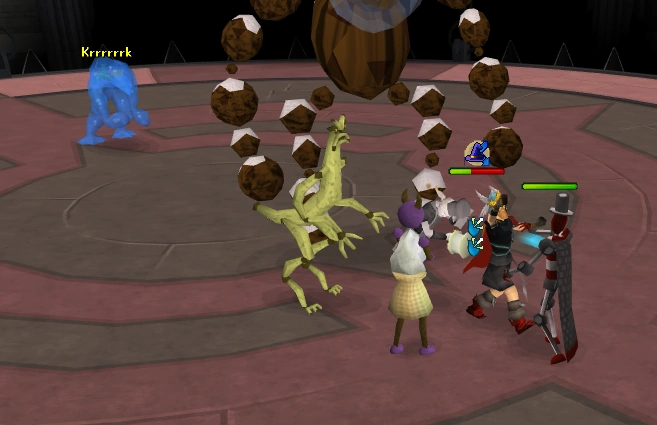
Revenge of the Evil Chickens[]

A player trapping all chickens behind one chicken and the side of the arena.
The player must fight fifteen evil chickens without any prayer.
The evil chickens are weak to magic. Area-of-effect ancient spells, coupled with Dragon Breath and Chain, will kill them quickly. Alternatively one can range them for better defence against their magic attacks, or one could use Cleave, Hurricane, and Quake with a two-handed melee weapon.
If you run to the side of the arena, only a few chickens will be able to attack you at once.


Blood barrage can heal you while dealing lots of damage.
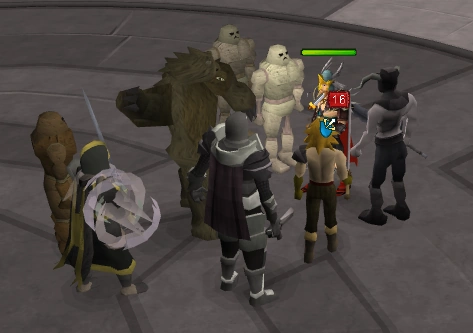
Finish Him![]

Not all the bosses can attack you at once.
The player must fight Arrav, Koschei the deathless, General Khazard, the Black Knight Guardian, The Kendal, the Black Golem, the White Golem and the Grey Golem. They will all be on 20% life, but Koschei and General Khazard will be at full health when they adopt their later forms. You will suffer the following penalties: No prayers, reduced melee, ranged and magic defence, poisoned, no ultimate abilities, random daze and no power-ups.
Because all the bosses use melee attacks, a magic setup will have the best defence, although the three golems are resistant to magic. Start with the Black Knight Guardian so he cannot heal from your prayer points, or you can deplete your points before starting the match as prayers are disabled anyway. Kill Koschei and General Khazard last as they have alternate forms with full life points.
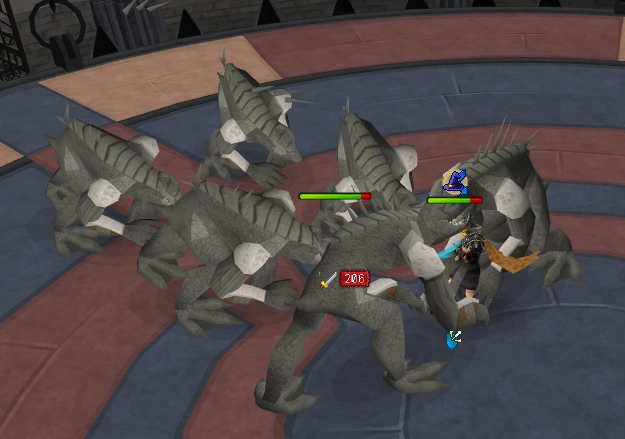
Just Die Already[]

Standing between a pair of sentinels can block their healing.
The player must fight three pairs of dagannoth sentinels -- six dagannoth in total. Each sentinel is said to heal only the one it is paired with.
The sentinels are weak to melee, and Balmung will apply its bonuses against them. The damage from their magic attacks will add up quickly, so bring food and good armour.
The healing from the sentinels is fickle: often a sentinel will not heal its wounded companion, and sometimes it will heal one that it is not bonded with. A reliable way to disable healing seems to be to stand between one sentinel and its pair, or to walk under the sentinel until you have moved it several tiles away from the pack. Then you can kill the sentinel easily. This is far easier than alternating small damage (about 1000) between a pair.
No More Nomad...No More![]

Nomad respawns the moment the first Nomad is defeated.
The player must defeat Nomad twice without using a bank.
See the below section on Nomad for information on the fight. Nomad can not be hit by diminuitive, massive or colossal bombs during the match. If Nomad is easy for you, then this challenge is just more of the same. If you have difficulty fighting him, know that this is more about your endurance rather than combat skill. Fill your inventory and beast of burden with food, or, if necessary, Saradomin brew and super restore potions.
If not yet unlocked, defeating both Nomads will make the regular fight available for Freestyle mode.
I Eat Dagannoths for Breakfast[]


Fight the Dagannoth mothers where the sentinels cannot see you.
The player must fight the original Dagannoth mother, the second Dagannoth mother, and two Dagannoth sentinels at once.
Bring armour and weapons for each combat style, as well as runes for all four elemental spells. You will have to keep changing your combat style and magic spell to match the mothers' weaknesses.
At the start of the fight, pick up Balmung and run to the entrance gate. The mothers will give chase but the sentinels will not move, meaning you can kill the mothers while taking no damage from the sentinels. See below for how to fight the sentinels.
Indigestion[]

A player in the Indigestion special.
The player must fight all of the bosses from Recipe for Disaster at once: Agrith-Na-Na, Flambeed, Karamel, Dessourt, Gelatinnoth Mother, and the Culinaromancer. The following handicaps apply: no shield or power-ups, reduced mage, melee and range defence, no familiar, no body armour, and no ultimate abilities. If you are not on the standard spellbook, you will be temporarily switched to it for the duration of the battle.
You will need ice gloves for this fight, or otherwise you cannot use a weapon against Flambeed. The bosses are weak to no style in particular, but ranged is advised as they predominantly use magic. If you will only bring gear for one style, however, bring magic as otherwise the Gelatinnoth Mother will take long to kill.
Use Protect from Magic and attack from afar. Kill Karamel first as her freezing magic drains your stats, and save the Gelattinnoth Mother for last.
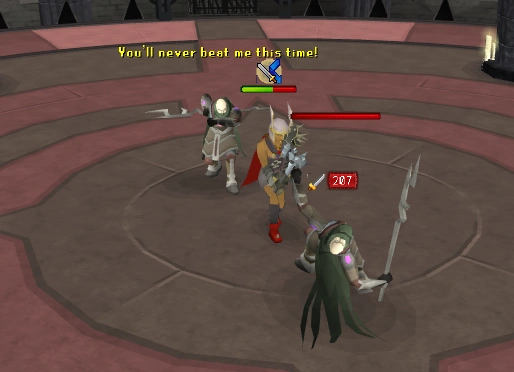
You'll Never Defeat Me[]

Two of the bosses are stuck behind the Inadequacy.
The player must survive for five minutes with the Inadequacy, The Everlasting, The Illusive, and the Untouchable. You will have the following handicaps applied: Reduced melee, ranged and magic attack and defence, no shield, no body armour, no potions, random daze, halved life points, no prayers, no food and no familiar.
Stay where you are when the fight begins. The Everlasting and Untouchable will stay trapped behind the Inadequacy, which will not attack from range during this special. The Illusive will not attack you. Kill the four doubts that the Inadequacy spawns and you will take no damage for the rest of the fight.
Portents of restoration can heal you during this special, as can enhanced excalibur. Also, scorpion meat will periodically spawn in the arena.
Hey! Eat Power-up[]

A player detonating a bomb in Hey! Eat power-up.
The player must defeat many low-level boss monsters with only bomb power-ups. No equipment can be worn in the special, including auras, and weapons other than those that spawn in the arena are disallowed.
The bosses in the fight are Solus Dellagar, Delrith, Count Draynor, Melzar the Mad, Sigmund, Tarn Razorlor, Draugen, The Kendal, Tumeken's Shadow, Culinaromancer, Elvarg and Treus Dayth.
The safest way to approach this special is to run to the south colossal spawn at the start, and stay there. Elvarg will be trapped behind several of the bosses, with only a few of them able to attack you; she will be one of the last bosses to reach you, if not the last. Stay there and detonate the colossal bombs that spawn every fifteen seconds. When almost all the bosses are dead, or Elvarg has sight of you, you can run around the arena's edge to avoid her dragon breath while detonating the bombs you come across. You cannot wear an anti-dragon shield during the fight, but a super antifire potion will fully block her dragon breath.
Diminuitive bombs deal 700 damage to one random target, or none at all. Massive bombs deal 700 damage to three targets, and Colossal bombs deal 700 damage to twelve targets. Thus while staying at a colossal bomb spawn is efficient in the beginning, when fewer bosses remain you may choose to detonate the bombs around the arena in a circle.
Silverlight, an ancient mace, and a stake and hammer are provided on the ground, but the bombs will finish all of the bosses regardless of special conditions.
Food and a familiar are permitted, so fill your inventory with food and bring a beast of burden.
The Fire! It burns![]

A player fighting Sunfreet.
The player must fight a level 112 Sunfreet. The following handicaps will be in effect: No power-ups, no familiars, no ultimate abilities and no prayers.
At the beginning of the battle, and infrequently afterward, Sunfreet will fly up into the air and rain patterns of fire. There are four waves, and to avoid the flames you must stand in the inner ring, outer ring, outer ring, and center. Sunfreet will then land and can be fought for a time before repeating the cycle. It has 60000 life points and very high defence, and attacks with magic and melee. When it reaches 10000 life points, it will become berserk and attacks faster and more accurately, but it will no longer perform its fire attack.
An easier version of the Sunfreet can be fought to practice dodging the fire rain. Defeating this version will not count towards the Desert Tasks or the Completionist cape.
Class A[]
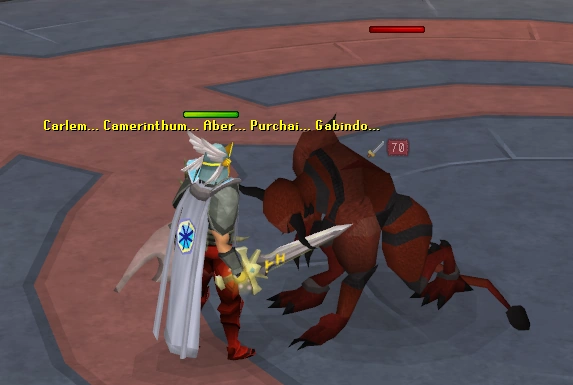
Nomad[]
![]()
- Combat conditions: Multicombat area (combat familiars can attack)
See the Nomad (monster)/Strategies guide on Nomad's abilities and the ways to defeat him.
In the tower, Nomad does exactly the same as during Nomad's Requiem, but with four large pillars rather than several smaller ones in the quest. The pillars are shaped differently, so he can often either walk around or fire his magic attack at you. You must position yourself carefully behind the pillar you are using to avoid this.
Players may encounter Nomad in Endurance mode, Climber mode or in Special mode (the No More Nomad...No More! match). He must be killed in any of these modes to obtain credit towards unlocking the Goliath gloves. In the Special mode match, both Nomads must be defeated for it to count.
Monster summary[]
| Image | Monster | Uses | Weakness | Poisonable? | Strong against | Other abilities |
|---|---|---|---|---|---|---|

|
Nomad | Magic, Melee | No | Ranged Armour | Too many to summarise briefly. See Nomad and Nomad (monster)/Strategies |
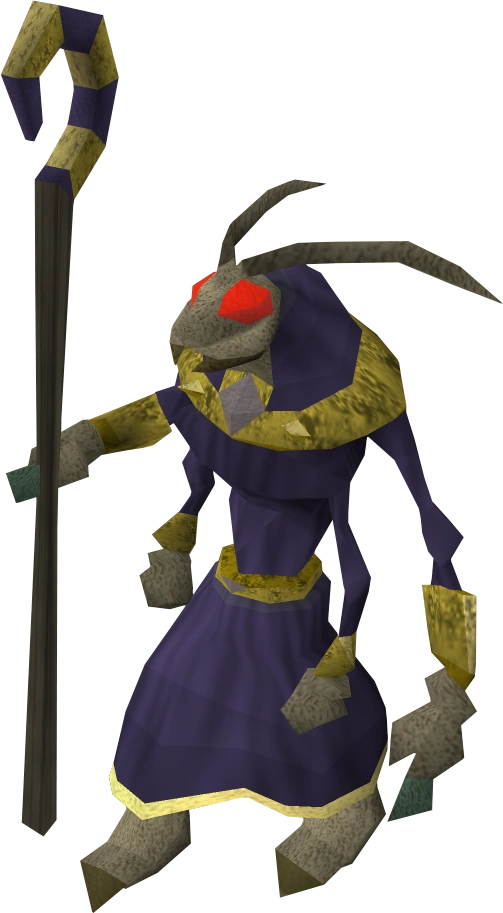
Pest Queen[]
![]()
- Combat conditions: Multicombat area (combat familiars can attack)
A Korasi's sword is provided in the arena, which must be wielded to damage the Pest Queen. Your own Korasi's sword, which you get from the quest, will NOT work. She attacks with magic and melee. When she rears up to charge a powerful attack, you must use either the sword's special attack or a stunning ability with it like Backhand on her, or else she will deal 4000 damage to you and your allies. If for some reason you were not able to stun the Queen, the abilities Resonance and Barricade will block the damage (Resonance will not heal you), although your allies will still be hurt.
As in the quest, the Queen will summon drones to heal her, which only the Void archers entering the arena can kill. An elite defiler will spawn every so often and attack the archers, and you must attack the defiler to get its attention or kill it outright. Defilers have 6500 life points and can be killed quickly with Slaughter + Kick. Because you will be using melee against the Queen, your armour will be weak to her magical attacks, so you will want to spend as little time away from her as possible.
Monster summary[]
| Image | Monster | Uses | Weakness | Poisonable? | Strong against | Other abilities |
|---|---|---|---|---|---|---|
|
Pest Queen | Magic, Melee | No | Her magic attack is stronger than her melee attack. Charges up and, if not stunned, heals herself and deals 4000+ damage to you and your archers. Summons drones that heal her until killed by the archers. Will occasionally summon up to two elite defilers which attack the archers. | ||
|
Pest drone | Doesn't attack | Your rangers | No | Immune to your attacks | The drones heal the Queen until they are killed. Only your archers can kill them. There are a total of ten drones, which spawn in four waves: 4 drones in the first wave, 3 in the second, 2 in the third, 1 in the fourth. After the fourth wave, no more drones spawn. |
|
Elite defiler | Ranged | Unknown | Will attack your rangers until you distract them by attacking them. Once distracted, they can walk through and even shoot around the Queen. Because their damage adds up, it is advisable to kill them rather than only distract them. They are vulnerable to slashing attacks, but although Korasi's sword is not very effective against them, it is still recommended to use it. |
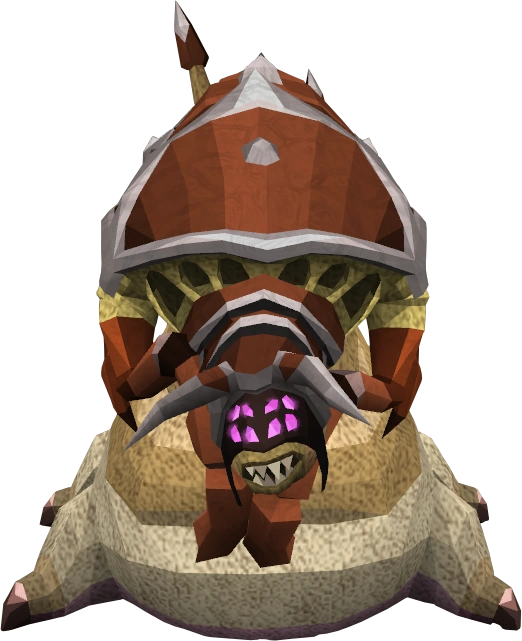
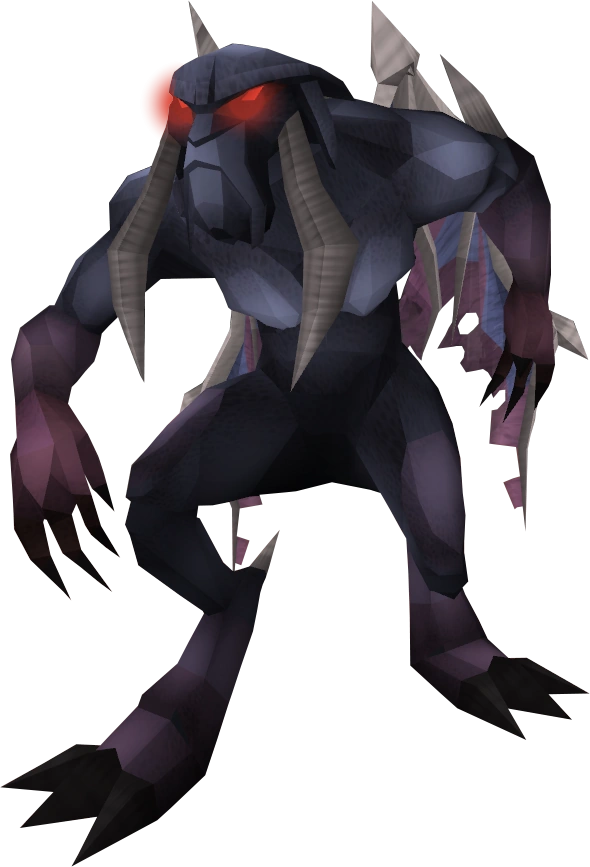
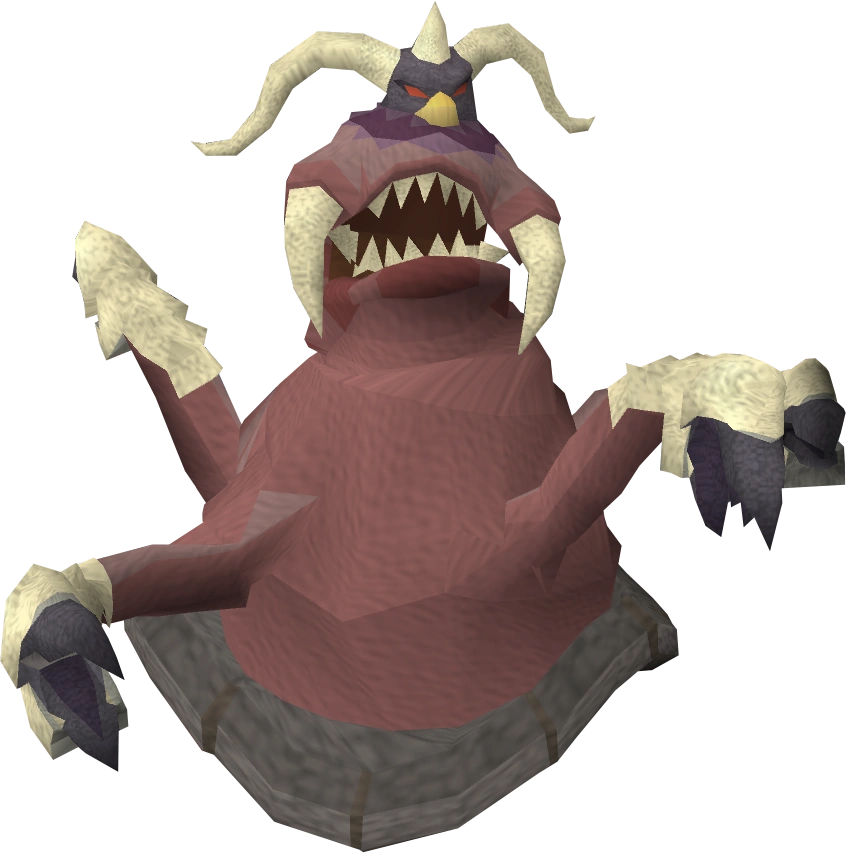
Decaying avatar[]
![]()
- Combat conditions: Single-way combat area (combat familiars cannot attack)

The Decaying avatar being trapped to the side of the arena
When fighting the avatar, it is recommended to use magic in order to make use of weaknesses in the combat triangle. A high-level player, however, can defeat the avatar with any combat style. It is still recommended not to use melee, as the avatar can deal somewhat high damage with its melee attacks.
For players using magic or ranged, the avatar can easily be trapped on the side of the arena, as seen on the image to the right. Just run along the side of arena slightly ahead of the avatar until it stops moving. Then, stop and attack it.
During the battle, three healing roots will appear, which the avatar can eat to heal to full health. These can be destroyed in order to prevent the avatar from healing. It is recommended lure the avatar to the opposite side of the arena when a root is about to spawn so that it is easier for you to destroy it before the avatar reaches it.
| Root | Spawns when the avatar reaches | Appears in this part of the arena |
|---|---|---|
| First | 75% health bar for the first time | North-west |
| Second | 50% health bar for the first time | North-east |
| Third | 25% health bar for the first time | South/South-west |
Binding or freezing abilities can also be used to keep the avatar from moving, giving you more time to destroy the roots. If you are using the Ancient Magicks, ice spells can be used to freeze the avatar and prevent it from attacking you or healing from the roots.
When destroying the roots, turn on protect from/deflect melee, because as soon as the roots are destroyed or eaten, the avatar will immediately attack you.
Monster summary[]
| Image | Monster | Uses | Weakness | Poisonable? | Strong against | Other abilities |
|---|---|---|---|---|---|---|
|
Decaying avatar | Melee | No | Ranged attacks | Heals up to three times by eating roots |
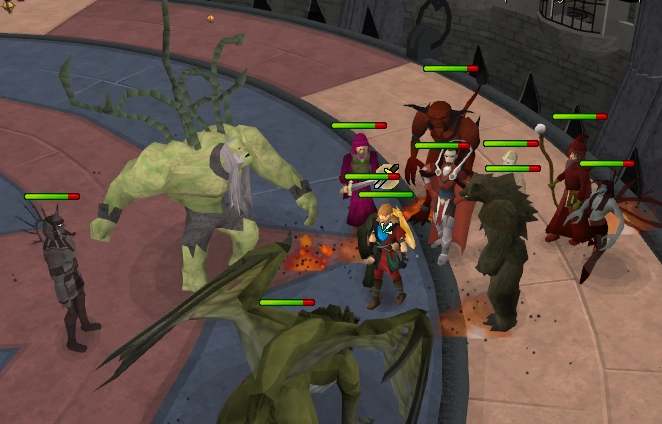
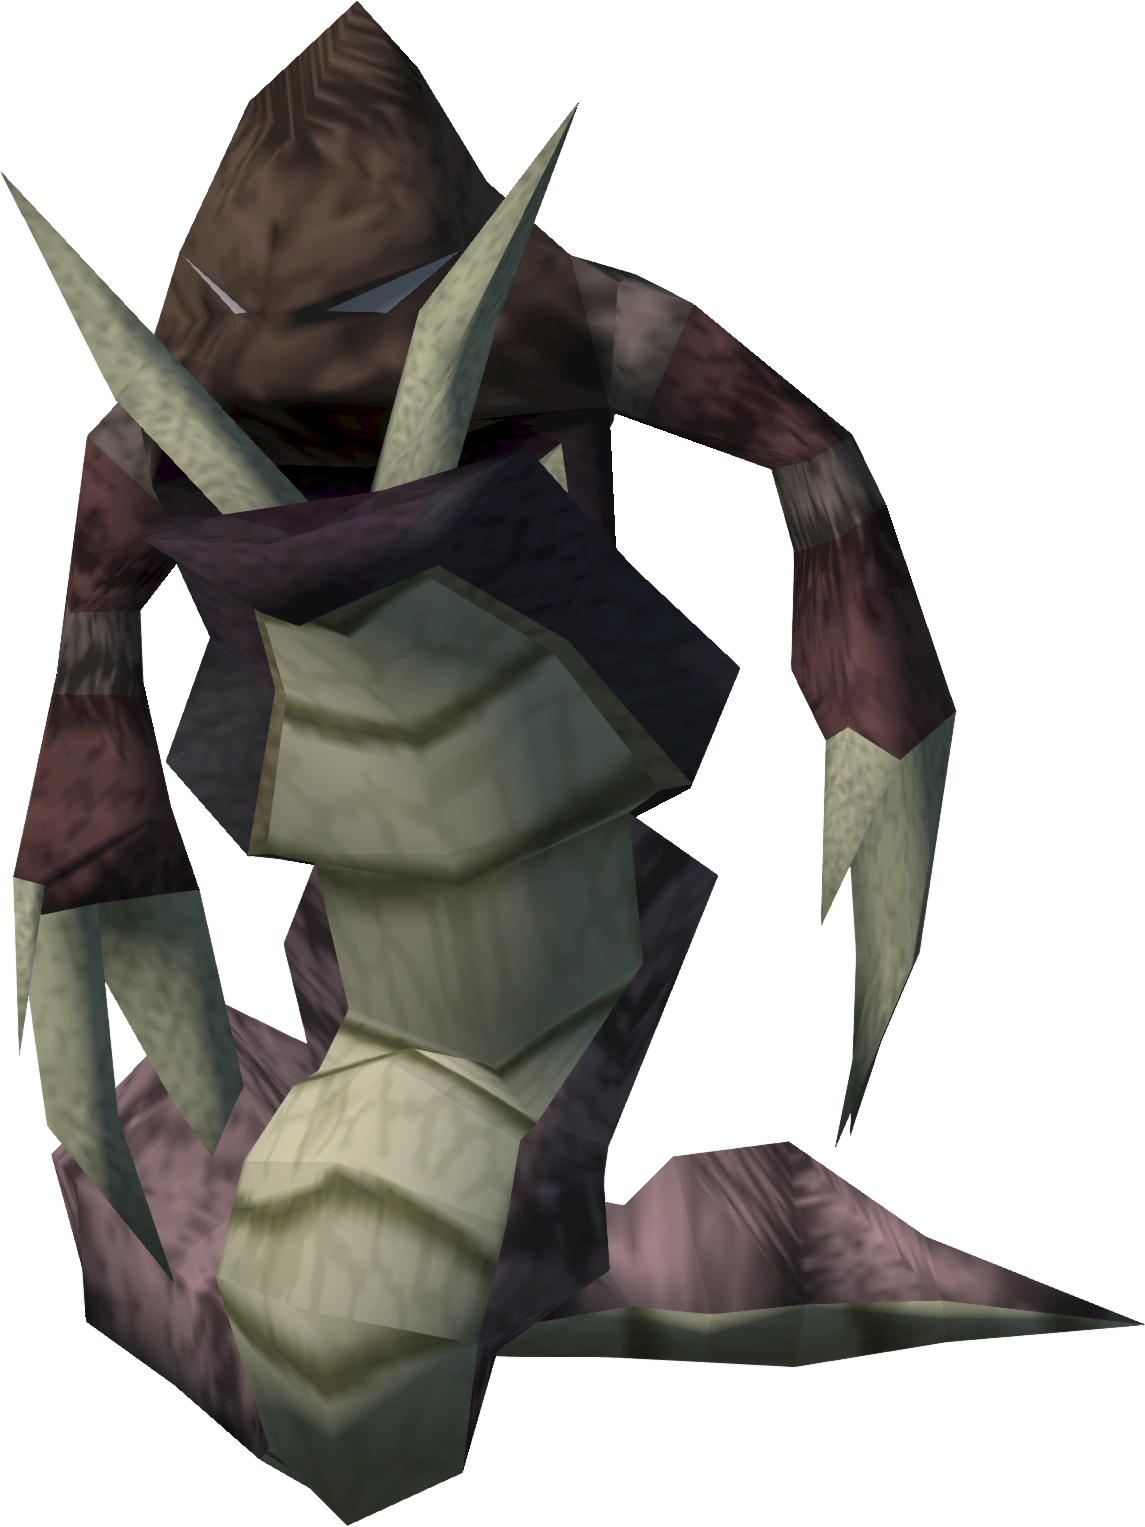
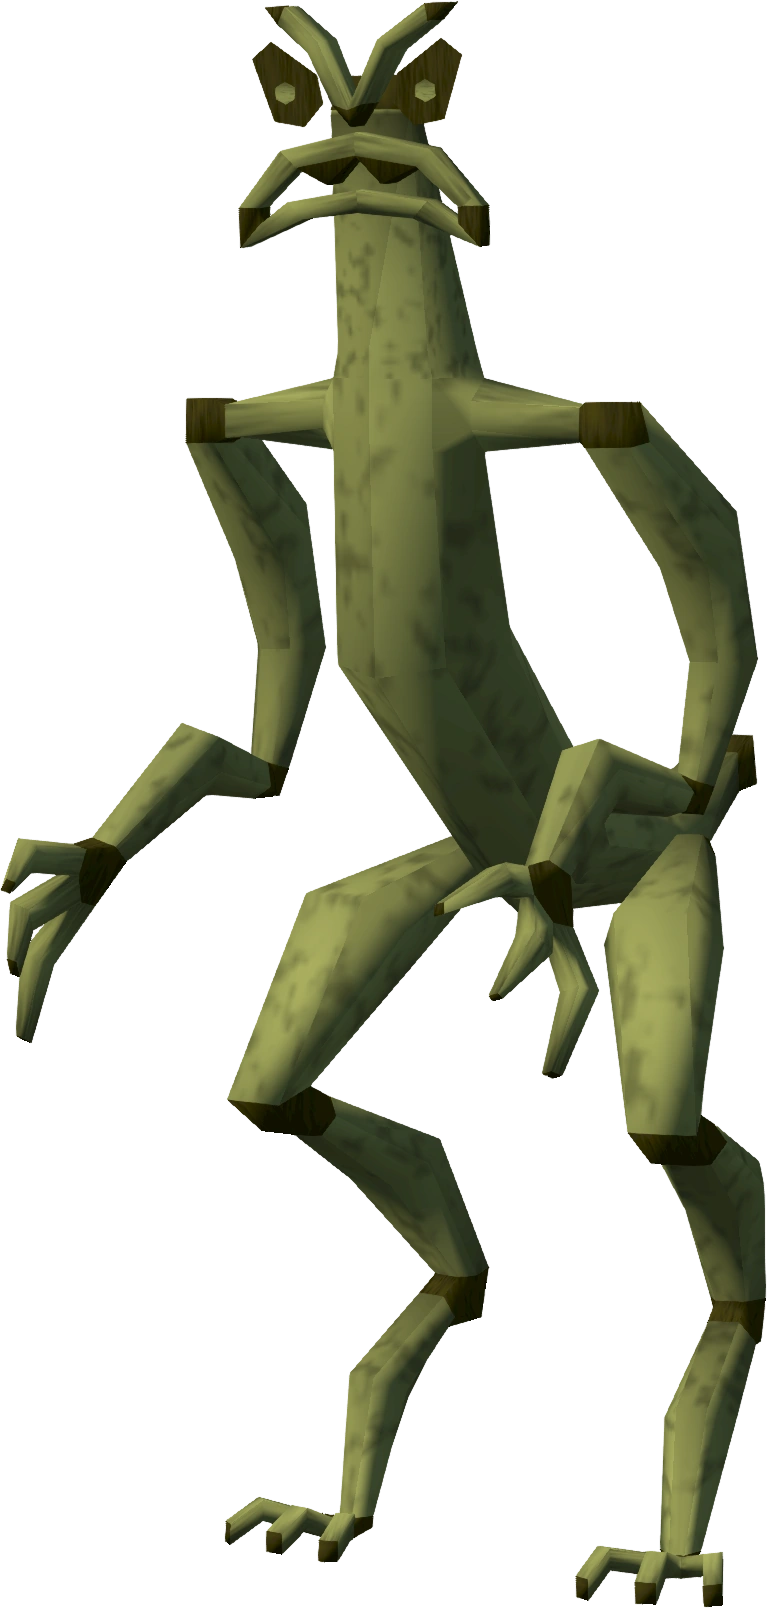
Eruni, Ayuni, and Leeuni[]
![]()
- Combat conditions: Multicombat area (combat familiars can attack)

Fighting Eruni.
The three monkeys are adept in every combat style, and have no weakness. Ayuni drains your prayer with her melee and magic attacks. Leeuni attempts to unequip your helmet if there is space in your inventory. Eruni spawns a lesser demon at the start of the fight, and she summons two, three, and four more demons when she falls to 3/4, 1/2, and 1/4 health; she is invulnerable until each demon is killed. Eruni has 40000 life points, and Ayuni and Leeuni have 50000 life points. All of the monkeys attack very quickly and have a max hit of just over a thousand.
It is advised to use ranged for this fight, and to use the pillars to fight the monkeys one-on-one. Run behind the north-west pillar at the start, and kill Ayuni when she teleports to you. Proceed to the north-east pillar and kill Leeuni. It is possible to trap them next to the pillars where they cannot melee you, though this is highly fickle as they will not get too close to the pillars. After they are dead you can engage Eruni and roam the arena to kill her lesser demons.
Monster summary[]
| Image | Monster | Uses | Weakness | Immune to stun | Other abilities |
|---|---|---|---|---|---|

|
Ayuni | No | Melee hits very fast and accurately. Moves very slowly. Drains prayer with magic and melee attacks. Will teleport near the player if she cannot see them. | ||
 |
Leeuni | No | Hits with magic and ranged simultaneously. Can unequip the player's helmet, or deals 300 damage if the player's inventory is full. Teleports around the arena occasionally. | ||

|
Eruni | No | Hits with magic and ranged simultaneously. Stays immobile during the entire fight. Summons a lesser demon at the start, and summons two, three, and four more demons when at 3/4, 1/2, and 1/4 health. Is completely impervious to attacks while a demon is alive. |
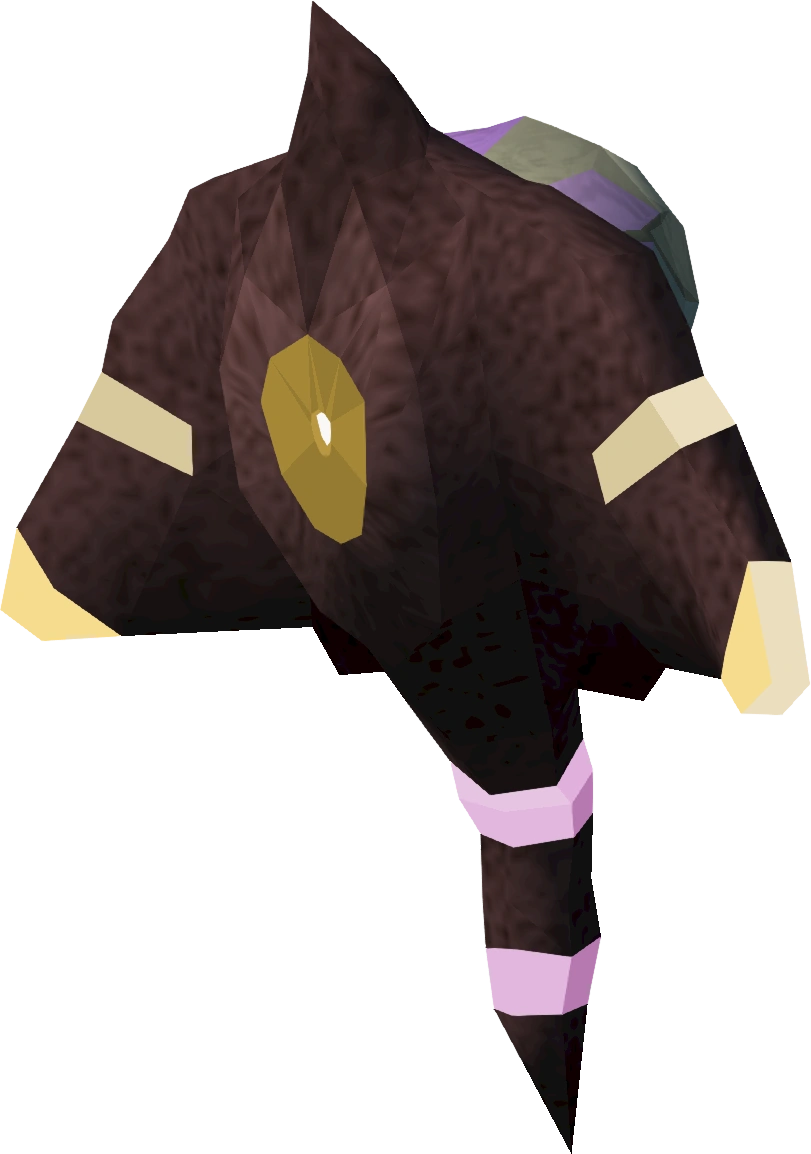
Dagannoth Mother (Version 2)[]
![]()
For this fight, it is wise to bring enough runes for every type of elemental spell, and a ranged weapon**. It is also possible to bring your own Balmung, although this is only recommended if it has been enhanced by Kharsai, because a normal Balmung is provided. There are pillars in this room, so in case you need to take a little break, for example when switching attack styles, the pillars can be used as obstacle. The Dagannoth Mother attacks with all three attack styles, but after switching attack styles, she sticks with that style for a while, so it is best to switch prayers to prevent the most damage. Do not use any other weapon besides the Balmung provided in the area when using melee, as she is extremely weak to that. Another strategy is to "hug" the pillars in the arena - by employing the hit-and-run tactics, the Dagannoth Mother would not be able to switch her weaknesses, allowing the Balmung to be used throughout the battle while preventing her from attacking you. Just remember to hit only after her life points bar is hidden, or else she may attack you.
- You don't need runes or range weapon. You can do the hug the pillar strategy right away, before she gets to colours and just use the Balmung. This will save you 6 spaces of runes that can be used for other supplies in Endurance mode. However, if you don't do the hug strategy and decide not to bring runes, you will never be able to kill her because she will never switch to green (range) or orange (melee). In the event that this does occur and she changes colour, you can simply log out behind the pillar to reset the fight.
Monster summary[]
| Image | Monster | Uses | Weakness | Poisonable? | Strong against | Other abilities | ||||||||||||||
|---|---|---|---|---|---|---|---|---|---|---|---|---|---|---|---|---|---|---|---|---|

|
Dagannoth Mother (the second Dagannoth Mother) | Melee, Ranged, Magic | Yes | Depends on her colour | You must first hit her with the Balmung provided in the arena. Until you do so, she does not change colour, cannot be damaged, and has no official weakness. After being hit by the Balmung, she can only be damaged with a certain attack type, depending on her colour.
|
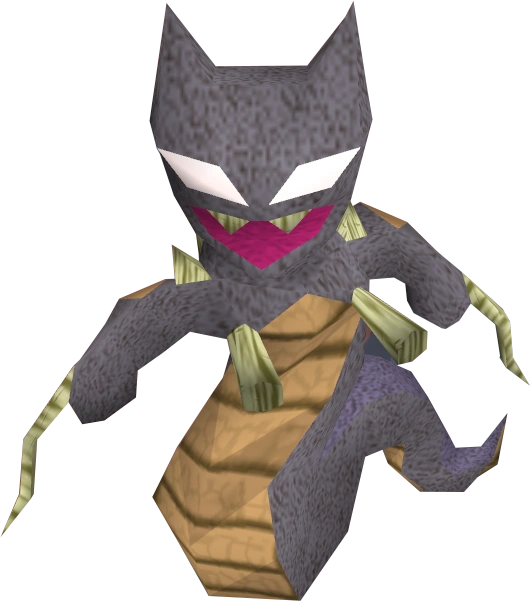
Zenevivia[]
![]()

Any melee weapon and Kick can shove Zenevivia off a plinth.
Zenevivia can be very hard or very easy depending on whether or not players have the correct equipment and, in climber mode, which handicaps players have. In endurance mode, not having the correct equipment can be fatal if players do not have sufficient food to offset the damage they'll be taking from the flame pits. Use melee and Kick to knock her off of the plinth, making her much easier to kill. She kicks players back who try to melee her up close when she is on a plinth, dealing a small amount of damage, but players only need to connect once with Kick for each plinth. After that, they can use any attack they like, including melee.
Players without a melee weapon are advised to pray Protect from Magic or Deflect Magic and range her, moving when she creates flames underneath them. She has no weakness, but magic doesn't seem to be as effective as ranged. The Wise Old Man will cast spells on her, but cannot be relied upon to do much damage.
If you range Zenevivia and bolts or arrows drop to the ground, for some reason, her fire pit attack does not appear on that spot. This trick may be useful for when you knock her off all plinths. When she starts to make huge fires, just stand on your ammunition and you will take no damage from the fire. The fire pits can damage familiars also, and can be fatal to some with relatively low life points such as the Unicorn stallion, as they cause rapid hits above 100 on them. They may also cause the game to run slower for a few moments for slower computers.
For players intending to range, she will switch her prayers between ranged and magic based on how much damage she takes. She will start using protect from magic, but will switch to protect from ranged after you hit her a few times with range. She will continue using protect from ranged until the Wise Old Man (or you) deal enough damage to her with magic. Although it is possible to just use ranged and let the Wise Old Man damage her when she prays against range, this will greatly prolong the fight. It is strongly recommended to bring an alternate attack style. Meleeing with halberd from two squares away is a viable option if you choose not to use the Kick ability.
Monster summary[]
| Image | Monster | Uses | Weakness | Poisonable? | Strong against | Other abilities |
|---|---|---|---|---|---|---|

|
Zenevivia | Magic, Melee |  |
No | Uses Blood Barrage unless you pray protect from/deflect magic, in which case she instead uses a special flame pit spell that deals constant hits of 100-200 damage as long as you stand on its flames. She teleports to a plinths and prays protect from magic or ranged if you attack her with magic or ranged. |
Class B[]
The Untouchable[]
![]()
- Combat conditions: Single-way combat area (combat familiars cannot attack)
As The Untouchable only fights with melee, this is a fairly easy fight when using Protect from Melee. Even without prayer, its attacks are rather inaccurate. There is nothing very hard about this boss aside from its high defence, so just use the protection prayer and kill it. It has no official weakness, but magic seems to work well due to being at an advantage in the combat triangle.
Monster summary[]
| Image | Monster | Uses | Weakness | Poisonable? | Strong against | Other abilities |
|---|---|---|---|---|---|---|
|
The Untouchable | Melee | No | Extremely high defence |
Damis, Fareed, Kamil and Dessous[]
![]()
- Combat conditions: Multicombat area (combat familiars can attack)
- Without ice gloves, this will be a very long fight.
You face all four bosses of the Desert Treasure quest: Damis, Dessous, Fareed, and Kamil.
All four bosses are weak to magic. Kill Kamil first as he frequently stuns the player, and then kill Dessous and Fareed. Damis should be fought last as he has two forms, thus taking twice as long to kill. Do not use Protect from Melee until Dessous is dead, as the prayer causes him to use his bat swarm attack repeatedly.
If using magic, you must use fire spells to successfully hit Kamil and water spells to hit Fareed. Elemental spells from the Ancient Magicks work. Neither boss is immune to melee or ranged, though they are somewhat resistant.
Without ice gloves, attempting to auto-attack Fareed will unequip your main-hand weapon, and all abilities will be ineffective. This happens even when you are outside Fareed's attack range. If you did not bring ice gloves, you will have to kill Fareed barehanded, aided with auto-attacks from your off-hand weapon if you have one.
Monster summary[]
| Image | Monster | Uses | Weakness | Poisonable? | Strong against | Other abilities |
|---|---|---|---|---|---|---|
| Damis | Melee | Yes | Melee | Attacks with melee. He must be fought first as a level 86 and then as a level 124. His second form drains prayer points with every attack made, even when he misses. | ||
| Dessous | Melee, special magic/ranged bat attack | Yes | Melee | Attacks with melee. His bat attack deals high and accurate magic and ranged damage. He can teleport next to the player if attacked from a distance. | ||
| Fareed | Melee (mainly), magic (sometimes) | Yes | Melee; also immune to Fire spells and Air spells. | Players must wear ice gloves to deal any damage to Fareed. | ||
| Kamil | Ice magic, melee | Yes | Melee; also immune to Air spells and Water spells. | He stuns you with his ice spell, and may melee you if next to you. |
The Everlasting and The Illusive[]
![]()
- Combat conditions: Multicombat area (combat familiars can attack)
For these, it is advised to attack The Everlasting first. It is impossible to walk through The Everlasting. The Illusive usually doesn't attack, so should not be seen as a danger. Therefore, if you have a lower prayer level, it is advised to kill The Everlasting first with prayer, and then kill The Illusive.
The Illusive is much easier to kill with ranged or magic. The Illusive is effectively immune to the monster-stun handicap, as it still burrows away during the stun period and thereafter isn't stunned.
When using ranged or magic, it is useful to stand in the centre of the arena when The Illusive burrows, as this makes it easier to spot it on the minimap when it reappears. (When you are not in the centre, The Illusive might reappear in an area outside what it shown on the minimap.) You can usually get two to three hits against it before it burrows again. If using melee, this tactic is somewhat less useful, as the time it takes it run to The Illusive often means only one hit is scored before it burrows again.
A combat familiar is quite useful against The Illusive. Once the familiar has begun attacking The Illusive, it will immediately run up to the monster and start attacking again when The Illusive reappears from burrowing (as long as the familiar does not get too far away from you).
As in the quest, Cyrisus would occasionally heal the player or cast Vengeance Other.
There is currently a glitch that causes Cyrisus to deal damage to himself rather than the monsters.
Monster summary[]
| Image | Monster | Uses | Weakness | Poisonable? | Strong against | Other abilities |
|---|---|---|---|---|---|---|
|
The Everlasting | Melee | No | Magic | High defence and many life points | |
| The Illusive | Melee | No | Constantly digs into floor, disappears, and reappears else. Unfightable when digging. |
Dagannoth sentinels[]
![]()
- Combat conditions: Multicombat area (combat familiars can attack)

Hide under a sentinel's snout continuously so that only one attacks you.
For these it is advised to use the Balmung for both its bonus damage against Dagannoths and its access to two-handed abilities. A high-hitting two-handed melee weapon such as a Godsword can be substituted if you did not bring your Balmung to the fight. It is recommended to make use of the area-of-effect abilities Quake and Hurricane whenever you can during battle, and to balance your attention between the sentinels while those abilities are on cooldown. The sentinels cannot move at all, and will use only melee if you are standing next to them, so if you do not have access to Soul Split, you can activate Protect from Melee to reduce incoming damage.
Monster summary[]
| File: | Monster | Uses | Weakness | Poisonable? | Strong against | Other abilities |
|---|---|---|---|---|---|---|
|
Dagannoth sentinel | Melee, Ranged, Magic | Yes | A sentinel with more life points can partly heal its companion with less life points. When there are two sentinels, standing under a sentinel's jaws will cause it not to attack you, nor will it heal its companion. |
Karamel and Gelatinnoth Mother[]
![]()
- Combat conditions: Multicombat area (combat familiars can attack)
For these bosses, it is advised to bring weapons for all three combat styles with you when going on an Endurance trip in order to deal with the Gelatinnoth Mother. It is possible to defeat it with only one attack style, however it will take much longer and will cause the player to take more damage. Make sure you have a few restore potions with you, as Karamel's freezing attacks can greatly reduce your stats, although a Super Dominion Medallion may offset the effects of this. Like the boss she is based on, the Gelatinnoth Mother follows a cycle of Orange (melee) - Brown (earth) - Red (fire) - Green (ranged) - White (air), Blue (water) before repeating, but begins coloured white.
It is recommended to use protect from magic and to kill Karamel first. Afterwards, use protect from ranged and kill the Gelatinnoth Mother.
Monster summary[]
| Image | Monster | Uses | Weakness | Poisonable? | Strong against | Other abilities | ||||||||||||||
|---|---|---|---|---|---|---|---|---|---|---|---|---|---|---|---|---|---|---|---|---|
 |
Karamel | Magic, Melee | No | Her magic attacks also freeze you, reduce your stats, and completely drain your adrenaline bar, effectively restricting you to basic abilities. | ||||||||||||||||
|
Gelatinnoth Mother | Melee, Ranged | Yes | Depends on her colour | As her colour changers, so does her weakness.
|
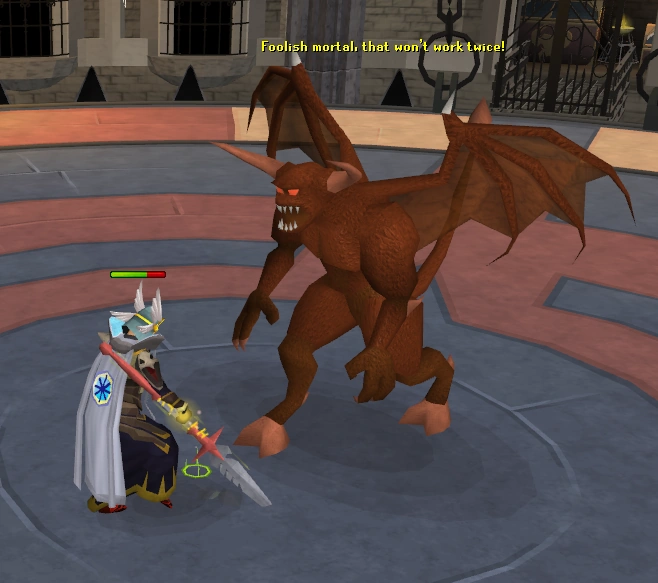
Nezikchened[]
![]()
- Combat conditions: Single-way combat area (combat familiars cannot attack)
This demon is probably the easiest boss of Class B. It is advised to wear good melee armour or use Protect from Melee/Deflect Melee while fighting him from melee distance. This will prevent him from attacking with Magic, making it an easy fight. You can also use Protect from Magic or Deflect Magic, and attack him from a distance with magic or ranged, preventing all damage.
In the Dominion Tower, Nezikchened doesn't drain prayer at all unlike in some conditions in the Legends' Quest.
Monster summary[]
| Image | Monster | Uses | Weakness | Poisonable? | Strong against | Other abilities |
|---|---|---|---|---|---|---|
|
Nezikchened | Melee, Magic | Yes | Magic | Will only use melee if you are in melee range. Will not drain prayer, unlike in the Legends' Quest. |
Class C[]
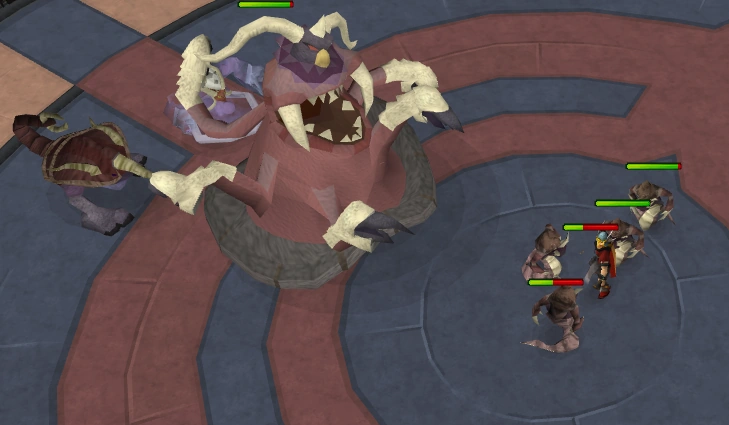
Balance Elemental[]
![]()
- Combat conditions: Multicombat area (combat familiars can attack)
This is by far the hardest boss of Class C, using melee, magic, and ranged, along with a stat draining magic attack. At least one stat restore potion is recommended for this fight. The Balance elemental will attack with either a melee attack (the right rock arm will become a lot bigger), a ranged attack (the left fire arm will equip a fire bow), or a magic attack (the crest of the watery head will boil and fire balls of boiling, steaming water). It will always attack 4 times with the same style and then on the 5th attack use its stat-draining magic attack (looks like a rock being thrown on you). After the draining magic attack, it will switch attack style, reacting to your prayer. For example, if you are praying protect from/deflect melee at this time, it will never switch to melee. If you are praying protect from/deflect magic at this time, it will always switch to ranged.
It is important to keep watching your prayer and stats, and drink prayer and stat restore potions when needed.
It will always start the match using ranged, so when waiting for the fight to start it is suggested to activate protect from/deflect ranged.
A useful strategy is to switch your prayer quickly after its 4th attack to protect from/deflect magic. This blocks its regular attack and causes it to switch to ranged. You then switch player to protect from/deflect ranged until the after the next 4th attack, where you repeat this process. Once you have mastered this, you will not take any damage from the elemental.
The arena contains columns, and if you are taking damage (such as not switching prayer at the right time), run to place a column between yourself and the elemental. You can then heal and drink potions without being attacked, and, when ready, return to the battle.
It is also possible to use a column as a Safe spot against the elemental. Attack the elemental and then immediately hide behind a column. Wait for its health bar to disappear and then repeat this hit-and-hide tactic. It will have time to attack you once, but you can tell what attack this will be and set your prayer accordingly. Doing this you will only need a few pieces of food.
Monster summary[]
| Image | Monster | Uses | Weakness | Poisonable? | Strong against | Other abilities |
|---|---|---|---|---|---|---|

|
Balance Elemental | Ranged, Melee, Magic | Nothing | Yes | Every 5th attack is a special stat-draining magic attack. After this attack, switches attack style based on prayer you are using, and next 4 attacks will be that style. |
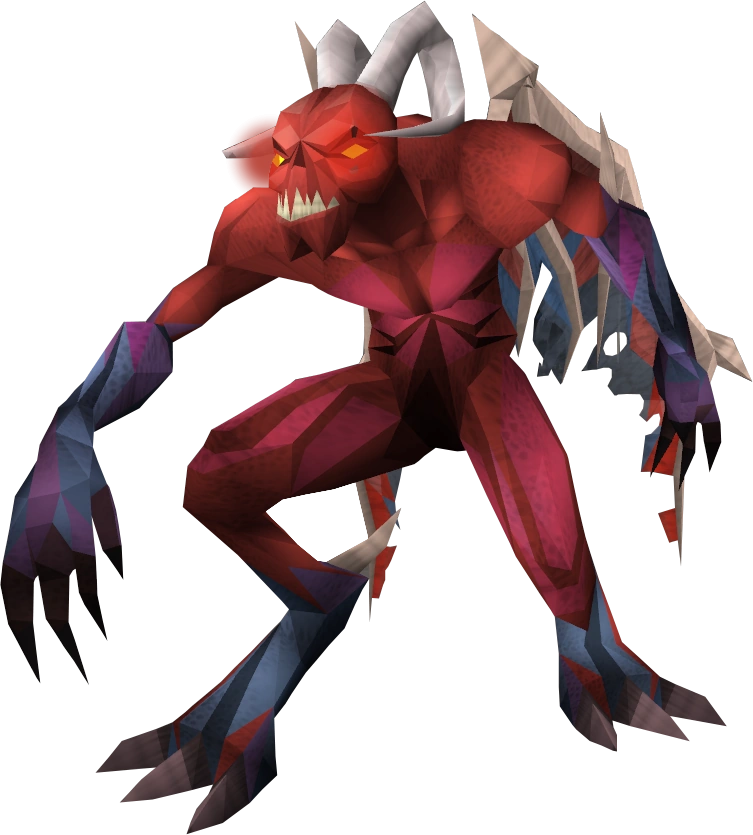
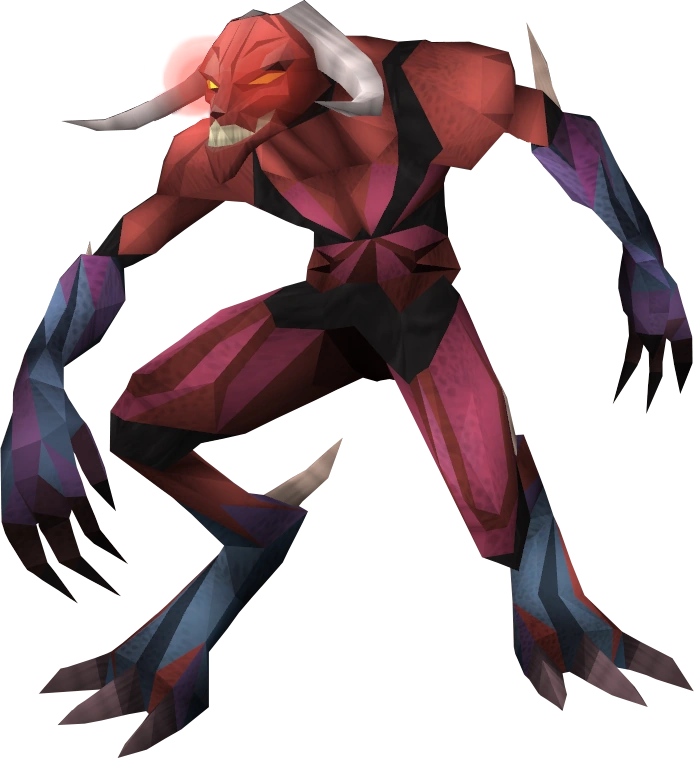
Jungle demon[]


Fighting the jungle demon.
![]()
- Combat conditions: Single-way combat area (combat familiars cannot attack)
For higher levels, it is advised to wear melee armour, then use protect from magic and just use melee to kill the demon. That way, it will not hit very often, and will be a fairly easy boss. It can hit up to 320 with both magic and melee, so keep a watch on your health. Alternatively, a hit-and-run strategy may be employed with careful timing to avoid all damage. Lower levels are advised to use ranged or magic, and attack from a distance with protect from magic on. That way, it won't be able to deal any damage.
Monster summary[]
| Image | Monster | Uses | Weakness | Poisonable? | Strong against | Other abilities |
|---|---|---|---|---|---|---|
|
Jungle demon | Melee, Magic | Nothing | Yes | Magic | Melee attack is like a Halberd, can hit two squares away |
Trivia[]
- The monster guide on the monster selection screen claims the demon will switch attacks based on what you are praying. However, if you stand several squares away from it and attack with magic or ranged, it will only attack back with magic and will not attempt to close on you to use melee. This make praying protect from/deflect magic useful. It is not known if this is a bug.
Arrav[]
![]()
- Combat conditions: Single-way combat area (combat familiars cannot attack)
Despite his relatively high combat level, Arrav is a fairly easy boss, as his attacks are quite inaccurate. At around 1/3rd of his health, he will also interrupt the battle. You will have to click to continue. Afterwards, once he is almost dead, he will interrupt the fight again. After clicking to continue, he will be summoned back by Zemouregal and you will win the fight.
Monster summary[]
| Image | Monster | Uses | Weakness | Poisonable? | Strong against | Other abilities |
|---|---|---|---|---|---|---|
|
Arrav | Melee | Any | Unknown | When reduced to 1/3 health, he will be summoned away from the match. |
Ice demon[]
![]()
- Combat conditions: Single-way combat area (combat familiars cannot attack)
This is the Ice demon from The Temple at Senntisten quest, not the ones from the Ritual of the Mahjarrat quest.
A fairly easy and basic fight. It uses ranged and magic attacks, so the best option is to wear melee gear and protect from magic; as melee gear will protect most of the ranged attacks.
Although an ice demon, it is not weak to fire. However, it is immune to water magic.
Monster summary[]
| Image | Monster | Uses | Weakness | Poisonable? | Strong against | Other abilities |
|---|---|---|---|---|---|---|
|
Ice demon | Magic, Ranged | No | Magic attack can freeze you in place, preventing you from moving but not attacking. Immune to water magic. |
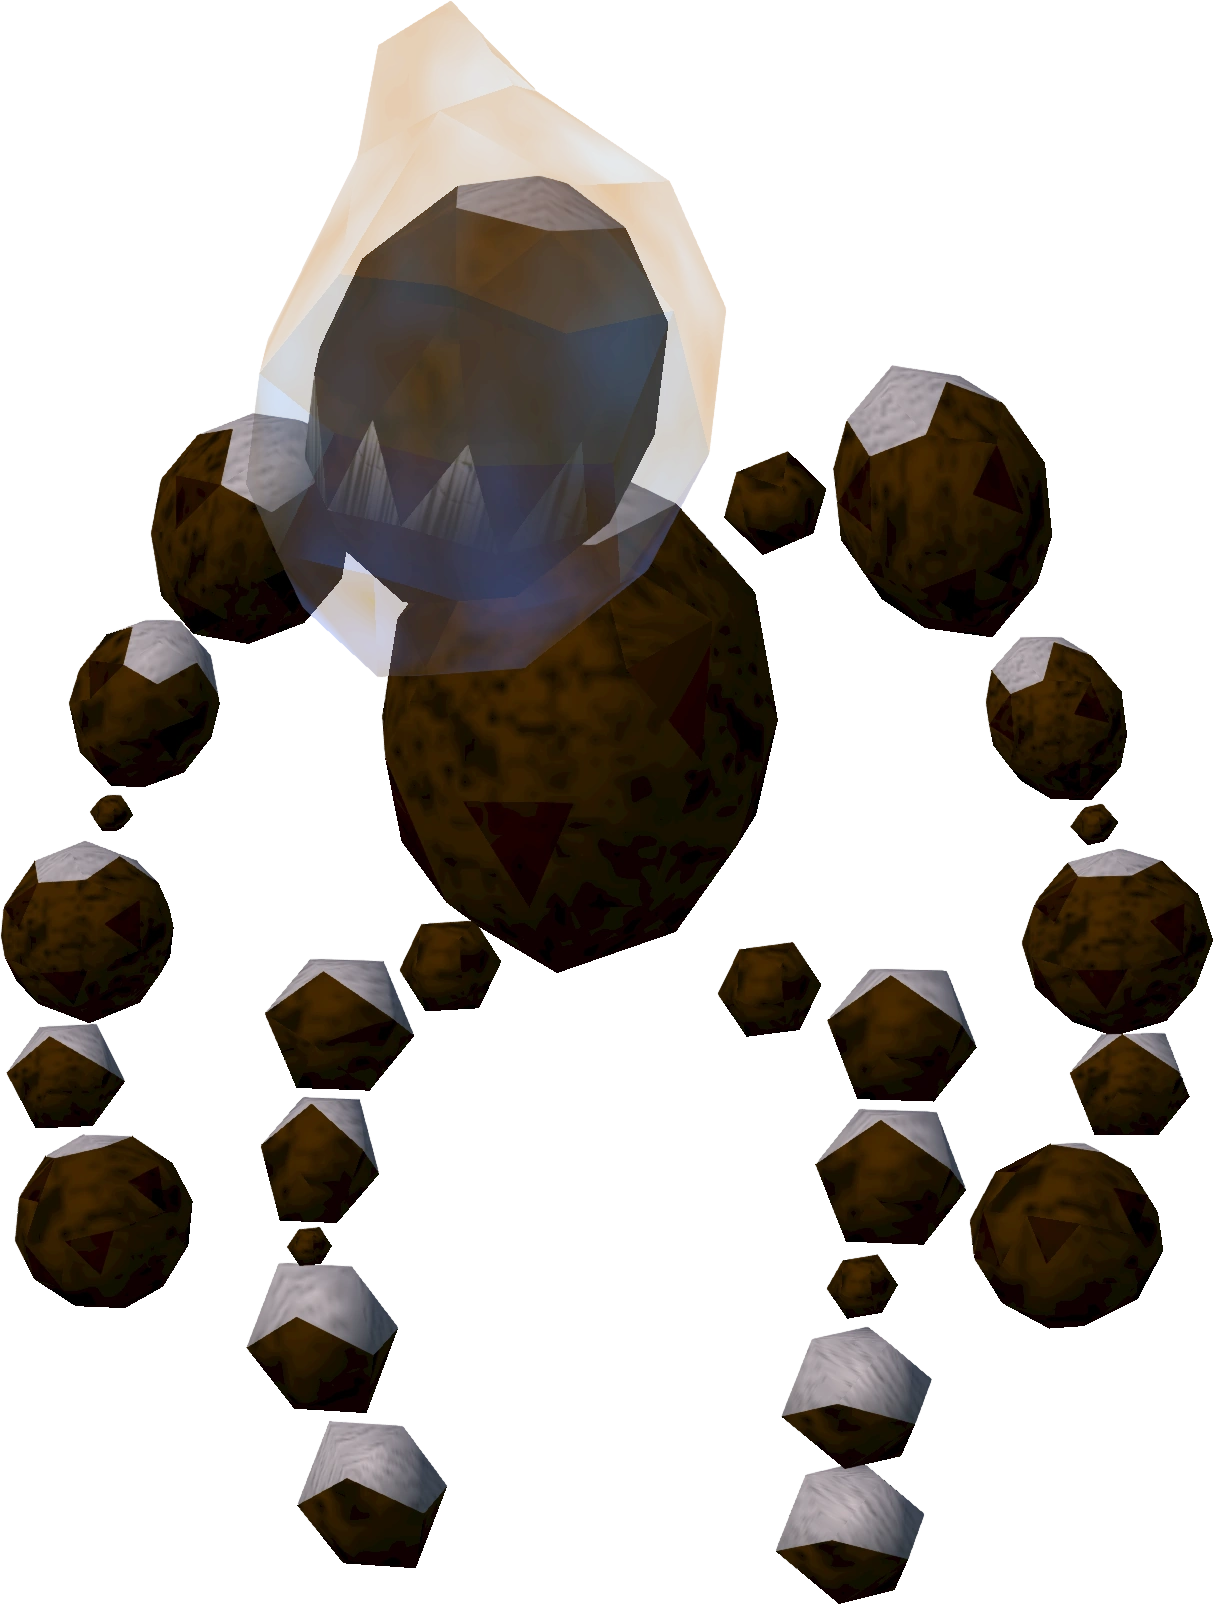
The Inadequacy and Doubts[]
![]()
- Combat conditions: Multicombat area (combat familiars can attack)
When fighting this boss, it is best to use Protect from Melee and ignore the doubts, as the battle will end when The Inadequacy is defeated. When standing next to The Inadequacy, it will only use melee attacks, so it should be a safe battle when using protect from melee.
Monster summary[]
| Image | Monster | Uses | Weakness | Poisonable? | Strong against | Other abilities |
|---|---|---|---|---|---|---|
|
The Inadequacy | Melee, Ranged (only when player is out of melee distance) | No | Will randomly spawn Doubts during the battle. | ||
|
A Doubt | Melee | Yes | None. |
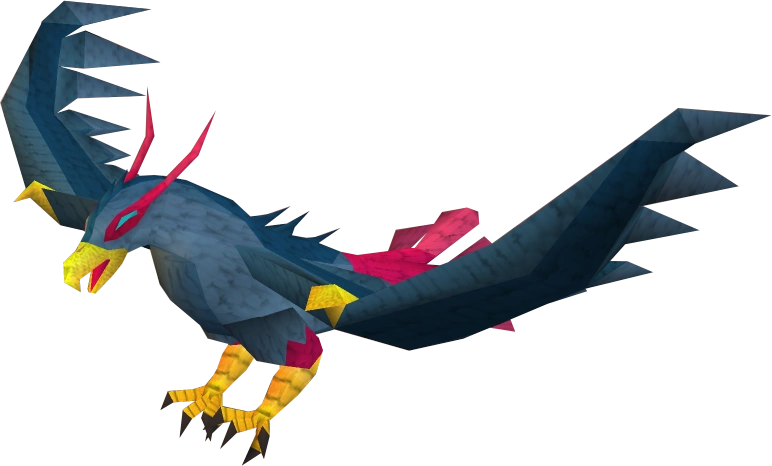
Giant Roc[]
![]()
The Giant Roc can be a fairly tough fight, as it will knock you back quite often during the fight. In addition to dealing damage that cannot be protected against, this attack will also stun you, thus preventing you from eating. The Roc's ranged attack can deal high amounts of damage, but can be avoided by running away from the spot where you are. When attacking from a distance, the Roc will come towards you, so there is no way to protect from both its melee and ranged attacks at the same time. For prayers it is advised to use Soul Split or Protect from Melee during this fight. Protect from Missiles may be used instead to force the Roc to use melee only, but it will use its knock back attack more often. If the Random Freeze handicap is active, Protect from Missiles may be the better choice when using melee, since it allows you to draw the Roc into attack range if you happen to become frozen out of range. The Giant Roc can be lured by standing on the east side of it (near the exit gate). By doing this, it will follow you, making its special attack less effective.
Monster summary[]
| Image | Monster | Uses | Weakness | Poisonable? | Strong against | Other abilities |
|---|---|---|---|---|---|---|
|
Giant Roc | Melee, Ranged | Nothing | Yes | Will buffet you with its wings, knocking you backwards and damaging and stunning you for a short time. |
Class D[]
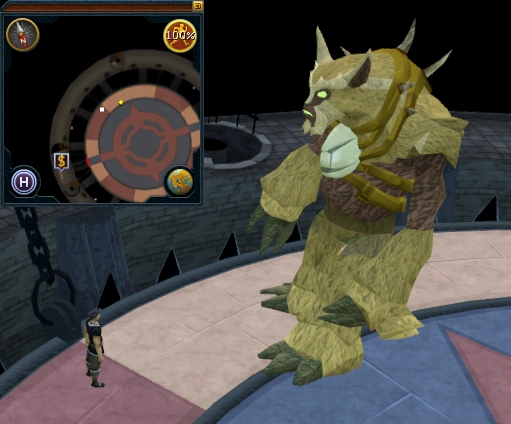
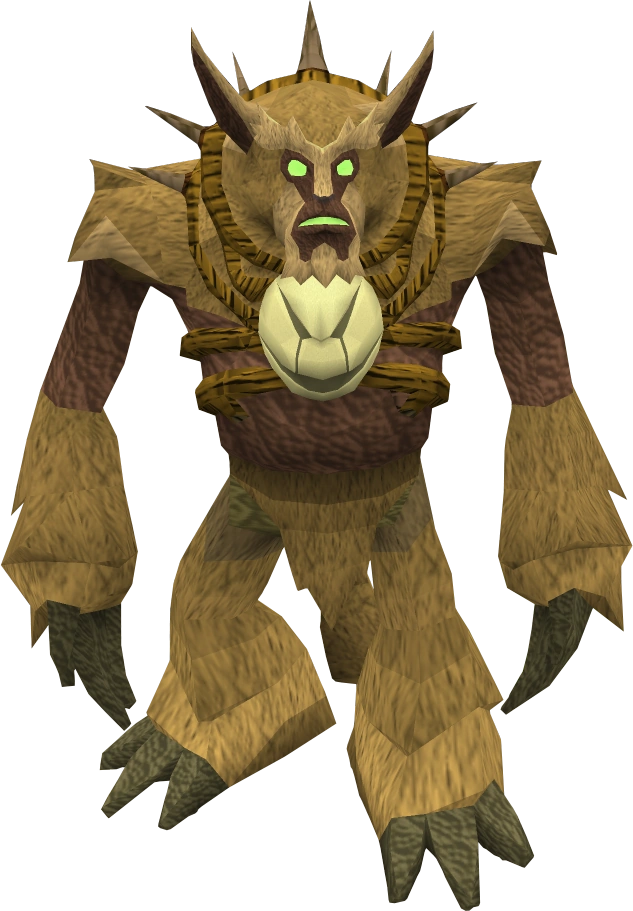
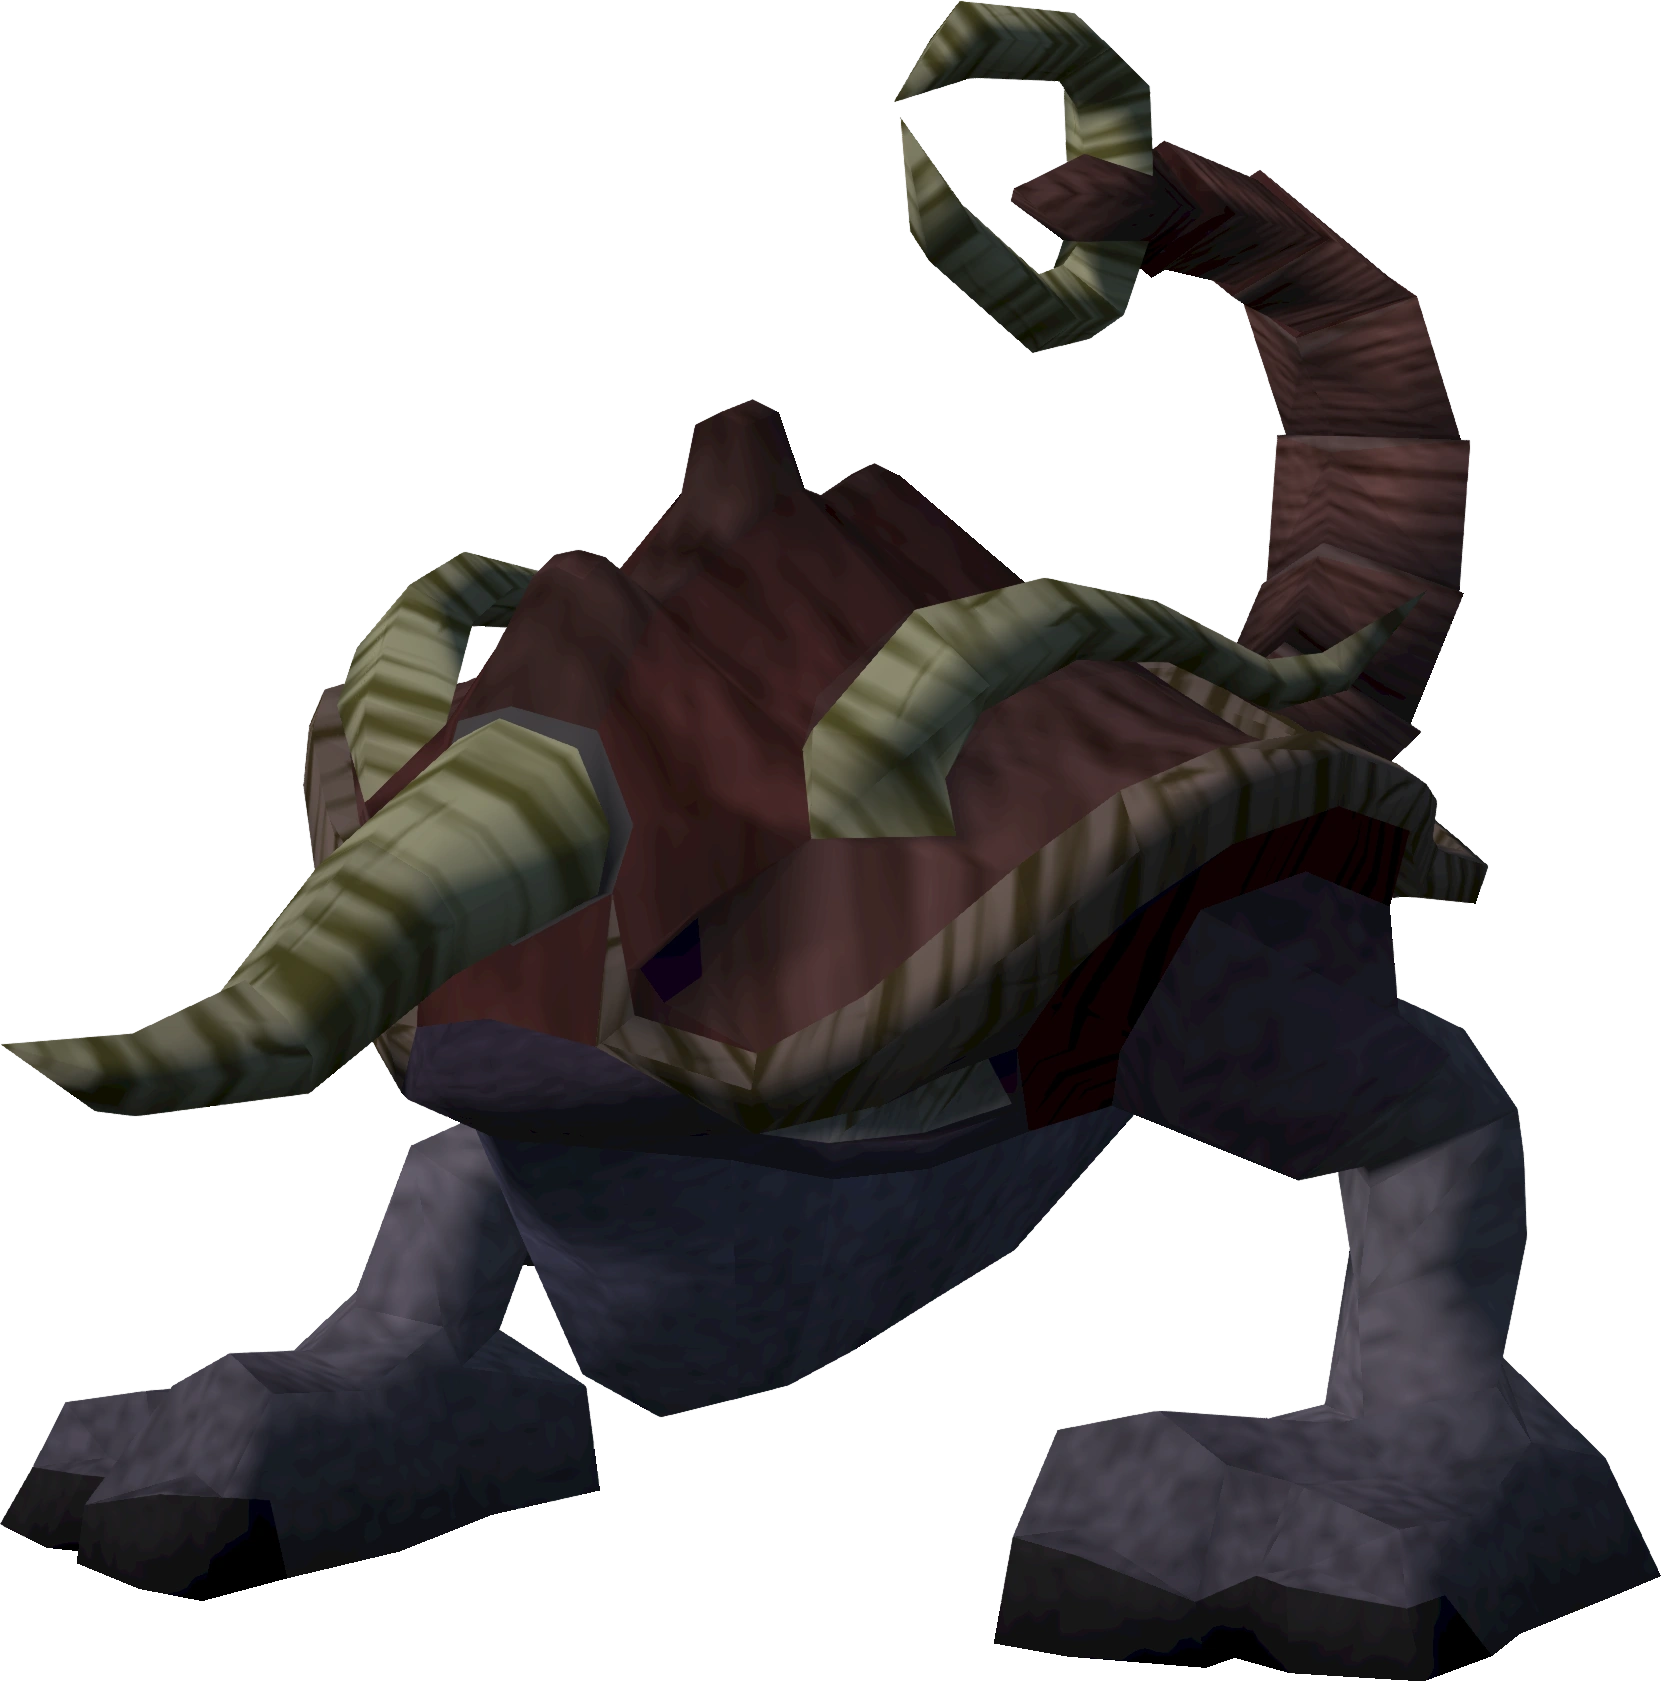
Arrg[]

Fighting Arrg.
![]()
Arrg is a strong boss, and can hit very high with both his melee and ranged attacks. His attacks are not very accurate, and don't deal any damage most of the time, especially at higher defence levels. As his most common attack style is melee, it is advised to use Protect from Melee with melee armour, and try to kill him as fast as possible. He doesn't have very high defence or life points, so it shouldn't be hard to kill him in a fairly short time.
Monster summary[]
| Image | Monster | Uses | Weakness | Poisonable? | Strong against | Other abilities |
|---|---|---|---|---|---|---|

|
Arrg | Melee, Ranged | Yes | Fremennik round shield reduces max hit of Arrg's ranged attack. |
Barrelchest[]
![]()
- Combat conditions: Single-way combat area (combat familiars cannot attack)
This is the Mark I version of Barrelchest, which is encountered in the The Great Brain Robbery.
Even though Barrelchest turns off your prayer every time he attacks you, the attack that turns off your prayer is still blocked by Protect from melee, so when entering, you should turn on your protect from melee, and turn it back on every time Barrelchest turns it off. Using the quick prayers function is very useful. It is not advised to drink prayer potions to restore your prayer after it is fully drained by Barrelchest, as this would be a waste of potions, unless you are doing climber mode and have plenty in the bank. After your prayer is fully drained, just keep attacking him until he is dead. He might hit quite high, but just eat when needed.
Monster summary[]
| Image | Monster | Uses | Weakness | Poisonable? | Strong against | Other abilities |
|---|---|---|---|---|---|---|
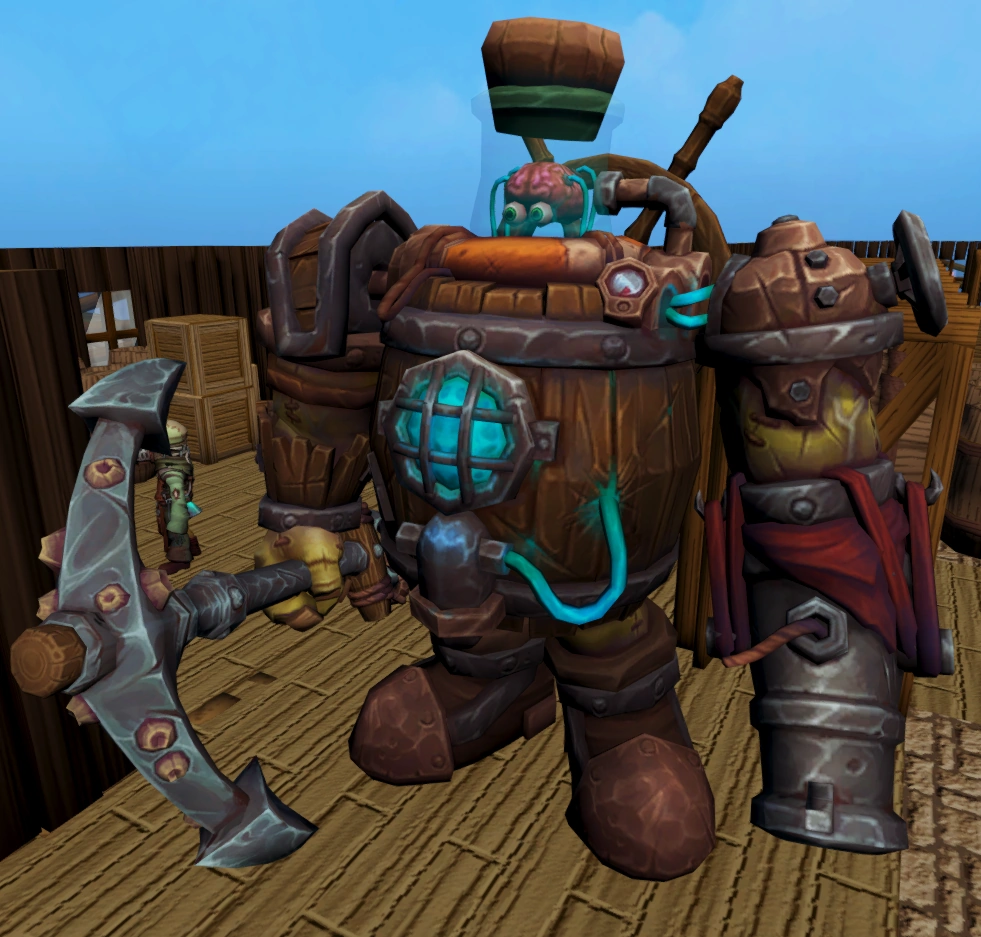
|
Barrelchest | Melee (Crush), Ranged | Yes | None | Its attacks turn off prayer and drain prayer points and defence. |
Chronozon[]

Fighting Chronozon.
![]()
- Combat conditions: Single-way combat area (combat familiars cannot attack)
Before starting to fight Chronozon, turn on Protect from melee, then pick up the Elemental and Catalytic runes, equip a magic weapon, and cast each of the blast spells on Chronozon (until you get a hit form each). (Other elemental spells do not work, e.g., strike, surge, etc.) Then just finish him, preferably using melee or surge spells. As long as you make sure to hit with one of each of the blast spells before you kill him, this is an incredibly easy fight. The tower will place extra runes on the floor if needed.
Monster summary[]
| Image | Monster | Uses | Weakness | Poisonable? | Strong against | Other abilities |
|---|---|---|---|---|---|---|
|
Chronozon | Melee | Blast spells |
Yes | To be slayable, must be weakened by being hit once from each blast spell (fire, earth, water, and air). If not weakened, what would be a kill blow instead heals the demon to full strength. The blast spells must hit (if successful, the chat box will say "Chronozon weakens."); a blast that is cast but misses does not weaken the demon. Also bear in mind that if Chronozon regenerates, you will have to cast the blast spells again. |
Evil Chicken[]
![]()
The Evil Chicken uses magic attacks with moderate damage and accuracy, however they can be easily blocked with Protect from Magic.
Monster summary[]
| Image | Monster | Uses | Weakness | Poisonable? | Strong against | Other abilities |
|---|---|---|---|---|---|---|

|
Evil Chicken | Magic | Yes | None |
Flambeed, Agrith-Na-Na and Dessourt[]
![]()
- Combat conditions: Multicombat area (combat familiars can attack)
Unlike most other bosses, this fight has become substantially more difficult following the Evolution of Combat. If you are not prepared, you can be killed extremely quickly from their attacks.
Regardless of your combat style, it is strongly recommended to use Magic protection prayers, as otherwise you can be dealt extremely heavy damage by all three monsters.
If you chose to tank damage from all three monsters, it is best to kill Flambeed first, as he is capable of dealing the most damage out of the three. If you are using melee, you will need to use ice gloves when fighting Flambeed, as otherwise he will unequip your weapon. Afterwards, kill Agrith-Na-Na and Dessourt. The order of the last two doesn't really matter, as both are fairly equally strong.
Alternatively, when the fight starts, you can run south, as Flambeed won't attack you and will become unaggressive if you move away from him. Then you can kill Agrith-Na-Na and Dessourt separately from Flambeed, reducing the amount of damage you will take at once.
This fight is not ideal practice for facing Damis, Fareed, Kamil and Dessous, as it is much more difficult and the monsters do not all have the exact same abilities. While Flambeed is similar to Fareed and Dessourt is similar to Dessous, Agrith-Na-Na is not similar to Kamil or Damis, but instead is similar to Agrith-Naar.
Monster summary[]
| Image | Monster | Uses | Weakness | Poisonable? | Strong against | Other abilities |
|---|---|---|---|---|---|---|

|
Dessourt | Melee, Range, Magic | Yes | Melee | Can teleport next to player. Magic attack can drain stats. | |
|
Flambeed | Melee, Magic | Yes | Ranged | Player must wear Ice gloves to use weaponry against Flambeed. He can deal extreme amounts of damage, so it is advised to stun him at the beginning of the battle and move out of range. | |
|
Agrith-Na-Na | Magic, Melee | Yes | Magic |
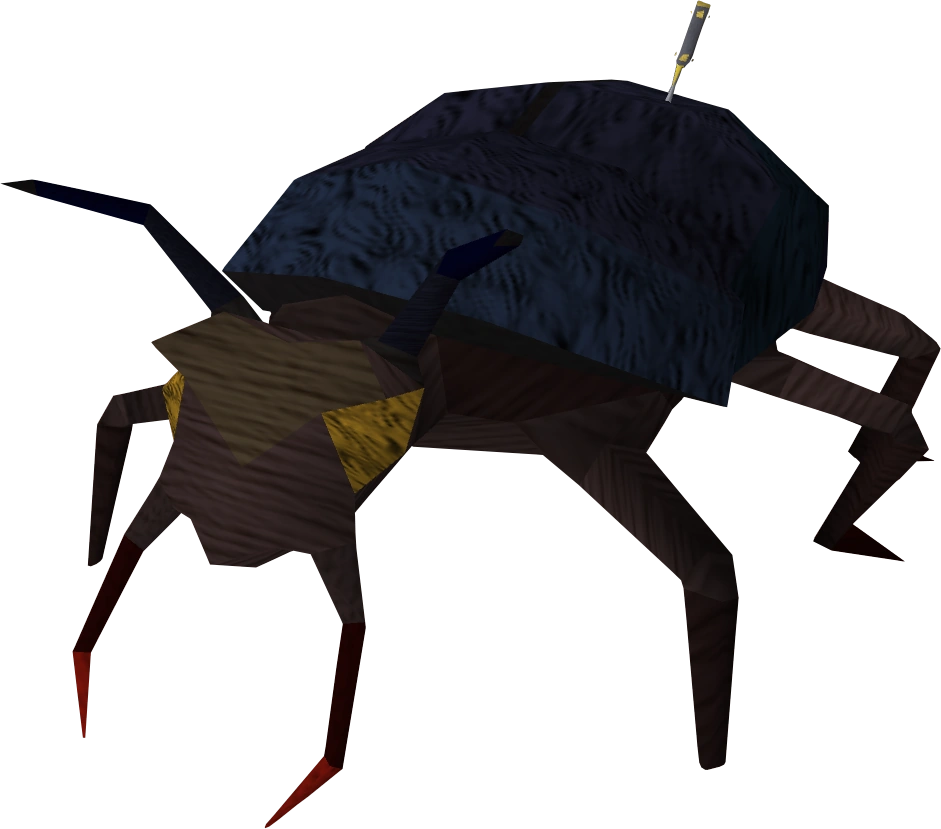
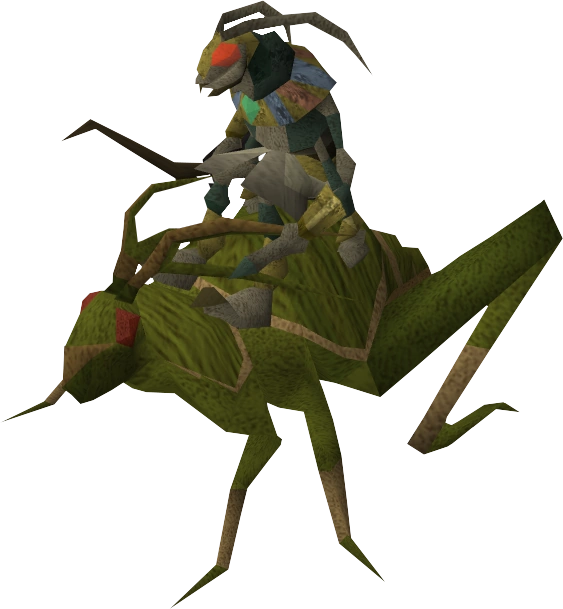
Giant scarab[]
![]()
- Combat conditions: Multicombat area (combat familiars can attack)
The Giant scarab is weak to the Keris dagger, but on endurance matches, it is not recommended to use an inventory space just for the keris, as other weapons still work quite well. During the match, it will summon a level 93 Scarab mage, a level 98 ranged-using Locust rider and a level 106 melee-using Locust rider. The scarab mage has a very low attack speed, which can be ignored during the match. The ranged Locust rider can deal quite large amounts of damage when not using protect from missiles, so it is recommended to switch to that as soon as the ranged locust rider gets summoned. After that, a melee locust rider will be summoned, which can be trapped behind the Giant scarab. During the battle, do not attack any of the summoned monsters, as the battle will end as soon as the scarab is dead. Sometimes, the scarab will fail to summon its minions - such as using the Polypore Spell's Longrange attack.
Monster summary[]
| Image | Monster | Uses | Weakness | Poisonable? | Strong against | Other abilities |
|---|---|---|---|---|---|---|
|
Giant scarab | Melee, Ranged | No | None | Poisonous (starting at 98), but cannot poison at a distance as in Contact quest. Summons helpers that attack with magic, ranged, and melee. | |
|
Scarab mage | Magic | Yes | Highly accurate attacks but slow attack rate. | ||
|
Locust rider | Ranged | Yes | Highly accurate attacks but slow attack rate. | ||

|
Locust lancer | Melee | Yes | Hits hard. |
Class E[]
Bouncer[]
![]()
- Combat conditions: Single-way combat area (combat familiars cannot attack)
This boss is fairly easy, as it only uses melee attacks. Protect from Melee will prove useful here, though for players with very high defence it may not be needed. If the "no prayer" handicap is activated on climber mode, this boss may be difficult for lower-levelled players that have access to the tower as it hits fairly accurately.
Bouncer could also be safespotted with one of the pillars present in the arena during the fight.
Monster summary[]
| Image | Monster | Uses | Weakness | Poisonable? | Strong against | Other abilities |
|---|---|---|---|---|---|---|
|
Bouncer | Melee | Yes | Very accurate attacks. |
Koschei the deathless[]
![]()
- Combat conditions: Single-way combat area (combat familiars cannot attack)
Like in The Fremennik Trials, Koschei will have four forms. You will be able to use the Protect from Melee prayer during the first three forms. At his last form Koschei will drain your prayer completely and start attacking you rapidly. It might be useful to bring some Rings of recoil for this last part. Lower-levelled players may sip some Prayer potion if needed. If you are on climber mode with Life Saver and you have a good weapon with a special, such as Dragon Claws, it may be useful to allow Koschei to get you to low health, allowing you more special attacks, speeding up the battle. Another tactic is to use any fast range weapon, or magic, and keep running from one side of the arena to the other, avoiding Koschei's attacks and damaging him from a distance. If using Dragon claws on him on endurance mode, it may be best to save both special attacks for the fourth and final form.
Monster summary[]
| Image | Monster | Uses | Weakness | Poisonable? | Strong against | Other abilities |
|---|---|---|---|---|---|---|

|
Koschei the deathless | Melee | First 3 forms: Last form: |
Yes | Has four lives, each of which must be defeated. Becomes stronger and faster in each life. Unlike in the Fremennik Trials quest, the fourth life can (and must) be defeated. |
Arzinian Avatar[]


Fighting the Avatar.
![]()
- Combat conditions: Single-way combat area (combat familiars cannot attack)
Unlike in Between a Rock..., the Avatar won't be one out of three forms, and will always be the mage form that uses fire attacks. Prayer may or may not be needed if you can defeat it quickly, which usually is not an issue due to its low defence.
Monster summary[]
| Image | Monster | Uses | Weakness | Poisonable? | Strong against | Other abilities |
|---|---|---|---|---|---|---|

|
Arzinian Avatar | Magic | Yes | Melee | None (unlike in the Between a Rock quest). |
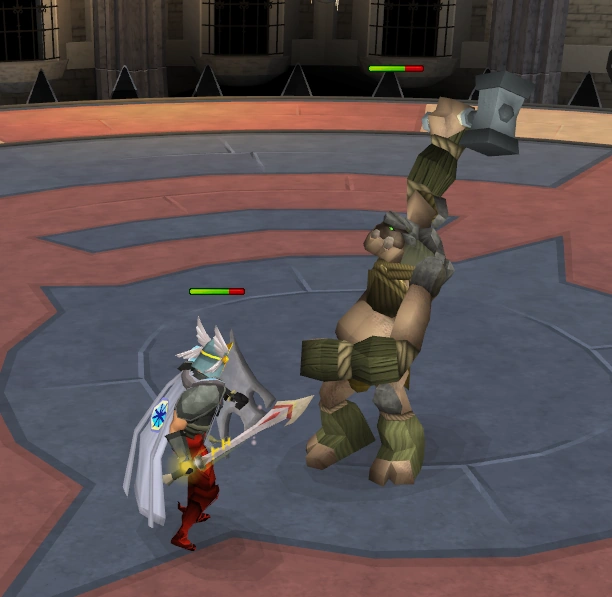
Black Knight Titan[]

Fighting the titan.
![]()
- Combat conditions: Single-way combat area (combat familiars cannot attack)
The Black Knight Titan is a fairly easy boss monster. Unlike in his quest, Excalibur does not have to be used to deal the final blow. His defence is relatively low, and he should go down fairly quickly with any combat style.
Monster summary[]
| Image | Monster | Uses | Weakness | Poisonable? | Strong against | Other abilities |
|---|---|---|---|---|---|---|

|
Black Knight Titan | Melee | Yes | None | None. |
General Khazard[]
![]()
- Combat conditions: Single-way combat area (combat familiars cannot attack)
This is the first encounter with Khazard from Fight Arena, and has two forms, the second which appears after depleting the life points of his first form. Unlike during the quest, both forms must be defeated. Protect from Melee/Deflect Melee or food may be necessary if you are limited by handicaps in Climber mode, but for the most part, he is no problem, and can be killed with little effort using any combat style.
Monster summary[]
| Image | Monster | Uses | Weakness | Poisonable? | Strong against | Other abilities |
|---|---|---|---|---|---|---|

|
General Khazard | Melee | Yes | Has two lives; second is giant form but no more able than first. Both must be defeated. |
Black Knight guardian[]
![]()
The Black Knight Guardian is harder compared to the other bosses in class E, because he is able to drain the player's prayer to heal himself. It may be a good tactic to activate as many prayers as possible before the fight, including Protect from Melee, so your prayer will drain quickly and the Guardian won't have much to heal with. However, you will not be able to do this if the "No Prayers" handicap is active in Climber Mode. Another method is to stun him, hide behind a pillar and attack him with magic or ranged, preventing him from attacking you and using his healing ability. His defence is moderately high, but he goes down fairly quickly using magic.
Monster summary[]
| Image | Monster | Uses | Weakness | Poisonable? | Strong against | Other abilities |
|---|---|---|---|---|---|---|
|
Black Knight guardian | Melee | Yes | Ranged | Very high ranged defence and moderate defence in general. Periodically drains your prayer to heal himself, if your prayer points are above 0. |
Class F[]
Dad[]
![]()
- Combat conditions: Single-way combat area (combat familiars cannot attack)
Dad is more accurate than Arrg, but only uses melee attacks which can be easily weakened by prayer. Like the Giant Roc, he can push you backward, but not for as long, does not stun, and can be negated by prayer. A no prayer handicap in climber mode may make this boss significantly harder if you have low defence, or are not using magic.
Monster summary[]
| Image | Monster | Uses | Weakness | Poisonable? | Strong against | Other abilities |
|---|---|---|---|---|---|---|

|
Dad | Melee | Yes | Smashing hits can push you back. |
Dramen Tree Spirit[]
![]()
- Combat conditions: Single-way combat area (combat familiars cannot attack)
The Dramen Tree Spirit is easier than it was in Lost City, as you are not limited to Entrana's limitations on equipment. A hatchet is not necessary. With or without prayer, this boss is quite easy.
Monster summary[]
| Image | Monster | Uses | Weakness | Poisonable? | Strong against | Other abilities |
|---|---|---|---|---|---|---|
|
Dramen Tree Spirit | Melee | Not on projectiles or in Smoke spells | Melee | None |
Agrith Naar[]

Fighting Agrith Naar.
![]()
- Combat conditions: Single-way combat area (combat familiars cannot attack)
A Silverlight is provided for you to use when the fight starts. He fights and can be fought similarly to the Jungle demon, but is weaker, and can be easily fought with melee. If you choose to range him, you can protect from magic if the ranged armour you are wearing is not enough, though the final blow must be done by Silverlight or Darklight or he will regenerate a bit.
After the Evolution of Combat it is possible to use a bleed attack then quickly switch to Silverlight/Darklight and the demon will die. Sometimes it is necessary to click him again after equipping your sword, otherwise he will heal to 600 life points.
Monster summary[]
| Image | Monster | Uses | Weakness | Poisonable? | Strong against | Other abilities |
|---|---|---|---|---|---|---|

|
Agrith Naar | Melee, Magic | Yes | Can teleport you next to him. Will switch attack style if you pray against the style he is using. Can be damaged by any weapon but the killing blow must be dealt using Silverlight. Will regenerate a bit if a hit that would kill him was not done by Silverlight. |
Dagannoth mother (Version 1)[]
![]()
- Combat conditions: Single-way combat area (combat familiars cannot attack)
The Dagannoth mother begins coloured orange, but will quickly change to brown and be able to be hit by earth spells, so you should enter the fight prepared with earth spells if you can. She will switch her attack style based on what prayer protection you use, which should be protection from missiles, as her ranged attack is potentially stronger than her melee attack. If you do not have runes for spells available, you can wait her out by praying protection from missiles and standing next to her allowing her to hit you with melee, or running as she will try to hit you with melee. She follows a cycle of Orange (melee) - Brown (earth) - Red (fire) - Green (ranged) - White (air), Blue (water) before repeating.
Monster summary[]
| Image | Monster | Uses | Weakness | Poisonable? | Strong against | Other abilities | ||||||||||||||
|---|---|---|---|---|---|---|---|---|---|---|---|---|---|---|---|---|---|---|---|---|
|
Dagannoth mother (the first Dagannoth mother) | Melee, Ranged | Depends on her colour | Yes | Depends on her colour |
|
TokTz-Ket-Dill[]
![]()
- Combat conditions: Single-way combat area (combat familiars cannot attack)
A Rune pickaxe is provided, but you may use your own pickaxe if you brought one, but it must be rune or dragon. Afterwards it is weak to crush only attacks. During battle, it may occasionally perform a special attack where it slams the ground, causing unavoidable damage. Do not use protection prayers while the shell is still intact, or else it slams the ground every time it attacks and hits constant 1500s. Once the shell is broken, protection from melee is recommended.
Monster summary[]
| Image | Monster | Uses | Weakness | Poisonable? | Strong against | Other abilities |
|---|---|---|---|---|---|---|

|
TokTz-Ket-Dill | Melee, Ranged | No | Magic that isn't a water spell. | Shell must be cracked by a pickaxe (multiple hits required) before it will take damage. When shell is intact, praying against it causes it to make powerful stomp attacks that are unaffected by prayer. |
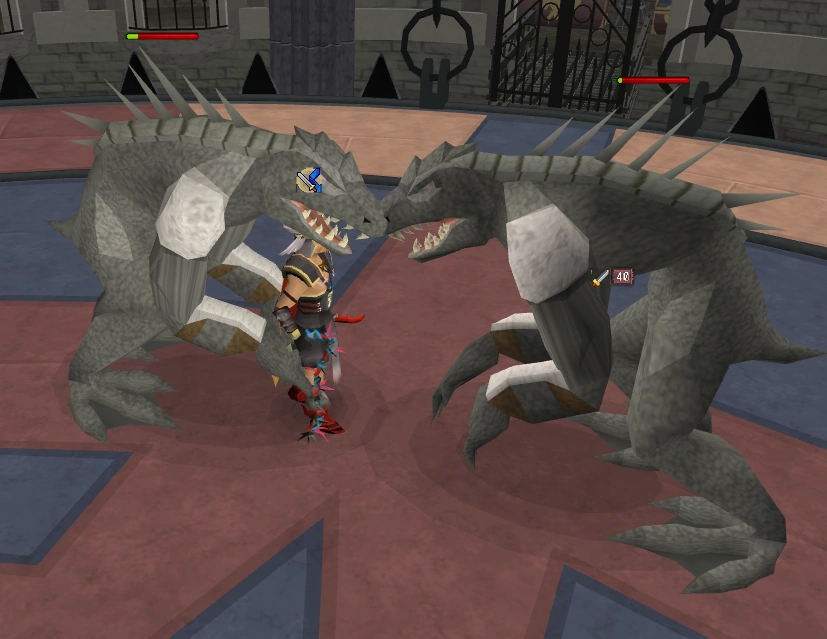
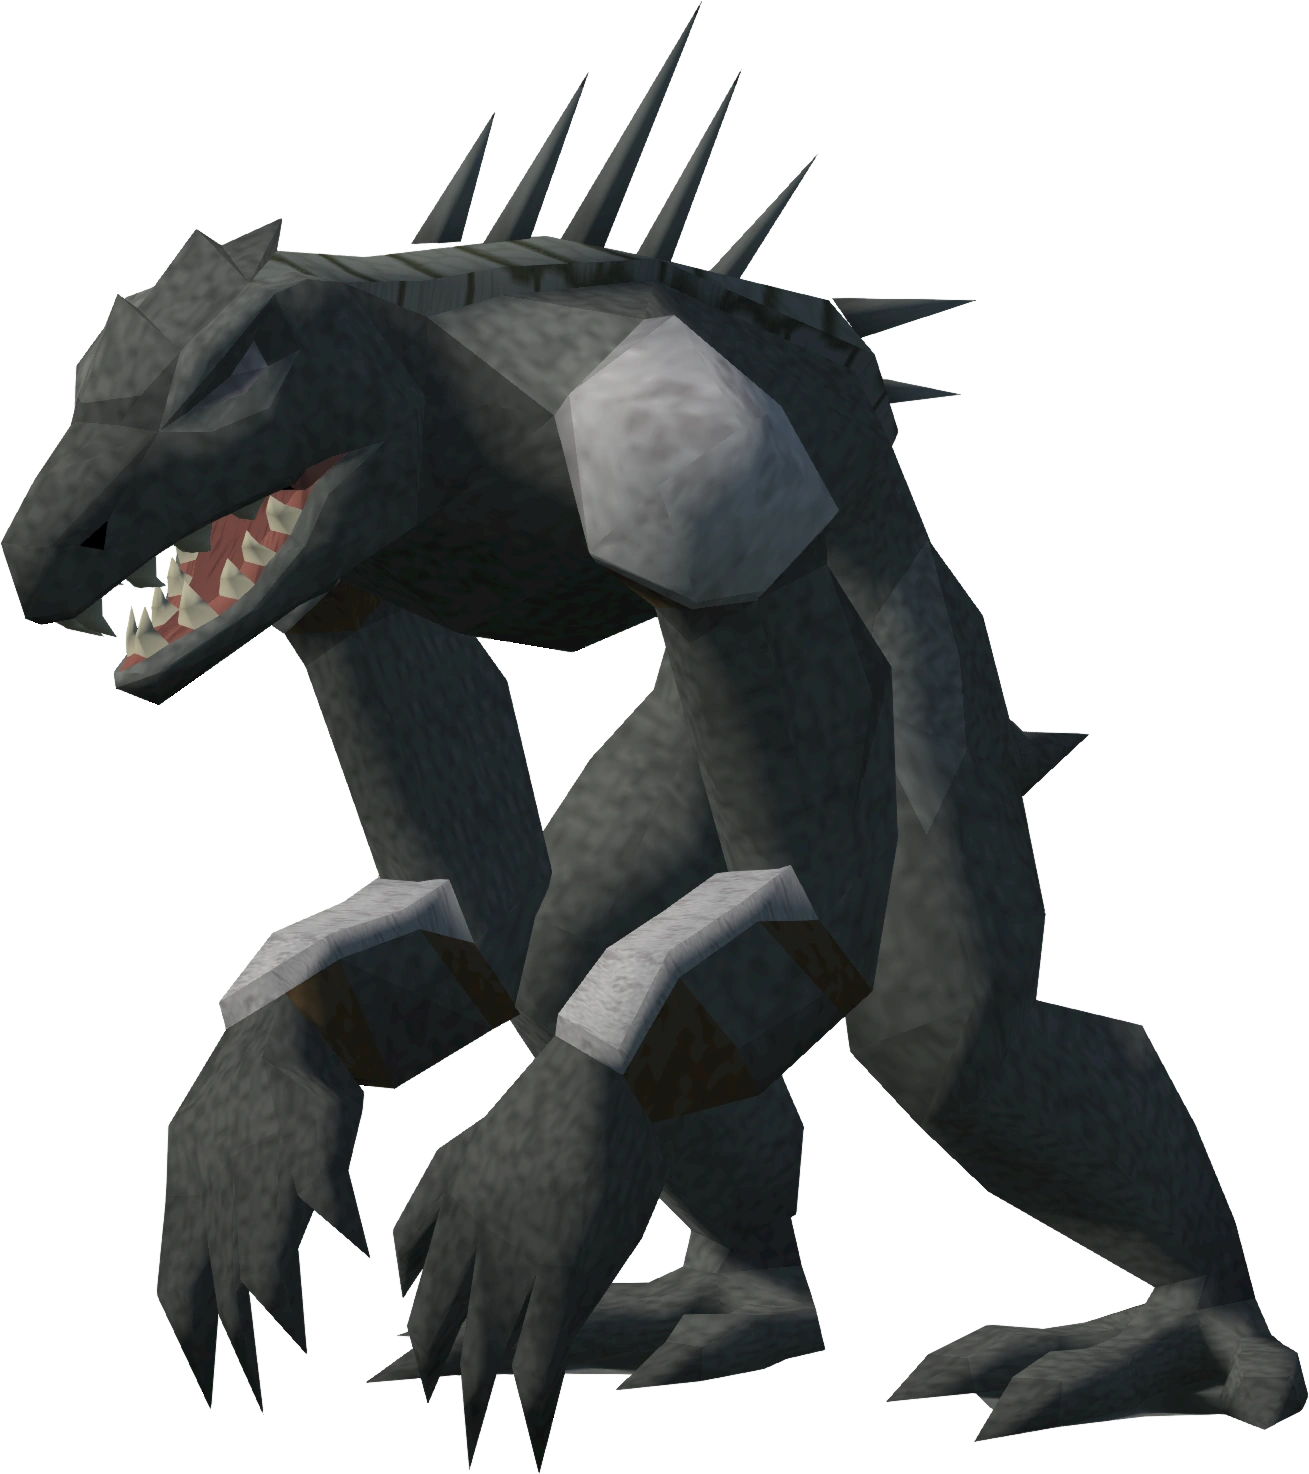
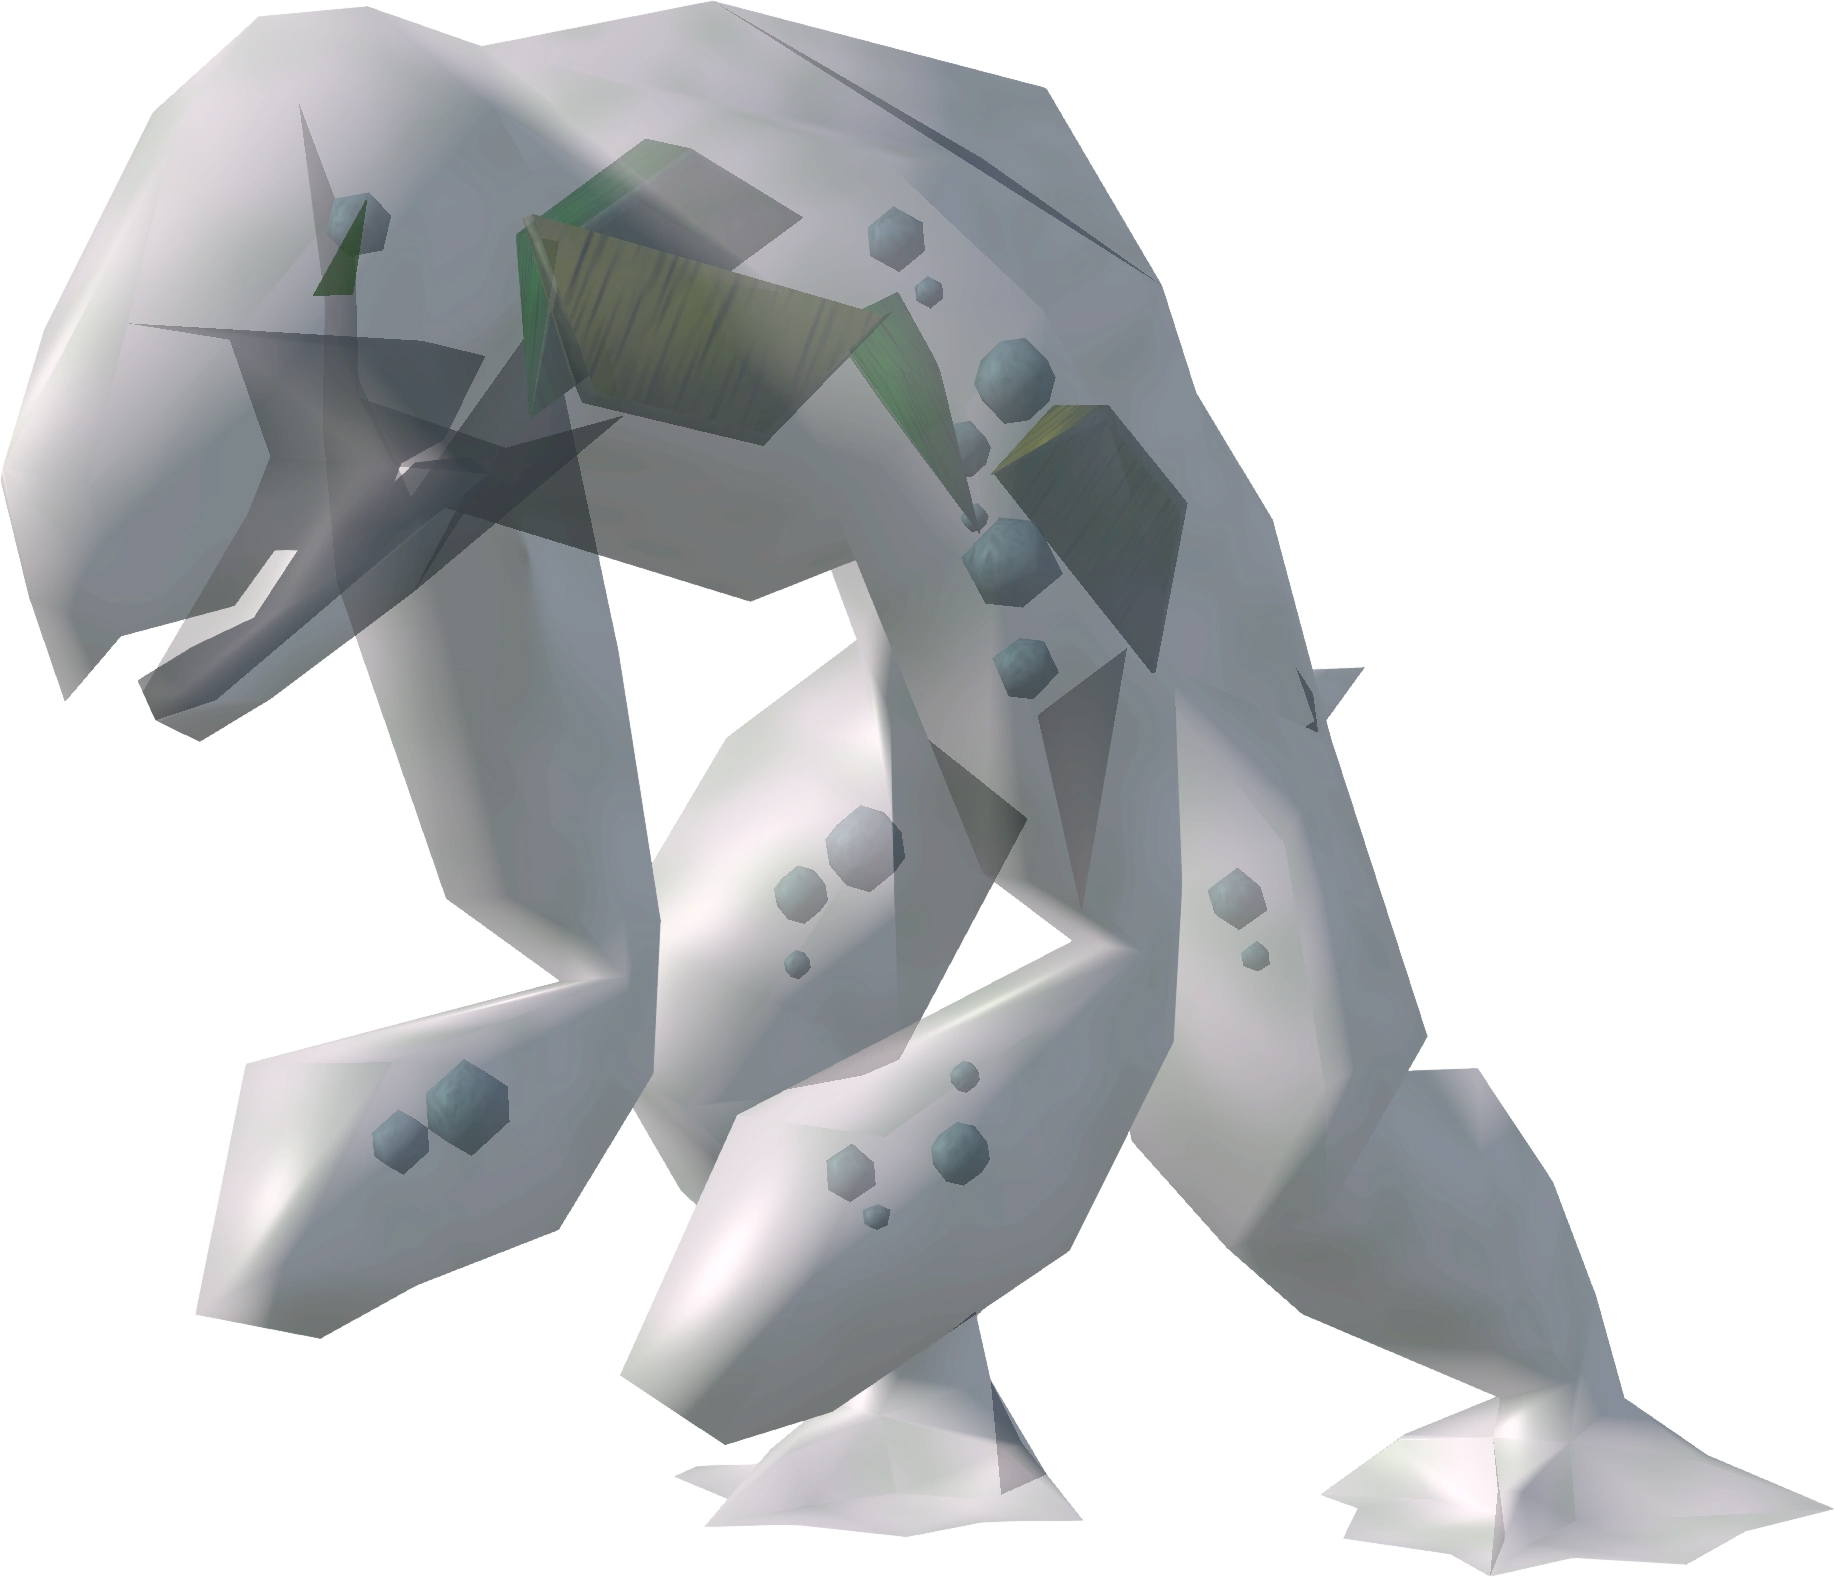
Black, Grey and White Golems[]
![]()
- Combat conditions: Multicombat area (combat familiars can attack)
No weapons are provided to damage these correctly, so you must bring your own. Each golem is weak to one of the three melee styles, which are stab (white golem), slash (grey golem), and crush (black golem). You do not need all three melee styles to kill the golems, though your accuracy will be significantly reduced if you use an incorrect style, or if you use ranged or magic. However, this is not usually an issue if you are using Chaotic or drygore weaponry. At lower levels, if you do not possess all the attack styles it may take a long time to defeat the golems. You can always use crush while unarmed, but this is ineffective, so it is wise to at least bring a Dragon mace for this battle, while dual wielding a Chaotic rapier or Korasi's sword (for stab) and Enhanced excalibur (for slash), and switch to the mace when attacking the black golem.
Monster summary[]
| Image | Monster | Uses | Weakness | Poisonable? | Strong against | Other abilities |
|---|---|---|---|---|---|---|

|
Black golem | Melee | Yes | Magic (works well with them, though), Ranged, Stab, Slash | None | |

|
Grey golem | Melee | Yes | Magic (works well with them, though), Ranged, Stab, Crush | None | |

|
White golem | Melee | Yes | Magic (works well with them, though), Ranged, Crush, Slash | None |
Class G[]
Treus Dayth[]
![]()
- Combat conditions: Multicombat area (combat familiars can attack)
Treus Dayth is accompanied by three level 50 Possessed pickaxes, but these won't be too much of an annoyance. This boss will be significantly easier to fight than at the end of Haunted Mine, as he will simply disappear into the floor and you will not have mining equipment obstructing and hitting you. Summoning familiars could attack and damage him while he is hidden. It appears that he doesn't attack you at all after he disappears into the floor for the first time. Only Treus Dayth himself needs to be defeated to win the fight.
There is currently a glitch that causes Treus Dayth to wander around the arena as a barely visible Ghost (level: 95), which is not attackable by both the player and familiars. The only way to get around this is logging out and back in.
Monster summary[]
| Image | Monster | Uses | Weakness | Poisonable? | Strong against | Other abilities |
|---|---|---|---|---|---|---|

|
Treus Dayth | Ranged, Melee | No | May teleport away when hit. Crumble Undead has no effect on him. | ||
|
Possessed pickaxe | Melee | Yes | None |
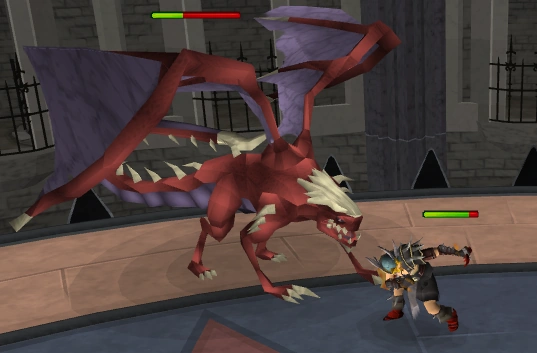
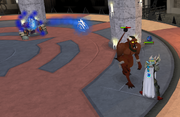
Elvarg[]
![]()
- Combat conditions: Single-way combat area (combat familiars cannot attack)
Elvarg may seem to become a problem in climber mode if you are not allowed to equip a shield or you cannot drink potions. If you have the Monster stun handicap enabled, you may be able to kill her quickly before she can retaliate. The dragonfire will drastically reduce prayer points, often completely in no more than 2 hits (making Protect from Magic or Deflect Magic not very useful against the dragonfire). In addition, it reduces your melee stats significantly (Attack, Strength and Defence lowered to around 30% of normal level). It is possible to defeat Elvarg without using a shield if you are using magic or ranged, however this is not recommended. After the Evolution of Combat Elvarg's dragonfire reduces stats even more (if you have no protection), usually taking it down to 1 after 2 breaths, As stats do not matter so much you will still have decent accuracy but you will be unable to use a lot of abilities and will have to rely on the autoattack-slice combo to do the most damage.
Monster summary[]
| Image | Monster | Uses | Weakness | Poisonable? | Strong against | Other abilities |
|---|---|---|---|---|---|---|
| Elvarg | Melee, ranged Dragonfire | Yes | Dragonfire if not blocked reduces prayer points and melee stats. |
Culinaromancer[]
![]()
- Combat conditions: Single-way combat area (combat familiars cannot attack)


Fighting the food maniac.
The Culinaromancer is easier than he was in Recipe for Disaster as you will have access to prayer. Protect from Magic or Deflect Magic is recommended for this fight as this is his only attack style. Even without prayer, he will not deal too much damage and should be relatively easy to defeat.
Monster summary[]
| Image | Monster | Uses | Weakness | Poisonable? | Strong against | Other abilities |
|---|---|---|---|---|---|---|

|
Culinaromancer | Melee, Magic | None | Yes | None |
Tumeken's shadows[]

Fighting the shadows.
![]()
- Combat conditions: Multicombat area (combat familiars can attack)
All five of Tumeken's shadows will be fighting you at once, and are all levelled differently. The shadows have a low max hit but moderate accuracy. This fight is quite simple and most players shouldn't have too much trouble, even without prayer. If you have trouble, you can line them up so that only one or two can attack you at once. Players may also safespot stronger shadows with weaker ones. Multi-target spells such as ice barrage may be useful to speed up the battle.
Monster summary[]
| Image | Monster | Uses | Weakness | Poisonable? | Strong against | Other abilities |
|---|---|---|---|---|---|---|

|
Tumeken's shadow | Melee | Crush | No | All five shadows, each at a different level, are present at once. |
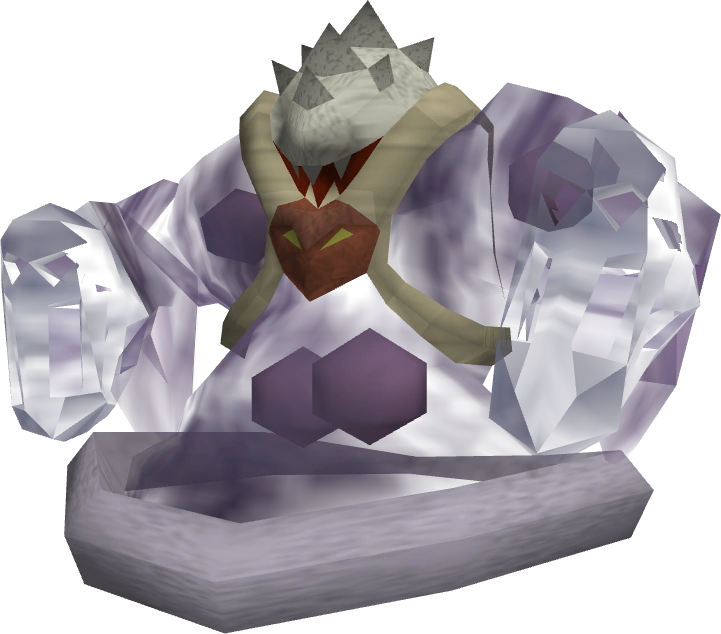
The Kendal[]
![]()
- Combat conditions: Single-way combat area (combat familiars cannot attack)
The man-in-a-bear-suit boss can be easily dispatched even by the weakest of those who have access to the tower, with or without praying melee protection.
Monster summary[]
| Image | Monster | Uses | Weakness | Poisonable? | Strong against | Other abilities |
|---|---|---|---|---|---|---|

|
The Kendal | Melee | Yes | None |
The Draugen[]

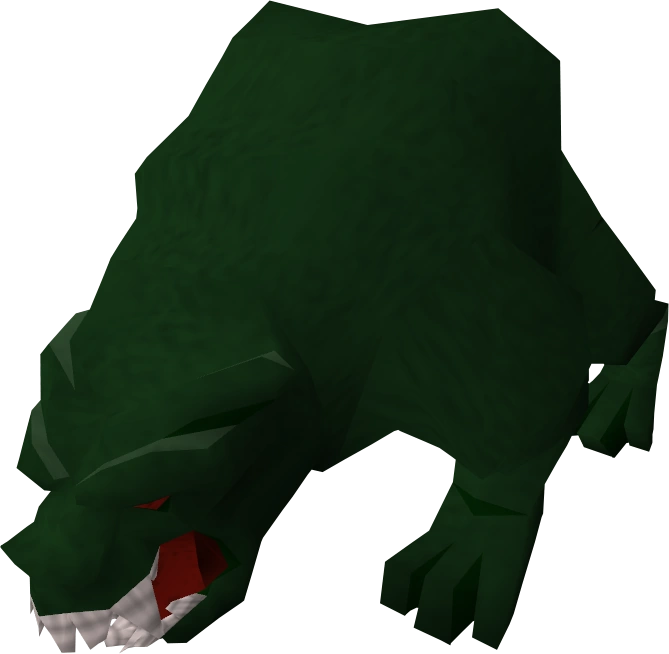
Fighting the Draugen.
![]()
- Combat conditions: Single-way combat area (combat familiars cannot attack)
The Draugen uses only melee attacks and has a high ranged defence. Regardless, much like The Kendal, The Draugen should not pose much trouble to those facing him.
Monster summary[]
| Image | Monster | Uses | Weakness | Poisonable? | Strong against | Other abilities |
|---|---|---|---|---|---|---|
|
The Draugen | Melee | Fire spells, Salve amulet (e), Stab is still effective | No | Ranged | None |
Class H[]
Tarn Razorlor[]
![]()
- Combat conditions: Multicombat area (combat familiars can attack)
The strongest boss in this class has two forms, as opposed to the three (though only the later two were fightable) he had in the The Lair of Tarn Razorlor. He is accompanied by four level 110 Terror dogs, but these won't be too much of a problem. Tarn begins in his mutant form upon entering the arena, and begins attacking with a red-orb magic attack. He will switch to melee when you are in range, and can block all of his attacks by praying melee protection. After defeating his mutant form he will switch to his ghost form which attacks with melee only. If you have trouble with this boss or are limited by handicaps, try getting the Terror dogs trapped behind each other so fewer attack you at once. The terror dogs are in front of Tarn as the fight begins. The simplest way to get them stuck is to run straight through them and also Tarn, trapping all terror dogs behind him if done correctly. Prayer points are not constantly drained like it was in his lair from the miniquest.
It appears that animated steel armours are summoned when Tarn slams his fists together and a green orb flashes briefly on his back. They could accumulate if the battle drags on, so kill Tarn as quickly as possible. The animated armour and terror dogs does not need to be slain to win the fight. Most of the time, the animated armours wander off rather than attacking. It is unknown whether it is a glitch.
The terror dogs appear to use some sort of an orange orb magic once in a while, but it has a very low accuracy and should be ignored. Protect from Melee or Deflect Melee should be used.
Monster summary[]
| Image | Monster | Uses | Weakness | Poisonable? | Strong against | Other abilities |
|---|---|---|---|---|---|---|

|
Tarn Razorlor, mutant form | Magic, Melee | Yes | Upon death, becomes a ghost and continues to fight. | ||
 |
Tarn Razorlor, ghost form | Melee | Yes | None. | ||
|
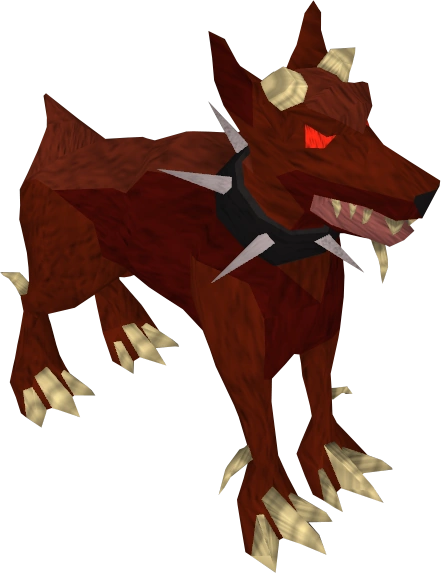
Terror dog | Melee | Yes | Can hit hard and accurately, but has low defence. |
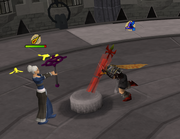
Sigmund[]
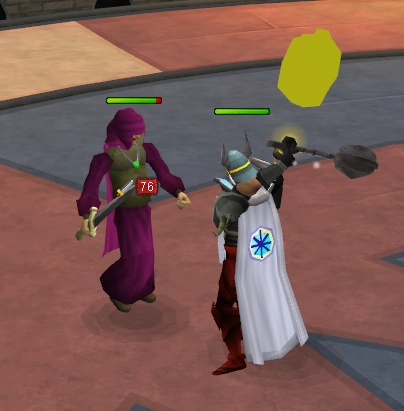

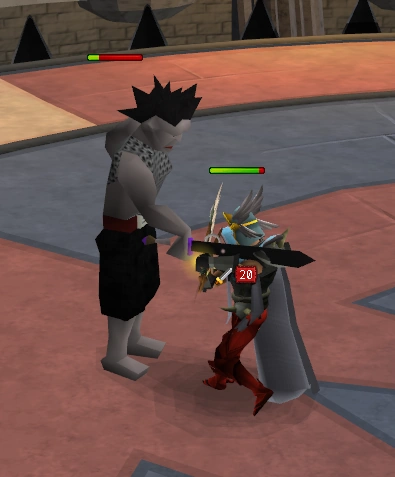
Fighting Sigmund.
![]()
- Combat conditions: Single-way combat area (combat familiars cannot attack)
This is potentially the hardest boss in this class if you do not complete any of the basic actions. An Ancient mace is provided on the floor when the fight begins. Make sure to use the 'Special Attack' ability (if under EoC, it's "Favour of the War God" under the Constitution ability book) whilst holding the Ancient mace when he begins praying, or it will not drain his prayer points and stop him from praying.
Monster summary[]
| Image | Monster | Uses | Weakness | Poisonable? | Strong against | Other abilities |
|---|---|---|---|---|---|---|

|
Sigmund | Melee | Nothing | Yes | Immediately prays protection from whatever combat style you use, making him invulnerable. You must use the Special Attack while wielding the Ancient mace in order to disable his prayer, or kill him with a combat familiar. |
Melzar the Mad[]
![]()
- Combat conditions: Single-way combat area (combat familiars cannot attack)
Melzar attacks by casting a half-strength Fire strike (max hit of 40) and curses, and with melee by punching or kicking (max hit of 50). He is very easy to dispatch before he can even summon cabbage (which can be used as food for later floors if very necessary).
Monster summary[]
| Image | Monster | Uses | Weakness | Poisonable? | Strong against | Other abilities |
|---|---|---|---|---|---|---|

|
Melzar the Mad | Magic, Melee | Nothing | Yes | Punches or kicks, casts a weak fire strike spell, casts weaken/confuse/curse, casts a spell that produces a cabbage (which can be used for food), babbles incoherently. |
Count Draynor[]
![]()
- Combat conditions: Single-way combat area (combat familiars cannot attack)
A Stake hammer and Stake are both on the floor when the fight begins, and must be in your inventory before you kill him, or he will regenerate.
Monster summary[]
| Image | Monster | Uses | Weakness | Poisonable? | Strong against | Other abilities |
|---|---|---|---|---|---|---|

|
Count Draynor | Melee | Garlic, Magic, Silverlight, Darklight, |
Yes | Player must have hammer and stake in inventory to kill him; otherwise he heals instead of dies on a killing hit. Garlic weakens him. |
Delrith[]

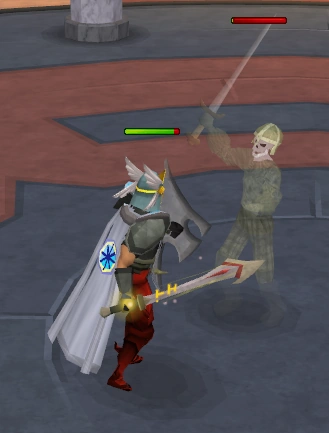
Banishing Delrith.
![]()
- Combat conditions: Single-way combat area (combat familiars cannot attack)
Like Agrith-Naar, a Silverlight is provided on the floor, but this will be the only weapon you can use, or you will receive the message "I should probably equip Silverlight first." Nonetheless, this fight is fairly easy as Delrith has 3000 life points, and the incantation is automatically done correctly. Stay in the protective barrier when he uses his special attack as it will reduce your life points to 1 otherwise.
Monster summary[]
| Image | Monster | Uses | Weakness | Poisonable? | Strong against | Other abilities |
|---|---|---|---|---|---|---|
|
Delrith | Melee | Silverlight | Yes | Immune to all weapons except Silverlight |
Solus Dellagar[]
![]()
- Combat conditions: Single-way combat area (combat familiars cannot attack)
Despite his prowess in cutscenes from Wanted!, Solus only attacks with his staff, despite warning about his powerful magic in his taunt. He is the easiest boss in this class that does not involve gimmicks or special items.
Monster summary[]
| Image | Monster | Uses | Weakness | Poisonable? | Strong against | Other abilities |
|---|---|---|---|---|---|---|

|
Solus Dellagar | Melee | Water spells | Yes | None |
Class X1[]
Vanstrom Klause[]
![]()
All of the blisterwood weapons unlocked during The Branches of Darkmeyer are provided in the arena, the Sunspear from the River of Blood quest can also be used, alongside Vertida's bottle of holy water.
When Vanstrom shouts, "Stare into the darkness!", run away from him and turn your camera away, or you will be hit for up to 4000 damage. When he says, "Let the blood consume you!", move to another tile to avoid damage. If he takes flight, keep moving to dodge the blood he throws at your location. Kill any bloodveld that he spawns to prevent his healing.
Vanstrom takes increased damage while airborne, so landing quick thresholds during this time can shorten the fight. When his life points are low he takes on a vaporous form, and you must pour holy water onto the floor and lure him over it to finish him.
Monster summary[]
| Image | Monster | Uses | Weakness | Poisonable? | Strong against | Other abilities |
|---|---|---|---|---|---|---|

|
Vanstrom Klause | Melee, Magic | Yes | Darkness, blood bombs, bloodveld summons |
Char[]
![]()
Char can only be attacked when fires are burning. A Pitch can is provided in the arena, which can be used to light fires. Each hit Char will take 101 damage times the amount of fires burning. The boss will move around the arena with slowly, stay ahead of her to prevent getting hit and light around 10 fires, then attack her. Every now and then Char will start to glow, avoid getting into melee range when she is glowing, otherwise she will deal very high damage. Light new fires, when existing ones go out. A counter on the top shows the amount of fires burning at any moment. Repeat this process until Char is dead.
Near the end of the fight the boss will spawn fires walls that move across the arena, either go around the walls or position yourself in one of the gaps to avoid receiving damage.
Char will occasionally summon small sparks that veer toward you, and which will appear as another yellow dot on the mini-map. The sparks will do a small amount of damage if they hit you, or will give certain benefits if they hit one of your fires instead. Green: life-giving spark, each time you hit you have a chance to restore some life points. Blue: cooling spark, with each hit you have a chance to slow Char's attacks. Yellow: glittering spark, your hits have a chance of extra damage. Red: unknown. The benefits from sparks are short-lived and don't appear to help much.
Monster summary[]
| Image | Monster | Uses | Weakness | Poisonable? | Strong against | Other abilities |
|---|---|---|---|---|---|---|

|
Char | Melee | Fires lit by Pitch can | ? | Become enraged, extinguish fires, spawn sparks and fire walls |
Apep and Heru[]
![]()
Apep can perform a dervish, dodging your attacks and stunning you if near him. Heru uses his shield to blind you.
It is a little easier to kill Heru first. You can easily avoid being stunned by Apep by attacking him from afar with magic or ranged. Neither boss is immune to binds.
Monster summary[]
| Image | Monster | Uses | Weakness | Poisonable? | Strong against | Other abilities |
|---|---|---|---|---|---|---|
 
|
Apep, Heru | Melee | ? | Blinding the player, whirling dervish |
Khazard and Lucien[]
![]()
With the aid of Wahisietel, you take on General Khazard and ice minions summoned by Lucien.
Khazard is fought first. He is relatively easy to defeat, although he has high life points and a high hitting magic attack (somewhat innacurate though). It is recommended to pray protect/deflect from magic. When Khazard reaches about half health, he summons Bouncer, who cannot be targeted and deals typeless damage if next to you. This damage can not be blocked, and adds up quickly. To avoid using a lot of food, kill Khazard as quickly as possible with magic or ranged while running from Bouncer (will avoid some damage, not all).
You then have to fight a wave of enhanced ice titans, and a wave of ice demons after that. The ice titans can encase you in ice, and you must click away rapidly to break out; Freedom does not work. The ice demons spawn icicles that block movement, but this should not be as much of a problem as in the quest because Lucien does not use his pillar of darkness special attack against you.
Do not attack Lucien, as doing so will make him retaliate for around 3000 damage.
Dawn[]
![]()
Dawn's fight consists of taking turns between dealing damage to her and the skeletons that she summons. She is immune to damage while a skeleton is alive. Though killing her takes a little time, she is an easy boss.
Zemouregal and Enakhra[]
![]()
You fight Zemouregal and then Enakhra, one on one. Both of them attack with magic, so it is advised to range them.
Zemouregal can spawn portals that deal consistent magic damage when you stand near them. They have 1500 life points and you can kill them from afar with your ranged weapon. Enakhra can enter a stance where she siphons your health, and this is stopped by using a stunning ability or by running behind a pillar. She can also pin you to the ground, stunning you; Anticipation and Freedom will protect from and cure this attack.
Enakhra can be tricky to fight, although a good strategy is to let your health decrease to ~1000-2000 LP and maintain it there, eating when necessary. This will ensure that Enakhra isn't able to heal much relative to the amount of damage you deal to her. If you have the Life Saver handicap, it will activate, perhaps to your own displeasure.
Class X2[]
Yelps[]
![]()
For a good portion of the fight, Yelps spins while chasing you around the arena, during which he is invulnerable. Standing near him during this time will inflict typeless damage. When Yelps is not spinning, he attacks with melee. To kill Yelps in as few cycles as possible, one can farm adrenaline while he spins and then use several thresholds when he can be hurt.
In addition to the above, Yelps starts the fight with two bodyguards, and he summons a single one at intervals throughout the fight. He cannot be hurt while a bodyguard is alive.
Yelps has a huge 200,000 life points, but he takes largely increased damage from the player so healing via Soul Split is perfectly viable.
Dragon Hunters[]
![]()
There are three dragon hunters, each of them fighting with a different combat style. The hunters gain adrenaline and use abilities, including stuns such as Asphyxiate. Defeating them is fairly straightforward.
Echo of Jas[]
![]()
The Echo of Jas fights with magic, and conjures images of false users that, if not killed, will heal her or deal damage. The false users have only one life point. The Echo can use abilities like Asphyxiate and Omnipower.
Chaos Grimsson and Hreidmar[]
![]()
Grimsson fights with ranged and melee, and Hreidmar with magic. You may use any combat style against them.
Grimsson slowly gains adrenaline as he fights, and once his bar is full he charges the player, dealing major damage over time. Suffering the Random Freeze and/or Random Daze handicaps while fighting Grimsson can prove disastrous, as you may be frozen during his charge attack. Unless avoided, this will lead to a quick death. You can use Siphon whenever you have less adrenaline than him, which will delay his ultimate. Either fighting Grimsson close up or at a slight distance will make him use only either ranged or melee, allowing you to protect/deflect pray accordingly.
Hreidmar will summon chaos dwarves to attack you, and he can make them explode to hurt you. He can also swap location with a chaos dwarf, causing the player to no longer target him. Hreidmar uses adrenaline too: at 50% he can empower his chaos dwarves, and at 100% he can heal himself and the dwarves. Protect/deflect from magic is advised. In general, it is be best simply to ignore the summoned chaos dwarves and kill Hreidmar as quickly as possible.
The fight is made significantly easier by fighting the dwarves one on one. Run behind the north-west pillar at the start of the fight. Hreidmar will be stuck behind the pillar, and Grimsson will run around it to fight you. Kill Grimsson before challenging Hreidmar. Do realise though that trapping the dwarves in Dominion Tower (where there are only large pillars) will be more difficult than in the quest (where there was a wall/door to block them).
Though the dwarves deal significant amounts of damage, when fought on their own, Soul Split can be enough to negate food at high levels.
Lol[]
![]()
Unlike during the quest, you may use magic or ranged against Lol. Lol himself attacks with ranged.
Lol will regularly throw rocks at your position, the game warning you each time. Either side-step whenever you see the warning, or just keep moving to another tile after each attack. Using magic or ranged will make this easier. When all the rocks begin to glow, stand more than two tiles away to avoid damage when they explode.
Nial Swiftling[]
![]()
- Combat conditions: Multicombat area (combat familiars can attack)
Nial Swiftling has only 5,800 life points, but he has a decent defence. He attacks with ranged and melee, and can knock the player back with a roar.
Monster summary[]
| Image | Monster | Uses | Weakness | Poisonable? | Strong against | Other abilities |
|---|---|---|---|---|---|---|
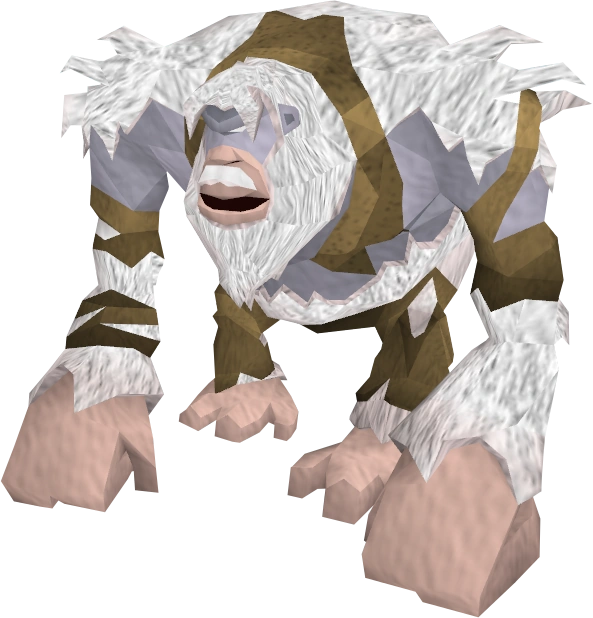
|
Nial Swiftfling | Ranged | Nothing | ? | Knock you backward |
Notes[]
- Prayer automatically recharges to full after a match, even in endurance mode, so you should use prayer when you can to gain its benefits like boosting your stats.
- Life points automatically return to full after a match, even in endurance mode. When you take damage, you should thus consider whether you can win the match without healing. If you can, you will save food and potions.
- In climber mode, try to avoid the worst handicaps as long as possible, so you can continue your run as long as possible. For example, if you plan on using prayer a lot, avoid the 'No Prayer' handicap. It is usually better to save your nudges/respins to avoid the worst handicaps rather than to gain those that affect monsters.
- Consider playing so that some handicaps don't really affect you. Use a powerful two-handed weapon rather than a one-handed weapon and a shield, as this makes the 'No Shield' handicap ineffective. (You could carry an Antifire potion in case you encounter Elvarg.) Similarly, 'No Familiar' is ineffective if you don't use one.
- 'Reduced Ranged Defence' should usually be accepted, as few monsters in the tower use ranged.
- It is possible to do some last minute changes during the few seconds of the battle intro. Quick prayers and Auto Retaliate and change action bars. However, turning prayers on manually is glitched and the second click may not register, and equipment cannot be changed.
- If you have forgotten which boss you are going to fight next, check status on your dominion medallion. It would be helpful if it turns out to be something like Elvarg.