| West | East | |
|---|---|---|
| Karil | Guthan | |
| Ahrim | Torag | |
| Dharok | Verac | |
| (wrong?) | ||
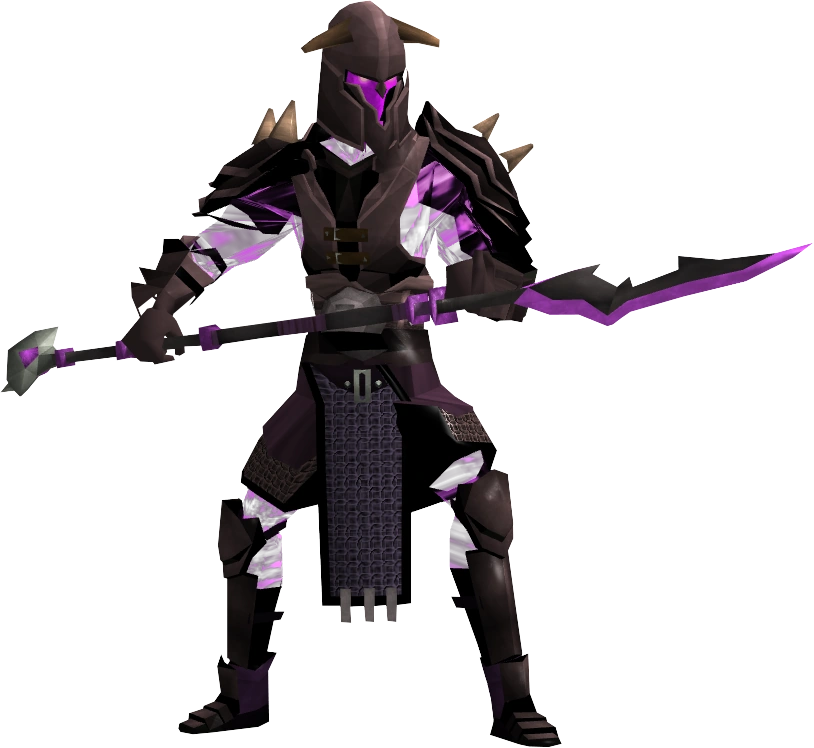
Fighting against the empowered Barrow Brothers may prove profitable, especially in an experienced team. They are killed for their unique rewards, their Malevolent energy, which can be used to form a pet or the Malevolent equipment, and the level 90 kiteshields, which are the strongest kiteshields outside Dungeoneering.
The brothers change positions on a daily basis. When they switch, their setup will be completely different. This means that one day you might face a pure melee side and the next day have a mixed setup of brothers. Teamwork is essential to defeat them.
A Barrows totem is required to begin the fight. Up to four players may fight the brothers.
Special Moves[]
Each of the brothers have at least one move unique to them, in addition to some which are shared between Brothers.
All[]
- Shadow Drag: At the beginning of the fight, one of the brothers will say "You dare disturb the darkness!" and is shown with an animation similar to Rejuvenate. The message is also shown in the chatbox. That brother will have a random health/time requirement before the team is thrown into the Shadow Realm. In the Shadow Realm, all brothers deal double damage(including almost all special abilities) and have a 100% hit rate.
- The health and timer are completely random. If the brother is defeated, the trigger resets and stays on hold until the brother rejoins the fight.
- Karil's Shadow Dash bombs still deal normal damage, but his lightning dash deals more than triple and can easily kill players.
- Empowerment: If one side of the arena is empty, a game box message will say, "As there is no one on the other side of the portal, it empowers the Barrows Brothers to destroy everyone!". The three Barrows Brothers on the side without players will go to the other part of the arena to help out.
- If there are any players in the barrier section, they must not be near the second barrier or the brothers will be unable to go over to the other side.
- If a brother is currently defeated, the brothers on the unoccupied side will not be able to go over until all brothers are restored.
- Healing: For each Barrows Brother disabled, all remaining active brothers heal for 5,000 life points and a bar counting to 30 seconds will appear over the disabled brothers. If this bar fills up, all disabled brothers will heal back to 25,000 life points and return into the fight. However, if another brother is disabled before the bar is filled, the bars on any disabled brothers will reset back to 0%. The fight ends when all brothers are disabled at the same time.
[]
It should be noted that these abilities never occur back to back with each other. See ability rotations below.
- The melee brothers can perform Hurricane, where a brother will spin his weapon around, dealing 300s at the start and scales up to 2500s typeless damage overtime per tick for ten ticks and can hurt other players. This can be avoided by moving away quickly or using Surge. While this attack is being performed, the brother's movement is reduced to walking speed until it ends. Verac has his own version of this attack; Deathcopter, though he is still capable of using Hurricane (as a revival attack).
- Dharok, Torag and Verac can perform Wall Slam. They will run up against the side of a wall and do area damage for up to 3000 life points. To avoid damage, players must simply move away from the location he is about to hit.
- Karil and Ahrim can perform Lightning Conductor and Turret of Fire respectively, where they will spin around with flaming energy releasing from their hands. While this attack is being performed, they will stay still. It can deal up to 1500 damage and deals constant damage if the player is within 3 squares from them. When Ahrim and Karil use this attack, they stay on the opposite side of the barrier while using it. While performing this attack, they are immune to any damage they would have taken.
- The brothers spin on the northern spot by default on both sides of the arena. If Karil and Ahrim are on the same side, the second brother will spin on the southern spot if the first brother is already spinning north.
- Most tiles along the sides of the arena are safe from spin damage.
- Both Karil and Ahrim can perform Teleport, where they will teleport to pillars adjacent to the portal. They are immune to melee attacks while they are on the pillars, and cannot be attacked by players from the side they came from. When Karil teleports, he also performs the Bombard special. Ahrim performs Shadow Pits (summoning six purple and two red immediately). They will also attempt to attack players on the other side.
- Ahrim and Karil can perform Throw, where one of the melee brothers will surge to them and toss them in the air where they arc over. Players in their way will get dealt up to 2200 damage if one of them goes over a player initially (if a player moves under the arc after they are tossed, no damage will be taken).
Torag the Corrupted[]
- When Torag hits with an auto attack, there is a 1/8 chance that the target's adrenaline is reduced by 5%.
- Whack: Torag smashes his target into the ground, and the player will be unable to move away or use abilities while being pummelled for 250 damage quickly, also rapidly resetting most defensive abilities. To rescue the trapped player, the other player must deal a set amount of damage onto Torag before he will let go of his target. While Torag is pummelling the player, damage dealt to him during the animation will not affect his health.
- Players being whacked can use defensive abilities to build adrenaline and food to heal.
- It is possible for a trapped player to free themselves by using bleeds, though it requires precise timing to ensure enough damage will be dealt.
Dharok the Wretched[]
- Dharok's auto attacks deal more damage when his life points go down.
- Greatest Axe: Dharok yells "Give me everything!" and is put in a state where any damage dealt to him will be added to his next attack. When Dharok stops, he will head to his target and deal the damage onto the player, regardless of the correct protection prayer active. While Dharok is doing the animation, damage dealt to him will not affect his health when he finishes the ability. Players using Devotion can reduce the damage, regardless of how much has been stored, to 1.
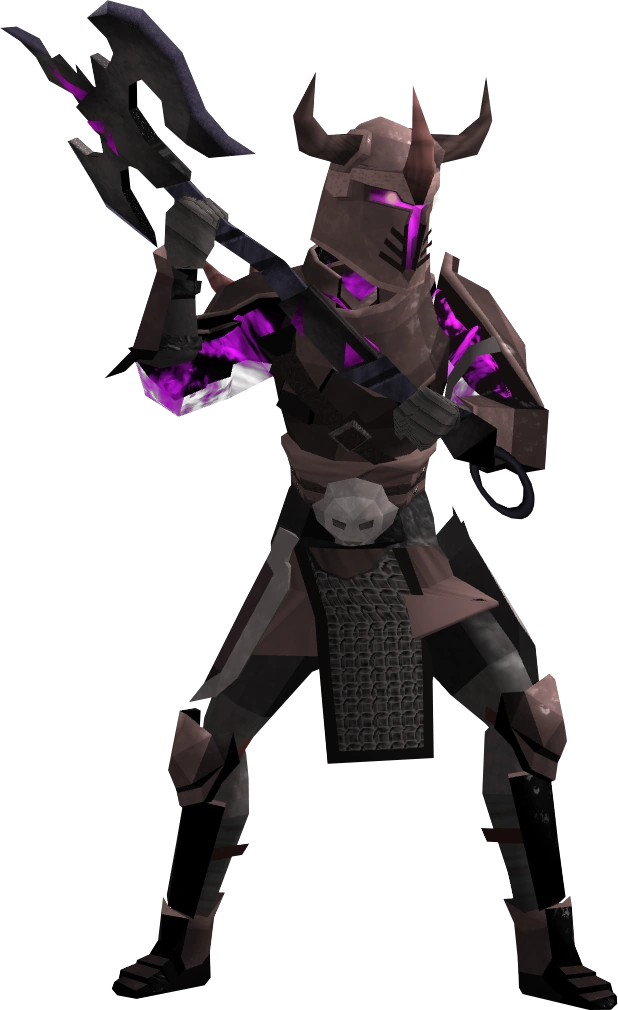
Verac the Defiled[]
- Verac's auto attacks have a 1/8 chance to ignore the target's armour.
- Soulspot: Verac binds a player's soul to a specific place, which is marked by four green arrows. This will drain their prayer extremely quickly. To prevent this, they must move to the centre of the bound spot. When done, the player restores some prayer points and prayer drain stops.
- This can happen multiple times in a row if Verac can't perform any of his other specials.
- Deathcopter: Verac will use a charging animation when he signals this attack. If any of the Brothers help Verac within 20 seconds, he will track a player with his flail, and acts similar the Hurricane attack. This won't occur if he is the only brother standing on his side and most brothers don't help Verac perform the attack.
Guthan the Infested[]
- Guthan has a 1/8 chance to heal with his auto attacks. Damage healed is equal to damage done.
- Impale: Guthan throws his warspear at a player who he is not attacking on his side. His primary target will receive the message "Guthan prepares to throw his spear!", while the other player will receive the message "Guthan throws his spear at you!" The targeted player will suffer 400-500 damage per tick until the warspear is given back to him. Guthan will attack his target by punching, and loses access to his special attacks. When the impaled player is next to Guthan, he will rip his spear out of them and deal 1,000 unblockable damage.
- If the targeted player dies, gets pummelled by Torag, or Guthan dies, the spear is automatically sent back to him. If there is no other target that Guthan can select, he will throw it at his target instead.
- When Guthan takes the spear back, the animation will prevent the target from moving for a moment. This can lead to deaths from Karil's bombs or lightning, so eat up to avoid being killed.
- If Guthan is killed right as he is about to retrieve his spear, a rare bug can occur where he will still attack the player.
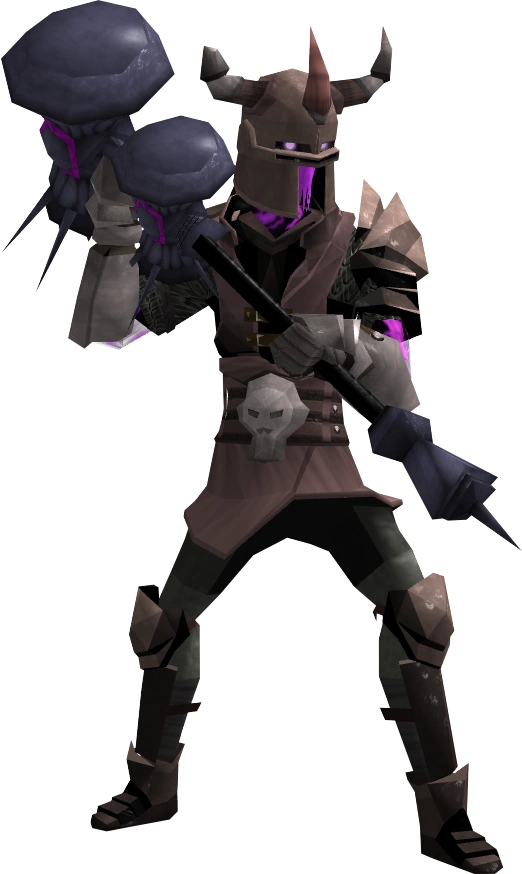
Karil the Tainted[]
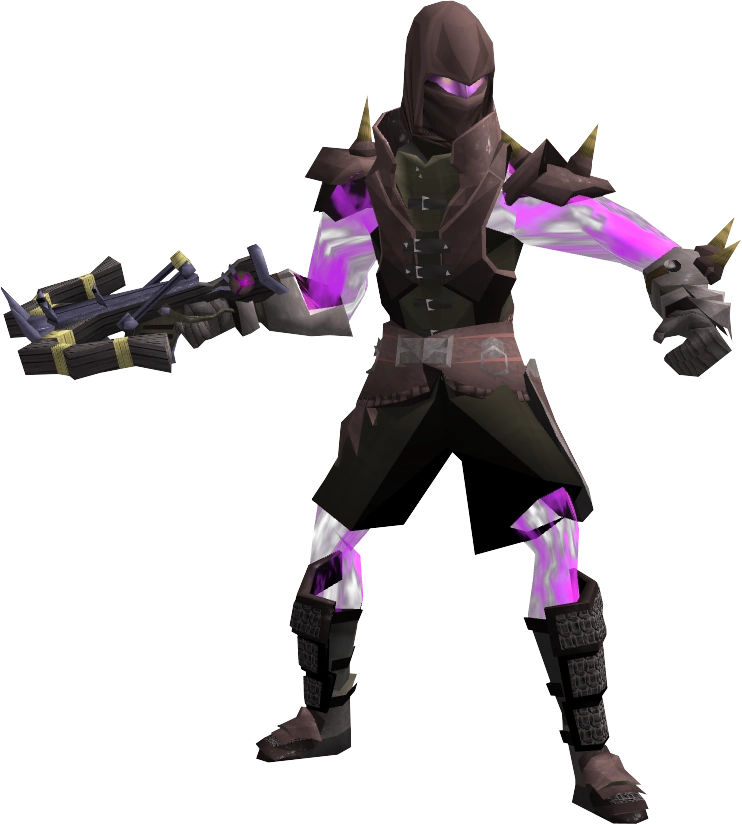
- Portal Dash: Karil dashes into the shadows, and leaves a shadow cloud (bomb) on both sides, starting on the side he is on and then placing one on the other side. If a player goes to the portal, the cloud disappears, the player who runs in takes 500 damage, and is sent to the other side. If no one enters, the bomb explodes and deals damage depending on the player's distance from it. The cloud has a radius of 8x8 and it can also hit players on the other side if near the chasm. The minimum amount of damage that is taken is 4,800, while the maximum is 8,000.
- Note: If one side collapses, Karil will still use this move. Players who use his portals when this happens get sent to a random location on the current side and Karil will set off his next cloud on the same side.
- Three bombs are placed on both sides, starting from the side Karil is on.
- The damage from the cloud (not the explosion) increases by 500 every time a player runs into the cloud.
- When Karil is dashing across the field, he can be attacked for a brief moment before he dashes to the other side.
- Bombard: Karil will jump onto a pillar near the middle portal and send a line of lightning across the other side which can deal 1500 damage every 2 ticks. The lightning will go along either of the two paths of stones in the room, randomly going north-to-south or south-to-north. Players should Surge against the way the lightning is going or run against it. It can deal very high damage, hitting 3 times initially if the player does not move.
- This is the most dangerous attack, even more dangerous than bombs as it is capable of killing players easily in the Shadow Realm as there it can hit 5000 to 6000 per 2 ticks.
Ahrim the Blighted[]
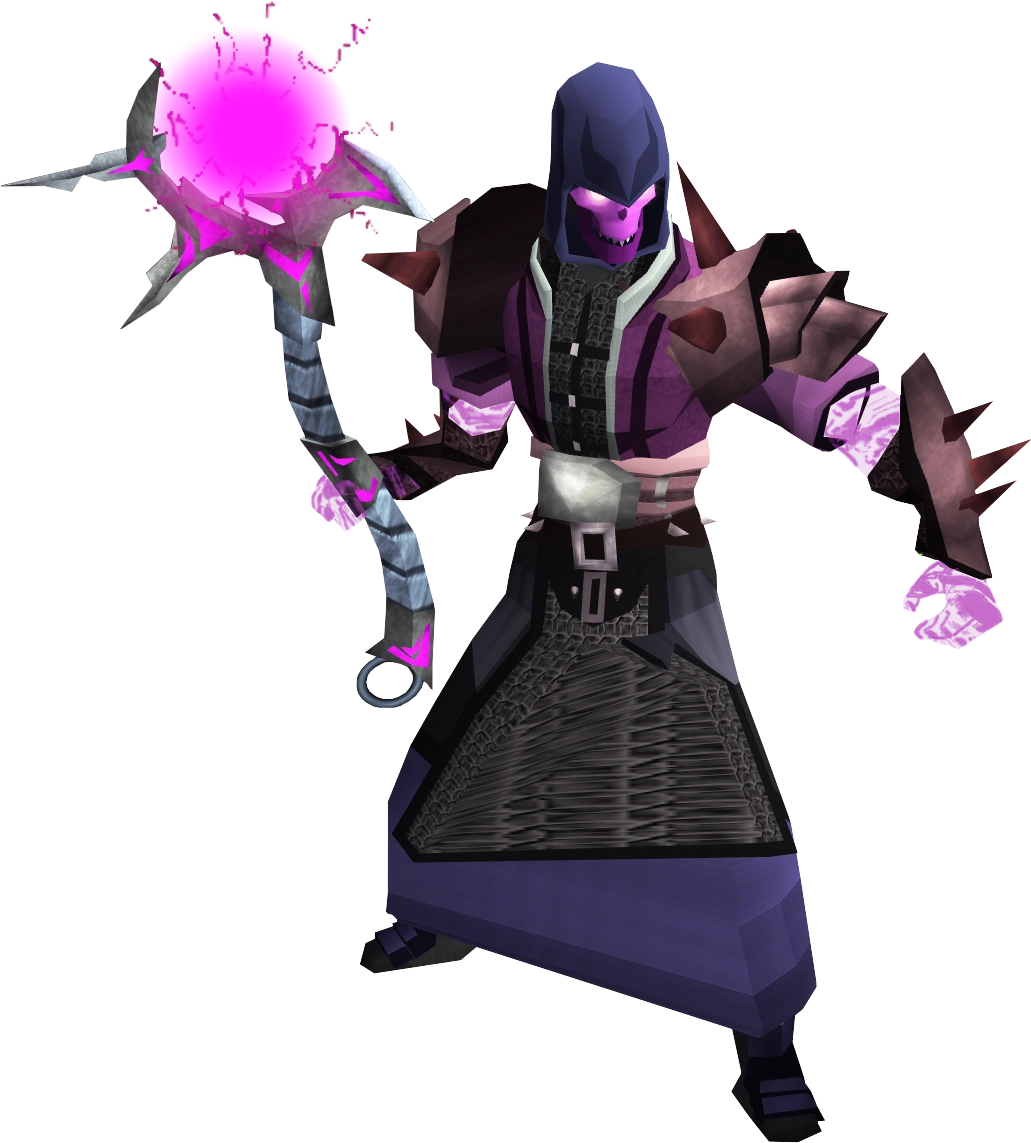
- Ahrim attacks with Blood spells, which means he will heal himself for a portion of the damage he deals. His auto attacks also have a 1/8 chance to drain the target's Strength level.
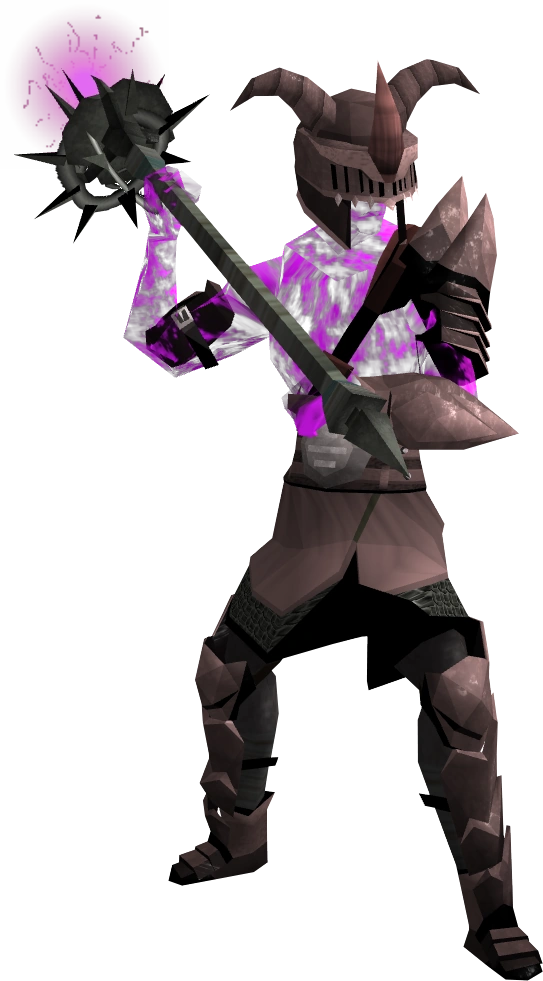
- Flight: Ahrim levitates mid-air, granting him immunity from melee attacks and 50% reduced damage from magic attacks.
- Note: While Ahrim is in the air, he will only use his Shadow Pits ability on his side until he comes down.
- Shadow Pits: When Ahrim teleports to the pillars, he will spawn 8 gas clouds on the opposite side of the field; two red and six purple. Red portals heal brothers standing on them, while purple ones damage players.
- On Ahrim's side, he will conjure the clouds up one at a time.
- The clouds don't always despawn after the fight ends, so be careful when looting the chest.
Special move rotations[]
Note that every brother's attack rotation begins at a random point of the rotation when the fight starts. The first special move is completely random, but the next move will still be the same as in other instances.
For example, in one instance Karil may start with S-L-B (spin, lightning, bombs, spin...), while in another he may do B-S-L (bombs, spin, lightning, bombs...).
The number of standard auto attacks between abilities seems to be random. The Throw ability of Karil/Ahrim stalls the next special and is randomly performed when possible. Verac's Deathcopter is an irregular special but is possible with the help of other Brothers. Commonly the Brothers to air him will be either Torag or Guthan. When Verac does spin the player will receive a message saying: "Verac is tracking you from the skies!".
Karil[]
Spin -> Lightning -> Bombs -> Repeat
Ahrim[]
Spin -> Shadow Pits
If Ahrim uses Flight, he will only conjure the occasional shadow pit on his side but does not use any other abilities until he lands.
Melee brothers[]
Hurricane (spin) -> Impale/Whack/Greatest Axe -> Wall Slam (if near wall, can be skipped?) -> Repeat
Verac[]
He usually only spins once after revival. Most of the time he uses his soul bind and rarely uses his Deathcopter.
Overview[]
The fight[]
In order to win the fight, all six Barrow Brothers must be defeated. When you defeat a Brother, a game message appears saying "As you defeat (Barrows Brother), the shadow engulfs the remaining wights!". When this happens, the other brothers which are still alive gain 5000 of their life points back.
From the first Brother's death a timer starts above the Brother which is a 30 second timer. If the timer reaches the 30 second mark all deceased Brothers are resurrected with 25000 life points and the following message pops up: "The shadow bond is restored between the brothers, bringing back lost combatants." . To stop this timer from reaching the 30 second mark killing any other Brother will cause the timer to reset back to 30 seconds.
If the timer does reach 30 seconds and Melee Brothers are resurrected; the next attack the Melee Brothers make will be a spin attack. The other non-melee Brothers will continue to attack and follow their special attack rotations.
Commonly the kill order for this boss fight is as follows: Karil > Torag > Dharok > Guthan > Ahrim > Verac. This order should always be followed, as taking out the most dangerous brothers improves kill times and speed.
Karil takes the highest priority, regardless if he is the shadow dragger or not. He has the highest killing potential with his bombs and lightning attack, even though his auto-attacks barely deal any damage.
Next up is Torag, because his pummel attack can lower the side's overall damage output, and also makes them extremely vulnerable to follow-up specials from other brothers; there is almost no chance of survival if a player is being pummelled and another brother is spinning on them. The chance of death is also high if the player is within range of a shadow cloud while they are being pummelled.
Dharok is not much of a threat, but his Greatest Axe ability is somewhat of an issue if he is the last brother remaining, as it provides him with pseudo-immunity which could result in the other brothers reviving, along with the increased damage as his health decreases.
Like Dharok, Guthan is not much of a threat, but players should be careful if they are impaled as there is a small delay when he rips the spear from his impaled target, which could result in death from a bomb or spin. The bleed is especially dangerous if the team is dragged into the Shadow Realm.
Ahrim is not much of an issue, as his special attacks are negated when he performs Flight. Simply deal 5,000 damage to trigger Flight and leave him for later.
Verac is the least dangerous of the brothers, as despite his decent auto-attacks, his Soulspot ability does not do much to the player, and he rarely activates Deathcopter as the other melee brothers are either too busy to assist or defeated. He takes lowest priority.
If the damage dealt by the melee brothers are too great, it is advised to run in a straight line back and forth while using non-channelling abilities. The melee brothers will be chasing the player, and they do not perform any abilities if they cannot attack them. Try to avoid turning corners and do not pause momentarily as it will allow them to land a hit.
Both sides should be using adrenaline potions or replenishment potion at the start of the kill. The goal is to rush thresholds against the high important Brothers using bleeds and other high hitting basics followed by your best thresholds. Using Sunshine and Death Swiftness is not recommended in this fight due to the shortness of it and also the potential chance of Shadow Realm removing the ultimate. Once all the Brothers are defeated, the portal collapses and the chest appears. Loot the chest before leaving.
Recommended equipment[]
Magic is useful here as the brothers themselves are equally weak to all forms of combat. However, it is not recommended if facing against Ahrim, as his Levitate ability will reduce incoming magic attacks by 50% as long as it is active. The player also has to be wary of Karil, as his set effect will drain their Magic level, resulting in lower accuracy and damage. It is also heavily recommended to use a staff to use the 2H ability Sonic Wave over the dual wield Concentrated Blast due to being immobile when casting it.
- Spell: Blood Barrage / any Barrage/Surge spell
Range is the best form of combat against the brothers, as none of them are capable of draining the player's Ranged stat. It also bypasses Ahrim's Levitate ability, as he will still take 100% damage from ranged attacks. When fighting the brothers it can be really useful to make use of Mechanised Chinchompas. The use of AoEs inside this boss fight will deal extremely high damage.
While it is possible to use melee, it is only recommended if facing a purely melee side. This is because Ahrim's Levitate makes him immune to melee attacks. In addition to this, both Karil and Ahrim can drain the player's Attack and Strength stats respectively. Even then, using melee is rather hard as players will have less time to react to special attacks.
Melee=
Niche abilities[]
You must use several abilities to help you deal with your enemy. Without these abilities, you may spend more food trying to defeat them.
- Surge: A must for escaping melee spins, energy blasts, Karil's shadow clouds and escaping from the dungeon.
- Escape: Same as Surge, to avoid being killed easily.
- Metamorphosis and Berserk: Helpful for dealing extra damage onto the brothers.
- Sunshine and Death's Swiftness can be used, but make sure that it is timed correctly. If the brothers drag the arena into the Shadow Realm, the effect areas of these abilities will disappear from the field!
- Provoke: To get the Barrow Brother off a player and onto you, and to make Guthan take his spear off you.
- Devotion: With the correct prayer, it reduces damage by 100%, including Dharok's "Give me everything!" attack. It is helpful against Dharok or when trapped in the Shadow Realm.
- Resonance: Alternatively, you can use this ability on Dharok's attack, but only if he is the only brother attacking you.
Inventory[]
The perfect inventory must be used if you want to survive the powered Barrow Brothers.
- Rocktail soup - costly but you will pay back the cost from the energies. Skilled players can get by with using rocktails or sharks.
- Saradomin brew - Can provide supplemental healing and is useful in situations where adrenaline must be conserved.
- Phoenix necklace - helpful for health restoring in case you get hit by a spin or exploding cloud. Note that this will only trigger if hit by typed damage, the typeless damage dealt by most of the special attacks will not trigger the necklace. The necklace will trigger if you are lowered into range by typeless damage and then survive a hit from typed damage.
- Sign of life/Sign of death - second wind.
- Sign of item protection - in case you die, you will keep another item.
- A shield - not recommended for killing, but most teams use the shield when escaping the dungeon or using Resonance on Dharok's "Give me everything!" attack.
- Super prayer flask/Prayer flask/Super Restore - Especially useful when fighting Verac's side.
- Adrenaline potion/Replenishment potion - For reaching thresholds faster after using damage boosting ultimates.
- Overloads/Overload combination potions (substitute with what you can use if you cannot use them)
- Elite Enhanced Excalibur
- 1-handed Melee Weapon - This can be wielded alongside the Enhanced Excalibur to use the Bladed Dive ability for extra mobility in the tunnel escape.
- Barrows totem - This is required to be able to open up a tunnel per fight. This is the equivalent of the instance cost.
- Berserk blood essence - An item which allows your stats to be increased to 133 for the first 20 seconds of the fight assuming you have supreme potions. This item will not work with Overloads and will hinder the player massively if they use Saradomin Brews during the kill.
Example Setups[]
These Setups will assume the absolute highest gear is usable and will give you an example Inventory and Equipment setup to aim for. This setup can be suggestive to opinion and may not fit personal tastes which is down to each player.
The following Invention perks are the top DPSing you can use for this boss fight:
- Body -Crackling 3 with Undead Slayer and Biting 3.
- Legs - Impatient 3 and Enhanced Devoted.
- Main Weapon(s) - Aftershock 3 and Precise 4 with Equilibrium 2.
- Excalibur - Mobile.
- 1 Handed Melee Weapon - Aftershock (Does not matter which number this perk is. The goal is to retain the Aftershock stack count for the next fight).
The ideal inventory and equipment setup for Magic users. The single rocktail is suppose to be used to give extra life points before the actual fight starts. Eating the rocktail will allow the user equip the staff. Using Blood essence followed by Scrimshaw will stack up allowing for temporarily 133 Magic Level and Scrimshaw benefits.
Range is by far the most versatile combat style at this boss. Being able to be used on every rotation and being the most effective AoE damage with the use of chins. Note Chins are lost on death unless wearing Ring of death for that reason it is suggested to bring only a few chins. The single rocktail is suppose to be used to give extra life points before the actual fight starts.
Melee is by far the least used style but nonetheless is still viable to use. Commonly this style is avoided due to the fact of having to be in close distance to the Brothers all the time causing issues for when they Spin. It is also possible for the player to bring T92 Dual wield as well for a switch to use Decimate during their rotation. However this is only advised for the very experienced players.
Some may argue that using Zaros godsword is better option however the scythe range is higher and allows the player move margin to escape Special Attacks.
Familiars[]
A beast of burden familiar is highly recommended for when you are starting out, for doing multiple kills per trip. Pack Yaks should be loaded with the best food you prefer. War tortoises can be used also, but carry less food. Healing familiars should not be used unless you are certain you can recover the damage from special attacks.
If however you have gained enough experience in the boss battle and no longer need a beast of burden. Nihils can also be used to bring a little offence and add a 5% accuracy bonus (along with other bonuses with an ice nihil), which can make a difference between a successful and failed kill, but will create more banking trips.
Commonly trips should be able to last 6 kills before your team needs to bank.
Roles[]
In the Rise of the Six there are commonly two type of roles set in each team. Inciter and DPSer.
Inciter[]
The Inciter. This is someone who will have the ability Incite activated and will be taking the aggro of all brothers on their side for the fight. The Inciter should know how to run the melee brothers so that they reduce the amount of special attacks they can perform and ultimately avoid getting hit. The main purpose of the Inciter is to have all the Brothers on that side stacked and control the positioning of the brothers to exploit AoE damage.
DPSer[]
The DPSer. This is the player who will not have Incite on and instead should be the main source of the damage dealt for that side. Most times the DPSer will be in Range gear using chinchompas to deal the highest amount of damage with AoE. The DPSer will also be the one who must free the Inciter from Torag if he manages to pummel them.
The tunnel[]
The tunnel between the entrance and the fight arena is randomly generated, with anywhere from 0 to 4 bridges. After the fight is over, the bridges collapse. In order to cross over the bridge, you must shimmy across the ledge on the side or jump/swing on the middle obstacle (often referred to as just the 'middle'). Only one person can use an obstacle at a time. While the ledge can be used as many times as needed, the middle shortcut will be removed after one use. As such, it is common courtesy to leave the middle path for the last player to reach the bridge.
Once all players are ready to go, start moving back to the entrance. The players have 30 seconds to escape the tunnels before it begins to explode, causing massive damage on them. Like the fight, purple gas clouds appear and deal damage to players. Debris also falls and deals damage to players that get hit by them. With a bridge, the first three players should take the ledge, while the last player should take the vine/rock pillar shortcut. When 30 seconds are up, bombs start exploding, rapidly dealing over 1000 damage. Spam clicking obstacles/exit rope slightly stalls the damage.
Rebank at Burgh de Rott (with Drakan's medallion) or Max Guild if needed. Inform your team when you are banking to save time.
Killing The Brothers[]
This section will cover certain methods of killing the Brothers depending on each type of rotation players may face. The strategies will assume that the team has 4 members in it and are split into 2 each side. These methods that are discussed can become particularly advanced and may not succeed depending on the teams skill. It should also be noted that some methods have higher risk of death but pay off with faster kill times.
As mentioned previously the kill order that these methods will continue to follow is: Karil > Torag > Dharok > Guthan > Ahrim > Verac. Although some methods will not require the Kill Order due to the AoE damage some methods achieve and others will ask players to kill other Brothers than the highest priority.
Ahrim & Double Melee[]
On this side Ahrim is present with a random set of melee brothers. In this rotation Ahrim will always be spawned in the top corner which is useful and utilised more in the Double Chinning method.
Magic & Range[]
In this method the Magic user will be Inciting and for this will run the two Melee Brothers. The Ranger use will help DPS and kill the strongest Melee Brother for that side (determined by the kill order above). Once the first Melee Brother is dead the two players will split. Splitting in this example is when the Magic user will continue to kill the second Melee Brother while the Ranger will kill Ahrim.
The Ranger can easily kill Ahrim with a few basics and using Onslaught on Ahrim after he has aired. For the Magic user it is suggested to use Metamorphosis if the second Melee Brother has high life points still. At this stage using Wild Magic + Guthix staff special attack near the end of the Metamorphosis is advised.
Double Chinning[]
In this method both players will be using Range and making high use of death dotting also known as DD (standing in the same position as each other) and Mechanised chinchompas. For this to work both players will need Soul Link. One player will be using Incite and will be praying Soul Link and Protect from Melee. While the other player will not have Incite and will be praying Soul Link and Soul Split instead.
Both players will be DDing 1 square off of Ahrim's spawn. This ensures the melee brothers will stack on him to allow chinchompas to be used with devastating effect.
The Inciter should focus on using Corruption Shot first to make sure they obtain all the aggro and switch to chinchompas for the rest of the fight. If a brother does spin it is suggested that the Inciter surges the spin away while the DPSer moves into the North corner to avoid being caught up with the spin as well.
Players should also be aware that in this position they are vulnerable to Karil's bombs, along with potential spins from the melee brothers.
Karil & Double Melee[]
On this side Karil is present with a random set of Melee Brothers. The focus of all these methods is to kill Karil first and to have him out of the fight fast, due to his deadly abilities.
Magic & Range[]
For this rotation you will need a Magic user to be the Inciter and the Range to be chinning. The Magic user has two options when taking on this side, which depends on which Threshold they prefer between the 3-hit-Detonate trick or simply using Wild Magic.
The Inciter should start the kill already adrenaline potted and at Karil's spawn point. The Inciter should auto with Blood Barrage and use Corruption Blast gaining aggro of the other Melee Brothers (assuming the DPSer is far away enough from portal). Then using Combust walk under Karil so it pushes him to move increasing the damage dealt, follow this with strong basics. Once you have reached Threshold level either use Wild Magic as normal or use Detonate. For the Detonate trick it is suggested to target a Melee Brother for the possibility that Karil teleports away and making Detonate useless. If Karil is not dead yet, simply finish off Karil with a threshold on his return. The rest should be simple Melee Brother running.
As the DPSer you are required to be using chins and be efficient in the use of them. For the starting of the kill target Karil with your non-chin weapon and hit an auto with Corruption Shot, then swapping to your chins, use Fragmentation Shot at this point the Inciter would of moved Karil so you would benefit from the double damage bleed too. After this rush for high hitting thresholds to kill Karil. Once Karil is dead simply use a respectable chin rotation utilising Rapid Fire and other thresholds to finish off the remaining two Melee Brothers.
Double Chinning[]
Similar to the method from the Ahrim and Double Melee section of double chinning, but relies on much more luck.
The method will require the same setup and both players to be DD by the Karil spawn location. Commonly this method is not done due the high likelihood of Karil using special attacks However if this method is pulled off successfully expect to see highly fast kills.
Karil & Ahrim & One Melee[]
The most diverse combat styled side to face in this Boss Battle. This side can present some tricky issues and surprising killing potentials from the Brothers with the mix of the two Ahrim and Karil spinning simultaneously.
Mage & Range[]
In this method Magic user will be using Incite and the Range will be DPSer.
The Inciter will have to face all three styles, in which it is still suggested to pray against Melee for the first part of the fight. In this particular rotation using Detonate is not suggested due to the fact that there is not two Melee Brothers on you. As previously explained the Inciter is suggested to move Karil for the bleeds to increase the damage and kill Karil before he uses a Special Attack. It may be advisable to use the Guthix Staff Special Attack after Wild Magic to deal extra hard hitting damage to guarantee Karil's death.
As the DPSer it may be suggested to not use chins in this rotation. Having non-chin weapons can allow for extra damage on Karil to kill him before he uses any Specials. Due to the fact there is only one other Brother stacked it is optional and down to preference on how the Inciter may want the DPSer to do.
After Karil has died, running the Melee brother and building adrenaline for Metamorphosis would help finish off the remaining Brother. The DPSer will most likely be done with Ahrim and can do the very extra hits on the Melee Brother to finish the side.
As the DPSer, you will split from the Inciter after Karil and target Ahrim focusing on using basics and making him air. Once he has aired using Onslaught on Ahrim should quickly finish him off allowing you the move onto the Melee Brother and ending the kill.
Double Chinning[]
This method can only be done on the East side of the battle.
In this method you will required the other side to start for you, so that your DD can work effectively and stack every single Brother on the side. Upon entering the east side of the arena you will notice there are two squares by the barrier which are dipped in allowing the player to stand there. If the two players stand in the most west square (closest to the portal) in that two square area the Brothers upon spawn should align up next to you. The reason for this is because Ahrim and Karil cannot target you so the game drags them closer to you until they can attack which luckily is within melee distance.
Once this DD position is achieved and the Brothers are stacked continue to use a normal Double Chinning rotation. As always keeping an eye out for any abilities and act accordingly.
Triple Melee[]
In this rotation it is really flexible of what players combat style is for this side. The Inciter can using any of the three combat styles of their choice. However they need to be aware if they choose to be Range they need to be aware of overlapping bleeds with the DPSer.
Any & Range[]
One player will need to be the Inciter, who will start closer to the portal and take aggro of the three Melee Brothers.
As the Inciter the best way to gain aggro of all three brothers is starting close to the portal. Then to use AoE (Area of Effect) ability like Corruption Blast or others to 'tag' all the Brothers. Once this is achieved the Inciter just needs to run around in close proximity to the DPSer making much turns as possible to keep the Melee Brothers in a running stall. The Inciter should also be DPSing effectively as well with the only setback of not using channelled abilities.
The DPSer should be using Mechanised chinchompa to DPS all three Melee Brothers. As all the three brothers are stacked together this method makes chinning very effective. The DPSer should allow time for the Inciter to gain aggro by avoiding using any AoEs for their first ability. With Adrenaline potion the DPSer should be aiming and needing to only use thresholds to complete the side.
Tips[]
- Players should avoid the middle as this is where Karil and Ahrim will spin, and they will catch you off guard. If only one of those two brothers is on your side, you are safe on the south side. If both are on your side, you hug the edges. If you have three melee brothers, you can ignore this tip.
- Do not stand near the portal. Karil's bombs from the other side will hurt you if you are close enough. This is one of the most common causes of death.
- Melee brothers might spin if they get the chance to. Verac spinning is a bug and only happens rarely after revival. This is due to the brothers sharing similar code and the spin attack was not removed from his rotation entirely.
- If you get hit by any special attack in the shadow realm, you have a high chance of dying as the damage received is doubled. Karil’s lightning is currently bugged and the damage is tripled. If Karil uses lightning in the shadow realm, make use of the Surge ability and stand near the middle of the arena to quickly evade incoming lightning.
- If you are standing in the middle, be ready to Surge and eat. If you are by the portal, keep an eye on Karil and/or his bombs. If your partner is tanking Torag, keep an eye on him in the event he grounds your partner.
- Once Karil is dead, the rest of the kill should be very calm. Perfect your damage output against Karil, and experienced players will be able to kill him before he does a special attack.