| |||||||||||||||||||||||||
| Also called | FotG, The Purple Rose | ||||||||||||||||||||||||
|---|---|---|---|---|---|---|---|---|---|---|---|---|---|---|---|---|---|---|---|---|---|---|---|---|---|
| Release date | 24 March 2014 (Update) | ||||||||||||||||||||||||
| Members | Yes | ||||||||||||||||||||||||
| Voice Over | Yes | ||||||||||||||||||||||||
| Official difficulty | Grandmaster | ||||||||||||||||||||||||
| Quest series | Return of Zaros God Series Elder God series | ||||||||||||||||||||||||
| Age | Sixth Age | ||||||||||||||||||||||||
| |||||||||||||||||||||||||
Fate of the Gods is a grandmaster quest featuring Zaros' return to Gielinor, where the World Guardian is required to help him create a new host body. It is the conclusion of the Return of Zaros series that started with The Dig Site in 2003. The World Gate also plays a key role, taking the adventurer to the realm of Freneskae, where the majority of the content takes place.[1]
While Missing, Presumed Death is the only actual quest requirement, completion of Ritual of the Mahjarrat and The World Wakes is strongly recommended in order to fully appreciate the quest's storyline, and completion of the Mahjarrat Memories also gives an Engrammeter that can be used to reduce damage while on Freneskae, in addition to providing further information on Zaros.
Walkthrough
| Start point | |||
|---|---|---|---|
| Member requirement | |||
| Official difficulty | |||
| Official length | Medium (1-2 hours) | ||
| Requirements | Skill requirements are not boostable unless marked with a [B] for boostable.
| ||
| Items required | Items from the tool belt are not listed unless they do not work or are not automatically added.
Recommended:
| ||
| Enemies to defeat |
|
Powering the World Gate

Speak to Azzanadra, south of the Eagle's Peak lodestone and north-west of the gates to Arandar Pass, who will inform you that the death of Guthix has allowed all of the gods to return, but there is one final obstacle preventing the return of Zaros, which you can help remove. Accept the quest. Upon speaking to Azzanadra again, he will explain that the World Gate was created by Guthix long ago, and is the only portal that can reach every plane in existence, although it is currently limited to those worlds that Guthix or Zaros visited with it.
He will tell you that he, together with Zaros, has enlisted the help of Sliske to pull the World Gate out of the Shadow Realm. Sliske will appear and pull you into the Shadow Realm to offer you a proposal before telling you how to fix the World Gate. Sliske will say that his mastery of the Shadow Realm has grown, and explain how you may be able to achieve a big win (depending on your God Emissaries alignment). Since you will be the only one able to pass through the World Gate and meet Zaros, the fate of Zaros will be in your hands. Sliske will claim to be still loyal to Zaros, after a fashion.
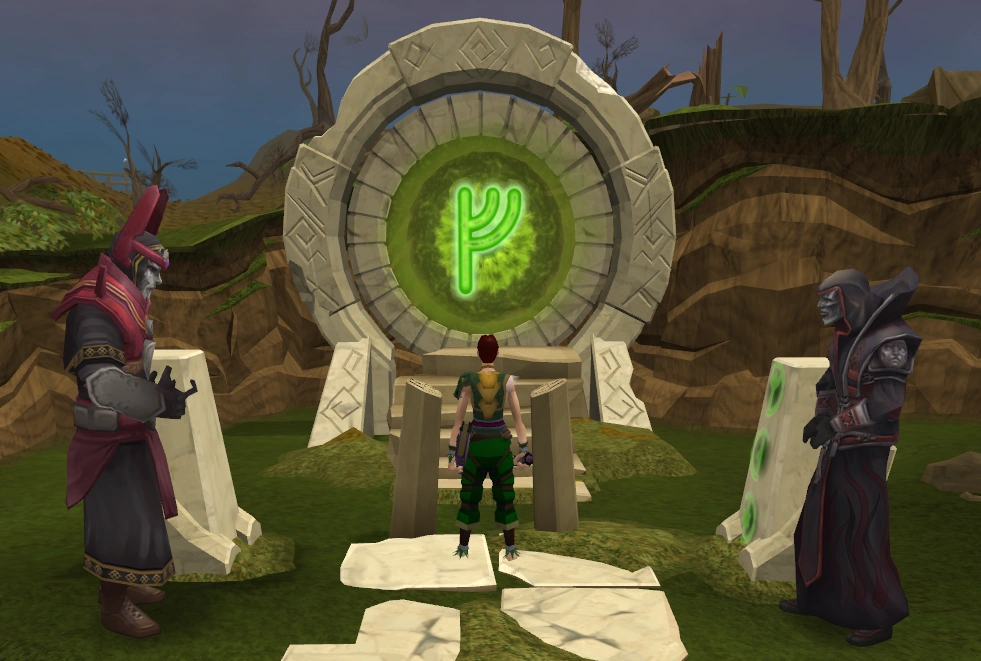
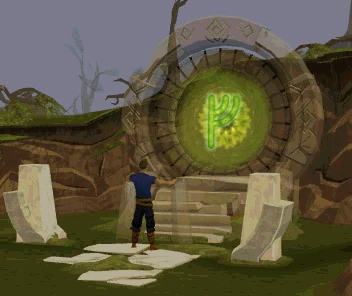
A combination lock on the gate will need to be removed before it can be used. Sliske will place the combination on a pillar, which you should investigate to get the symbols. Then click on the control consoles in front of the gate. The left console will rotate the symbols to the left, and the right console will rotate them to the right. You'll have to rotate the symbols in the noted direction to each symbol, like a combination lock, so that they spell out M-A-H in the runic alphabet. When a correct world of the combination is switched to, an animation occurs alerting you to this fact. Heading in the wrong direction once you've got the correct world will de-power the World Gate, forcing you to start again. Note that this can be done before the quest, and if you have, you will not need to do it again.
To power up the World Gate, you must use the following combination in the following order.
- Rotate RIGHT until you reach M(
 ), or "A world engulfed in flames. It's kind of beautiful."
 - Rotate LEFT until you reach A(), or "Many rock islands floating in the sky above an exposed planetary core."
- Rotate RIGHT until you reach H(), or "A vast ocean speckled with hundreds of small islands. One of which has a gleaming white tower upon it."
After the World Gate has been activated and Sliske has returned it to the material realm, Azzanadra will tell you that he has set the gate so that it will only take you to the right location until Zaros is returned. Enter the gate once you have made necessary preparations, a decent amount of food, a face mask (or an item that acts as one) and a beast of burden are highly recommended.
Freneskae
Notes
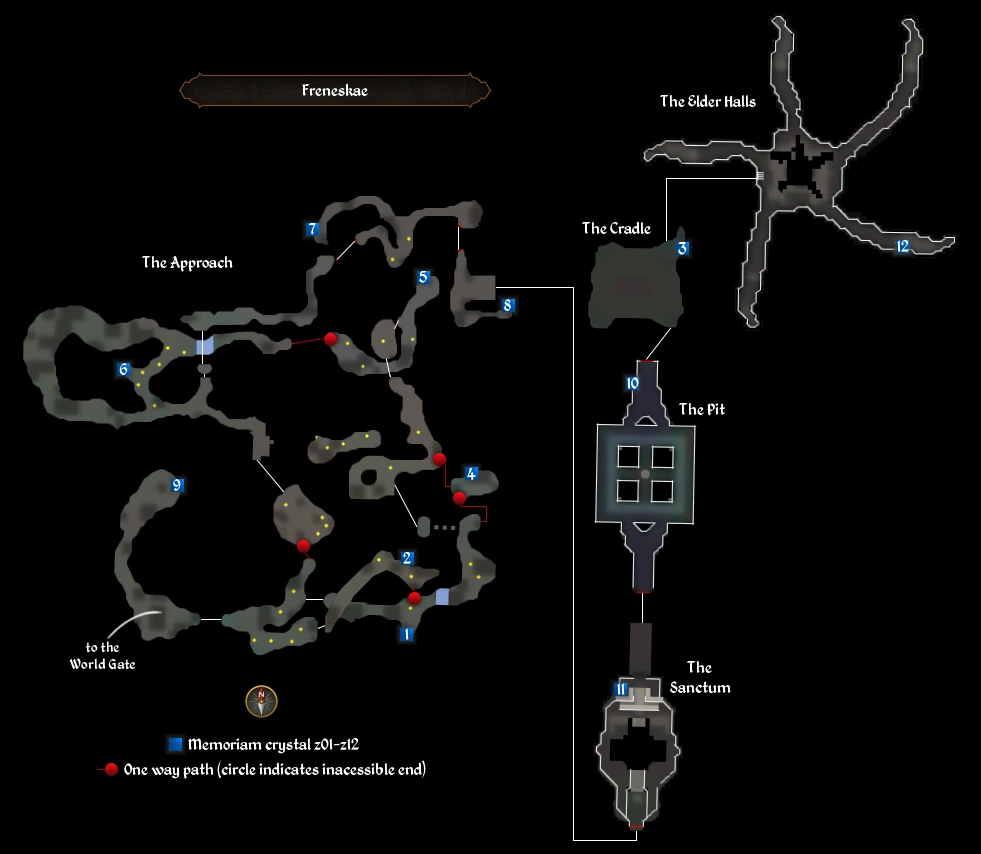
A map of Freneskae (click to enlarge).
When on Freneskae, you will need to move quickly. There are dangerous hazards and things to be aware of during your journey through this realm.
- The air here is filled with smoke and will make you choke. This causes 50 life points worth of damage every few seconds (reduced to nothing if wearing a face mask or equivalent).
- Lightning can strike at any time causing a large amount of damage. Lightning strikes will be preceded by a flickering light on the ground. If you are hit by a lightning strike you will be damaged for 1500 (1275 with a distorted engrammeter) life points; being near a lightning strike will cause you 750 (637 with a distorted engrammeter) life points of damage. Insulated boots will not reduce this damage.
- Volcanic vents will spew hot steam, and will spill lava if you step on them. This causes 400 life points of damage.
- Balls of lava will drop from the sky. If you are hit by a ball of lava you will be damaged for 500 life points; being near an impact will cause you 250 life points of damage.
- Walls will leak lava onto passers-by. If you are hit by the lava you will be damaged for 1000 life points; being near the wall will cause you 500 life points of damage.
Remember to keep an eye on your life points and heal if required. Freneskae actually has a number of safe spots for players to rest and heal without food, as well as a few healing archways that provide immediate healing. A Regen Bracelet is useful to not waste food and save time healing. You are guided/followed by a mysterious entity. If you die at any point while on Freneskae, your grave will appear near the World Gate. As you progress through the different areas of Freneskae, the World Gate will give you the option to travel either to the beginning of 'The Approach' or to the last checkpoint that you have reached. Once the quest is complete, you can travel to any area directly from the World Gate.
Memoriam crystals can be found throughout Freneskae. The crystals can be deposited in The Sanctum to unlock memories, which will reveal a part of the past. Collecting the crystals is not required to complete the quest, although they provide information which may help you decide whether or not to ultimately help Zaros.
Approaching the Volcano


You arrive on the harsh realm of Freneskae.
Once through the World Gate, you will arrive in an area named The Approach, the most dangerous and largest area of Freneskae. Although you will initially get the feeling that you are being watched, you will quickly dismiss it. To progress, from the entrance, go east and jump the two ledges, then take the north branch and cross a rock formation to the east. Follow the passage to the first healing point.
Continue along the passage and cross the stepping stones, then climb the cliffside. Go east, then north and cross the overhang then climb down the cliffside to the east. Go south then west and slide down the slope. Continue along the passage to the second healing point, and then head southwest across the lava vents and climb the cliffside opposite the second healing point. Walk across the rock formation, run east to the end of the next passage and climb down the drop. Go east and traverse the rock bridge.
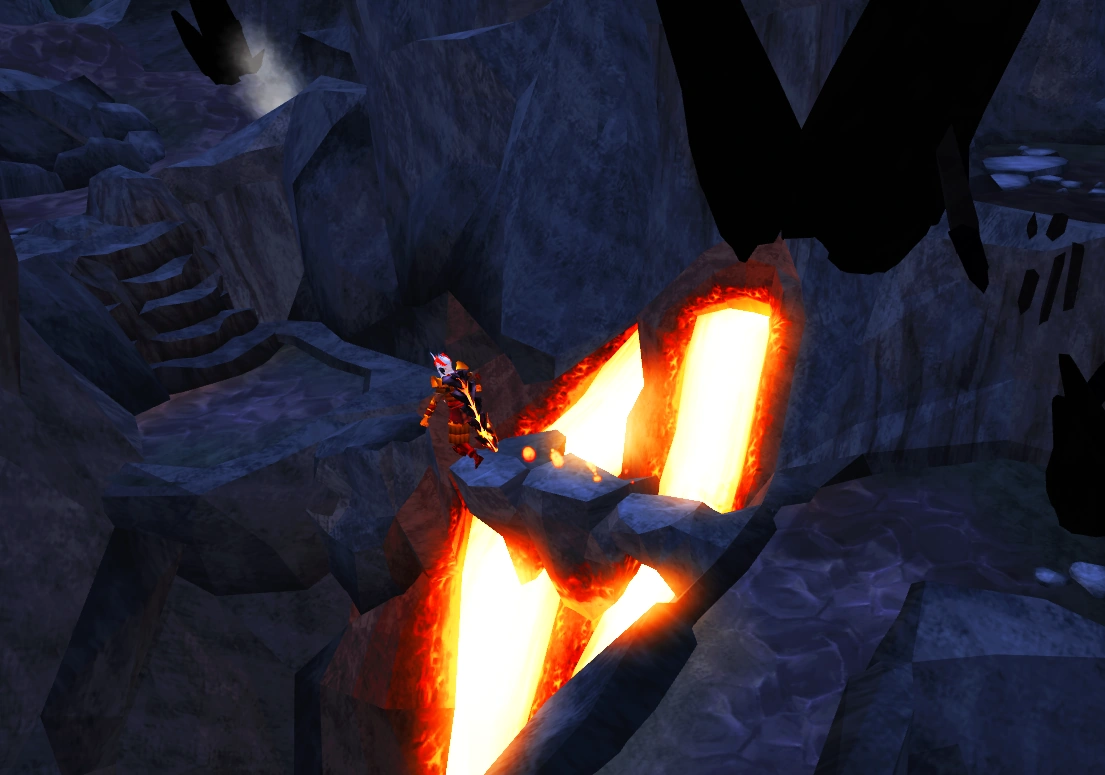
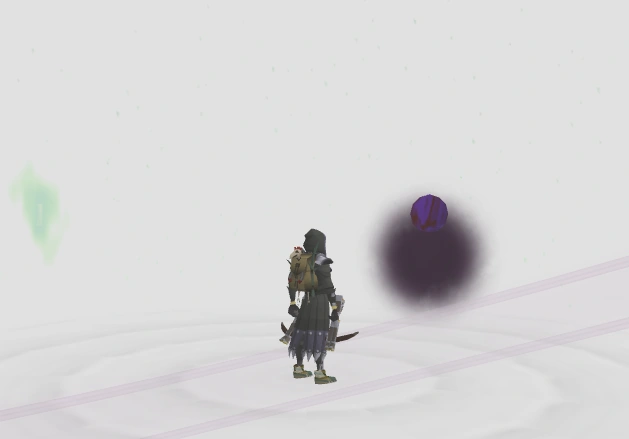
Walking across the lava pit.
The opening to the Sanctum will be ahead, marked by the mysterious entity that you have been seeing throughout your journey. Enter it.
Zaros's Sanctum
Once you enter the cave at the end of The Approach, you will enter the Sanctum, the area where Zaros contacted Azzanadra in the Temple at Senntisten. Unlike the Approach, this area is completely safe, and the middle of the room, there is an area where you can deposit any memoriam crystals you may have found, and review the memories of Zaros.
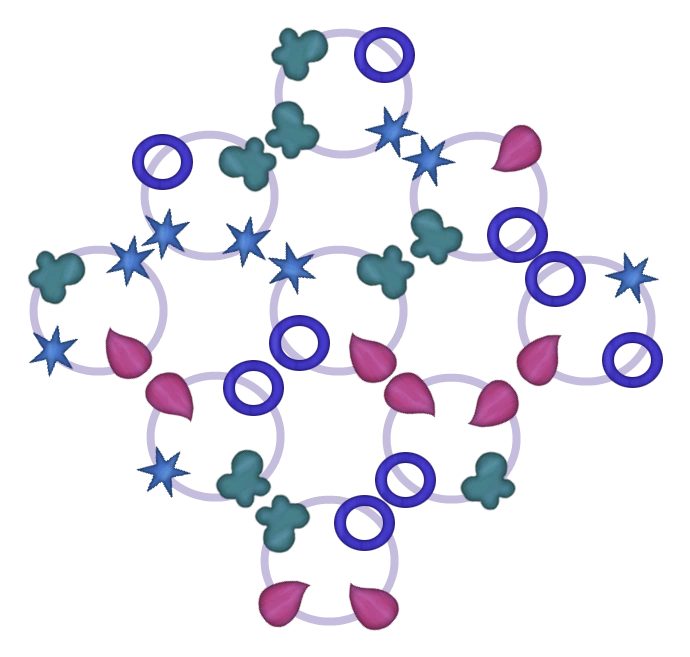

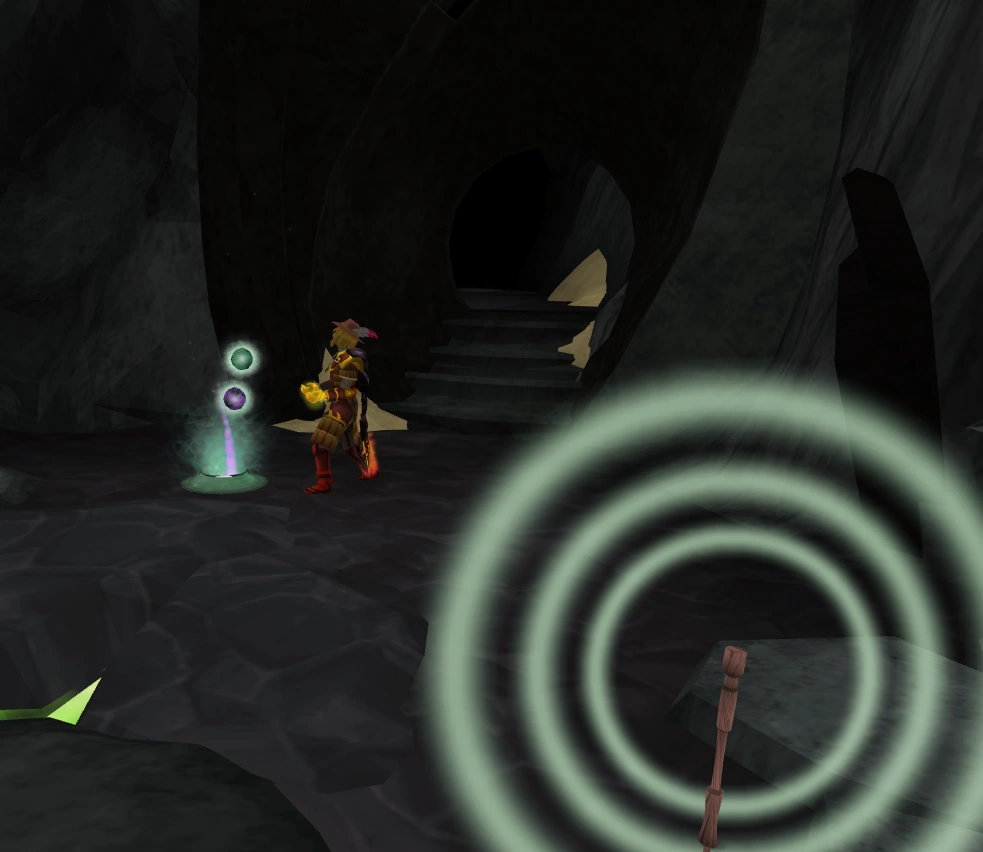
The solution to the final puzzle.
At the other end of the room is a door with symbols on it. The door is locked, and to open it, a relatively simple puzzle must be solved. There are three stages to this puzzle, with the last being the hardest.
To solve the puzzle, you must rotate the panels on the door to match the symbols on them to light up the lines which are in-between the dials. Once all of the lines are lit up, the next stage will begin. After completing all three stages of this puzzle, you will be able to proceed.
Note: now is the time to bank as you will be faced against four level 160 Nihil in the next room - you will now be able to return to the puzzle room from the World Gate.
Nihil in the Pit
Enter the next room and stand on the center of it, where the mysterious entity will be found. Four different creatures known as Nihil will then emerge from the tunnels around the edge of the room. Each Nihil is based on one of the elements from Ancient Magicks and one of the races of Gielinor. If you try to exit or continue, the doors will lock shut, so you will have to fight the Nihil to unlock the doors.
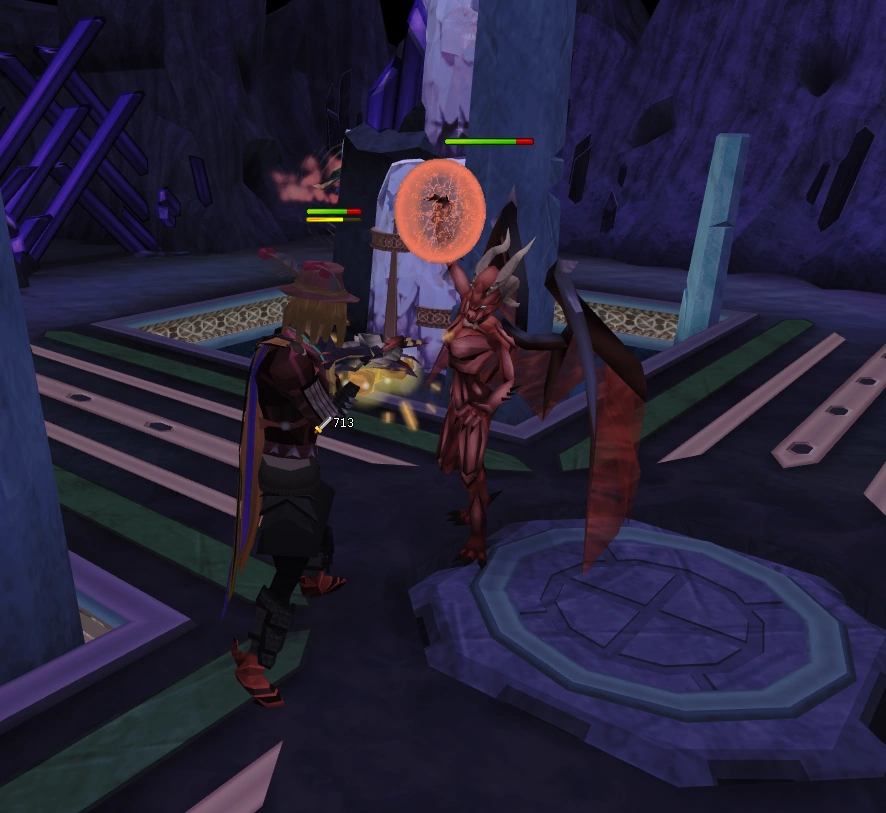

Fighting a Blood Nihil.
The Nihil emerge at random from the twelve doorways and will charge in one direction. Making contact with one of them while they are running will cause approximately 2000 damage, as well as a side effect based on the nihil that hit you. Each Nihil will always run in the same direction: The ice Nihil always runs south, smoke runs west, shadow runs north, and blood runs east. Therefore, a pair of nihil (ice and shadow or smoke and blood) can be killed, leaving areas between the tracks unused and safe. Lower levelled players can also use this to rest and heal between fights.
Each Nihil uses a different combat style, but has no weaknesses, and has a special attack (which is signaled by it hissing beforehand) as follows:
- Smoke Nihil: Attacks with Magic that can lower stats, special attack creates a cloud that rapidly cuts stats. Players utilising an overload or drinking a form of stat restore potion (once their stats are lowered) and using Protect from magic/soul split will have little trouble with this Nihil.
- Shadow Nihil: Attacks with ranged, special attack creates an area-of-effect that deals rapid damage (like Nex). Players should hit and run when fighting this form (use an ability and run several spaces away, and repeat) in order to avoid prayer and life point drain. Additionally, players should constantly move in order to avoid the Nex-like shadow bombs that can cause heavy damage. Protect from ranged or soul split are advised.
- Blood Nihil: Attacks with melee, special attack causes all incoming damage to heal it. This nihil attacks with a hard-hitting melee attack and has a special ability similar to Nex's healing siphon, which is signalled one tick after a hiss. The creature will lower its head, cease its attack, and begin to glow. Any damage dealt to it during this time will instead heal it. It also will passively heal other nihil if it is damaged (e.g. inflicting 500 damage on it will heal all the other nihil by 500 lp each). Use Protect from melee or soul split to avoid high food consumption.
- Ice Nihil: Attacks with magic, special attack applies a six second stun. If not attempting to obtain the "Annihilator" title, a recommended strategy would be to attack this nihil after building up adrenaline from a previous Nihil kill, then using Death's swiftness, Sunshine, or Berserk to take it down before multiple ice specials are used. However, if this tactic is not feasible, simply using Protect from magic/soul split, Freedom when frozen, and Anticipation after the creature hisses will allow for unhindered damage.
Even though they have no particular weakness, a very effective way to engage in combat with the Nihil is to fight them separately, one by one, using (mid-)high-level melee gear and weaponry (such as dual-wielding a Chaotic rapier (or Korasi's Sword, also with an Offhand chaotic rapier or similar) together with its offhand variant; and wearing Bandos/Barrows armour), with protect prayers/curses active and avoiding their charge attacks. This method has, reportedly, been more successful than using Magic or Ranged with those skills at levels between 80-90, provided the player makes full use of abilities such as "Destroy". Using this, food (or other healing methods, such as portents) is also a must. Players able to make use of Drygore weaponry and better armour should use that instead of the earlier mentioned equipment if they plan to utilise this method.
The Nihil can deal significant damage even through prayer, so prayer points, stats, and mainly health should be monitored closely in order to avoid death (especially if trying to obtain the "Annihilator" title). Super restore potions are undoubtedly very useful to counter the stat-reducing effects. Keep in mind that most of the damage income during the fight comes from the Nihil charges (which should always be avoided) and their special attacks.
Once the Nihil are dead, head north through the now unlocked doors, and climb the cliffside.
NOTE: After killing the Nihil, DO NOT log out. Doing so WILL require you to face them again. You might experience a glitch where the crystals won't open up even after defeating the four nihil. You would have to log out then back in and kill the nihil again.
The Cradle of Mah

You will emerge atop the Volcano, next to a large sleeping figure. Approach the figure and attempt to climb down the cliff next to its right hand, and the mysterious entity will once again appear, telling you to stop, and revealing itself to be no other than Zaros himself.

Zaros speaks to the player within their mind threshold.
Zaros will explain that the entity is Mah, an elder god, and that he has been guiding you through Freneskae. He will also tell you that his and your presence is making Mah awaken from her slumber, and takes you to a place where you and he can speak more easily: your mind threshold. Here, he explains that he needs you to make him a body from Mah's energy in an area called the Elder Halls beneath the volcano, and allows you to ask questions about his plans, origins, and thoughts on people. Through this, he reveals he is the creation of Mah, and that an event known as the "great revision" is coming, which he aims to ascend to elder godhood in order to stop.
After you have finished asking Zaros questions, tell him that you are ready, and he will explain that when you wake up, you will have to defend against Mah's nightmares until it subsides, allowing you to go and make him a body. Zaros will offer to stay in your body in order to help you fight the nightmares. You have the option to refuse him, but if you accept his offer to stay in your body to help you fight the nightmares, then you will receive unlimited prayer points and runes while using the Ancient Curses and Ancient Magicks, respectively. You will then awaken back at the Volcano.
Mah's Nightmare


A player faces Mah's wrath as they fight the muspah.
To start the nightmare, approach Mah. The nightmare will last a couple of minutes, and you must defend against Muspahs. Your progress is displayed at the top of your screen in order to help you keep track of how long you have got left. Prayer and food is especially useful in this part, and a beast of burden is highly recommended. It is recommended to use the Ancient Magicks spellbook as the Muspah take slightly more damage from those spells, despite not having any specific weaknesses. It is also highly recommended to wield a shield, so you can make use of abilities such as Immortality, Resonance, Rejuvenate, and Barricade.
If you agreed to let Zaros into your mind, he will give you unlimited prayer points for Ancient Curses and unlimited runes for Ancient Magicks, as well as reduce a small part of the damage from the Muspahs. Thus, it is recommended to use an offensive prayer such as Anguish or Torment and Protect from Magic as the Mage Muspahs seem to deal the most damage per second. If you refused to let him enter you, or if you die, by talking to him you can let him in again. Note: While Zaros is inside you, Prayers will drain your prayer points, but Curses will not! If you are not using Curses, bring some prayer potions.
Upon the start of the fight, one Muspah is created and if it dies, another one will quickly replace it. As the nightmare runs its course through Mah, more Muspahs begin to spawn, to a maximum of 5 at the last moments of the nightmare. If you see Mah clench her hands, quickly use Freedom or Anticipate; if you don't you will get stunned when she screams in agony. When this happens, players take approximately 1800-2000 damage while Muspah take up to 9200 damage from the scream.
If, by bad luck, a player reaches 0% on the progress bar and runs out of life points at the same time, the player may still complete the battle if the player receives a message in their chat box saying they succeeded.
Once the progress bar hits 0%, all of the Muspah will die and you are free to climb down the summit into the Elder Halls. Zaros will once again explain that he needs you to make a body from the Mah wisps, and specifies that he needs you to make a Dark simulacrum in order to aid his return, and that a Light simulacrum would reject his essence. Zaros will also once again offer to enter your body in order to assist you and offer advice, but this is once again optional, and this time, doing so gives no gameplay advantage.
Halls of the Elders
Using the Measure to harvest Mah's memories.
Climb down the ledge at the opposite end to where you entered, next to Mah's hand. You will enter a large area with several Mah wisps, the Elder Halls of this world. Pick up The Measure; an Elder artefact created to measure Anima, from the nearby ground. This artefact causes faint Mah wisps to become visible, allowing you to siphon them for Mah energy and Mah memories, the latter of which can be converted to memories at the crater in the middle of the halls. Mah wisps can be found all over the halls, spawning both in the center and at the ends of the tunnels where curious "eggs" can be found, one of which looks similar to the Stone of Jas, and another of which Zaros explains to be "Mah's".
Once you obtain 250 Mah energy, you must weave a simulacrum from it, either a dark simulacrum if you wish to aid Zaros, or a light simulacrum if you wish to hinder him. Once you are done, climb back up the summit and return to Zaros. He will accept your chosen simulacrum, being extremely disappointed if you chose to give him a light one, but forced to accept it nevertheless. Bear in mind that whichever simulacrum you chose will change his appearance, so carefully consider your choice.
After you have given him your simulacrum, Zaros will form and outfit his new body, before Mah awakens, causing Zaros to teleport you and himself away back to the World Gate at the entrance to Freneskae. Before you leave, Zaros will have a little chat with you, questioning you about how you feel about the choice you made. Once you are done discussing it with him, head back through the World Gate.
")
")
")
")
")
")
The Return of Zaros
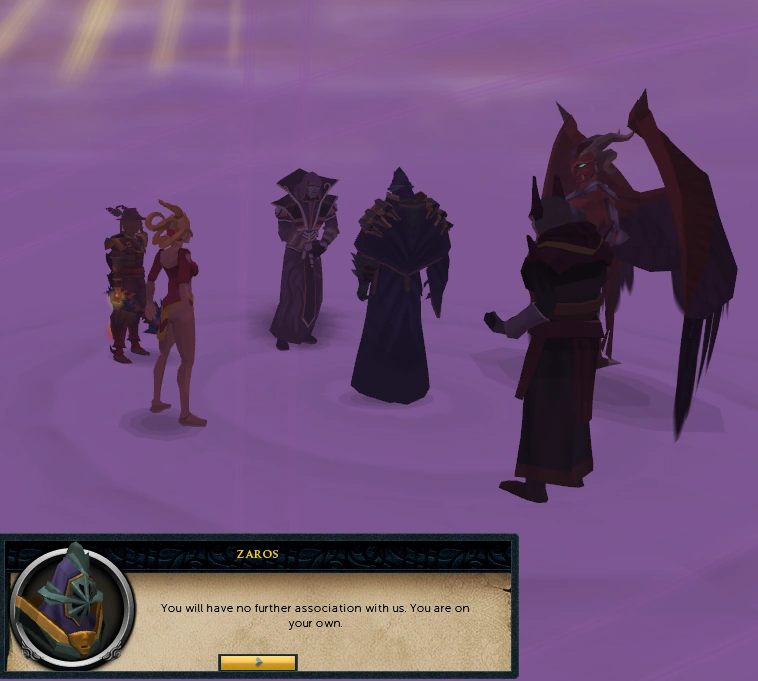

Zaros meets with his followers and excommunicates Sliske.
_chathead.png)
Step through the World Gate and return to Azzanadra to witness the return of Zaros. Azzanadra will summon Char and Nex, and you will be back in your mind threshold. Aware of Sliske's betrayal due to your memories, and no longer able to condone his methods, Zaros proceeds to excommunicate him, telling him that he will have no further association with the Zarosians. This angers Sliske, causing him to state that Zaros's protection will no longer apply to you as far he's concerned, and teleports away.
Zaros will then task his followers with various tasks: he tasks Char with keeping an eye on Sliske, fearing he may do something rash due to being hurt, Nex with keeping Sliske's god contest in check, and charges Azzanadra with locating the Elder Halls in Gielinor, so that he may prepare to rouse the Elder Gods and prevent them from destroying the universe. If you hindered him, he also charges Azzanadra with finding a way to extend the lifespan of his body. If you helped him, he charges you with dealing with the threat of the Dragonkin.
Finally, regardless of your decision, Zaros will reward you with a variety of things, including a shard from his arm, which will affiliate you with Zaros and allow you to speak with him at any time, and the quest will finish.
Congratulations, quest complete!
Rewards
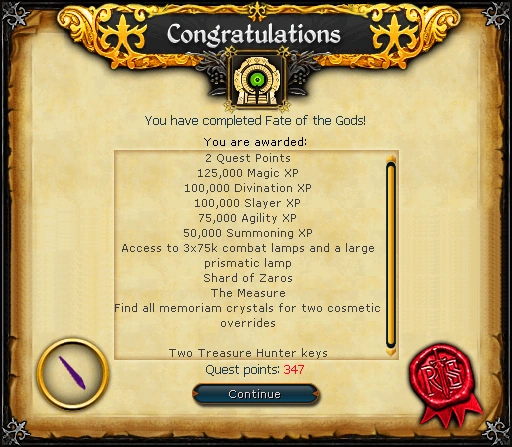
Upon completing this quest, you will receive:
- 2 Quest points
- 125,000 experience
- 100,000 experience
- 100,000 experience
- 75,000 experience
- 50,000 experience
- The Shard of Zaros which, when equipped in the pocket slot, grants protection from all factions in the God Wars Dungeon.
- The ability to fight bladed muspah, force muspah and throwing muspah when returning to "The Cradle"
- The ability to fight blood nihil, shadow nihil, ice nihil, and smoke nihil when returning to "The Pit"
- Access to the Elder Halls, with a level 75 training spot
- 2 Treasure Hunter keys and 2 Hearts of Ice
Post-quest rewards
- A survivor's lamp which grants 75,000 experience in a chosen combat skill (80+, excluding prayer/summoning) up to three times, if you talk to Azzanadra in Senntisten (requires completion of The Temple at Senntisten)
- A large prismatic lamp from Wahisietel (Ali the Wise) in Nardah (requires completion of Ritual of the Mahjarrat)
- If you visit the Empyrean Citadel throne room and attempt to leave, Sliske will appear and answer one question, before giving you a gift: the ability to see into the Shadow Realm without a ring of visibility (requires completion of The General's Shadow miniquest and Ritual of the Mahjarrat).
- "Are you really a god now?" - No and nor does he wish to be, although he claims to have the same powers as The World Guardian.
- "Who ordered you to kill Guthix? – No one, but he felt that it needed to be done and that it would have been requested of him sooner or later.
- "Do you actually have, and did you use, the Stone of Jas?" – Yes and yes, although he has only used the stone for knowledge and not power.
- "What are your plans as of now?" – To start the God Wars anew, although to what end he does not say.
- "What… is your favourite colour?" – Blue and green, but if he had to pick one: aquamarine.
- If you fight the Nihil during or after the quest, engage all four before finishing any of them off and kill them all you will receive the title "the Annihilator".
- Two cosmetic head overrides, the Helm of Zaros and Crest of Seren, but only if you find all the memoriam crystals on Freneskae.
- Four elder chronicles, each granting 50,000 experience when The Measure is placed:
- Near the submerged statue on Entrana located on the far Northwest corner of the island.
- Outside the TzHaar City entrance.
- Near the Oracle atop Ice Mountain.
- By the archaeologist camp on the plateau at the top of the stairs in the Ruins of Ullek.
- A teleport to the World Gate added to the Sixth-Age circuit by speaking to the Guthixian High Druid (requires full completion of The World Wakes)
- If a charged engrammeter is used on Freneskae, 25,000 experience is granted, and you take less damage from environmental effects. (requires completion of Mahjarrat Memories)
Optional "Annihilator" title
If you kill all four of the nihil during or after the quest when they are all attacking you at once, you will receive the title "the Annihilator".
Suggested strategy for obtaining this title:
- First attack the Blood nihil, and reduce its hitpoints until it is fairly close to death.
- Do the same with the Smoke nihil, then the Shadow nihil.
- Finally, attack the Ice nihil.
- Once you have engaged all four, kill the Ice nihil first due to its stunning effects; make sure you have Anticipation and Freedom on your action bar or the Ice nihil will stun you for 6 seconds about every 10-15 seconds.
- Kill the other three in any order you see fit, according to your setup. However, as a general tip, it may be helpful to dispatch the Blood nihil next so that it cannot heal itself or its companions. Whilst the Shadow nihil is alive, keep moving every few seconds to dodge its Nex-like Shadow attack.
- One suggested kill order is: Ice, Shadow, Smoke, and Blood.
- Another very effective strategy is to follow the above but after the 4th nihil starts to attack you, quickly finish off the near-death nihils so you just face the last one alone, without 3 other nihils blasting you during the whole battle.
- Starting with the Ice nihil has proved to be effective, since you will get a feeling of its stun before you attack the other targets.
- It is advised to move one step now and then, so you do not get the shadow damage and smoke choke.
It is recommended to utilise any area of effect spells and/or abilities in order to speed up the kills and save food. Beware when using multi-target attacks, however - using these early on in the battle may result in you killing one of the nihil before you have engaged all four, so watch their health bars.
This multi-target strategy would work well with blood spells and the Vampyrism Aura in order to maximise health regain whilst still dealing high amounts of damage.
Another, more defensive method which is effective is the use of any of the 3 enhanced spirit shields to reduce incoming damage, particularly during the phase of the fight when all 4 of the nihil are attacking you. If you use this method, you can also make use of shield abilities such as Resonance to keep your health up. If you choose this method, remember to bring plenty of prayer potions as the drain is high.
Generally, it's a very tough fight as long as ice nihil lives, so it's advised to either fight her alone or fight the others with its absence. After reducing blood, shadow and smoke nihils to critical health and engage ice then quickly kill the 3 puts you in a one-on-one situation with ice nihil. Start with ice nihil and quickly kill it after engage all 3 others results in a fight with 3 nihils without interference of ice nihil.
Music unlocked
- Amor Fati
- Freneskae (music)
- Sanctum
- Non Compos Mentis
- Nightmare at the Cradle
- Zarosian Reprise
- The Elder Halls
Required for completing
- Tirannwn Tasks:
- Elite: "The Crested Guest Is Best"
Transcript
Post-Quest FAQ
Cultural references
- Amor Fati, one of the music tracks unlocked during the quest, is a phrase used repeatedly in the philosopher Friedrich Nietzsche's writings and is representative of the general outlook on life.
- The name of the quest; Fate of the Gods, is another name for Ragnarok, the Norse apocalypse. This is a reference to both the Great Revision and Zaros being the god of fate.
- During the initial dialogue with Zaros he says to the player: "Say my name!", to which the player responds, "Zaros." This could be a reference to a scene in an episode of Breaking Bad where Walter White demands that they say his pseudonym, Heisenberg. It could also be a reference to 'The Never-Ending Story' where the princess calls out to Bastien to "say my name!"
- Sliske referring to Zaros as "Big Brother" is a reference to George Orwell's novel Nineteen Eighty-Four.
- One of the questions you are able to ask Sliske in the Empyrean Citadel, "What... is your favourite colour?" and the answer he gives "Blue and Green" references a scene in Monty Python and the Holy Grail where the same question and similar answer were given.
- Another question you are able to ask Sliske in the Empyrean Citadel, "Are you a god?" and the answer he gives is "What is a god? Power? Followers? A miserable little pile of secrets?", a reference to the infamous opening scene from Castlevania: Symphony of the Night between Richter and Dracula.
Trivia
- The World Gate was added to the game the week before Fate of the God's release. Located in the Shadow Realm, it could only be seen with the aid of the ring of visibility, and while it could be interacted with, and powered up with the correct sequence of symbols, it could not be travelled through upon its release.
- Upon completion of the quest the Adventurer's Log states: "Zaros has returned..."
- There was a glitch where if the player attempted to interact with anything in the shadow realm using Sliske's gift it would disappear; the player would then be unable to interact with that NPC even with the Ring of Visibility equipped. This was fixed on 25th March 2014.
- There seems to be a glitch with some players where Sliske's gift requires being "activated" by wearing the ring of visibility once before the effects become permanent.
- This is one of the few quests to have a unique "quest complete" jingle. A small part of the music played during Zaros' formation plays when completed.
References
| Mysteries of the Mahjarrat | |||||
| Rise of Lucien |
| ||||
| Return of Zaros |
| ||||
| Arrav |
| ||||
| Sliske |
| ||||
| Related quests |
| ||||
| Related miniquests |
| ||||
| Lores and Histories |
| ||||
| Quest recollector |
| ||||