| |||||||||||||||||||||||||
| Release date | 2 October 2006 (Update) | ||||||||||||||||||||||||
|---|---|---|---|---|---|---|---|---|---|---|---|---|---|---|---|---|---|---|---|---|---|---|---|---|---|
| Members | Yes | ||||||||||||||||||||||||
| Voice Over | No | ||||||||||||||||||||||||
| Official difficulty | Intermediate | ||||||||||||||||||||||||
| Quest series | Elemental Workshop (#2) | ||||||||||||||||||||||||
| Age | Fifth Age | ||||||||||||||||||||||||
| |||||||||||||||||||||||||
The Elemental Workshop II is the second installment in the Elemental Workshop series. You discover more about Vitruvius and his apprentice, as well as gaining access to another part of the workshop.
Official description
| “ | Among the ancient scrolls and papers held at the Dig Site's Examination Centre, scholars have discovered more references to the mysterious elemental ore. Recently they have uncovered a beaten book detailing long-lost uses for this odd material.
Can you decrypt the code that will lead you to the deeper depths of the Elemental Workshop? Can you get your head around fixing the mind-bending machinery, or will you fry your brain in the attempt? |
” |
Walkthrough
| Start point | |||
|---|---|---|---|
| Member requirement | |||
| Official difficulty | |||
| Official length | Short (20-30 min) | ||
| Requirements | Skill requirements are not boostable unless marked with a [B] for boostable.
| ||
| Items required | Items from the tool belt are not listed unless they do not work or are not automatically added.
| ||
| Enemies to defeat | 2-3 Earth Elementals (level 44) |
Starting Off
To begin, the player needs to go to the Exam Centre, south of the Digsite and east of Varrock. Search the bookcases for a book found in the most north-eastern of the small bookcases, which are located in the south-eastern corner of the building. The player finds a beaten book with a scroll in it as a bookmark. Make sure to keep the book, as you need it later. Read the scroll, then head to Seers' Village.
The slashed book and battered key from Elemental Workshop I are not required at all. Once players have completed Elemental Workshop I, they can enter the wall in Seers' Village without the book or the key by simply clicking on the wall.
The Workshop
In Seers Village, go to the building west of the bank. Click on the odd-looking wall on the north wall to walk through it, and go down the stairs. Once inside, follow the directions on the scroll;
- Down
- 2 N (2 spaces north)
- 2 E (2 spaces east)
- 2 N (2 spaces north)
- 2 E (2 spaces east)
- 10 N (10 spaces north)
- 4 W (4 spaces west)
- Pipe 3
Walking the steps is important. If players simply try to skip to the spot without following the path, they cannot search the machinery for the key.
Search the machinery to find a key. It is also necessary for you to have opened the book and taken out the scroll before you attempt to search the machinery, as it may not let you search the machinery until you have done so.
Mine two or three elemental ores in the north-western room. The ores turn into earth elementals, in which you need to fight them to get the elemental ores to drop. With the your elemental ores and 8 or 12 coal in your inventory, head to the southern-most room with the fire elementals and the furnace. Use the elemental ore on the furnace with 4 coal in your inventory to get an elemental bar. Two ores/bars are needed to complete the quest. However, if you wish to make a Mind Shield as well, you need an additional bar.
Now head back into the middle room and open the hatch.
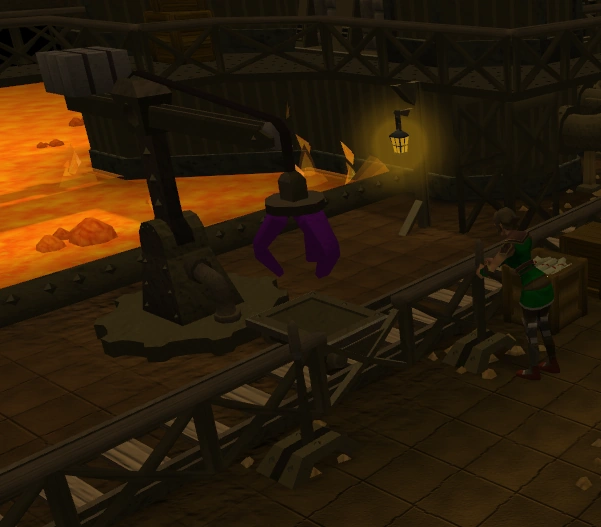
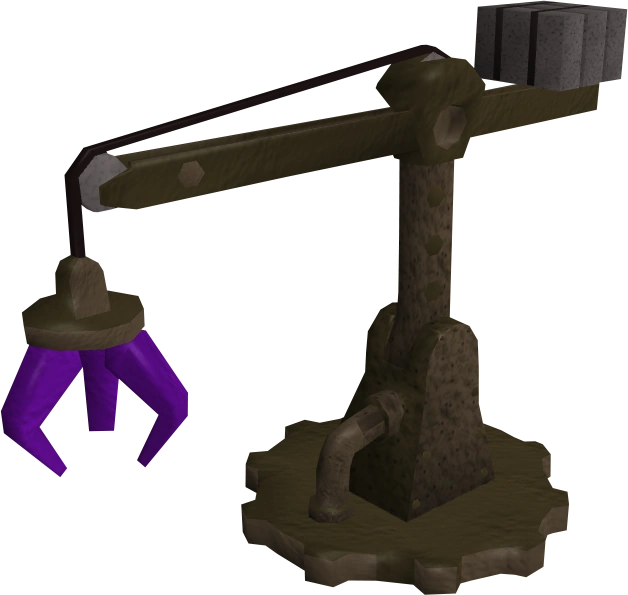
Making repairs
Claw repairs
Map of the room
Once downstairs, players need to fix the machinery. First off, take both schematics, crane and lever schematics, from the schematics crate south of the stairs, near the wall. Players have to take both of them. First, players must use the crane schematic. Go back upstairs and use one of the elemental bars on the workbench, making an elemental crane claw.
Go back down the hatch and lower the claw using the west-most lever on the southern wall. Make the repairs by using the claw in the inventory with the claw on the crane. Once it's repaired, raise it again using the same lever.
Once the claw is repaired, place an elemental bar on the jig cart. Lower the crane again, and it should pick up your bar. Raise the crane again. Now, rotate it by pulling the eastern lever so it can be above the lava. Lower the crane again. This should dip your elemental bar into the lava, making it orange. Raise the crane again, then turn it with the other lever once more so you can place it on the jig cart. Lower the crane, leaving the bar on the jig cart, and then raise it.
Just north of the crane, there is a small area with a lever and a picture of a mine cart. Pull the lever, and the jig cart and bar should move on to the next step, the press.
NOTE: If you use the third lever before the bar is dropped, you have to pull the lever multiple times until it is back under the crane.
Press repairs
(If you use the lever and a message says the system is not pressurized; go to the first workshop and activate both the waterwheel {in the north room} and the bellows {in the east room} by the valves or lever next to each.)
Use the short staircase on the south-west or north-east corners to get to the upper gantry area.
Move to the western side of the room over the press to get to the junction box.
Location of the pipe junction box.
Open the junction box to work on the pipes for the press. To connect the pipe junctions, simply click on one pipe section and then click the section to which you want to connect it to. Players should arrange them as seen in the image.
For the first pipe connect it with the top number 1 (going from left to right) to bottom number 3. For the second pipe connect top number 2 and top number 3. For the third pipe connect bottom number 1 and bottom number 2.
Once they are connected in the proper way, go back downstairs and pull the lever that is just next to three small pipes in the western part. This should flatten the bar. Now, go back to the jig cart controls in the middle-south and pull the lever once. It should now move on in front of a water tank.
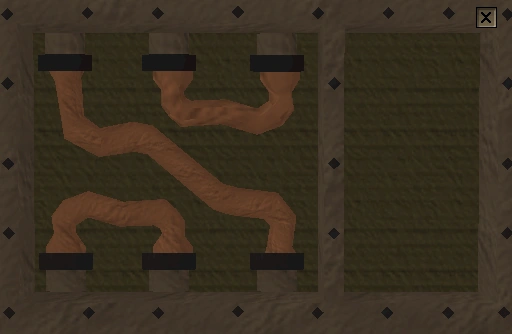

The pipes in the junction box.
Water Tank
The Pipe
For the next two parts, search the crates to find a small cog, medium cog, large cog, and a pipe. The location of these items is random for every player. There are also boxes in the gantry. Go to the northern area of the gantry and replace the broken piece of pipe. The piping must be repaired before proceeding.
Cooling the bar
Go back downstairs. If the cooling chamber in the northern section of the room has water in it, turn the east water valve to open the drain, then turn the east water valve again to close the drain.
Pull the old lever beside the water hatch to open the door. Next, turn the corkscrew lever twice, which moves the jig inside the chamber. Seal the water hatch again by pulling the old lever. To flood the cooling chamber, turn the west water valve once to open it, then turn it again to close it. To empty the cooling chamber, turn the east water valve once to open the drain, then turn it again to close it. Pull the old lever, turn the corkscrew twice, and pull the old lever again to bring the jig back onto the track. The bar should be blue if done correctly.
Pull the jig cart control lever in the middle room and the jig moves along to the next area.
The Cogs

Position of the cogs
Take the three cogs to the machine on the east side. The side of the machine contains three pins. Use the large cog on the pin to the south. The medium cog goes on the lower pin and the small cog goes on the upper pin.
Turn on the fan with the lever to the south of the machine, then turn it back off again. If the machine says "It must be powered somewhere else", head upstairs and make sure the water wheel to the north is rotating. If not, pull the lever near the wheel. Go back to the jig controls and advance the bar back to the south, where a white primed bar can now be picked up.
Finishing Up
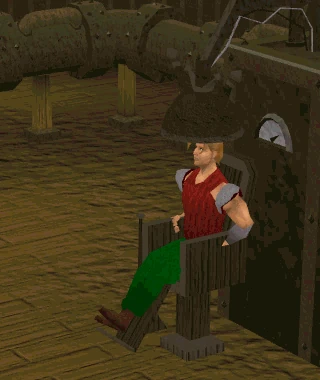
A bit of mind draining
Use the stairway to go down another level, where there are two sets of doors: one with the mind symbol and another with the body symbol. The body door cannot be opened yet, so go into the mind room. Place the primed bar on the extractor gun then operate the extractor hat next to it. You will temporarily lose 20 magic levels, as your skill level is drained to turn the bar into an elemental mind bar. Pick up the bar. Any number of elemental mind bars can be made as long as the magic level does not fall below 20. There is no danger of dying or losing life points, unless no bar is placed under the extractor gun. If your magic level is less than 20, you cannot even sit in the chair. Players can use a stat restore potion here.
Note: If you don't place anything under the gun, and put on the extractor hat, your character receives a shock, depleting 10% of your LP.
Now, simply go back up to the workshop on the top floor, and, with the Beaten Book in inventory, make a Mind Helmet out of the elemental mind bar. You no longer need the Beaten Book to make mind equipment. To make a mind shield repeat this process on another elemental bar.
Congratulations! Quest complete!
Rewards
- 1 quest point
- 7,500
 experience
 - 7,500 experience
- Ability to make Elemental helmets, Mind shields, and Mind helmets
- 2 Treasure Hunter keys and 2 Hearts of Ice
Music unlocked
Required for completing
Completion of Elemental Workshop II is required for the following:
Trivia
- Upon completing this quest one's Adventurer's Log reads: "Documents from the Digsite Exam Centre led me deeper into the elemental workshop, where I learned to infuse elemental metal with the power of the mind."
Elemental Workshop II | |
|---|---|
| Part 2 of the Elemental Workshop quest series | |
| Enemies | |
| Items |
|
| Locations |
|
| Music |
|
| Miscellaneous | Quick guide • Transcript |
|