This article covers the most efficient ways to train the Divination skill.
General overview
The majority of Divination experience comes from harvesting and depositing memories. For optimal experience, harvest memories from the highest level springs you can until your inventory is full and then deposit them into the rift. There are three options when converting: memories to energy, memories to experience, and memories and energy to experience - the latter giving the fastest experience per hour. It is possible to convert memories more quickly by constantly right clicking the energy rift crater and clicking the preferred convert, at the expense of more clicking. Convert memories to experience until you have enough energy to create the boon for the next tier and then convert memories and energy to experience.
Note that once all of the standard memories are converted, you will immediately start converting enriched memories (option 2) and vice versa (option 3).
Boons can be created from the energy that the boon affects, even though boons are listed as requiring the previous type of energy; to create, for example, a boon of glowing energy using glowing energy, click on the glowing energy to open up the weaving interface, select bright energy products from the drop down menu on the top left, and select the option to weave a boon of glowing energy. 500 glowing energy will be consumed to craft your boon.
The amount of energy gained from gathering an inventory of memories is less than that needed to convert a full inventory of memories with an enhanced amount of experience. Consequently to get the best experience per hour, you must purchase energy on the Grand Exchange or from other players.
Experience boosts
- The Diviner's outfit can boost your experience rate by up to 6%.
- Clan avatar boosts your experience gained by 6% if you are within 20 squares with the warden (or yourself) or 3% if on the same world.
- Purchase energy, allowing you to always offer energy and memories
- Play the Guthixian Cache D&D
- Train with a Nightmare Muspah familiar (see below)
- Enrichment Auras from Loyalty Shop, increasing the chance to obtain enriched memories.
Light Creature
The light creature is a level 88 summoning familiar that grants a passive 10% chance at instantly converting memories harvested(at enhanced xp option rates). Using its special move with the enlightenment scroll increases this effect to 50%, in addition to other effects.
Nightmare Muspah
The Nightmare muspah is a level 81 Summoning familiar that can store energies and memories. When harvesting memories from wisps, incoming memories and energy are stored in the Nightmare muspah, rather than the player's inventory, until it is full. The muspah has 32 spaces to hold memories and energy, allowing players to deposit up to 59 memories at one time.
Guthixian Cache
See main article Guthixian Cache for more information.
Experience Insights
Note: Base experience is shown with the use of a boon. Hourly rates assume use of boons and are approximate
| Level | Energy type | Experience (Enriched) | Hourly rates with Nightmare muspah | |||||
|---|---|---|---|---|---|---|---|---|
| Harvest | Memory | Memory and Energy | Keeping Energy | Using Energy | ||||
| Convert to Experience | Convert to Energy | Using Own Energy | Buying Extra Energy | |||||
| 1 | 1 | 3 | 3.7 | 3,900 | 4,100 | 4,400 | ||
| 10 | 2 (4) | 4.4 (8.8) | 5.5 (11) | 7,900 | 1,000 | 8,600 | 9,500 | |
| 20 | 3 (6) | 5.5 (11) | 6.8 (13.6) | 10,500 | 11,300 | 11,600 | ||
| 30 | 4 (8) | 7.7 (15.4) | 9.5 (19) | 12,900 | 13,400 | 15,000 | ||
| 40 | 5 (10) | 13.2 (26.4) | 16.5 (33) | 22,500 | 24,800 | 26,000 | ||
| 50 | 6 (12) | 20.9 (41.8) | 26 (52) | 32,100 | 1,450 | 34,900 | 36,000 | |
| 60 | 7 (14) | 27.5 (55) | 34.4 (68.8) | 45,000 | 2,000 | 47,100 | 50,000 | |
| 70 | 8 (16) | 35.2 (70.4) | 44 (88) | 53,500 | 56,300 | 58,000 | ||
| 75 | 8.5 (17) | 36.8 (73.7) | 45.9 (92) | 50,000 | 60,000 / 63,000 | |||
| 80 | 9 (18) | 38.5 (77) | 48 (96) | 62,000 | 68,000 | 70,000 | ||
| 85 | 10 (20) | 41.8 (83.6) | 52.2 (104.4) | 72,000 | 75,700 | 85,000 | ||
| 90 | 11 (22) | 46.2 (92.4) | 58 (116) | 84,000 | 89,800 | 92,000 | ||
| 95 | 12 (24) | 49.5 (99) | 61.8 (123.6) | 95,000 | 104,300 | 110,000 | ||
Enriched memories and wisps
Every so often, an enriched memory is harvested instead of a standard one. They exist for all tiers starting with tier 2. They grant twice the experience over standard memories for any action, whether it be harvesting or converting.
An enriched wisp spawns on the hour, 20 minutes after the hour, and 40 minutes after the hour (with a small degree of variability). When activated, it will become an enriched spring that guarantees any harvested memory will be an enriched one. It does not, however, guarantee a harvest; i.e. you may find yourself getting the experience for an enriched memory, but not the enriched memory itself. Make sure you have at least one normal memory: being one of the first to harvest from the enriched spring will turn the normal memory into an enriched one and prolong the spring's timer (each player can only prolong the timer once, and it can only be prolonged a maximum of five times).
Boons
Create the boon for the next tier before moving onto the next tier, or your XP per hour will suffer slightly until you gather enough energy to create the boon. Each boon can only be created once; the experience boost they give is permanent.
| Boon | Level | Amount | Energy type[1] | Experience | |
|---|---|---|---|---|---|
| Boon of flickering energy | 10 | 100 | Pale or Flickering | 3 | |
| Boon of bright energy | 20 | 300 | Flickering or Bright | 5 | |
| Boon of glowing energy | 30 | 500 | Bright or Glowing | 7 | |
| Boon of sparkling energy | 40 | 600 | Glowing or Sparkling | 9 | |
| Boon of gleaming energy | 50 | 800 | Sparkling or Gleaming | 11 | |
| Boon of vibrant energy | 60 | 1000 | Gleaming or Vibrant | 13 | |
| Boon of lustrous energy | 70 | 1250 | Vibrant or Lustrous | 15 | |
| Boon of elder energy | 75 | 1375 | Lustrous or Elder | 16 | |
| Boon of brilliant energy | 80 | 1500 | Lustrous, Elder, or Brilliant | 17 | |
| Boon of radiant energy | 85 | 1750 | Brilliant or Radiant | 19 | |
| Boon of luminous energy | 90 | 2000 | Radiant or Luminous | 21 | |
| Boon of incandescent energy | 95 | 2250 | Luminous or Incandescent | 23 | |
- ^ Be wary that the production interface only states the energy required as being the tier below the boon's namesake. For example, the Boon of flickering energy will only state that it can be made with Pale energy. However, it will consume energy from the namesake's tier if necessary; without warning.
Chronicle fragments
Chronicle fragments provide the largest single bunch of experience in divination, along with Hunter experience equal to 10 times your hunter level. Every player has a 1/25 chance of a fragment spawning for them each minute while harvesting memories. After a short period of only being visible to the player, it becomes visible for anyone to catch. They can be offered to either May Stormbrewer or at Guthix's shrine, with the latter providing the largest experience. A maximum of 30 chronicle fragments can be owned by a player, however it is advised to turn them in when 10 have been caught, as their spawn rate decreases at this point.
Gathering fragments is dependent on population, traffic, and time to deposit. Population is the number of people at a given harvest area; this affects the spawning of the fragments. Traffic is the number of those people that actually chase after the desired fragment. The latter is important because only one player may catch a fragment.
What decides if it is worth your time to go after fragments is whether or not you can actually be the first player to catch them. Meaning, if you are fast enough to click a fragment and it is nearby, you have a chance to be the person catching it.
Travel time is also important. For some locations, the time taken to and from the Guthix Shrine is generally worth it considering the experience (assuming you are teleporting with a Sixth-Age circuit). If The World Wakes has not been completed, you can still deposit chronicle fragments with May Stormbrewer. You can use your Saradominist or Zamorakian token from the Battle of Lumbridge to teleport to May Stormbrewer, however you can only teleport here 10 times a day.
Tuska
The Tuska event features an island that trains Divination scaling to your level, as well as Agility and Dungeoneering. Enter the event, and if you don't get the Divination island (four islands and some crystals), press the home teleport to go back to Tuska's back and re-enter. By doing this you can reset until you get the Divination island and spend five minutes there each time. The experience rate is dependent on your level but is generally considered the best in the game until level 90, where you should move on to Luminous Wisps as detailed below.
Levelling up
1-10
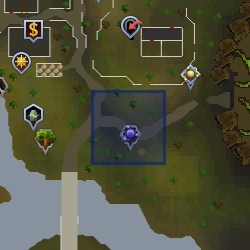
During the early levels, your only option is to train on pale wisps outside the divination camp. This is the only location where one will not encounter enriched wisps. Turning chronicle fragments in to May Stormbrewer may be beneficial depending on your interest in hunter experience as she is in the immediate vicinity of the camp. Turning fragments in at the Guthix Altar consumes too much time. Be sure to have at least 100 pale energy for yourself to create the Boon of flickering energy.
10-20
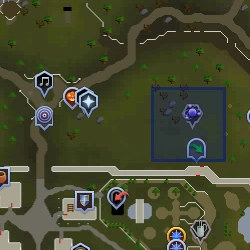
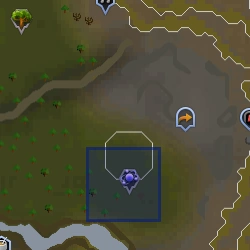
At level 10, you should move on to the location north of Falador. The fastest method of travel is either using Falador teleport or the Falador lodestone teleport to reach Falador and then running to the spot. Another method of transportation to this location is teleporting to Gamers' Grotto with a Games Necklace. This is also the first location where you will encounter enriched wisps and springs. They provide double experience for harvesting and converting to experience, and double energy when converting to energy. It is best to only convert the enriched memories to energy here; however, if you decide to do otherwise, be sure to at least save 300 flickering energy for a boon of bright energy.
20-30
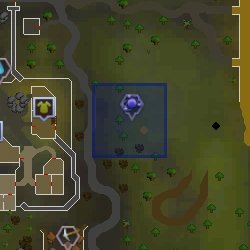
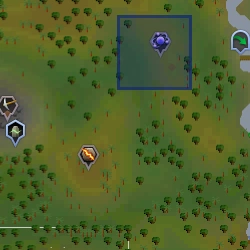
The next location is located southwest of the Digsite. Efficient methods of travelling here include a Digsite pendant, Senntisten Teleport from the Ancient Magicks spellbook, and a Gnome glider to Lemanto Andra. Even with the pendant, it is not worth the time to deposit chronicle fragments. Be sure to save 500 bright energy for the boon of glowing energy.
30-40
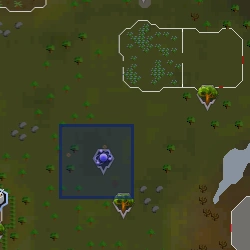
The next location is just south of Seers' Village. The fastest method of travel to here is with the Seer's Village Lodestone. Depositing fragments may or may not be worth it, depending on your exact level, but travel times will be fairly quick. Be sure to save 600 glowing energy for the boon of sparkling energy.
40-50
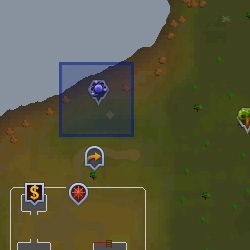
This location is right outside the Fremennik Slayer Dungeon. Fairy ring AJR is the nearest renewable transportation, two seconds away. Unlike with previous boons, the boon of gleaming energy is cheaper to make with gleaming energy itself than with sparkling energy, so you may want to buy 800 of those instead of using up sparkling energy. It may be worth the time to deposit fragments at the Guthix Altar, provided that the player can use fairy rings.
50-60
The next location is just northeast of the Nature Altar; your best means of travel is with either the Wicked hood's daily teleports or a Nature altar tablet. If neither is available, the Tai Bwo Wannai Teleport, Karamja lodestone or the fairy ring code CKR are your next best options. If you have a surplus of Nature altar tablets, then depositing your fragments at the Guthix Altar is worth the time, otherwise it isn't. At level 55, you will begin harvesting 2 energies from a wisp at a time. Be sure to save 1,000 gleaming energy for the boon of vibrant energy.
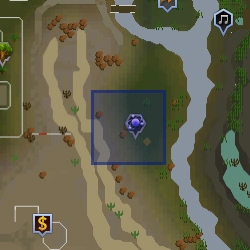
60-70
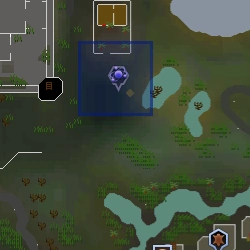
The next location is immediately north of Mobilising Armies. Using the Mobilising Armies Teleport either in your spellbook or with the ring of duelling is the fastest means of transportation. You can also travel by the spirit tree system. Capturing chronicle fragments is more worth it here than any other location as the player can be at the altar and back in 20 seconds or less. Be sure to save 1,250 vibrant energy for the boon of lustrous energy.
An alternative training method at this point is to do the Mahjarrat Memories miniquest (after Ritual of the Mahjarrat and Blood Runs Deep), because the quest requires you gather 15 sets of 500 Vibrant memories, giving 25000 Divination experience per set, which amounts to 50 experience per memory, compared to the default 27.5. It can also be done with higher levels of memories, but is the most efficient at this point. Finishing the miniquest also gives 150,000 bonus Divination experience.
At level 60, the experience per hour averages 25,000. At level 65, the hourly experience averages 30,000.
70-75 or 70-80
The next location is just east of the Slayer Tower. The fastest means of travel is with the ring of slaying's teleport; if not, use the Canifis lodestone teleport and run west. If you have a surplus of rings of slaying, then depositing fragments will be worth the travel time. At level 75, you will begin harvesting 3 energies from a wisp at a time, which means more xp, or more profit depending on what you do with the energy. Be sure to save 1,375 lustrous energy for the boon of elder energy (only if you have the requirements to do Fate of the Gods) , and 1,500 for the boon of brilliant energy.
75-80

The next location is in the Elder Halls, and requires the completion of Fate of the Gods. The fastest means of travel is by unlocking the World Gate option at Guthix's Shrine, then using the last option on the World Gate to teleport to the Elder Halls. It is worth the time to capture the fragments due to the ease of going back and forth from the shrine to this colony. Note that enriched wisps spawn on the corridors rather than near the crater, and players may optionally harvest them as it may affect xp rates per hour.
Completion of Fate of the Gods will also allow you to hunt the four Elder Chronicles, which will give 50,000 each for a total of 200,000 xp. Combined with the experience reward from the quest, this will bring you to a minimum of level 77.
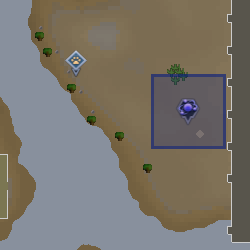
80-85
The next location is just east of the Mage Training Arena. The fastest means of travel is using a TokKul-Zo to teleport to the Fight Caves, running north to the fairy ring, and then using fairy ring code BIP to teleport to the Polypore Dungeon and running south.
An alternative travel route is to use a Ring of Slaying to travel to the Fremennik Slayer Dungeon, travel a short distance west to the fairy ring, and use the same fairy ring code to teleport to the Polypore Dungeon. Offering fragments at the Altar of Guthix may or may not be worth your time. Be sure to save 1,750 brilliant energy to make the boon of radiant energy.
The time taken here should actually be shorter than at the lustrous wisps, as 70-80 requires almost as much experience as 80-85 but the experience rate of brilliant wisps is notably higher.
85-90
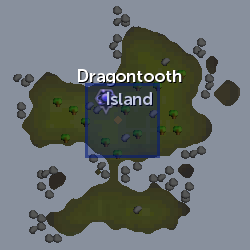
The next location is on Dragontooth Island. The fastest means of travel is using an ectophial then running to the Ghost captain in the Port Phasmatys docks. You may or may not want the next boon depending on your intentions (covered below), but if you do, be sure to save 2,000 radiant energy for the boon of luminous energy.
While it is possible to bank the ectophial at the bank near the ghost captain without a ghostspeak amulet, the amulet is required to travel to Dragontooth Island, even with the right click Travel option, so wear it unless you have completed the hard Morytania Tasks.
It is also possible to use the Hoardstalker ring to teleport to the entrance to the Celestial Dragon dungeon, which is also on the island.
90-95
The next location is south of Sophanem, in the deepest part of the Kharidian Desert. After an update, luminous wisps now spawn closer to the energy rift, but it might still be far enough for players to consider staying at the radiant wisps.
As long as special attention is given to minimise running times between wisps/springs and the rift, the experience per hour rate from training here can exceed that from radiant wisps on Dragontooth Island. Strategies to ensure a higher experience rate with luminous wisps include making good use out of the Surge and Escape abilities, and continuously planning the next, closest wisp to harvest. Players harvesting memories close to the rift may find it appropriate to convert memories from a partially filled inventory when no wisps are nearby. Those who prefer a simplified training method without paying special attention may find a higher hourly experience rate by staying on Dragontooth Island until level 95.
The Sceptre of the gods and its lesser counterpart Pharaoh's sceptre can both teleport players to the agility pyramid near Sophanem, but they are either expensive or hard to get, and require periodic recharging. The more readily available Magic carpets can be taken from the Shantay Pass to Pollnivneach, and then to Sophanem, but are more time-consuming. If you have at least one 99 and access to Prifddinas, you can tune a skill portal in the Max Guild to teleport you directly to the colony.
Desert heat is in effect here. Waterskins are impractical as they take up inventory space and there are no suitable cacti to refill them, and Humidify would be cost inefficient.
The enchanted water tiara provides protection at the cost of 3 water runes per drink. A tome of frost allows players to stay indefinitely by reducing the damage to the point natural life points regeneration exceeds it. Desert clothing is unneeded if wielding a tome of frost. Alternatively the enhanced excalibur can be used due to its healing special, equipped as an off-hand weapon makes it an ideal item to use. Another option is to wear Desert clothing and a Regen bracelet as the increased regeneration mostly exceeds the Desert heat damage, this however limits your ability to use the Diviner's outfit.
Remember to gather 2,250 luminous energy for the boon of incandescent energy.
95-99

The final location is just south of the Poison Waste. There are no real efficient means of travel, but the best options are:
- Use the teleport portal in the Elf City.
- Use a spirit tree to teleport to the Mountains east of Poison Waste (Teleport 9 in the spirit tree interface) (Using the ring of dueling to Mobilising Armies gets you next to a spirit tree), run south to the Agility Shortcut (requires crossbow and mithril grapple). Once across river, run west along the bridge.
- Use the TokKul-zo or a Ring of slaying to get to a fairy ring and using fairy ring code bkp to arrive a short trek from the swamp.
- Use a ring of duelling to teleport to Castle Wars and run south then west.
An efficient way of training here is as follows:
- Arrive with a Nightmare Muspah pouch and Tokkul-zo. Summon the Nightmare Muspah and train until its timer runs out, collecting all Chronicle Fragments
- Once its timer has ran out, teleport to a bank with the Tokkul-Zo and withdraw your Sixth-Age circuit
- Teleport to Guthix's shrine using the Sixth-Age circuit and offer your Chronicle Fragments
- Teleport to the fight caves using the Tokkul-Zo
- Deposit your Sixth-Age Circuit and withdraw a Nightmare Muspah pouch
- Use the fairy ring north of the bank to teleport to Zanaris
- Recharge your summoning points at the small obelisk just north of the fairy ring
- Return to the fairy ring and teleport to b-k-p
- Return to the divination spot
Using this method you can usually bank within three minutes. As the Nightmare Muspah has a timer of 57 minutes, this means that your experience rate per hour is the experience gained at the divination spot plus the experience gained from offering the chronicle fragments. You will usually obtain between 6-10 chronicle fragments per Nightmare Muspah pouch.
| Free-to-play guides | |
| Members' guides |
|