m (details) Tags: mobileedit sourceedit |
(revert vandalism) |
||
| (168 intermediate revisions by 94 users not shown) | |||
| Line 2: | Line 2: | ||
{{Infobox Quest |
{{Infobox Quest |
||
|name = Dishonour among Thieves |
|name = Dishonour among Thieves |
||
| − | |image = [[File:Dishonour among Thieves.png| |
+ | |image = [[File:Dishonour among Thieves.png|200px]] |
|aka = Zamorak's Heist, DAT |
|aka = Zamorak's Heist, DAT |
||
|release = [[23 February]] [[2015]] |
|release = [[23 February]] [[2015]] |
||
|update = Dishonour among Thieves |
|update = Dishonour among Thieves |
||
|members = Yes |
|members = Yes |
||
| − | |series = [[God series]] |
+ | |series = [[God quest series|God]]<br />[[Sliske quest series|Sliske]] |
|difficulty = Intermediate |
|difficulty = Intermediate |
||
|voice = No |
|voice = No |
||
| Line 15: | Line 15: | ||
|age = [[Sixth Age]] |
|age = [[Sixth Age]] |
||
}} |
}} |
||
| − | '''Dishonour among Thieves''' is an intermediate quest in the [[ |
+ | '''Dishonour among Thieves''' is an intermediate quest in the [[God series]]. It is a sequel to [[Missing, Presumed Death]], and features [[Zamorak]] gathering his allies to stage a heist to steal the [[Stone of Jas]] from [[Sliske]] following his downfall at the [[Battle of Lumbridge]]. |
| − | In September [[2014]], it won a [[Power to the Players]] poll against Elemental Workshop V, a pirate quest and a spellcrafting quest.{{CitePoll|url = http://services.runescape.com/m=poll/archive.ws?year=2014&id=1058|poll = Which quest?|question = no|polldate = 5 September 2014}} A few weeks later, another poll was released to determine three of the members of Zamorak's team. The options were [[Lord Daquarius]], [[General Khazard]], [[Nomad]], [[Movario]], [[Malak]], [[Scorpius]], [[Surok]] and [[Moldark]], with the first three winning.{{CitePoll|url = http://services.runescape.com/m=poll/a=1/c=8xCTR5ZDYr4/archive.ws?year=2014&id=1108|poll = Zamorak Heist - Team Members|question = no|polldate = 21 October 2014 |
+ | In September [[2014]], it won a [[Power to the Players]] poll against Elemental Workshop V, a pirate quest, and a spellcrafting quest.{{CitePoll|url = http://services.runescape.com/m=poll/archive.ws?year=2014&id=1058|poll = Which quest?|question = no|polldate = 5 September 2014}} A few weeks later, another poll was released to determine three of the members of Zamorak's team. The options were [[Lord Daquarius]], [[General Khazard]], [[Nomad]], [[Movario]], [[Malak]], [[Scorpius]], [[Surok]], and [[Moldark]], with the first three winning.{{CitePoll|url = http://services.runescape.com/m=poll/a=1/c=8xCTR5ZDYr4/archive.ws?year=2014&id=1108|poll = Zamorak Heist - Team Members|question = no|polldate = 21 October 2014}} |
| − | Although [[Missing, Presumed Death]] and [[Hazeel Cult]] are the only quest requirements, it is highly recommended to have completed [[Ritual of the Mahjarrat]], [[Nomad's Requiem]] and [[The World Wakes]] as well as the [[Nadir]] [[Fremennik Sagas|saga]] for full storyline comprehension. Dialogue |
+ | Although [[Missing, Presumed Death]] and [[Hazeel Cult]] are the only quest requirements, it is highly recommended to have completed [[Ritual of the Mahjarrat]], [[Nomad's Requiem]], and [[The World Wakes]] as well as the [[Nadir]] [[Fremennik Sagas|saga]] for full storyline comprehension. Dialogue remains the same whether or not the quests have been completed. |
| − | Additionally, reading the three ''RuneScape'' novels |
+ | Additionally, reading the three ''RuneScape'' novels (''[[Betrayal at Falador]]'', ''[[Return to Canifis]]'', and ''[[Legacy of Blood]]'') may help the player understand the background of [[Jerrod]] the werewolf. |
==Official description== |
==Official description== |
||
| − | {{ |
+ | {{Quote|Zamorak needs your help to steal the Stone of Jas, and he has sent his general Moia to find you. You'll need to put together an elite team of Zamorakians with different skills and abilities, and lead them through fiendish traps and puzzles laid down by the slippery Sliske. However it's not all plain sailing as some of the team members notoriously don't get along so it'll be down to you to make the team work together and steal the stone without Sliske noticing.}} |
==Walkthrough== |
==Walkthrough== |
||
| Line 31: | Line 31: | ||
|start = Speak to [[Moia]] in the [[Empyrean Citadel]] |
|start = Speak to [[Moia]] in the [[Empyrean Citadel]] |
||
|difficulty = Intermediate |
|difficulty = Intermediate |
||
| − | |length = Long |
+ | |length = Long |
|members = Yes |
|members = Yes |
||
| − | |requirements = |
+ | |requirements = |
| − | {{Questreq|Dishonour |
+ | {{Questreq|Dishonour among Thieves}} |
{{skillreq|Agility|30}} |
{{skillreq|Agility|30}} |
||
{{skillreq|Thieving|30}} |
{{skillreq|Thieving|30}} |
||
| − | *Access to [[Morytania |
+ | * Access to [[Morytania]] |
| + | |items = |
||
| − | '''Recommended''' |
||
| ⚫ | |||
| ⚫ | |||
| + | |recommended = |
||
| − | *[[Drakan's medallion]] for teleporting to Barrows |
||
| ⚫ | |||
| ⚫ | |||
| + | * [[Ardougne cloak]] of any kind for teleporting south of [[Ardougne]] |
||
| − | |kills = |
+ | |kills = |
| − | *6 [[Armoured zombie]]s (level 84) |
||
| − | *[[ |
+ | * 6 [[Armoured zombie]]s (level 84) |
| + | * [[Foreshadow]] (level 84 but stats scale to the player's level) |
||
| ⚫ | |||
| − | *[[ |
+ | * [[Moia apparition]] |
| − | *[[ |
+ | * [[Jerrod apparition]] |
| − | *[[ |
+ | * [[General Khazard apparition]] |
| − | *[[ |
+ | * [[Enakhra apparition]] |
| − | *[[ |
+ | * [[Hazeel apparition]] |
| − | *[[ |
+ | * [[Zemouregal apparition]] |
| − | *[[ |
+ | * [[Lord Daquarius apparition]] |
| ⚫ | |||
}} |
}} |
||
===Return to the Empyrean Citadel=== |
===Return to the Empyrean Citadel=== |
||
| + | [[File:Moia (The Battle of Lumbridge) chathead.png|left]] |
||
| ⚫ | |||
| + | [[File:Sliske appears.png|thumb|Sliske appears in the Shadow Realm.]] |
||
| ⚫ | Players can begin the quest by talking to [[Moia]] in the [[Empyrean Citadel]]. Moia will hand the player a [[Communication device]] which can be used to contact Moia or to teleport to [[Zamorak's hideout]] which is beneath Daemonheim. After talking to Moia, you will be pulled into the Shadow Realm by Sliske. He will ask what your plan is with Zamorak's quest, before sending you back to the normal realm. |
||
| + | |||
| + | The only way to get to the citadel is to use the [[Invitation box]] which is obtained during Missing, Presumed Death. |
||
| − | + | If you happen to log out or disconnect at all, any progress you've made in the quest will be kept. |
|
| + | {{clear|left}} |
||
| − | ===Gathering Zamorak's |
+ | ===Gathering Zamorak's chosen=== |
| − | [[File:Meeting with Zamorak.png|thumb|Zamorak, Moia and Bilrach in Daemonheim.]] |
+ | [[File:Meeting with Zamorak.png|thumb|Zamorak, Moia, and Bilrach in Daemonheim.]] |
| + | [[File:Zamorak chathead.png|left]] |
||
| − | Teleport to Zamorak's hideout by accessing the communication device to meet with [[Zamorak]], [[Bilrach]] and Moia (if you don't talk to Zamorak first, some of the followers will not be in their locations). They ask the player to gather some of Zamorak's most powerful followers to help with the heist; [[Hazeel]], [[Nomad]], [[General Khazard]], [[Lord Daquarius]], [[Zemouregal]] and [[Enakhra]]. |
+ | Teleport to Zamorak's hideout by accessing the communication device to meet with [[Zamorak]], [[Bilrach]], and Moia (if you don't talk to Zamorak first, some of the followers will not be in their locations). They ask the player to gather some of Zamorak's most powerful followers to help with the heist; [[Hazeel]], [[Nomad]], [[General Khazard]], [[Lord Daquarius]], [[Zemouregal]], and [[Enakhra]]. |
| − | You can search the chest to the west to receive {{ |
+ | You can search the chest to the west to receive {{NoCoins|5000|c}}, 250 dungeoneering tokens, and either 3 cut sapphires or emeralds (noted). Depending on your skill levels, the other chests can be open and searched. |
The order in which you locate these chosen ones does not matter. |
The order in which you locate these chosen ones does not matter. |
||
| + | {{Clear|left}} |
||
====Hazeel & Jerrod==== |
====Hazeel & Jerrod==== |
||
| + | [[File:Hazeel returns.png|thumb|left|Hazeel tasks you with releasing Jerrod.]] |
||
| − | Hazeel can be found in his cultist hideout south of the [[Ardougne Zoo]] and east of the [[Clock Tower (building)|Clock Tower]], enter the dungeon and take the raft to the hideout and speak with Hazeel. He will agree to join Zamorak's team if the player will free a werewolf being held in a mansion in [[East Ardougne]]. Go to the [[Handelmort Mansion]] just to the west of the marketplace and enter the trapdoor at the back of the mansion. Speak with [[Jerrod]] who will tell you why he is being held as a prisoner and after a discussion will ask you to search the dead butler for a [[Cell key (Dishonour among Thieves)|cell key]] so you can release him. Once you do he will agree to join the team and will remark |
+ | Hazeel can be found in his cultist hideout south of the [[Ardougne Zoo]] and east of the [[Clock Tower (building)|Clock Tower]], enter the dungeon, and take the raft to the hideout and speak with Hazeel. He will agree to join Zamorak's team if the player will free a werewolf being held in a mansion in [[East Ardougne]]. Go to the [[Handelmort Mansion]] just to the west of the marketplace and enter the trapdoor at the back of the mansion. Speak with [[Jerrod]], who will tell you why he is being held as a prisoner and after a discussion will ask you to search the dead butler by the ladder for a [[Cell key (Dishonour among Thieves)|cell key]] so you can release him. Once you do, he will agree to join the team and will remark that he doesn't eat his associates. |
| − | You can search the chest by the dead butler to receive {{ |
+ | You can search the chest by the dead butler to receive {{NoCoins|5000|c}}, 3 cut sapphires (noted), and 250 dungeoneering tokens. |
====Nomad==== |
====Nomad==== |
||
| − | [[File:Nomad confronts Death.png|thumb|Death attempts to kill Nomad.|right]] |
+ | [[File:Nomad confronts Death.png|thumb||left|Death attempts to kill Nomad.|right]] |
Nomad can be found in [[Death's office]] just north of the Draynor lodestone. Upon entering the office you will join a conversation with Death who is attempting to reap Nomad's soul in recompense for all the souls that Nomad stole. He will agree to let Nomad go because he owes the player a favour for rescuing him during the events of [[Missing, Presumed Death]]. |
Nomad can be found in [[Death's office]] just north of the Draynor lodestone. Upon entering the office you will join a conversation with Death who is attempting to reap Nomad's soul in recompense for all the souls that Nomad stole. He will agree to let Nomad go because he owes the player a favour for rescuing him during the events of [[Missing, Presumed Death]]. |
||
| + | {{Clear|left}} |
||
====General Khazard==== |
====General Khazard==== |
||
| − | Khazard can be found in the [[Ruins of Uzer]] by entering the stairs near the clay golem. Before he will join the team, he asks the player to search the Shadow Realm for his mother, [[Palkeera]], who he believes fought there alongside his father. Agree to enter the Shadow Realm and search the body of Palkeera for a [[bloody journal]]. Read the journal and you will return to the normal realm when you close it. Talk to Khazard and |
+ | Khazard can be found in the [[Ruins of Uzer]] by entering the stairs near the clay golem. Before he will join the team, he asks the player to search the Shadow Realm for his mother, [[Palkeera]], who he believes fought there alongside his father. Agree to enter the Shadow Realm and search the body of Palkeera to the north for a [[bloody journal]]. Read the journal and you will return to the normal realm when you close it. Talk to Khazard and he will leave for Daemonheim. |
| − | You can search the chest by General Khazard for {{ |
+ | You can search the chest by General Khazard for {{NoCoins|5000|c}}, 3 cut sapphires (noted), and 250 dungeoneering tokens. |
====Lord Daquarius==== |
====Lord Daquarius==== |
||
| + | [[File:Black Knights scheming.png|thumb||left|Some knights rebelling against Daquarius.]] |
||
| − | Daquarius can be found in the [[Black Knights' Base]] in [[Taverley Dungeon]]. Speak with Daquarius, who will ask you to help him discover who is behind the spread of "Saradominist drivel", and a suspected assassination attempt. |
+ | Daquarius can be found in the [[Black Knights' Base]] in [[Taverley Dungeon]]. Speak with Daquarius, who will ask you to help him discover who is behind the spread of "Saradominist drivel", and a suspected assassination attempt. Search the chest in the north-western room to find a [[Poison (Dishonour among Thieves)|bottle of poison]]. Go to the north-eastern room and speak with any of the black knights there. Finally, "discuss" the issue with the [[Preaching Black Knight]] east of Lord Daquarius in the centre of the room (either choice will work). Bring the poison and note back to Daquarius, who, after remarking that he knows who is behind it and that he will be taken care of, agrees to join the team. |
| − | You can search the chest in the |
+ | You can search the chest in the south-western room with Lord Daquarius for {{NoCoins|5000|c}}, 3 cut emeralds (noted), and 250 dungeoneering tokens. |
| + | {{Clear|left}} |
||
====Zemouregal & Enakhra==== |
====Zemouregal & Enakhra==== |
||
| + | [[File:Killing armoured zombies (DaT).png|thumb|left|Fighting Zemouregal's zombies.]] |
||
| ⚫ | Zemouregal and Enakhra can be found at [[Zemouregal's fortress]]. The best route to get here is to teleport to Moia at Zamorak's |
||
| + | [[File:Enakhra & Zemouregal location (DaT).png|thumb|right|Location of Zemouregal and Enakhra]] |
||
| ⚫ | Zemouregal and Enakhra can be found at [[Zemouregal's fortress]]. The best route to get here is to teleport to Moia at [[Zamorak's hideout]] via Moia's [[communication device]]. Speak to her and she will teleport you to the basement inside the fortress. Once there, you will have to kill several armoured zombies, then go up the stairs (if you leave at this point after killing the zombies, they will not respawn) and talk with Zemouregal and Enakhra; they will agree to join the team. There is currently a glitch that keeps you from using the stairs if you have LootShare on or are in a group. If this happens, leave your group, come back to the castle, and kill the armoured zombies again. After they teleport away to take their place at Zamorak's side, you can search the chest in the room for {{NoCoins|5000|c}}, 3 cut emeralds (noted), and 250 dungeoneering tokens. In the event of your death your grave will be near the stairs by the rewards trader in Daemonheim; use your [[Ring of kinship]] to return to your grave. |
||
| − | ===Preparing for the |
+ | ===Preparing for the heist=== |
| − | [[File:Zamorakian gathering.png|thumb|The Zamorakians gather at Daemonheim |
+ | [[File:Zamorakian gathering.png|thumb|The Zamorakians gather at Daemonheim and Viggora reveals where Sliske is keeping the Stone of Jas.]] |
| − | Once all parties have agreed to join the team, [[Moia]] will contact the player and offer them a teleport back to the hideout |
+ | Once all parties have agreed to join the team, [[Moia]] will contact the player and offer them a teleport back to the hideout. Upon arrival, you are joined by General Khazard, Hazeel, Jerrod, Nomad, Lord Daquarius, Enakhra, Zemouregal, Moia, Bilrach, and of course, Zamorak. At this point you may continue the quest or talk with people. Once you continue, a discussion will start and Zamorak will offer everyone places by his side after he has the Stone of Jas. Shortly into the conversation, Moia will report that [[Viggora]] has arrived; Zamorak will ask Khazard to open a window to the Shadow Realm so that everyone may see Viggora; he will appear and reports of a secret lair containing the Stone of Jas, hidden near the Barrows in the Shadow Realm, but is heavily guarded. |
| − | + | Zemouregal and Nomad insist they should be the one to retrieve the stone, but Zamorak interrupts and demands everyone to follow his orders. He begins to outline his plan: The player and Jerrod will infiltrate the perimeter and dispatch the guards, Daquarius is to read the runes and unlock the vault, Enakhra and Nomad are to deal with Sliske's magical traps, Khazard and Hazeel are to deal with Sliske's mastery of the Shadow Realm, and Zemouregal is to deal with Sliske's undead horde. After Zamorak tells you of his plan, Moia tells everyone to meet south of the Barrows in Morytania at Sliske's lair. |
|
| − | While still in Zamorak's hideout, you can search the chest by the western door for {{ |
+ | While still in Zamorak's hideout, you can search the chest by the western door for {{NoCoins|5000|c}}, 3 sapphires (noted), and 250 dungeoneering tokens, if you haven't yet. |
| − | ===The |
+ | ===The great stone robbery=== |
| − | ====The |
+ | ====The maze==== |
| − | The entrance to Sliske's lair is located just south-east of the Barrows; you may reach it by |
+ | The entrance to [[Sliske's lair]] is located just south-east of the Barrows; you may reach it by running from northern Morytania. |
| − | Just before you enter, you can search the chest to the north for {{ |
+ | Just before you enter, you can search the chest to the north for {{NoCoins|5000|c}}, 3 cut rubies (noted), and 250 dungeoneering tokens. |
| − | Upon entering, there will be a series of passageways with markings above the |
+ | You must dismiss your follower before entering. Upon entering, there will be a series of passageways with markings above the cave openings or on the floor. In every passageway will be a signpost with a poem written on it, giving the clues to which cave openings to enter. |
| + | If you are uncertain of the colour, shape or number; right click and examine. |
||
| ⚫ | |||
| ⚫ | |||
| − | #Blue |
||
| + | |||
| ⚫ | |||
| + | # Blue (blue paint above the cave opening) |
||
| − | #Green |
||
| ⚫ | |||
| − | #Triangle |
||
| + | # A smiling green face (northernmost cave opening) |
||
| − | #Red |
||
| + | # Triangle (north-eastern most cave opening) |
||
| ⚫ | |||
| + | # Red (red paint above the cave opening) |
||
| ⚫ | |||
| ⚫ | |||
| ⚫ | |||
| + | |||
| + | If you log out during the maze or the dialogue following you will be returned outside and will have to repeat the maze. |
||
====Sneaking past the guards==== |
====Sneaking past the guards==== |
||
[[File:Infiltrating Sliske's lair.png|thumb|Evading the guards in Sliske's lair.]] |
[[File:Infiltrating Sliske's lair.png|thumb|Evading the guards in Sliske's lair.]] |
||
| − | Once you have made it through the tunnels, you and Jerrod must take care of the guards. You will enter the next room after a short discussion and must use the given movement options to sneak past the guards and traps to clear the room. |
+ | Once you have made it through the tunnels, you and Jerrod must take care of the guards in a sorceress's garden-esque puzzle. You will enter the next room after a short discussion and must use the given movement options to sneak past the guards and traps to clear the room. |
| − | You |
+ | You cannot run in these rooms. Additionally, Jerrod is needed for each section. |
| − | + | In the event that Jerrod does not follow you nor appear for you in the next sections, simply log out and log back in. Any previous progress will be saved. |
|
=====Room 1===== |
=====Room 1===== |
||
| − | Wait for the guard to face away from you and forward dive past him to assassinate him. Then wait for the masks to come on 3 times. You then have time to pass the beams, get to the dead spot in the centre of the room, and pull the lever on the south wall. After you pull the lever, Jerrod will kill the second guard and you will have a second lever on the west wall. |
+ | Wait for the guard to face away from you and forward dive past him to assassinate him. Then wait for the masks to come on 3 times. You then have time to pass the beams, get to the dead spot in the centre of the room, and pull the lever on the south wall. After you pull the lever, Jerrod will kill the second guard and you will have a second lever on the far west wall. Wait for beam to flash 3 times, then once again you have time to get by the beam and pull the lever, which will deactivate the masks and open the next room. |
=====Room 2===== |
=====Room 2===== |
||
| − | The first hallway on your right has a dark cloud which |
+ | The first hallway on your right has a dark cloud which will send you to the room entrance. Forward dive up the hallway following the cloud to the first doorway (there are also niches in the walls you can hide in). Assassinate the guard as he walks past and pull the lever, Jerrod will then kill the next guard. Follow Jerrod and forward dive past the guard and assassinate him (or you can assassinate him at the corner). Proceed up the hallway past the last two masks to the lever, and enter the next room. |
=====Room 3===== |
=====Room 3===== |
||
| + | Switches and guards will have numbers mentioned that correspond to the map image on the right. Mask flashes do not pause in this room. |
||
| − | Forward dive past the guard to the east and assassinate him, continue to the north and dispatch the next guard, stand in the doorway and wait for the guard in the hallway to come to you and dispatch him (watch out for the shadow on the floor). Continue across the hallway and dispatch the guard walking around the pillar. Go North to the lever and dive past the guard to dispatch him and pull the lever. Get yourself caught to return to Jerrod and go back east and then down the narrow hallway and stop before entering the main hallway, wait for the shadow to go to the far end and dive into the hallway, enter the room across from you and assassinate the guard. Pull the lever in the south-east corner (get caught and walk east). The next lever is in the north-east corner. Quickly dodge past the shadow into the doorway and assassinate the guard in the north-east room. Now stand in the doorway again and go behind the shadow and pull the lever. Jerrod will kill the last guard by the doors. Pull the lever by the door before the shadow returns. |
||
| ⚫ | |||
| + | * Forward dive past the guard (1) to the east and assassinate him. |
||
| + | * Ignore lever (1), continue north and dispatch the next guard (2). |
||
| + | * Stand in the doorway to the main hallway and wait for the guard (3) to come to you and dispatch him (watch for the shadow on the floor). |
||
| + | * Continue across the hallway and dispatch the guard walking around the pillar (4). |
||
| + | * Go north to the lever (2) and pull it. Rocks will fall, distracting the guard (5). Dispatch him and pull the lever (3). |
||
| + | * Return to Jerrod. You can get caught to get back quickly. |
||
| + | * Go back east and then down the narrow hallway and stop before entering the main hallway, wait for the shadow to go to the far end and cross the main hallway, enter the room across from you and assassinate the guard (6). |
||
| + | * Return to the south-east corner and pull the lever (1). |
||
| + | [[File:Jerrod kills.png|right|thumb|Jerrod kills a wight.]] |
||
| + | * The next lever is in the north-east corner. Head north and watch the shadow in the north-east corner (near lever 4). Stand in the south-east corner of the hallway where the shadow is patrolling; when the shadow moves away, move one space north, click the option to turn 45 degrees left, then forward dive. Assassinate the guard (7). |
||
| + | * Go behind the shadow and pull the lever (4). |
||
| + | * Jerrod will kill the last guard (near lever 5) by the doors. Pull the final lever by the door, watching for the main hallway shadow. |
||
| − | ====Unlocking the |
+ | ====Unlocking the vault==== |
[[File:Opening the doors.png|thumb|The team works together to unlock the doors to the Stone of Jas.]] |
[[File:Opening the doors.png|thumb|The team works together to unlock the doors to the Stone of Jas.]] |
||
This part of the quest is a little tricky, as it requires some degree of attention. You are required to multi-task and keep track of various elements in a short amount of time. While you are not timed, some events will timeout. The order in which you complete these events does not matter, but be mindful to keep a steady pace and be aware of which steps were recently completed. |
This part of the quest is a little tricky, as it requires some degree of attention. You are required to multi-task and keep track of various elements in a short amount of time. While you are not timed, some events will timeout. The order in which you complete these events does not matter, but be mindful to keep a steady pace and be aware of which steps were recently completed. |
||
| − | Upon entering the vault, you are greeted by two of Sliske's masks, |
+ | Upon entering the vault, you are greeted by two of Sliske's masks, Shadow and Light. After a short conversation with them, Moia will have you use Jerrod to find the guards in order to view their memories of unlocking the door. Speak with Jerrod to switch to his view, and use the controls to find sets of tracks (they glow green) by turning, then follow the tracks to find the guard. You must then talk to Moia to read the guard's mind. |
| − | + | Locate the correct memory by either listening to a light tinging sound or by looking at the speed of the blinking/pulsating area on the memory map. The memory meter does not have to be filled all the way up for it to count. Half-way also counts as a memory. Players have 3 attempts at getting a correct memory, but there is no penalty for failure. |
|
| + | [[File:Jerrod footprints.png|left|thumb|A trail of footprints]] |
||
| ⚫ | After you unlock the first memory, Nomad and Enakhra will begin draining the door. In the centre of the door is a black-and-white meter. Nomad will increase the gauge he is working on while Enakhra will decrease it. You must keep it balanced, requiring you to switch Enakhra and Nomad periodically. If the gauge goes out of balance, the room will reset and all previous memories will be lost. Once the gauge is balanced, quickly switch to Jerrod and track the next set of footprints. Once Jerrod tracks the footprints, drain the guard's memory via Moia's ability. |
||
| ⚫ | After the second memory is found, Zemouregal will place portals to defend the room from the undead horde. You must also tell Zemouregal where to place portals to keep the room safe. If any wights get into the room then it will reset. You can see where they will come from next by looking for glowing eyes in the tunnels. When you directly face the vault door, you're looking south. This will be confusing when allocating Zemouregal's portals. Keep a keen eye on your compass and on the compass in the top right of the portal menu. Be sure to hit accept when you're done changing the portals. In your chatbox you will get a warning telling you Zemouregal will move the portals in 60 seconds. If you do not change them in time, or change them incorrectly, the room will reset to the beginning. Zemouregal will move these portals at the end of those 60 seconds, at which point you'll receive another warning and need to change the portals again. You can determine if the new portals location are correct by talking to Zemouregal again after clicking confirm. You will get a message if they are already correct. |
||
| ⚫ | After you unlock the first |
||
| ⚫ | |||
| ⚫ | After the second memory is found, Zemouregal will place portals to defend the room from the undead horde. You must also tell Zemouregal where to place portals to keep the room safe |
||
| − | |||
| ⚫ | |||
Once all 5 memories are found, the doors will automatically open, and there will no longer be a need to keep balance. |
Once all 5 memories are found, the doors will automatically open, and there will no longer be a need to keep balance. |
||
| Line 151: | Line 182: | ||
===Fight for the Stone of Jas=== |
===Fight for the Stone of Jas=== |
||
====The Foreshadow==== |
====The Foreshadow==== |
||
| − | '''This is not a safe death.''' |
||
[[File:Sliske's apparitions.png|thumb|Sliske summons shadowy versions of the team.]] |
[[File:Sliske's apparitions.png|thumb|Sliske summons shadowy versions of the team.]] |
||
If you die during the fight, your grave will appear near the entrance to Sliske's lair by the Barrows. If you happen to have the Drakan's medallion kept upon death, simply teleport with it to the Barrows to reach your grave. |
If you die during the fight, your grave will appear near the entrance to Sliske's lair by the Barrows. If you happen to have the Drakan's medallion kept upon death, simply teleport with it to the Barrows to reach your grave. |
||
| − | The type of combat method that is used does not matter; Magic or Ranged is preferred, however. Players should also try to remain close to the shadow version of |
+ | The type of combat method that is used does not matter; Magic or Ranged is preferred, however. Players should also try to remain close to the shadow version of themselves, since the shadow has the ability to darken the room, which will cause massive damages to the player. |
[[File:Foreshadow's special attack.png|thumb|The Foreshadow activates its special attack.|left]] |
[[File:Foreshadow's special attack.png|thumb|The Foreshadow activates its special attack.|left]] |
||
| − | In this part of the quest, the player encounters a level 84 [[foreshadow|shadow of themselves]] |
+ | In this part of the quest, the player encounters a level 84 [[foreshadow|shadow of themselves]]. The Foreshadow's Life Points and damage scales to your level. The shadow attacks mainly with magic, and has four special attacks that it will use throughout the first half of the battle. The first attack binds the player in webbing and deals rapid hits of 660 damage (at ~90+ Constitution), similar to one of [[Araxxor|Araxxor's]] attacks; it can be countered by rapidly clicking to break free. The second attack teleports the player to the [[Stone of Jas]], after which the shadow casts a spell and shadow clouds roll down the stairways; if either the spell or the clouds hit you, you'll be dealt damage equal to 50% of your maximum life points. The player should run off the plateau and out of the way of the stairways. The third attack will darken the room and deal rapid hits of 825 damage to the player, unless you stay within melee range of the shadow. The last attack does not procure a text box like the others; the shadow will pull you in front of him and stun you. You will be unable to move or attack for a couple of seconds. |
| − | Once the foreshadow reaches 40% of |
+ | Once the foreshadow reaches 40% of its health, it will transform into the inner demon; move out of the way to avoid taking upwards of 2500 damage. The inner demon's attack speed will increase, and it will periodically summon dark portals which will heal him rapidly if they're not destroyed. It will not use any special attacks other than the room darkening one. It is highly recommended that you use Protect From Melee in this part of the fight, although if you attack from too far away, it will start attacking with magic. |
====The Elite Wights and Apparitions==== |
====The Elite Wights and Apparitions==== |
||
[[File:Defeating the Elite Wights.png|thumb|Fighting the Elite Wights as Nomad.]] |
[[File:Defeating the Elite Wights.png|thumb|Fighting the Elite Wights as Nomad.]] |
||
| − | After you have killed your shadow, |
+ | After you have killed your shadow, your view switches to the real realm, where a massive battle rages between your team and Sliske's wights. During this time you will be playing as Nomad, whose role is to kill 30 [[Elite Wight]]s that are attacking teammates while they fight their shadow counterparts. Nomad will be outfitted with three special attacks, any of which will instantly kill multiple elite wights close to him. Once you have killed 30 wights, you will appear back in the Shadow Realm before the Stone of Jas. |
| + | |||
| ⚫ | |||
| ⚫ | |||
Touch the stone to view a cutscene of the end of the God Wars with Armadyl, Saradomin, and Bandos standing before a defeated Zamorak with the Stone of Jas. |
Touch the stone to view a cutscene of the end of the God Wars with Armadyl, Saradomin, and Bandos standing before a defeated Zamorak with the Stone of Jas. |
||
| − | {{Gifresize|Channeling power from the Stone of Jas.gif| |
+ | {{Gifresize|Channeling power from the Stone of Jas.gif|200px|caption=A player channels power from the Stone of Jas.}} |
| − | After the cutscene, you return to the real realm once again. As your character, you must kill the last 8 shadow members of the group, each of which starts with |
+ | After the cutscene, you return to the real realm once again. As your character, you must kill the last 8 shadow members of the group, each of which starts with 250,000 life points. Some of the apparitions will be at low health, due to their previous encounters with their true selves. Additionally, some of the apparitions will target you. However, you need not worry about the incoming attacks as you will be able to channel power from the Stone of Jas and are able to hit very high with very good accuracy, as much as 25,000 damage per hit. If the apparitions die by an attack of another, they will regain their health in full. |
===The final decisions=== |
===The final decisions=== |
||
| − | + | After defeating the shadows with the power from the Stone of Jas, Nomad reveals his true colours and tries to steal the Stone of Jas - or at least a piece of it. Players can either choose to ruin his plans by throwing his spear back at him, or simply dodge the spear and let him enact his plot. Either way, after some more dialogue, a cutscene will start, in which Zamorak will teleport into the chamber and knock Nomad to the ground, who teleports away before Zamorak is able to kill him. |
|
| + | Allowing Nomad to escape with the piece of the Stone will make his Soul Blast attack during [[Nomad's Elegy]] deal 9000 damage instead of 7500. |
||
| ⚫ | |||
| + | |||
| ⚫ | |||
* Help Zamorak |
* Help Zamorak |
||
* Help Sliske |
* Help Sliske |
||
| Line 180: | Line 213: | ||
If you choose to help Zamorak, both you and Zamorak cast a spell at Sliske, injuring him, and he teleports away to the Shadow Realm with the Stone to 'lick his wounds'. Zamorak then congratulates you and the rest of the team for the work you have done for him, saying how he, and you, have gotten a lot stronger. |
If you choose to help Zamorak, both you and Zamorak cast a spell at Sliske, injuring him, and he teleports away to the Shadow Realm with the Stone to 'lick his wounds'. Zamorak then congratulates you and the rest of the team for the work you have done for him, saying how he, and you, have gotten a lot stronger. |
||
| + | {{Gifresize|Zamorak attacks Sliske.gif|151px|caption=Zamorak fires a powerful spell at Sliske}} |
||
If you choose to help Sliske, you cast a spell at Zamorak, and then Sliske teleports both you and the Stone to the Shadow Realm, where he congratulates you on making the correct decision. |
If you choose to help Sliske, you cast a spell at Zamorak, and then Sliske teleports both you and the Stone to the Shadow Realm, where he congratulates you on making the correct decision. |
||
If you choose to remain neutral, Zamorak alone casts a spell at Sliske, injuring him, and he teleports away with the Stone into the Shadow Realm to 'lick his wounds'. Although Zamorak is happy with the results, he is disappointed that the player did not help him defeat Sliske. He will congratulate you and the rest of the team for the work you have done for him, saying how he, and you have gotten a lot stronger. |
If you choose to remain neutral, Zamorak alone casts a spell at Sliske, injuring him, and he teleports away with the Stone into the Shadow Realm to 'lick his wounds'. Although Zamorak is happy with the results, he is disappointed that the player did not help him defeat Sliske. He will congratulate you and the rest of the team for the work you have done for him, saying how he, and you have gotten a lot stronger. |
||
| − | + | Congratulations, Quest complete! |
|
==Rewards== |
==Rewards== |
||
| + | {{Quest rewards |
||
| ⚫ | |||
| + | |name = Dishonour among Thieves |
||
| + | |qp = 2 |
||
| + | |rewards = |
||
| ⚫ | |||
| ⚫ | |||
| ⚫ | |||
| ⚫ | |||
| ⚫ | |||
| ⚫ | |||
| ⚫ | |||
| + | * Access to the [[Stalker dungeon]] |
||
| + | |post quest = |
||
| ⚫ | |||
| ⚫ | |||
| ⚫ | |||
| ⚫ | |||
| + | The fourth chest in Zamorak's hideout and five other chests contain {{NoCoins|5000|c}}, 250 Dungeoneering tokens, and 3 noted cut gems (either sapphires, emeralds or rubies): |
||
| − | *2 [[quest points]] |
||
| + | * West end of Zamorak's hideout (sapphires) |
||
| ⚫ | |||
| + | * Behind the [[Handelmort Mansion]] in the cellar where [[Jerrod]] was kept (sapphires - inaccessible after the quest) |
||
| ⚫ | |||
| + | * Inside the [[Uzer|Ruins of Uzer]], near [[General Khazard]] (sapphires) |
||
| ⚫ | |||
| + | * [[Black Knights' Base]], near [[Lord Daquarius]] (emeralds) |
||
| ⚫ | |||
| + | * [[Zemouregal's fort]], on the east side of the ground floor, accessible from [[Trollweiss Mountain]] (emeralds) |
||
| ⚫ | |||
| + | * South of [[Barrows]], near the entrance to [[Sliske's lair]] (rubies) |
||
| ⚫ | |||
| ⚫ | |||
| − | *{{Universal quest reward}} |
||
| + | Looting all these chests, excluding the Jerrod chest, is a requirement for the [[master quest cape]]. |
||
| − | ===Additional rewards=== |
||
| + | |music = |
||
| ⚫ | |||
| ⚫ | |||
| ⚫ | |||
| ⚫ | |||
| ⚫ | |||
| ⚫ | |||
| ⚫ | |||
| + | * [[Zamorak Zoo]] (If not already unlocked) |
||
| + | }} |
||
| + | |||
| + | ==Achievements== |
||
| + | * {{Achievement|Dishonourable Gains|15|Open and claim all XP chests during or after the 'Dishonour among Thieves' quest.}} |
||
| + | * {{Achievement|Dishonourable Loot|15|Open and claim all loot chests during or after the 'Dishonour among Thieves' quest.}} |
||
| + | |||
| + | ==Required for completing== |
||
| + | * [[Nomad's Elegy]] |
||
| + | * [[Children of Mah]] |
||
==Transcript== |
==Transcript== |
||
| Line 209: | Line 267: | ||
==Trivia== |
==Trivia== |
||
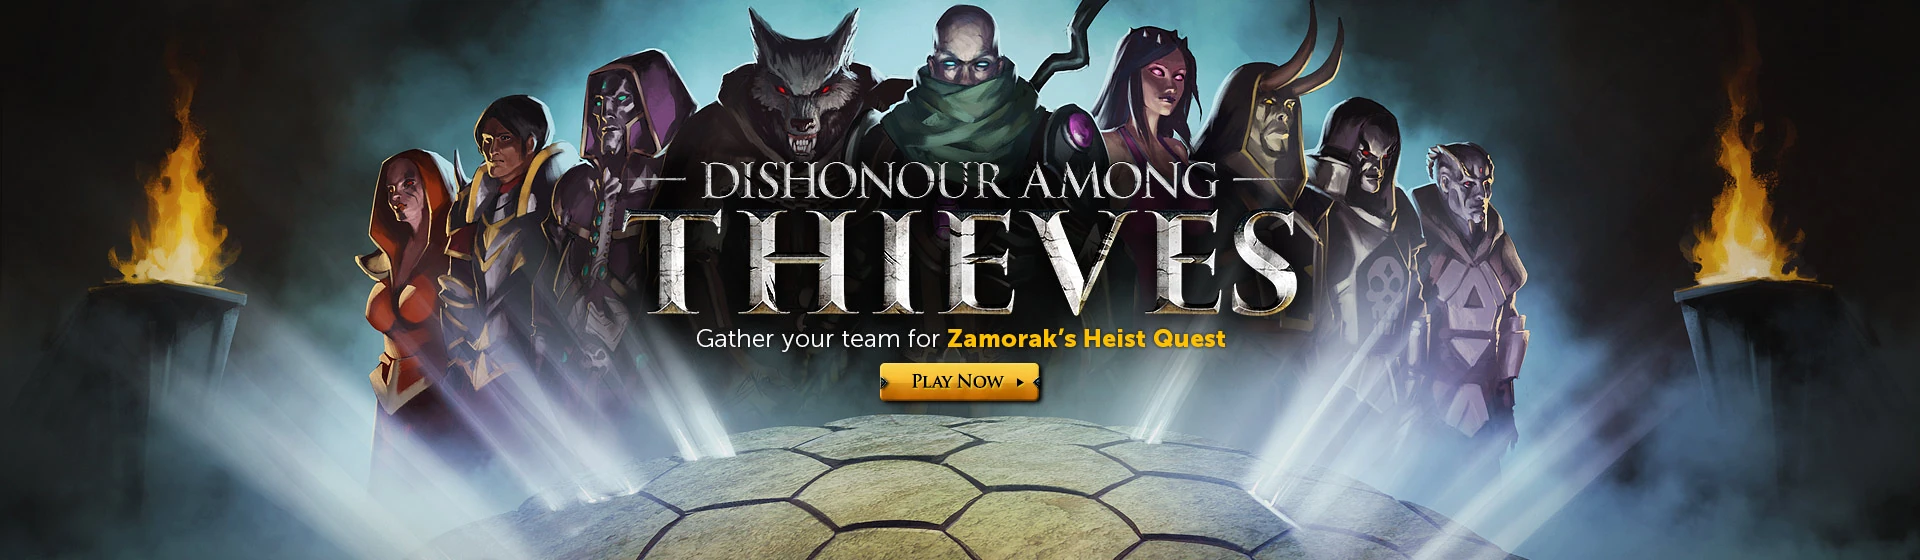
| + | [[File:Dishonour Among Thieves head banner.jpg|center|700px]] |
||
| − | [[File:Dishonour among Thieves noticeboard.png|thumb |
+ | [[File:Dishonour among Thieves noticeboard.png|thumb|''Zamorak conspires to steal the Stone of Jas and must assemble a team of his most loyal followers to aid him in his task.'']] |
| ⚫ | |||
| ⚫ | |||
| ⚫ | |||
| ⚫ | |||
| ⚫ | |||
| ⚫ | |||
| ⚫ | |||
| ⚫ | |||
| ⚫ | |||
| ⚫ | |||
| ⚫ | |||
| ⚫ | |||
| − | * Helping Sliske and talking to Zamorak generates the following dialogue: "I want to watch the world burn." This might reference the Joker in the Dark Knight |
+ | * Helping Sliske and talking to Zamorak generates the following dialogue: "I want to watch the world burn." This might reference the Joker in the film ''{{wp|The Dark Knight}}''. |
| − | * Legatus and Praetor, which Sliske refers to Zamorak and himself as in that order, are roman titles. Legatus being equal to a modern day general and Praetor being roughly equivalent to a magistrate but could also function as a commander. |
||
| + | * If the player has finished [[Fate of the Gods]], it is possible to tell Zamorak of [[Zaros]]' return, although this adds no additional rewards. |
||
| − | |||
| − | ==Music unlocked== |
||
| ⚫ | |||
| ⚫ | |||
| ⚫ | |||
==References== |
==References== |
||
| Line 229: | Line 283: | ||
{{Dishonour among Thieves}} |
{{Dishonour among Thieves}} |
||
{{Mahjarrat quest series}} |
{{Mahjarrat quest series}} |
||
| + | {{Sliske Series}} |
||
| + | {{God series}} |
||
[[es:El atraco de Zamorak]] |
[[es:El atraco de Zamorak]] |
||
| + | [[pt:Desonra Entre Ladrões]] |
||
Latest revision as of 16:57, 3 March 2019
| |||||||||||||||||||||||||
| Also called | Zamorak's Heist, DAT | ||||||||||||||||||||||||
|---|---|---|---|---|---|---|---|---|---|---|---|---|---|---|---|---|---|---|---|---|---|---|---|---|---|
| Release date | 23 February 2015 (Update) | ||||||||||||||||||||||||
| Members | Yes | ||||||||||||||||||||||||
| Voice Over | No | ||||||||||||||||||||||||
| Official difficulty | Intermediate | ||||||||||||||||||||||||
| Quest series | God Sliske | ||||||||||||||||||||||||
| Age | Sixth Age | ||||||||||||||||||||||||
| |||||||||||||||||||||||||
Dishonour among Thieves is an intermediate quest in the God series. It is a sequel to Missing, Presumed Death, and features Zamorak gathering his allies to stage a heist to steal the Stone of Jas from Sliske following his downfall at the Battle of Lumbridge.
In September 2014, it won a Power to the Players poll against Elemental Workshop V, a pirate quest, and a spellcrafting quest.[1] A few weeks later, another poll was released to determine three of the members of Zamorak's team. The options were Lord Daquarius, General Khazard, Nomad, Movario, Malak, Scorpius, Surok, and Moldark, with the first three winning.[2]
Although Missing, Presumed Death and Hazeel Cult are the only quest requirements, it is highly recommended to have completed Ritual of the Mahjarrat, Nomad's Requiem, and The World Wakes as well as the Nadir saga for full storyline comprehension. Dialogue remains the same whether or not the quests have been completed.
Additionally, reading the three RuneScape novels (Betrayal at Falador, Return to Canifis, and Legacy of Blood) may help the player understand the background of Jerrod the werewolf.
Official description
Zamorak needs your help to steal the Stone of Jas, and he has sent his general Moia to find you. You'll need to put together an elite team of Zamorakians with different skills and abilities, and lead them through fiendish traps and puzzles laid down by the slippery Sliske. However it's not all plain sailing as some of the team members notoriously don't get along so it'll be down to you to make the team work together and steal the stone without Sliske noticing.
Walkthrough
| Start point | |||
|---|---|---|---|
| Member requirement | |||
| Official difficulty | |||
| Official length | Long | ||
| Requirements | Skill requirements are not boostable unless marked with a [B] for boostable.
| ||
| Items required | Items from the tool belt are not listed unless they do not work or are not automatically added. | ||
| Recommended |
| ||
| Enemies to defeat |
|
Return to the Empyrean Citadel


Sliske appears in the Shadow Realm.
Players can begin the quest by talking to Moia in the Empyrean Citadel. Moia will hand the player a Communication device which can be used to contact Moia or to teleport to Zamorak's hideout which is beneath Daemonheim. After talking to Moia, you will be pulled into the Shadow Realm by Sliske. He will ask what your plan is with Zamorak's quest, before sending you back to the normal realm.
The only way to get to the citadel is to use the Invitation box which is obtained during Missing, Presumed Death.
If you happen to log out or disconnect at all, any progress you've made in the quest will be kept.
Gathering Zamorak's chosen

Zamorak, Moia, and Bilrach in Daemonheim.

Teleport to Zamorak's hideout by accessing the communication device to meet with Zamorak, Bilrach, and Moia (if you don't talk to Zamorak first, some of the followers will not be in their locations). They ask the player to gather some of Zamorak's most powerful followers to help with the heist; Hazeel, Nomad, General Khazard, Lord Daquarius, Zemouregal, and Enakhra.
You can search the chest to the west to receive 5,000 coins, 250 dungeoneering tokens, and either 3 cut sapphires or emeralds (noted). Depending on your skill levels, the other chests can be open and searched.
The order in which you locate these chosen ones does not matter.
Hazeel & Jerrod

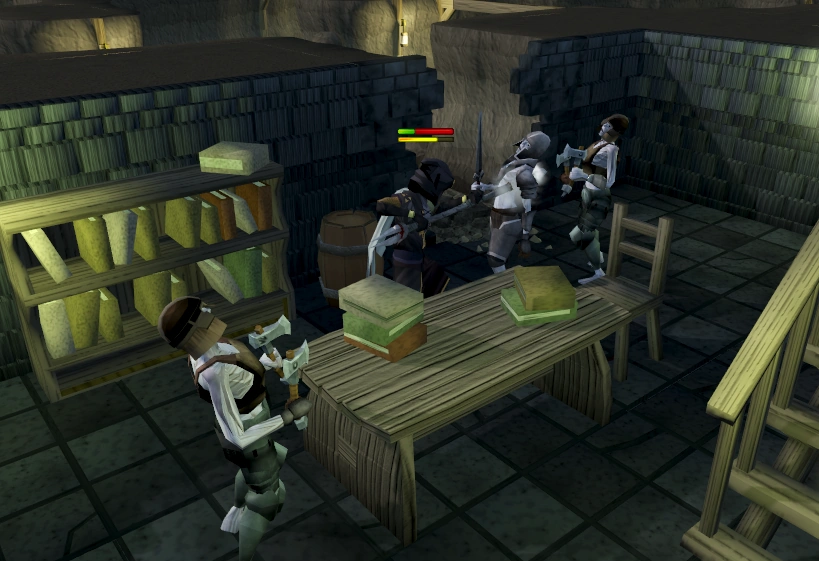
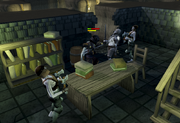
Hazeel tasks you with releasing Jerrod.
Hazeel can be found in his cultist hideout south of the Ardougne Zoo and east of the Clock Tower, enter the dungeon, and take the raft to the hideout and speak with Hazeel. He will agree to join Zamorak's team if the player will free a werewolf being held in a mansion in East Ardougne. Go to the Handelmort Mansion just to the west of the marketplace and enter the trapdoor at the back of the mansion. Speak with Jerrod, who will tell you why he is being held as a prisoner and after a discussion will ask you to search the dead butler by the ladder for a cell key so you can release him. Once you do, he will agree to join the team and will remark that he doesn't eat his associates.
You can search the chest by the dead butler to receive 5,000 coins, 3 cut sapphires (noted), and 250 dungeoneering tokens.
Nomad
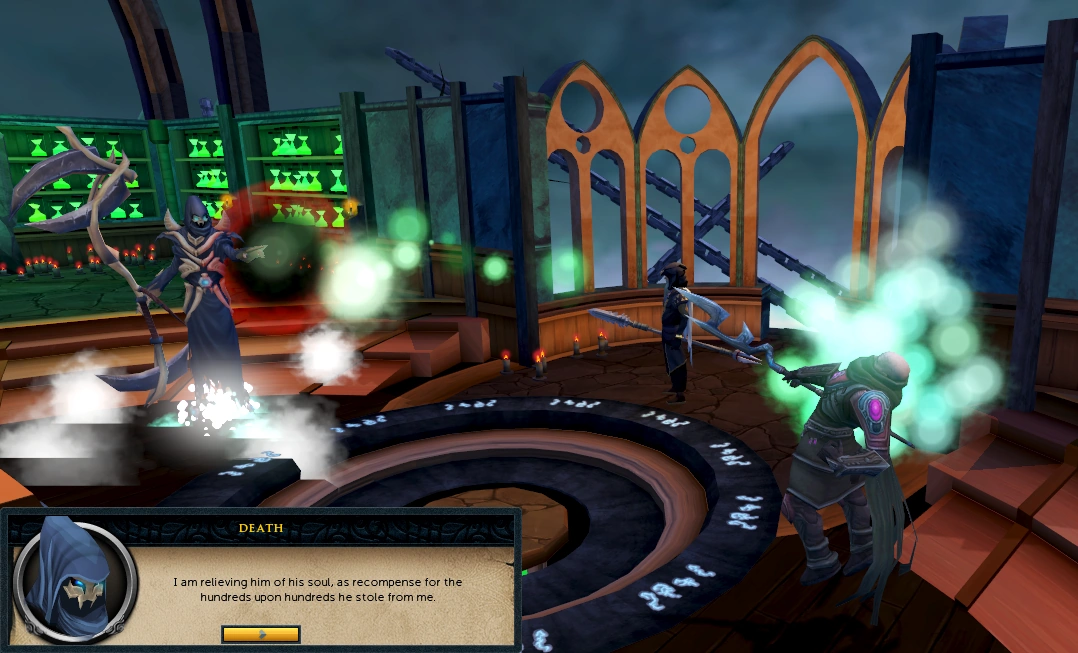
Death attempts to kill Nomad.
Nomad can be found in Death's office just north of the Draynor lodestone. Upon entering the office you will join a conversation with Death who is attempting to reap Nomad's soul in recompense for all the souls that Nomad stole. He will agree to let Nomad go because he owes the player a favour for rescuing him during the events of Missing, Presumed Death.
General Khazard
Khazard can be found in the Ruins of Uzer by entering the stairs near the clay golem. Before he will join the team, he asks the player to search the Shadow Realm for his mother, Palkeera, who he believes fought there alongside his father. Agree to enter the Shadow Realm and search the body of Palkeera to the north for a bloody journal. Read the journal and you will return to the normal realm when you close it. Talk to Khazard and he will leave for Daemonheim.
You can search the chest by General Khazard for 5,000 coins, 3 cut sapphires (noted), and 250 dungeoneering tokens.
Lord Daquarius
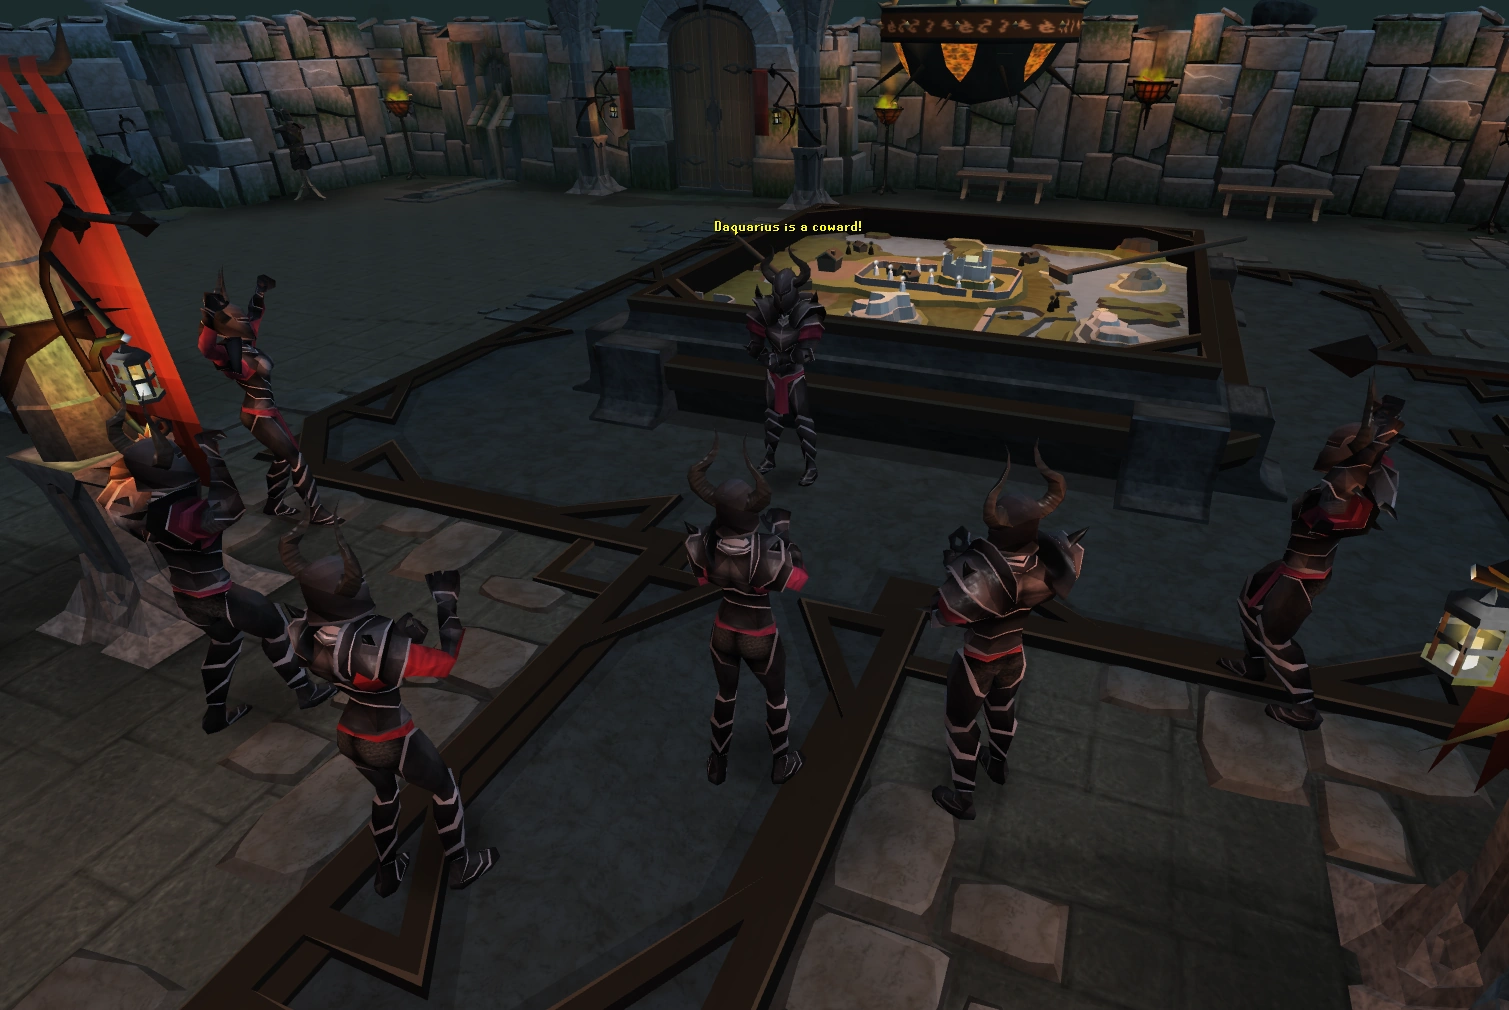

Some knights rebelling against Daquarius.
Daquarius can be found in the Black Knights' Base in Taverley Dungeon. Speak with Daquarius, who will ask you to help him discover who is behind the spread of "Saradominist drivel", and a suspected assassination attempt. Search the chest in the north-western room to find a bottle of poison. Go to the north-eastern room and speak with any of the black knights there. Finally, "discuss" the issue with the Preaching Black Knight east of Lord Daquarius in the centre of the room (either choice will work). Bring the poison and note back to Daquarius, who, after remarking that he knows who is behind it and that he will be taken care of, agrees to join the team.
You can search the chest in the south-western room with Lord Daquarius for 5,000 coins, 3 cut emeralds (noted), and 250 dungeoneering tokens.
Zemouregal & Enakhra
.png)
Fighting Zemouregal's zombies.

.png)
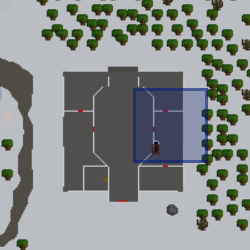
Location of Zemouregal and Enakhra
Zemouregal and Enakhra can be found at Zemouregal's fortress. The best route to get here is to teleport to Moia at Zamorak's hideout via Moia's communication device. Speak to her and she will teleport you to the basement inside the fortress. Once there, you will have to kill several armoured zombies, then go up the stairs (if you leave at this point after killing the zombies, they will not respawn) and talk with Zemouregal and Enakhra; they will agree to join the team. There is currently a glitch that keeps you from using the stairs if you have LootShare on or are in a group. If this happens, leave your group, come back to the castle, and kill the armoured zombies again. After they teleport away to take their place at Zamorak's side, you can search the chest in the room for 5,000 coins, 3 cut emeralds (noted), and 250 dungeoneering tokens. In the event of your death your grave will be near the stairs by the rewards trader in Daemonheim; use your Ring of kinship to return to your grave.
Preparing for the heist

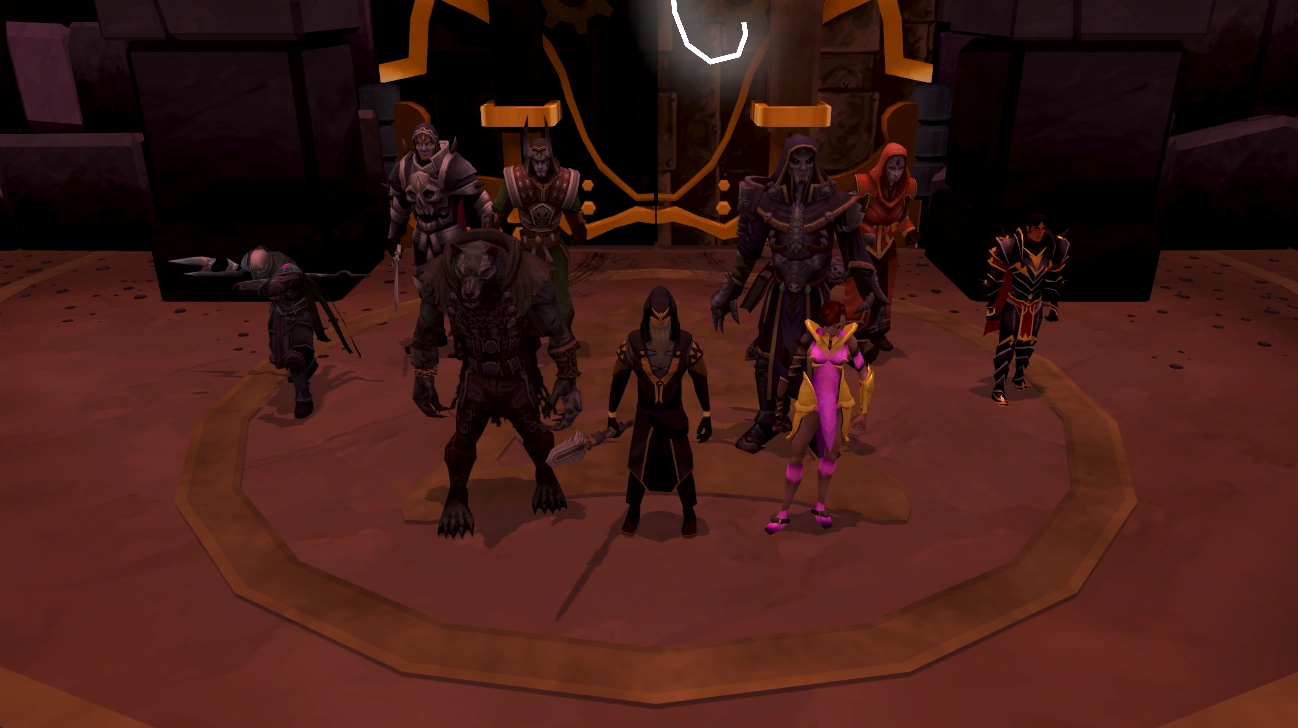
The Zamorakians gather at Daemonheim and Viggora reveals where Sliske is keeping the Stone of Jas.
Once all parties have agreed to join the team, Moia will contact the player and offer them a teleport back to the hideout. Upon arrival, you are joined by General Khazard, Hazeel, Jerrod, Nomad, Lord Daquarius, Enakhra, Zemouregal, Moia, Bilrach, and of course, Zamorak. At this point you may continue the quest or talk with people. Once you continue, a discussion will start and Zamorak will offer everyone places by his side after he has the Stone of Jas. Shortly into the conversation, Moia will report that Viggora has arrived; Zamorak will ask Khazard to open a window to the Shadow Realm so that everyone may see Viggora; he will appear and reports of a secret lair containing the Stone of Jas, hidden near the Barrows in the Shadow Realm, but is heavily guarded.
Zemouregal and Nomad insist they should be the one to retrieve the stone, but Zamorak interrupts and demands everyone to follow his orders. He begins to outline his plan: The player and Jerrod will infiltrate the perimeter and dispatch the guards, Daquarius is to read the runes and unlock the vault, Enakhra and Nomad are to deal with Sliske's magical traps, Khazard and Hazeel are to deal with Sliske's mastery of the Shadow Realm, and Zemouregal is to deal with Sliske's undead horde. After Zamorak tells you of his plan, Moia tells everyone to meet south of the Barrows in Morytania at Sliske's lair.
While still in Zamorak's hideout, you can search the chest by the western door for 5,000 coins, 3 sapphires (noted), and 250 dungeoneering tokens, if you haven't yet.
The great stone robbery
The maze
The entrance to Sliske's lair is located just south-east of the Barrows; you may reach it by running from northern Morytania.
Just before you enter, you can search the chest to the north for 5,000 coins, 3 cut rubies (noted), and 250 dungeoneering tokens.
You must dismiss your follower before entering. Upon entering, there will be a series of passageways with markings above the cave openings or on the floor. In every passageway will be a signpost with a poem written on it, giving the clues to which cave openings to enter.
If you are uncertain of the colour, shape or number; right click and examine.
From the first room, the cave openings are as follows:
- Blue (blue paint above the cave opening)
- The number 5 (V) (on the floor) - low detail users may have some trouble seeing this
- A smiling green face (northernmost cave opening)
- Triangle (north-eastern most cave opening)
- Red (red paint above the cave opening)
- Complete face (On the floor)
- Grey (may also appear as a white colour) (northeastern corner, left-hand cave opening)
If you log out during the maze or the dialogue following you will be returned outside and will have to repeat the maze.
Sneaking past the guards

Evading the guards in Sliske's lair.
Once you have made it through the tunnels, you and Jerrod must take care of the guards in a sorceress's garden-esque puzzle. You will enter the next room after a short discussion and must use the given movement options to sneak past the guards and traps to clear the room.
You cannot run in these rooms. Additionally, Jerrod is needed for each section.
In the event that Jerrod does not follow you nor appear for you in the next sections, simply log out and log back in. Any previous progress will be saved.
Room 1
Wait for the guard to face away from you and forward dive past him to assassinate him. Then wait for the masks to come on 3 times. You then have time to pass the beams, get to the dead spot in the centre of the room, and pull the lever on the south wall. After you pull the lever, Jerrod will kill the second guard and you will have a second lever on the far west wall. Wait for beam to flash 3 times, then once again you have time to get by the beam and pull the lever, which will deactivate the masks and open the next room.
Room 2
The first hallway on your right has a dark cloud which will send you to the room entrance. Forward dive up the hallway following the cloud to the first doorway (there are also niches in the walls you can hide in). Assassinate the guard as he walks past and pull the lever, Jerrod will then kill the next guard. Follow Jerrod and forward dive past the guard and assassinate him (or you can assassinate him at the corner). Proceed up the hallway past the last two masks to the lever, and enter the next room.
Room 3
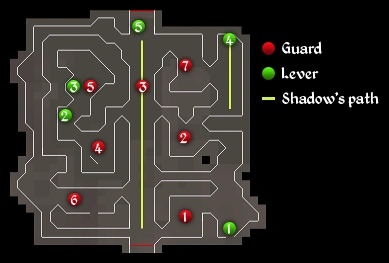
Switches and guards will have numbers mentioned that correspond to the map image on the right. Mask flashes do not pause in this room.
- Forward dive past the guard (1) to the east and assassinate him.
- Ignore lever (1), continue north and dispatch the next guard (2).
- Stand in the doorway to the main hallway and wait for the guard (3) to come to you and dispatch him (watch for the shadow on the floor).
- Continue across the hallway and dispatch the guard walking around the pillar (4).
- Go north to the lever (2) and pull it. Rocks will fall, distracting the guard (5). Dispatch him and pull the lever (3).
- Return to Jerrod. You can get caught to get back quickly.
- Go back east and then down the narrow hallway and stop before entering the main hallway, wait for the shadow to go to the far end and cross the main hallway, enter the room across from you and assassinate the guard (6).
- Return to the south-east corner and pull the lever (1).


Jerrod kills a wight.
- The next lever is in the north-east corner. Head north and watch the shadow in the north-east corner (near lever 4). Stand in the south-east corner of the hallway where the shadow is patrolling; when the shadow moves away, move one space north, click the option to turn 45 degrees left, then forward dive. Assassinate the guard (7).
- Go behind the shadow and pull the lever (4).
- Jerrod will kill the last guard (near lever 5) by the doors. Pull the final lever by the door, watching for the main hallway shadow.
Unlocking the vault

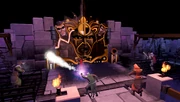
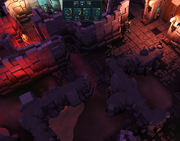
The team works together to unlock the doors to the Stone of Jas.
This part of the quest is a little tricky, as it requires some degree of attention. You are required to multi-task and keep track of various elements in a short amount of time. While you are not timed, some events will timeout. The order in which you complete these events does not matter, but be mindful to keep a steady pace and be aware of which steps were recently completed.
Upon entering the vault, you are greeted by two of Sliske's masks, Shadow and Light. After a short conversation with them, Moia will have you use Jerrod to find the guards in order to view their memories of unlocking the door. Speak with Jerrod to switch to his view, and use the controls to find sets of tracks (they glow green) by turning, then follow the tracks to find the guard. You must then talk to Moia to read the guard's mind.
Locate the correct memory by either listening to a light tinging sound or by looking at the speed of the blinking/pulsating area on the memory map. The memory meter does not have to be filled all the way up for it to count. Half-way also counts as a memory. Players have 3 attempts at getting a correct memory, but there is no penalty for failure.
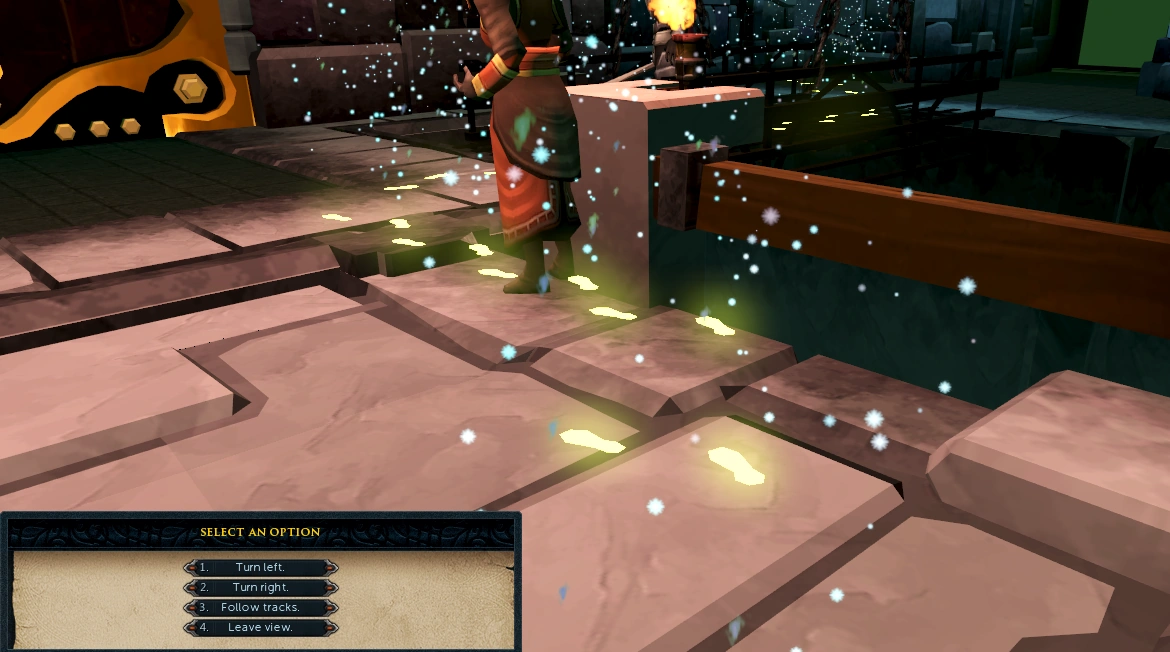

A trail of footprints
After you unlock the first memory, Nomad and Enakhra will begin draining the door. In the centre of the door is a black-and-white meter. Nomad will increase the gauge he is working on while Enakhra will decrease it. You must keep it balanced, requiring you to switch Enakhra and Nomad periodically. If the gauge goes out of balance, the room will reset and all previous memories will be lost. Once the gauge is balanced, quickly switch to Jerrod and track the next set of footprints. Once Jerrod tracks the footprints, drain the guard's memory via Moia's ability.
After the second memory is found, Zemouregal will place portals to defend the room from the undead horde. You must also tell Zemouregal where to place portals to keep the room safe. If any wights get into the room then it will reset. You can see where they will come from next by looking for glowing eyes in the tunnels. When you directly face the vault door, you're looking south. This will be confusing when allocating Zemouregal's portals. Keep a keen eye on your compass and on the compass in the top right of the portal menu. Be sure to hit accept when you're done changing the portals. In your chatbox you will get a warning telling you Zemouregal will move the portals in 60 seconds. If you do not change them in time, or change them incorrectly, the room will reset to the beginning. Zemouregal will move these portals at the end of those 60 seconds, at which point you'll receive another warning and need to change the portals again. You can determine if the new portals location are correct by talking to Zemouregal again after clicking confirm. You will get a message if they are already correct.
To obtain the remaining memories, you need to use Jerrod to track the wights down, then have Moia drain their memories. You will still need to keep the gauge balanced and prevent the undead horde from entering the room.
Once all 5 memories are found, the doors will automatically open, and there will no longer be a need to keep balance.
Fight for the Stone of Jas
The Foreshadow

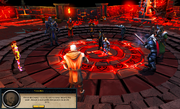
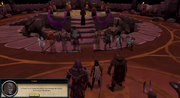
Sliske summons shadowy versions of the team.
If you die during the fight, your grave will appear near the entrance to Sliske's lair by the Barrows. If you happen to have the Drakan's medallion kept upon death, simply teleport with it to the Barrows to reach your grave.
The type of combat method that is used does not matter; Magic or Ranged is preferred, however. Players should also try to remain close to the shadow version of themselves, since the shadow has the ability to darken the room, which will cause massive damages to the player.
The Foreshadow activates its special attack.
In this part of the quest, the player encounters a level 84 shadow of themselves. The Foreshadow's Life Points and damage scales to your level. The shadow attacks mainly with magic, and has four special attacks that it will use throughout the first half of the battle. The first attack binds the player in webbing and deals rapid hits of 660 damage (at ~90+ Constitution), similar to one of Araxxor's attacks; it can be countered by rapidly clicking to break free. The second attack teleports the player to the Stone of Jas, after which the shadow casts a spell and shadow clouds roll down the stairways; if either the spell or the clouds hit you, you'll be dealt damage equal to 50% of your maximum life points. The player should run off the plateau and out of the way of the stairways. The third attack will darken the room and deal rapid hits of 825 damage to the player, unless you stay within melee range of the shadow. The last attack does not procure a text box like the others; the shadow will pull you in front of him and stun you. You will be unable to move or attack for a couple of seconds.
Once the foreshadow reaches 40% of its health, it will transform into the inner demon; move out of the way to avoid taking upwards of 2500 damage. The inner demon's attack speed will increase, and it will periodically summon dark portals which will heal him rapidly if they're not destroyed. It will not use any special attacks other than the room darkening one. It is highly recommended that you use Protect From Melee in this part of the fight, although if you attack from too far away, it will start attacking with magic.
The Elite Wights and Apparitions
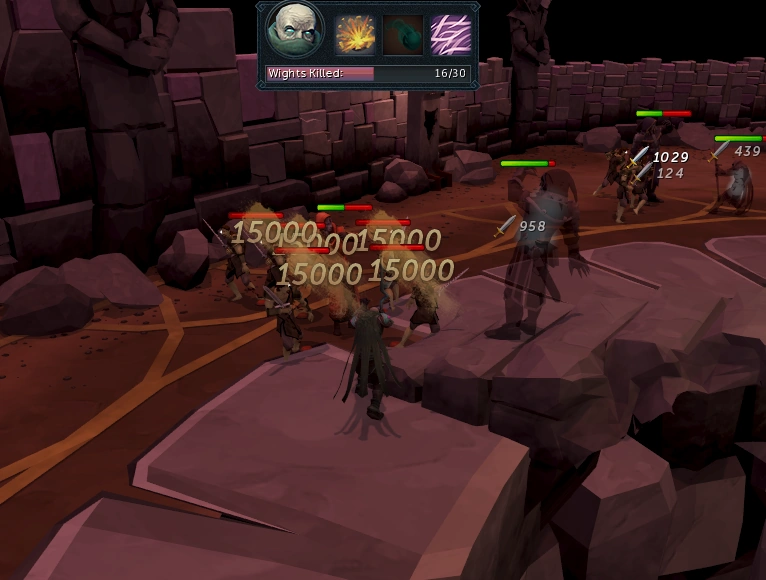
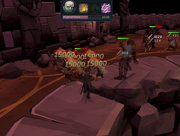
Fighting the Elite Wights as Nomad.
After you have killed your shadow, your view switches to the real realm, where a massive battle rages between your team and Sliske's wights. During this time you will be playing as Nomad, whose role is to kill 30 Elite Wights that are attacking teammates while they fight their shadow counterparts. Nomad will be outfitted with three special attacks, any of which will instantly kill multiple elite wights close to him. Once you have killed 30 wights, you will appear back in the Shadow Realm before the Stone of Jas.

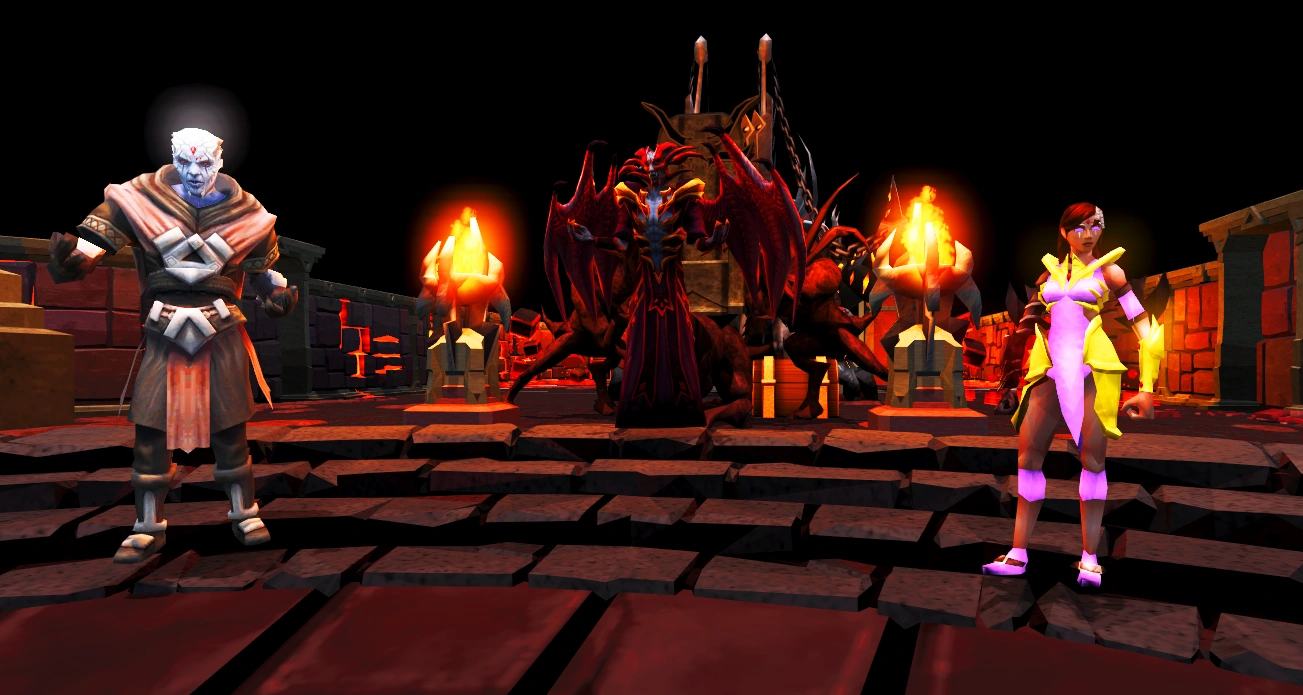
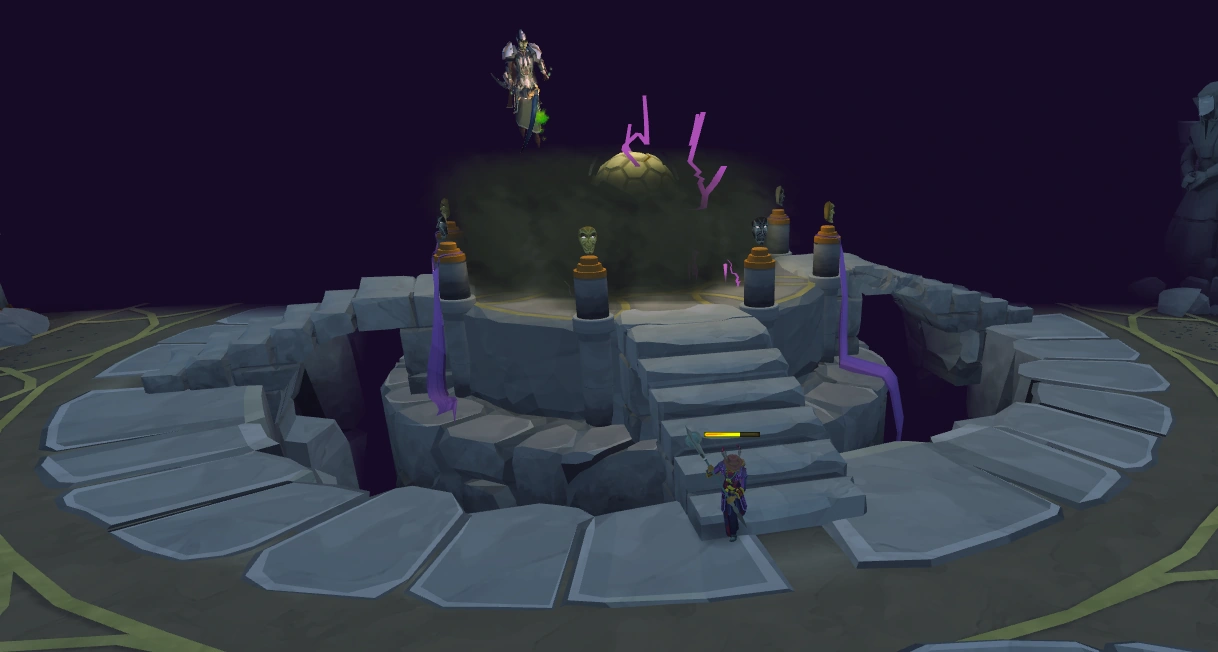
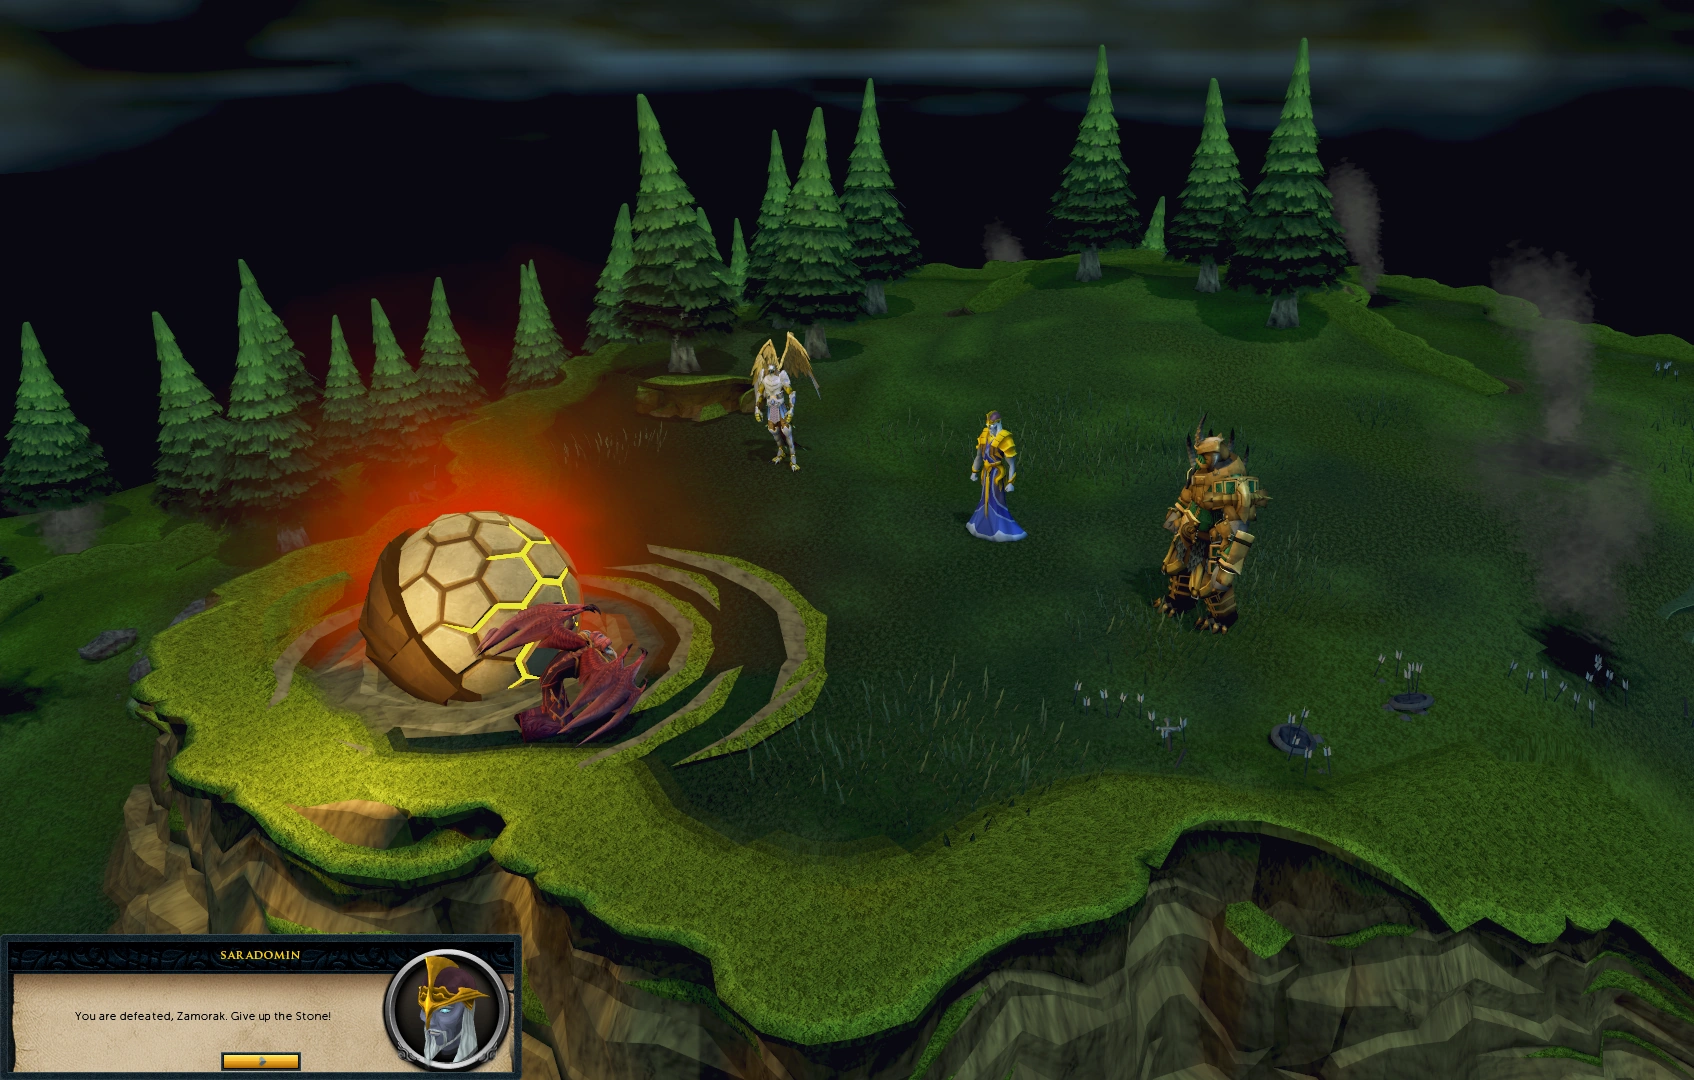
The flashback shows Saradomin, Armadyl, and Bandos confronting Zamorak, who has the Stone of Jas.
Touch the stone to view a cutscene of the end of the God Wars with Armadyl, Saradomin, and Bandos standing before a defeated Zamorak with the Stone of Jas.

After the cutscene, you return to the real realm once again. As your character, you must kill the last 8 shadow members of the group, each of which starts with 250,000 life points. Some of the apparitions will be at low health, due to their previous encounters with their true selves. Additionally, some of the apparitions will target you. However, you need not worry about the incoming attacks as you will be able to channel power from the Stone of Jas and are able to hit very high with very good accuracy, as much as 25,000 damage per hit. If the apparitions die by an attack of another, they will regain their health in full.
The final decisions
After defeating the shadows with the power from the Stone of Jas, Nomad reveals his true colours and tries to steal the Stone of Jas - or at least a piece of it. Players can either choose to ruin his plans by throwing his spear back at him, or simply dodge the spear and let him enact his plot. Either way, after some more dialogue, a cutscene will start, in which Zamorak will teleport into the chamber and knock Nomad to the ground, who teleports away before Zamorak is able to kill him.
Allowing Nomad to escape with the piece of the Stone will make his Soul Blast attack during Nomad's Elegy deal 9000 damage instead of 7500.
Zamorak will then touch the Stone of Jas, gaining power. Sliske will then appear, and cast dark magic on everyone in the room apart from you and Zamorak, freezing them in place. The cutscene ends, and after some more dialogue, you are given a choice between 3 options:
- Help Zamorak
- Help Sliske
- Remain neutral.
If you choose to help Zamorak, both you and Zamorak cast a spell at Sliske, injuring him, and he teleports away to the Shadow Realm with the Stone to 'lick his wounds'. Zamorak then congratulates you and the rest of the team for the work you have done for him, saying how he, and you, have gotten a lot stronger.

If you choose to help Sliske, you cast a spell at Zamorak, and then Sliske teleports both you and the Stone to the Shadow Realm, where he congratulates you on making the correct decision.
If you choose to remain neutral, Zamorak alone casts a spell at Sliske, injuring him, and he teleports away with the Stone into the Shadow Realm to 'lick his wounds'. Although Zamorak is happy with the results, he is disappointed that the player did not help him defeat Sliske. He will congratulate you and the rest of the team for the work you have done for him, saying how he, and you have gotten a lot stronger.
Congratulations, Quest complete!
Rewards
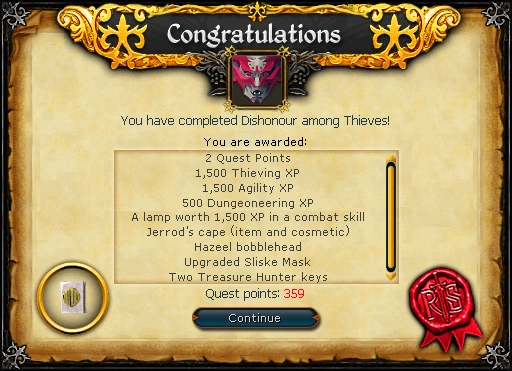
- 2 quest points
- 1,500
 experience
 - 1,500 experience
- 500 experience
- Combat XP lamp rewarding 1,500 experience in a choice of either Attack, Strength, Defence, Magic, Ranged or Constitution
- Jerrod's cape (and override)
- Tiny Hazeel
- An upgraded Mask of Sliske - when worn in the head slot or carried in the pocket slot during combat, it will occasionally spawn an undead archer, who'll deal damage to your current target before dissipating.
- Access to the Stalker dungeon
- 2 Treasure Hunter keys and 2 Hearts of Ice
- Additional rewards/activities
There are four chests within Zamorak's hideout, three of which contain an experience lamp which can be used on any skill. To go to the hideout use the communication device. The chests do not require elite skills (e.g. Invention) to open.
- The first chest contains an XP lamp (tier 1) with 7,000 experience, and requires level 50 in all skills to obtain (south side, along the east wall right before the wall slants diagonally).
- The second chest contains an experience XP lamp (tier 2) with 50,000 experience, and requires level 70 in all skills to obtain (east side, in front of the northern lava pit).
- The third chest contains an XP lamp (tier 3) with 96,000 experience, and requires level 90 in all skills to obtain (behind Zamorak's throne).
The fourth chest in Zamorak's hideout and five other chests contain 5,000 coins, 250 Dungeoneering tokens, and 3 noted cut gems (either sapphires, emeralds or rubies):
- West end of Zamorak's hideout (sapphires)
- Behind the Handelmort Mansion in the cellar where Jerrod was kept (sapphires - inaccessible after the quest)
- Inside the Ruins of Uzer, near General Khazard (sapphires)
- Black Knights' Base, near Lord Daquarius (emeralds)
- Zemouregal's fort, on the east side of the ground floor, accessible from Trollweiss Mountain (emeralds)
- South of Barrows, near the entrance to Sliske's lair (rubies)
Looting all these chests, excluding the Jerrod chest, is a requirement for the master quest cape.
- Music unlocked
- Breaking and Entering
- The Heist (Unless unlocked during The Curse of Arrav)
- The Heist II
- Zamorak Zoo (If not already unlocked)
Achievements
- Dishonourable Gains ( 15) - Open and claim all XP chests during or after the 'Dishonour among Thieves' quest.
- Dishonourable Loot ( 15) - Open and claim all loot chests during or after the 'Dishonour among Thieves' quest.
Required for completing
Transcript
Trivia

Zamorak conspires to steal the Stone of Jas and must assemble a team of his most loyal followers to aid him in his task.
- The quest's title is a reference to the proverb "honour among thieves".
- The Adventurer's Log referred to the quest as "Zamorak Heist" shortly after it was released.
- When Zamorak first asks the player to gather his team, the player refers to them as "Zamorak's 7", a reference to the film Ocean's Eleven, where a crew of 11 thieves led by Danny Ocean plan a casino heist.
- During the flashback instance where Zamorak decides to destroy Forinthry, hawthorn trees from the 2011 Easter event can be seen behind Zamorak and the Stone of Jas.
- Saradomin previously used his Sixth Age form during the flashback of the God Wars, which takes place in the Third Age. This was later changed to his Third-Fifth Age form.
- During the stealth section, the red "!" that appears is a reference to the Metal Gear game series.
- Helping Sliske and talking to Zamorak generates the following dialogue: "I want to watch the world burn." This might reference the Joker in the film The Dark Knight.
- If the player has finished Fate of the Gods, it is possible to tell Zamorak of Zaros' return, although this adds no additional rewards.
References
| Mysteries of the Mahjarrat | |||||
| Rise of Lucien |
| ||||
| Return of Zaros |
| ||||
| Arrav |
| ||||
| Sliske |
| ||||
| Related quests |
| ||||
| Related miniquests |
| ||||
| Lores and Histories |
| ||||
| Quest recollector |
| ||||
| Main series |
|
| Related quests |
|
| Related |
|