Template:2007 page
| |||||||||||||||||||||||||
| Also called | DT | ||||||||||||||||||||||||
|---|---|---|---|---|---|---|---|---|---|---|---|---|---|---|---|---|---|---|---|---|---|---|---|---|---|
| Release date | 18 April 2005 (Update) | ||||||||||||||||||||||||
| Members | Yes | ||||||||||||||||||||||||
| Voice Over | Partially | ||||||||||||||||||||||||
| Official difficulty | Master | ||||||||||||||||||||||||
| Quest series | Mahjarrat Series Return of Zaros series | ||||||||||||||||||||||||
| Age | Fifth Age | ||||||||||||||||||||||||
| |||||||||||||||||||||||||
Desert Treasure is a quest released on 18 April 2005. It involves the player assisting the Mahjarrat Azzanadra in his escape from his pyramid prison in the Kharidian Desert. This quest should not be underestimated, as it is considerably long, arduous and difficult to complete. Very few low level players have completed it, and lower level players attempting Desert Treasure should be wary of the fact that they will most likely come close to death at least once during the quest. However, medium or high level players with a combat level of 105 or more might find this quest rather easy and shouldn't have too much trouble completing it.
- This quest can be considered much easier after Evolution of Combat. Most enemies you need to fight during the quest aren't strong as they were when the quest was released.
Official description
| “ | Rumours abound throughout Varrock and Al-Kharid that an archaeologist has discovered clues to a hoard of treasure hidden deep in the desert, south of Al-Kharid.
Anybody prepared to offer him assistance in his treasure hunting could well find themselves benefitting from a very large reward indeed... |
” |
Walkthrough
| Start point | |||
|---|---|---|---|
| Member requirement | |||
| Official difficulty | |||
| Official length | Long (2 Hours) | ||
| Requirements | Skill requirements are not boostable unless marked with a [B] for boostable.
Skills:
Recommended:
| ||
| Items required | Items from the tool belt are not listed unless they do not work or are not automatically added.
Strongly recommended:
| ||
| Enemies to defeat |
|
There are a lot of strong bosses that you are required to kill in a one-on-one fight. Failure to bring good food and armour may result in a quick death.
Asgarnia Smith
Items needed: 1,000 or more coins.

Walk or take a carpet ride to the Bedabin Camp in the desert. Talk to the archaeologist, who can be found right next to the magic carpet merchant, and he will tell you that he has found a stone tablet, which speaks of a hidden treasure in the desert. He will give you some etchings to bring to the archaeological expert, Terry Balando, at the Exam centre, which is in the Digsite.
At the Digsite, head to the Exam centre to the south-east and talk to Terry, the expert. He will take the etchings off you. Talk to him again and he will give you a Translation to take back to the archaeologist. Go back to Asgarnia Smith, inform him of Terry's translation and agree to split the treasure 50/50. He wants you to dig around for information down at the Bandit Camp, while he searches for clues amongst the Bedabin nomads.
If you wear an item of Saradomin or Zamorak, the bandits in the camp will attack you, which can deter you from proceeding. Even if you survive the onslaught, Eblis will refuse to talk to you, calling you a false prophet.
Go south to the bandit camp. Talk to the bartender there and buy a bandit's brew. Talk to him again and ask about the four diamonds. He will tell you to look to someone else about the Diamonds of Azzanadra.
Diamonds of Azzanadra
- Items needed
- 6 steel bars
- 12 magic logs
- 6 molten glass
- 1 charcoal
- 1 blood rune
- 1 ashes
- 1 bones
Talk to Eblis, who can be found in (or near, he occasionally wanders outside) the house directly east of the bar, past the general store. Ask him if he knows about the four diamonds. Eblis, at first hesitant about your motives, goes on to explain about the diamonds, saying that they were taken during the God Wars. He says that he needs several items to create scrying mirrors that can tell you about the location of the diamonds - not necessarily where they are, but where they have been.
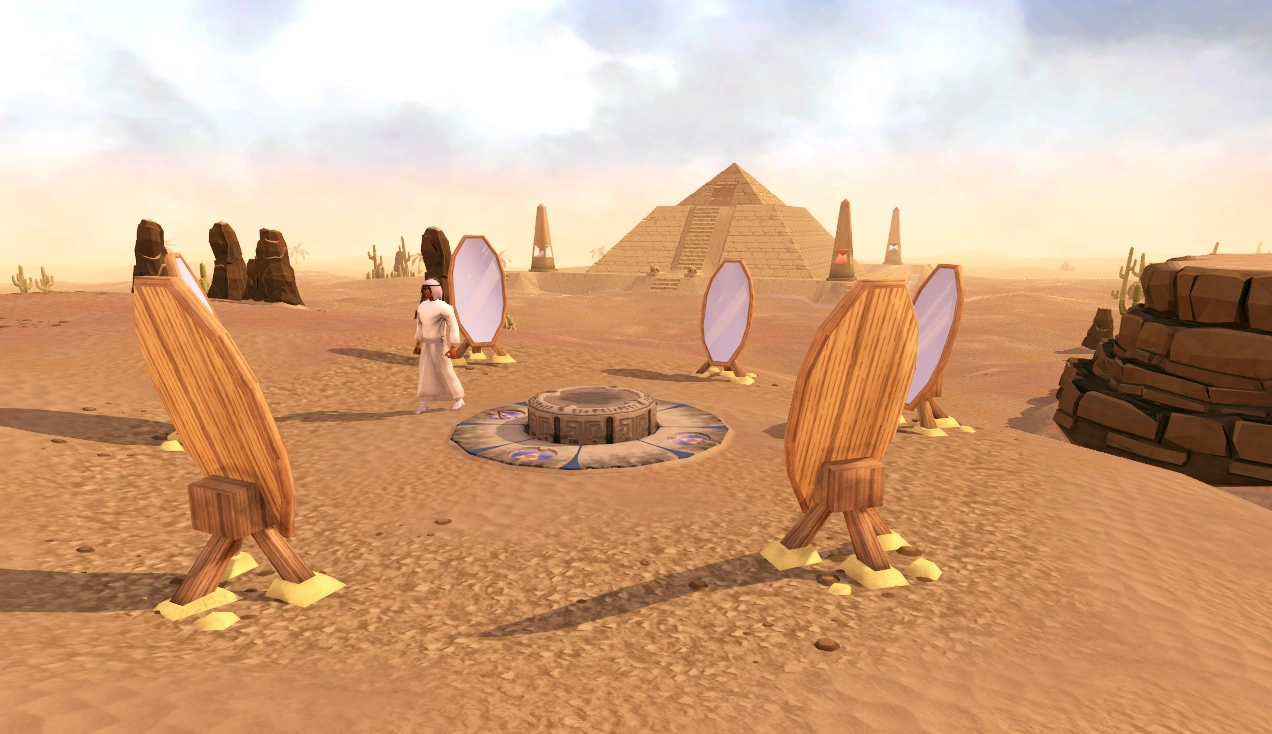
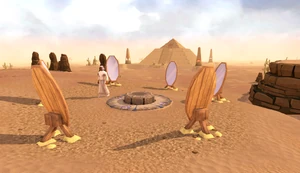
Eblis and the mystical mirrors.
Use the items on Eblis, who will tell you to meet him a little distance southeast of the camp (at the site of the Bandit camp lodestone; it will appear on your minimap as a small brown ring). Go to the small hill to find Eblis standing between 6 mystical mirrors.
Talk to Eblis. If you like, look into each of the mirrors, and you will see six locations across RuneScape. Two of them, the pyramid and the Bandit Camp, are not related to the diamonds' current location.
The other four locations show where you can find the diamonds. Those locations are Canifis; an icy location near Trollheim; a smokey well near Pollnivneach; and a calm, serene area with benches and trees that is west of Fishing Guild and South of Baxtorian Falls.
Should you keep any of the diamonds in your inventory, there is a chance you'll be attacked by a level 116 stranger who attacks with a Dragon dagger. The stranger should be no threat to you if you are level 150+, especially if you fight him with magic, but it is still safer to keep the diamonds in the bank.
You must now obtain each of these four diamonds, which are now in the possession of a strong guardian. The diamonds can be obtained in any order.
Canifis - Dessous - Blood Diamond
- Items needed
- Recommended items (You may wish to leave all weapons/armor in bank until after your visit to Entrana)
- Good food (something along your constitution level works best)
- 2-3 prayer potions if you have a low Prayer level
- Druid pouch or ouroboros pouch
- Magic combat supplies
- Dwarf multicannon can prove very helpful
- An emergency teleport (such as a teleport tablet)
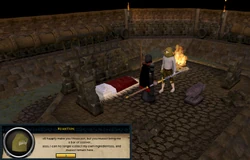
Kryptonite
Travel to Canifis and enter the Hair of the Dog pub, and a cut scene will play (if the cut scene does not play, just go ahead and talk to Malak) where Malak, a vampyre lord, demands a blood tithe from the tavern's owner. Malak then wants to talk to you, regarding your business in 'these lands'. Tell him that you are looking for the blood diamond, to which Malak replies by saying that it belongs to a vampyre lord named Dessous.

Ruantun living in the Draynor Sewers.
Malak will make a deal with you; kill Dessous for him and you can have the blood diamond. He says that you need to get a blessed pot of garlic and spiced blood in order to draw Dessous out. Make sure to have Malak talk to you about the blessed silver pot, otherwise you will have to go all the way back later in the quest.
To make the offering pot, he suggests you talk to a man in the Draynor Sewers. The entrance to the Draynor Sewers is located north of the marketplace. Take a silver bar to Ruantun, the man in the Draynor sewers, he is in the northern part of the sewers and is next to an anvil sign, and he will make you a silver pot.
To bless the pot, you require the help of the High Priest on Entrana, so make sure you have banked all of your weapons and armour. Talk to the high priest on the island and he will happily oblige. If the pot is not blessed, you can still get Dessous to attack, but he may hit four times as hard and will not die.
Return to Canifis and talk to Malak. He will damage you for 50 life points, and fill the blessed pot with your blood. Crush the garlic to get some powder and add it to the pot of blood, along with the spice, to get a blessed pot (complete).
If you do not add the garlic and the spices, you'll have to make another trip to the grave, as Dessous will only appear with a filled pot in your inventory.
Dessous, the Blood Forager
The Map to Dessous’ tomb.
Dessous has been considerably weakened due to the EOC update. A higher level player will easily defeat him without needing to adhere to the advice listed below.
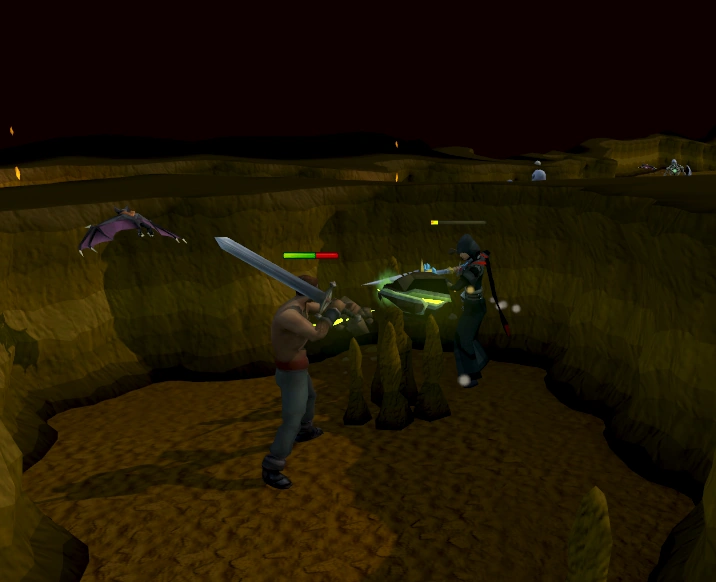
Take the pot to the graveyard in the Mort Myre swamp. Beware of ghasts as they may rot your food on your way to Dessous, unless you are carrying a charged druid pouch. Once you arrive at the graveyard, prepare yourself for combat and pour the blood on the tomb to summon Dessous.


A player fights Dessous with Wind spells, his weakness.
- Dessous has two attacking styles - a melee and a ranged/magic attack, both of which have a fast attack rate. The ranged/magic attack will hit constant 50s, while the melee attack can hit up to 200.
- A common mistake made by players whilst fighting Dessous is to panic and run around looking for a better spot. This should not be attempted, because he can teleport next to you.
- If you make him teleport more than three times, he says "I'm tired of playing with you" and return back inside the coffin, and you will have to go back to Malak for fresh blood and use new spices and garlic with it.
- Bring 1-2 prayer potions, the ectophial or a teleportation tablet, and fill your remaining inventory with good food. You can always teleport out and try again, but you need to visit Malak to refill the pot with your blood.
- Dessous changes his style of attack depending on which prayer you use, so if you pray protect from melee, he will only use ranged/magic attacks, while praying either Protect from Ranged/Magic allows him to use either. It is recommended to use the Protect from Melee prayer, as it hits considerably harder.
There are many ways to defeat Dessous:
- 1. Using Magic
- Dessous is weak against air spells, so use the strongest air spell you have access to. Drink a dose of magic and defense potions prior to the fight, activate Mystic Might and Overcharge prayers and attack him from up close. Dessous should not be be a problem, even with level 50 Magic and using Air Blast.
- 2. Using Melee
- Dessous is fairly easy to defeat using melee with Strength and Attack levels of 70 or better, but may require more food than the magic strategy as melee armour won't provide as much protection against his melee attacks as mage armour. Bring attack potions, one or two prayer potions, and 15-20 sharks/rocktails. You may wish to bring a fast weapon with a decent accuracy, like an abyssal whip, matched with a swift off-hand weapon, to try and get more opportunities to hit him. Since his magic and ranged attacks can't be avoided, Protect from Melee and any form of melee armour is recommended so as to not hinder your melee capabilities and still provide some protection.
- 3. Using Ranged
- Due to the accuracy of Dessous' attacks, even with Protect from Melee, ranging him is not recommended. Nevertheless, it is still possible with at least a level 70 ranged weapon, such as a crystal bow or black salamander. Ranged equipment such as black d'hide or Armadyl equipment will ensure your hits retain their accuracy, and an archer's ring will assist in landing critical hits. Bring ranging potions, one or two prayer potions, and 10-20 sharks or rocktails.
A player using ranged and a Dwarf Multicannon at Dessous.
- 4. Using a cannon
- A dwarf multicannon can be used to kill Dessous. In this case, simply set up the cannon and reload when needed. You can attack him with whatever you want, as the cannon will do most of the work.
After the fight, go back to Malak, who will give you the blood diamond and take the blessed pot. Make sure to bank the blood diamond immediately in the Canifis bank to prevent having to face the possibility of the stranger's appearance.
Ice Path - Kamil - Ice Diamond
- Items needed
- 1 regular cake or chocolate cake, or a chocolate bar
- Spiked boots (made by bringing Dunstan, the Burthorpe blacksmith, an iron bar and a pair of climbing boots)
- Climbing boots (In addition to the spiked boots, to climb over rock obstacles; not required if you have done Eadgar's Ruse)
- Recommended Items
The icy area reduces every single stat by 1 every few seconds, while also dealing 200 life points of damage every couple of seconds; adrenaline and run energy are reduced as well by 10 (making Rejuvenate impossible to use). You will not be able to run unless you activate Surefooted Aura, or have bathed in the salt-water spring from As a First Resort... beforehand. Under these conditions, you will have to kill 5 level 120 (level 89 after EoC) enemies, withstand attacks from aggressive, high-level wolves, have a boss fight, and then risk falling on the ice path. You can make multiple trips, if necessary.
- 4+ regular or super restore potions (depending on combat level don't forget brews)
- 3+ prayer potions (depending on combat level)
- Good food, preferably monkfish, sharks, rocktail
- You can also take some saradomin brews
- Runes for your best fire spell (Polypore strike and standard air, water, and earth spells do not affect Kamil)
- Emergency teleportation method.
- Surefooted or greater surefooted Aura
(Bringing a familiar seems to glitch the fight with Kamil; he constantly disappears and reappears, making it impossible to kill him)
Braving the Snow
This is the path to the Ice Child from north of the warriors' guild.
The lost troll child.
For this part of the quest, it is much faster and efficient to use EOC instead of Legacy mode; as Surge can compensate the long walk to Kamil.
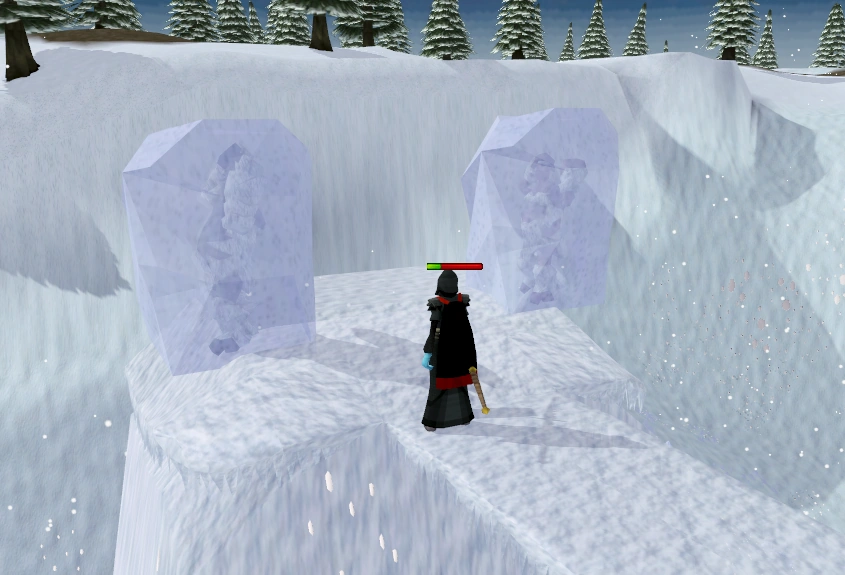
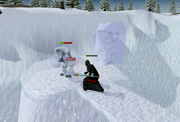
Head to Trollheim using a method such as teleporting or walking from Burthorpe. At the north-west corner of the mountain is a path leading towards the Ice Path. Do not confuse this with the northeast passage to the God Wars Dungeon. Go up this passage until you see a small troll child standing by an ice gate.
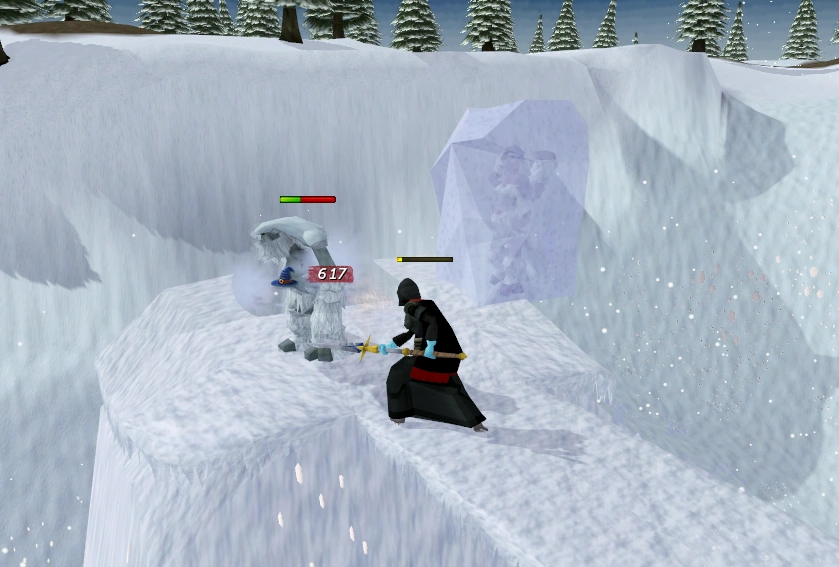
Talk to the child, and he will start crying. Give him a cake and he will tell you that his parents have been captured and frozen by a 'bad man' because they stole his diamond. Enter the ice gate and walk east towards a cave. The cave is blocked by five chunks of ice, preventing passage. Every time you kill an ice troll, one chunk falls down, which can be verified by the message: "A chunk of ice falls away from the cave entrance..." in your chat box.
- Fire spells are recommended to kill the ice trolls, as they do considerably higher damage. Pray against melee to avoid damage. Drink from a restore potion when your magic falls below the required level and eat as necessary.
Once you have killed five trolls at the gate, the cave at the back will be completely unblocked. If desired, leave to restore your stats or restock on items. Continue through the cave.
The area through the cave has level 132 (level 90+ after EoC) wolves, so Protect from Melee is highly recommended. The path is long and winding, so running when you can is highly advised, as it will save time and prevent you from dying or temporarily losing many levels. Although the cold drains your run energy, the surefooted aura or Oo'glog salt-water spring can counter this as they recharge your energy. Run mode is turned off every time you are drained and needs to be repeatedly turned back on again.
WARNING: If you are a low level player, attempting to reach Kamil can be the hardest part of this section. Do not underestimate the difficulty of moving through this area as it is loaded with fast, accurate attackers. Your stats will be drained, it's a fairly long distance to Kamil, and you will be losing large amounts of life points from both the wolves and the surroundings. Even at a combat level of 120 and with a full inventory of food, players will have a difficult time getting to Kamil and killing him, especially if not using prayer or restore potions.
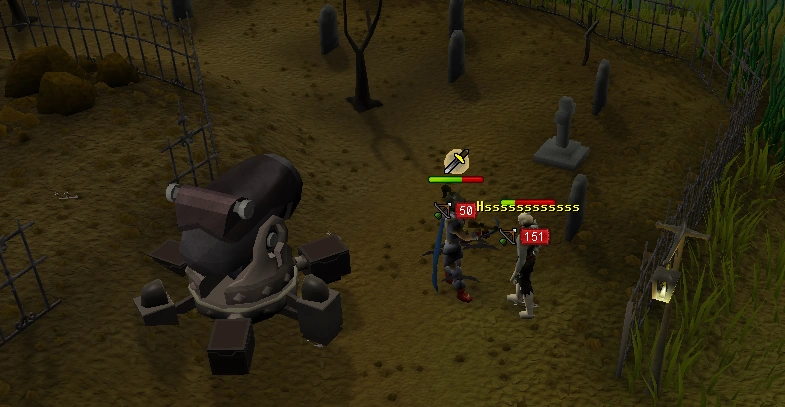
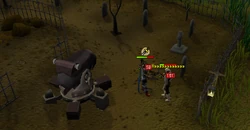
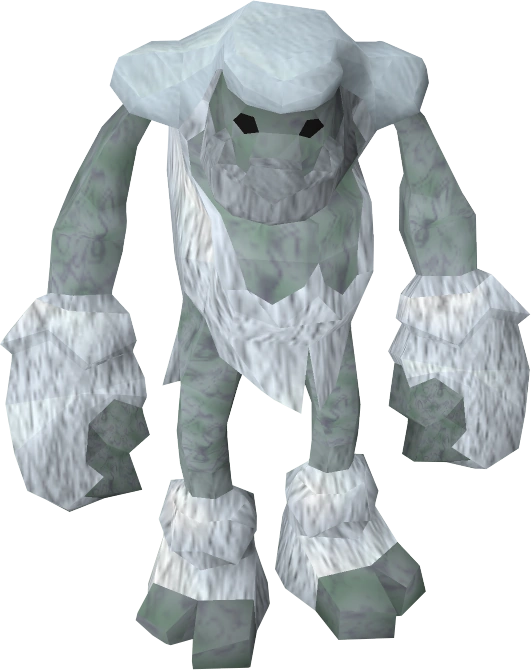
Kamil, Warrior of the Cold

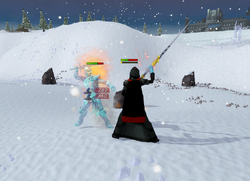
A player fights Kamil.
Kamil is a lot more deadly than his combat level suggests due to his unique ice spell, which is similar to Ice Barrage. Even if you are a very high level, it is critical to bring lots of food and potions. When you are fighting Kamil, remember to have Protect from Melee prayer on at all times, as he can hit very high with melee.
Through the first half of the fight, he freezes you frequently. While you are frozen, you will be unable to cast a spell, and after each time he freezes you, you will stop attacking. It is recommended to click "attack" as often as possible. About halfway through the fight, he stops freezing you as frequently and you will be able to make headway on casting spells at him. Kamil drops a Super restore potion and two Chocolate cakes. It is safe to eat the cakes — you will not need to give them to anyone.
- 1. Using Magic
- The highest possible level fire spell should be used here. Due to a recent update, the decreased Magic level you will suffer does not affect the ability to cast a spell, only the accuracy; but Kamil is extremely weak to fire spells inherently. When fighting, make sure to stand next to Kamil so that he will attack with melee more often than ice magic. If not, then Kamil will consistently cast his freezing spell up to several times per minute, dealing 50 damage with every hit. Even if you're capable of sustaining all of the damage, you will only have a few chances every minute to cast your own spell on Kamil. Note that Polypore Strike and air spells will NOT work against Kamil, every cast results in a splash (you can still use the Polypore staff with a standard fire spell).
- 2. Using a Cannon
- Kamil can be killed by a dwarf multicannon. Dragonhide armour is recommended to protect against the Magic attacks that he may cast. Ensure that your Ranged level does not significantly drop, either through restore potions or ranging potions. Bring at least 200 cannonballs . Coupling a strong ranged weapon with the cannon has been reported to make the fight considerably easier.
- 3. Using Melee
- Kamil can be killed using Level 70+ gear almost as easily as with magic, but he does have higher melee defence than he does against magic, so bring several restore potions to keep your stats at their regular levels. Boosts are less effective as the cold will constantly lower your stats.
After Kamil has been defeated, turn off all prayers and use food sparingly — there will be no more fighting for this diamond, so you will only have to worry about the constant 200 life point damage from the cold and the potential 200 life point damage from falling on the upcoming ice path.
Thawing the Thieves
Approaching the frozen troll parents.
For this part, playing on high detail is recommended, as the icy path can be difficult to see on standard detail.
If you are low on health, talking to the frozen trolls and leaving the menu open can temporarily stop the auto-damage and allow you to heal.
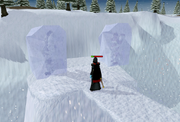
Once Kamil is dead, you need to follow the Ice Path to the north-west. The path winds anticlockwise around a small mountain. Put on your spiked boots and climb up the ledge. You will fall as you walk along the Ice Path and take 200 damage. Super restore potions may help here, since higher Agility seems to decrease the fall frequency. However with the surefooted aura you can run the whole course without falling once. Follow the Ice Path all the way to the top until you see another gate and a bridge. On the other side, the troll's parents are encased in ice. It is possible to run on the path, but a decent Agility level is needed to do so.
Freeing the Ice trolls.
The ice blocks have 1000 life points each. Attack them to free the troll mother and troll father. After freeing the troll parents, they will take you back outside the gate and their son will give you the ice diamond. Teleport out and quickly bank the diamond.
Be sure to restore any fallen stats to regular levels before continuing the quest.
Smokey Well - Fareed - Smoke Diamond
- Items needed
The polypore staff's attack does not affect Fareed.
- Recommended items
- Run energy restoration methods. (3+ super energy potions, explorer's ring 3/4, a spirit terrorbird, or the salt-water spring in Oo'glog) Try to use spotted/spottier cape and boots of lightness.
- Magic resistant armour
- A small amount of food and prayer potions may be needed, depending on your Constitution and Prayer levels.
- Runes for teleport to house if your house is in Pollnivneach, a modified house teleport tablet, desert amulet 2 or higher, coins for carpet rides or a slayer ring
Lights, Heat, Fire!

A torch in the smoke dungeon.
You will need at least one free inventory space at all times - opening the chest will cause the key to appear in your inventory, and defeating Fareed will cause the diamond to appear in your inventory.
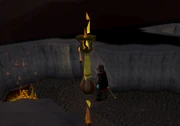
Equip a facemask or some similar kind of protection from the smoke and take all of the items listed to the Smokey Well. It is marked on the world map as a dungeon west of Pollnivneach.
There is a chest in the middle of the dungeon, which when attempted to open, says "Light the path to claim the key." In each of the four corners of this dungeon, there are torches that you need to light, using your tinderbox. Plan your route through the dungeon first, and then run and light all the torches, sipping energy potions or using summoning familiars such as the spirit terrorbird as you run.
If you have completed Smoking Kills, it is recommended to enter from the well and down the dark stairs inside Pollnivneach, and you will end up right next to a torch (marked 2 on the map below), and you won't have to run backwards to get the key. Setting your house teleport to Pollnivneach will greatly speed up this process as well. Some prayer protection could be advised for low levels; the left side contains dust devils, and the right side contains fire giants.
When all four are lit, go to the centre of the dungeon and open the burnt chest that contains a warm key. The lamps will burn out if you take too long. If you walk, the first lamp will burn out by the time you reach the chest. If you have access to the salt-water spring at Oo'glog (after As a First Resort...), it is strongly recommended to make use of it as you will be doing a lot of running during this part.
- 0, 2: Entrances
- 1-4: These are the torches you need to light. 2 is the entrance if entering by climbing down the Pollnivneach well, then through the cave to the immediate left of the well entrance. If entering at 2 best path is to light 2, 1, 3, then 4. If entering at 0 light 4, 3, 2, 1.
- 5: Chest where the key is located
- 6: Fareed
Once you have the warm key, there's no need to run any more. Stroll to the east part of the dungeon where there is a gate. Use the key with the gate and Fareed will be awakened.
Fareed, Guardian of the Smoke

Fareed; the guardian of the smoke diamond.
Fareed is arguably the easiest of the four bosses. Nevertheless, caution is required. If you die after entering Fareed's lair, you will lose your key. If Fareed kills you or you leave the fight via the gate, you do not need to relight the torches and reobtain the key.
Ice gloves are needed to wield a weapon against Fareed; if you don't wear ice gloves, you will not be able to cast any spells, as you need either a staff or a wand to cast spells. However, off-hand weapons can be used against Fareed. Fareed is weak to water spells and you need to use them to kill him. Or if you wish to range Fareed, ice arrows can be used. The crystal bow also appears to be able to be used, however, is extremely inaccurate even at high range levels. [further testing on arrow types needed since EoC update]
When fighting Fareed, using Protect from Melee is extremely important; make sure it is activated before you start the fight, as his melee attacks are very strong. His magic attack is weak, and magic-resistant armour, such as dragonhide, will greatly help.
Note: It is possible to kill him with range or magic without ice gloves. You need to run away from him and equip the weapon, fire quickly, and repeat. Everytime he gets close, you will drop your weapon again.
- 1. Using Magic
- Magic is the most effective way to kill Fareed due to his weakness to it; cast the best water spell that you have. Magic boosts are helpful, but not really necessary as he can be killed pretty fast if using water wave. The polypore staff can be used, however it should be noted that no air, earth, or fire spells, including polypore Strike, will affect Fareed.
- 2. Using Melee
- Simply wear the ice gloves and use a decent weapon such as barrows equipment or godswords. He has moderately high melee defence, so boosts and stat boosting prayers are advisable.
- 3. Using Ranged
- Range him with ice arrows while wearing ice gloves. You will need a magic shortbow, a seercull, or a dark bow to deal effective damage. Fareed will incinerate regular projectiles shot at him and turn them into ashes. Potions are highly recommended if using this method - Fareed has very high ranged defence.
Once you have killed Fareed, the smoke diamond will automatically appear in your inventory. Be sure to teleport out and immediately bank the diamond.
WARNING: If it doesn't appear in your inventory, you must pick it up from the ground, otherwise you will have to fight Fareed again.
Shadow Dungeon - Damis - Shadow Diamond
- Items needed
- Lockpicks - The amount needed depends on your Thieving level and some luck, with some players requiring as many as 100. You can bring noted lockpicks to sell to the shop there and buy back in the un-noted form, to prevent multiple trips to the camp. Lockpicks cost 3310 each at G.E. If you want to avoid paying this price the best way to obtain them would to be buy them from Martin Thwait in Rogue's Den in Taverley east of the lodestone (10 lockpicks are in stock at the shop). However 50 Agility and 50 Thieving are required to enter the trapdoor. A hair clip obtained after King's Ransom has a greater chance of picking the chest than a normal lockpick, but it will be destroyed on failure.
- Recommended items
- 1-2 antipoisons (preferably super or better) or a holy symbol (Only if using the prayer book acquired during The Great Brain Robbery). An antipoison-totem will not prevent you from being poisoned by the chest.
- Good food and potions
- A few filled waterskins
- Combat equipment to fight Damis
- A beast of burden to carry additional lockpicks.
- Gloves of silence may also help.
- Do not bring any Saradomin or Zamorak related items, it will make it very difficult to pickpocket bandits for new lockpicks and they might interrupt you when you try to picklock the chest.
Ring of Visibility

Obtaining the gilded cross.
Travel west of the Fishing Guild to where there are several moss giants. Just to the north of them, there is a fenced-in area near Baxtorian Falls, where you'll find Rasolo. Talk to him about a diamond and he will tell you about the shadow diamond, which is protected by a guardian, named Damis, in a dungeon which can only be entered with the use of a ring of visibility, which he holds himself.
He is willing to part with the ring of visibility if you can retrieve his gilded cross that was stolen by Laheeb of the Bandit Camp.
Take some food, antipoison, the bandit's brew you had bought earlier, and as many lockpicks or hair clips as you can carry to the Bandit Camp. In the southern-most tent is a secure chest; drink the bandit's brew to temporarily boost your thieving by 1 and click the confirmation and you will attempt to open the lock. And repeat until you manage to open it and get a gilded cross. There are three locks which you must get through, all of which will reset if any attempt should fail.
- Each failure will break a lockpick and deal 20-30 life points of damage. The hitsplat is always green, but you are not poisoned every time. If you are poisoned though, you will be dealt with 226 poison damage. Temporary boosts such as bandit's brew may help with this chest. You may pickpocket nearby bandits for lockpicks and anti-poisons.
- To save trips, you can also bring around 5 lockpicks and note the rest you have. When the 5 are used up, sell the noted ones to the general store and re-buy them unnoted. This allows for more food to be brought. If you run out of lockpicks you can pickpocket from the guards in the bar for them.
Once you have the gilded cross return to Rasolo and exchange it for the ring of visibility. If you lose the ring, speak with Rasolo for another one. When you wear it, a ladder will appear to the east of Rasolo, in the fenced picnic area. This is the entrance to the Shadow Dungeon.
NOTE: If you do not have 53 Thieving, you will get the same message over and over.
If you take off your ring of visibility at anytime while in the cave, you will have to leave the cave and re-enter to fight Damis.
- 1: entrance
- 2: Damis
- G: level 84 giant skeletons
- S: level 67 shadow hounds
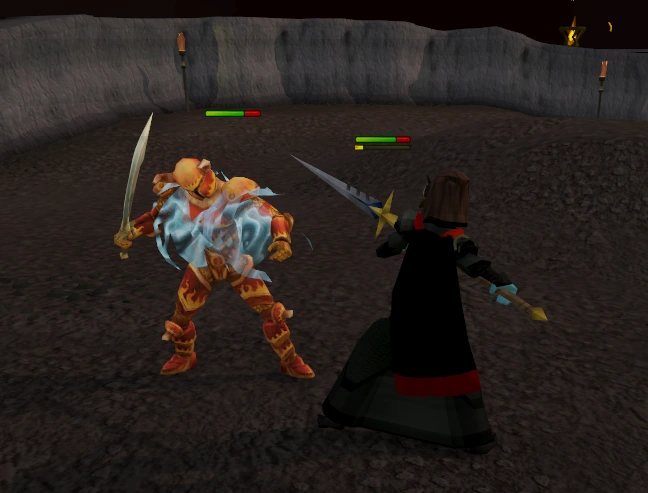
Damis, Lord of the Shadow
When you climb down the ladder, follow the directions shown by the red line, in the map above, to reach Damis's lair. Run to the centre and Damis will appear. Be aware that The Giant Skeletons are aggressive and hit fairly accurately with hits over 100.

A player attacking Damis.
The location of the corner at which Damis can be trapped.
Damis has two forms - His first form is relatively easy, whereas his second form will drain 40-60 Prayer points every time he hits you, even if he splashes and hits a zero. He only uses melee. If you die after defeating the first form you will only need to fight the second form when you come back. Bring a few prayer potions and preferably a ranged or magic weapon, as a safespot is available.
Warning: When walking to the safespot - he might disappear into the shadows and you will have to leave the dungeon completely and make your way back to fight him again or alternatively re-log into another world and he will re-appear. Do not attack him with a summoning familiar as it will cause him to vanish.
- 1. Using Magic
- Earth spells are extremely effective against Damis as it is how the quest is meant to be done by strategic means. It is recommended to use the specified safespot as Damis can burn your Prayer points constantly at a quick and steady rate at melee range, even so make sure to bring at least one or two prayer potions. Otherwise use your best earth spell coupled with frequent use of stunning abilities such as Impact.
- 2. Using Ranged
- Damis has very high ranged defence, so any weapon lower than level 70 will have difficulty hitting him, unless boosts and prayers are used. A crystal bow, at least, is recommended for its attack range.
- 3. Using Melee
- Due to the Prayer drain ability of Damis and high defence in his second form, meleeing foot to foot is not recommended. Using some form of weapon poison may prove useful if you can poison him in his first form, as he will remain poisoned in his second. It is suggested to take advantage of a safespot using a halberd.
A cannon works against him, but it is inadvisable as it would have to be set up outside the safe spot, and will frequently shoot at the skeletons and hounds. Be careful when trying to safespot him as the skeletons and hounds will try to attack you and will possibly start piling you from the moment you enter.
Once Damis is defeated, pick up the shadow diamond. Teleport out and bank the diamond.
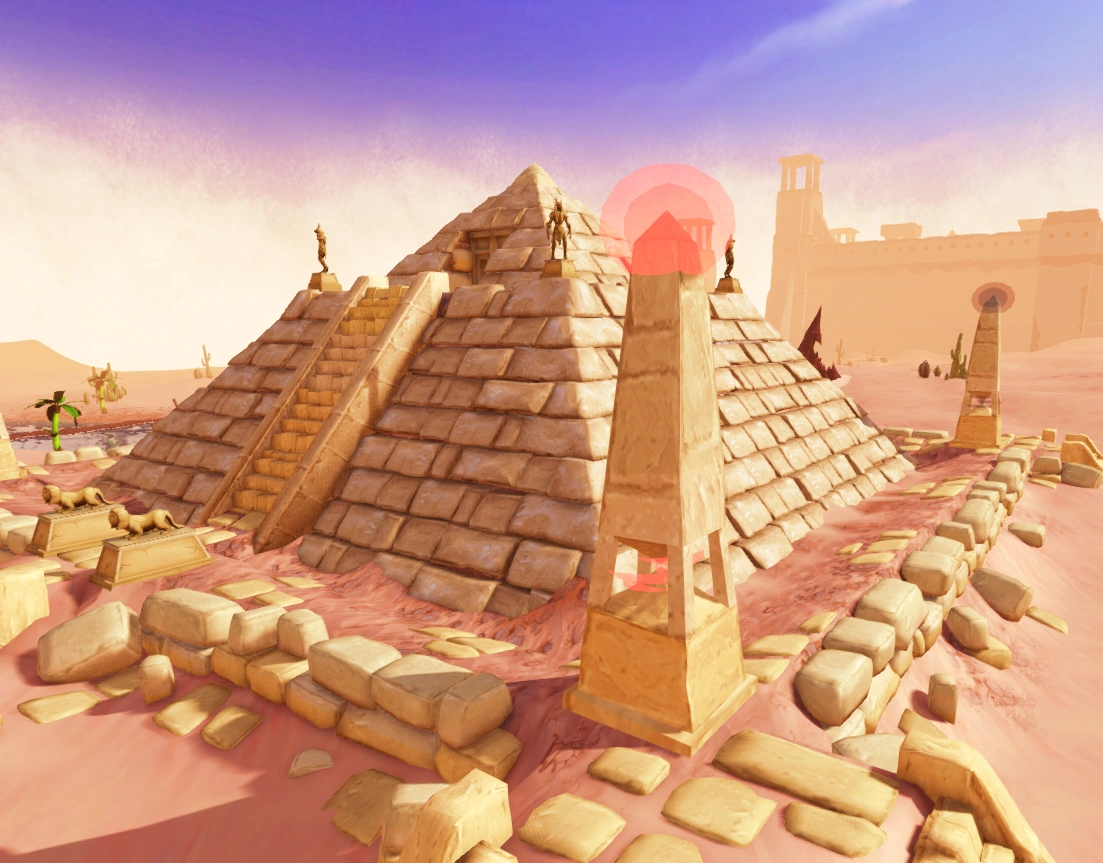
Jaldraocht Pyramid
- Items needed
- Recommended items
- Prayer point boosting equipment, holy wrench, Falador shield (for a free Prayer restore)
- Weight-reducing equipment
- Explorer's ring 3 or 4 (for both the prayer bonus and run energy)
- 2+ prayer potions
- 1 super antipoison (or some strange fruit)
- 4+ super energy potions or a dip in the Oo'glog salt-water spring (or surefooted/greater surefooted Aura)
- Waterskin or enchanted water tiara
- Some food; cooked sweetcorn is recommended as it has no weight.
- Emergency teleport for low level players if you run out of prayer potions and/or food
Iftah Ya, Simsim
The blood diamond obelisk
Return to Eblis, at the 6 mirrors in the desert. Be sure to have the four diamonds in your inventory. Go to the Pyramid southeast of Eblis (marked "Pyramid" on the world map), and place one diamond in each of the four obelisks at the outside corners of the pyramid. Each obelisk takes a specific diamond. You should be able to determine the diamond from the appearance of the obelisk, but trial-and-error placement also works. It is not possible to put a diamond into the wrong obelisk; it is also not possible to take a diamond back out of the obelisk.
When all four obelisks are activated, the pyramid will open and can be entered from the top.
Tomb Raider
Desert heat is not a factor inside the pyramid, but almost all of the interior is dangerous, with level 86 scarab swarms occasionally boiling out of the floor, and level 77 mummies roaming about and spontaneously popping out of sarcophagi. All monsters use only melee, though the scarab swarms can also poison. The scarab swarms, spontaneous mummies, and traps cannot be detected in advance. The room containing the altar on level 4, however, is safe.
Every time a scarab swarm appears or a mummy pops out of a sarcophagus, you will stop moving, and will not be able to move until the animation has finished. It is possible to avoid a scarab swarm entirely by making sure it is behind a mummy. There are also randomly activated traps that will send you back to the entrance of the pyramid if you stand still for too long. The trap placement is seemingly random so it's recommended to avoid stopping, and by bringing weight reducing clothing and plenty of energy restore potions, you can greatly reduce the chance of running into one of these traps. If you get caught by a trap you will be taken outside to the south side of the pyramid but with no damage done. Do not click directly to the ladder but keep clicking to your goal, this will reduce the chances of getting caught by traps. Just walk north and re-enter the pyramid to start over. It is useful to use a strange fruit while inside the pyramid, due to the fact that it recovers 60% run energy and cures any kind of poison you may have gotten while inside the pyramid.
The levels in the pyramid are numbered in the order the player encounters them in the quest. The purple line marks the route.
Diagram of the pyramid's exterior
- Outside
- Enter the pyramid from its top. The southern entrance to Level 4 and the Ancient Magicks altar can only be used after the quest has been completed.
Level 1 of Jaldraocht
- Level 1
- Run from the entrance ladder to the Level 2 ladder. This level is the smallest in the area, with the fewest mummies. If possible, flash your prayer and save your run energy.
Level 2 of Jaldraocht
- Level 2
- Run from the Level 2 ladder to the Level 3 ladder. This level is the second smallest in area, with a few more mummies roaming about. This room might have a few traps. Be sure to look out for them.
Level 3 of Jaldraocht
- Level 3
- Run from the Level 3 ladder to the Level 4 ladder. This level is fairly large in area, presenting more of a challenge to players traversing it. A significant number of mummies are roaming about, and there is a vast amount of traps.
Level 4 of Jaldraocht
- Level 4
- Run from the Level 3 ladder to the altar room. This level is quite large in area, with a lot of mummies roaming about everywhere except the altar room. The altar room is separated by a door - do not rely on the minimap to run outside.

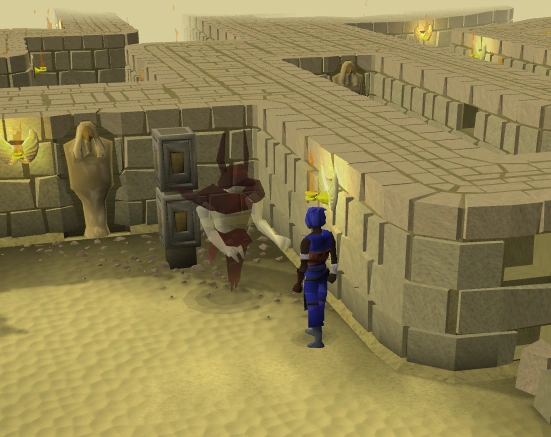
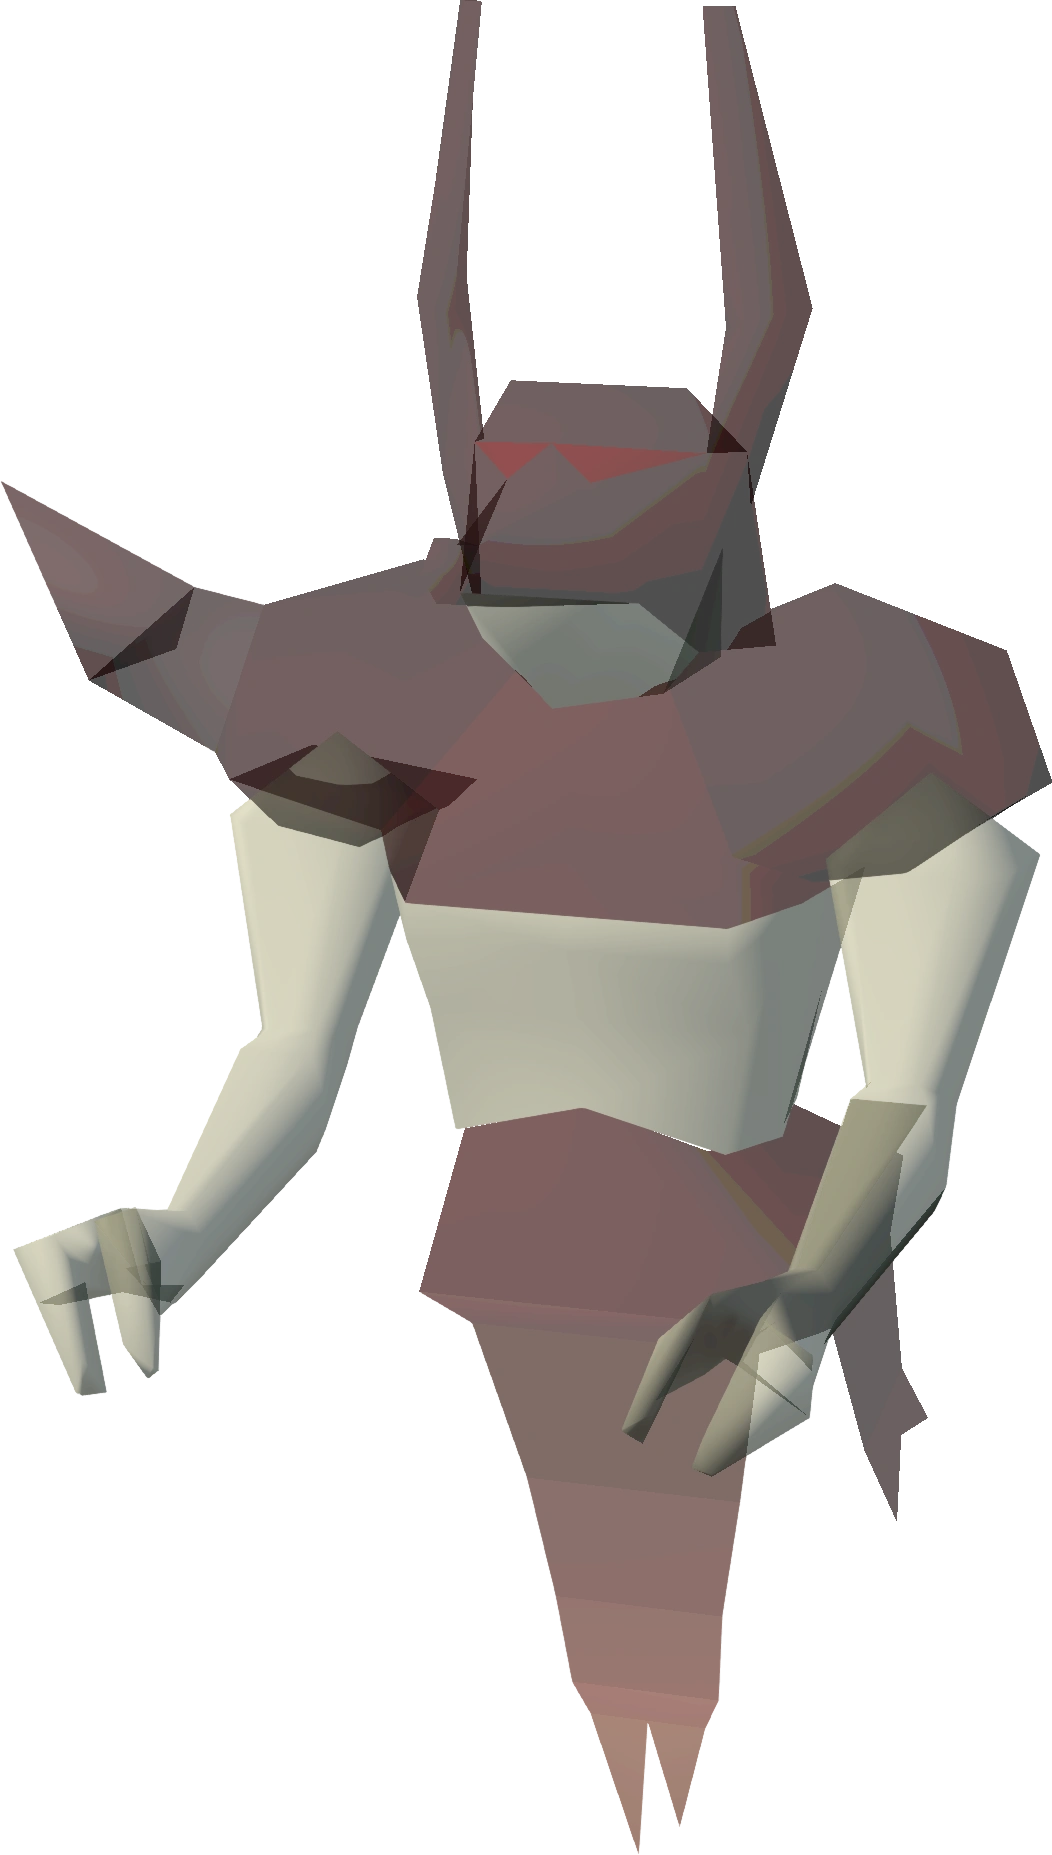
Azzanadra.
Azzanadra
It is possible for a scarab swarm to boil up inside the altar room, but this only happens if it was boiling up as you were entering the room. If this is the case, trap it between the door and an obstacle that is just in front of the door. Speak to Azzanadra, who has lost track of time and believes that the God Wars are still going on. He goes on to talk about some ancient unknown civilisations like Paddewwa, Lassar and Annakarl. He is also surprised to see that he cannot hear Zaros in his mind anymore.
Azzanadra, finally coming to peace with the reality, rewards the adventurer with the Ancient Magics of Zaros, for their efforts. (If Azzanadra is not present, use the altar and he should appear.)
Reward
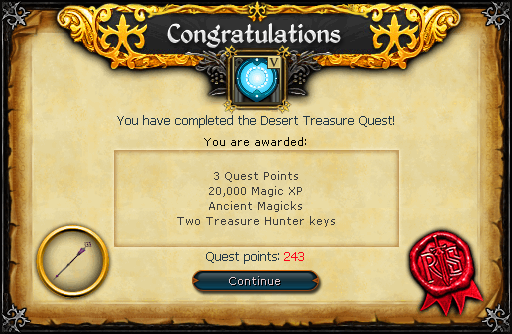
- 3 Quest Points
- 20,000
 experience
 - Ability to use Ancient Magicks. At any time, you can pray at the altar and change between the standard and Ancient Magicks spellbooks. After traversing the pyramid for the first time, you may enter via the back-door of the pyramid to gain a short cut to the altar. Be warned that changing spellbooks will drain your prayer to 0.
- Ring of visibility (If you ever lose it, you can obtain another one from Rasolo)
- You can also buy an ancient staff from Eblis for 80,000 coins, once. If you lose the staff, you will have to kill mummies inside the pyramid or at the Chaos Tunnels to get another one, or purchase a new one at the Grand Exchange for 135,580.
- Access to the Smoke Dungeon, which can be used for various slayer tasks.
- Access to the Zarosian Gravestone.
- The ability to home teleport to the Bandit Camp lodestone.
- 2 Treasure Hunter keys and 2 Hearts of Ice
Music unlocked
- Stranded - Ice Gate
- Frostbite - Ice Path
- Sarcophagus - Azzanadra's pyramid
- Path of Peril - Damis' Lair
- Bone Dry - Smokey Dungeon
- Sunburn - north of the Jaldraocht Pyramid
Required for completing
Completion of Desert Treasure is required for the following:
- Do No Evil
- Recipe for Disaster/Defeating the Culinaromancer
- The Temple at Senntisten
- Varrock Tasks:
- Hard: "Living on the Edge"
- Morytania Tasks:
- Hard: "Huge Success"
- Desert Tasks:
- Hard: "Ice-Cold Killer"
- Elite: "Staff of Stryke", "A, B, Cithara" and "Sun Shade" (Damis, Fareed, Kamil and Dessous need to be killed in the dominion tower)
- You need to obtain a Ring of visibility for:
- The Curse of Zaros
- Hopespear's Will
- The General's Shadow
- Obtaining the Holy cithara
- Finding the ghost penguin in Penguin Hide and Seek (After Some Like It Cold)
Transcript
Cultural references
- The name Eblis is derived from the Arabic word Iblīs "إبليس", which is the name of the major Satan (Devil, Shaitan or Setan) شيطان in Islam.
- 'Asgarnia Smith' is a reference to Indiana Jones, as both are archaeologists, and both have a first name after a location, and a common last name.
Desert Treasure | |||||||||
|---|---|---|---|---|---|---|---|---|---|
| NPCs | |||||||||
| Enemies |
| ||||||||
| Items |
| ||||||||
| Scenery |
| ||||||||
| Rewards |
| ||||||||
| Locations |
| ||||||||
| Music |
| ||||||||
| Miscellaneous |
| ||||||||