m (→Walkthrough) |
m (→Sewer raider) Tag: Visual edit |
||
| (112 intermediate revisions by 72 users not shown) | |||
| Line 1: | Line 1: | ||
| + | {{Confuse|Ashdale Tutorial}} |
||
| ⚫ | |||
| + | {{Has quick guide}} |
||
{{Infobox Quest |
{{Infobox Quest |
||
|name = A Shadow over Ashdale |
|name = A Shadow over Ashdale |
||
| − | |image = [[File:A Shadow over Ashdale.png| |
+ | |image = [[File:A Shadow over Ashdale.png|200px]] |
|release = [[22 April]] [[2014]] |
|release = [[22 April]] [[2014]] |
||
|update = A Shadow over Ashdale |
|update = A Shadow over Ashdale |
||
|members = No |
|members = No |
||
|voice = No |
|voice = No |
||
| − | |series = |
+ | |series = None |
|difficulty = Novice |
|difficulty = Novice |
||
|length = Short |
|length = Short |
||
| Line 14: | Line 15: | ||
|age = |
|age = |
||
}} |
}} |
||
| − | '''A Shadow over Ashdale''' is a [[free-to-play]] quest featuring the island of [[Ashdale]]. The quest has no requirements but the combat is scaled like in [[The Death of Chivalry]]. The quest features puzzles and unlike most |
+ | '''A Shadow over Ashdale''' is a [[free-to-play]] quest featuring the island of [[Ashdale]]. The quest has no requirements but the combat is scaled like in [[The Death of Chivalry]]. The quest features puzzles, and unlike most other quests, it presents story by environment rather than by dialogues. It was first announced in [[Update:Behind the Scenes - April 2014|Behind the Scenes]] for [[April]] [[2014]]. |
==Official description== |
==Official description== |
||
| − | {{ |
+ | {{Quote|Recently, ships ferrying supplies to Ashdale have returned with their cargo still aboard, reporting that the island has apparently been deserted. Gudrik is eager to investigate the mystery, but he is too old to do so himself – he needs someone to travel the island and find out what is wrong.}} |
==Walkthrough== |
==Walkthrough== |
||
| Line 24: | Line 25: | ||
|start = Speak to [[Gudrik]] in his house, south-west of the Taverley bank. |
|start = Speak to [[Gudrik]] in his house, south-west of the Taverley bank. |
||
|difficulty = Novice |
|difficulty = Novice |
||
| − | |length = |
+ | |length = Medium |
|members = No |
|members = No |
||
| ⚫ | |||
| ⚫ | |||
|kills = |
|kills = |
||
| − | + | * Several [[Crassian scout]]s (scales with your stats; some may be avoided)<br>{{*}} [[Agoroth]] (scales with your stats) |
|
| ⚫ | |||
| ⚫ | |||
}} |
}} |
||
| Line 36: | Line 37: | ||
Speak to [[Gudrik]] just southwest of [[Taverley]] bank. He says that the supply ships that are regularly sent to [[Ashdale]], an island located near the [[Feldip Hills]], have started returning with their cargo still aboard. The island is apparently deserted and an evil aura hangs over it. He asks you to travel to Ashdale to investigate. |
Speak to [[Gudrik]] just southwest of [[Taverley]] bank. He says that the supply ships that are regularly sent to [[Ashdale]], an island located near the [[Feldip Hills]], have started returning with their cargo still aboard. The island is apparently deserted and an evil aura hangs over it. He asks you to travel to Ashdale to investigate. |
||
| − | [[File:ASOA Finding Lucy.png|thumb| |
+ | [[File:ASOA Finding Lucy.png|thumb|200px|Lucy, one of the residents of Ashdale, too frightened to leave alone.]] |
| − | Board the ship docked to the west. When you arrive in Ashdale, walk through the town until you meet [[Lucy (Ashdale)|Lucy]], who is cowering in her house. She |
+ | Board the ship docked to the west. When you arrive in Ashdale, walk through the town. You will encounter some slime and a claw on the way, inspect them if you wish, and then continue until you meet [[Lucy (A Shadow over Ashdale)|Lucy]], who is cowering in her house. She tells you that the town was attacked by horrible creatures, and although she avoided them by hiding in her attic, the townspeople were taken away. She doesn't know where they are now, but guesses they may be under the island somewhere. You say that you need to get to the other side of the island and she suggests using the sewers, which can be entered through a pipe behind her house. |
{{clear|left}} |
{{clear|left}} |
||
===Sewer raider=== |
===Sewer raider=== |
||
| + | Enter the sewer from the storm drain out the back door. The sewer is populated by a few non-aggressive level 2 [[sewer rat]]s, and three coin spawns can be found along the way; pick these up if you wish (60, 50 and 40 coins, respectively). |
||
| ⚫ | |||
| − | Enter the sewer from the entrance out the back door. The sewer is populated by a few non-aggressive level 4 [[sewer rat]]s. When you reach the first chamber, a cut scene will introduce the [[Crassian scout]]. Kill it (it drops a [[Minnow]], which doesn't need to be kept) and continue down the sewer to the second chamber, with a second Crassian scout. Kill it and climb the ladder to leave the sewers. |
||
| ⚫ | |||
| − | Climb the steps and after a brief cutscene you will be in an area with two more Crassian scouts. Although they are aggressive, killing them appears to be optional. Go through the gate to the south and enter the house at the top. Search the table to find a [[Journal Entry|page from an old journal]]. This is the journal of Ogden Plainview, who was planning the construction of the house above some caves. Inspect the bust to open a stairway leading downwards. |
||
| + | When you reach a large chamber, you will step in some slime and a [[crassian scout]] will ambush you from above. It attacks with ranged and melee, and has the ability to stun you and then retreat to attack you from a distance. When its adrenaline bar reaches over 50%, it gains the ability to use an attack which will damage you heavily, depleting its adrenaline in the process. Alternately, you can run past the scout. On death, the crassian will drop a [[minnow]]. Although picking it up is not necessary for the quest, it can nevertheless be eaten to heal 200 life points. |
||
| + | Continue down the sewer and you will eventually reach the second chamber, with a second crassian scout. Either run past it or kill it and head up the ladder. |
||
| ⚫ | |||
| ⚫ | Descend the stairs. You will now be in the [[ |
||
| + | You will emerge from a storm drain in the Ashdale Farm, now devoid of cows. Head south up two sets of stairs (past the minnow pond), and after a short cutscene showing a house, you'll reach two more crassian scouts. Again, either dodge them or kill them. |
||
| − | Advance down the cave, which contains one more scout. Enter a cavern containing barrels and pipes. After a brief cutscene, you will need to open the door by channelling water to it. |
||
| + | Go through the gate to the south and enter the house at the top. Search the table to find a [[Journal Entry|page from an old journal]], which explains that the house was built by the [[Fourth Age]] architect Ogden Plainview, on top of a seastack that houses a vertical tunnel which leads to a large network of caverns. The page also reveals that he was thinking of making a hidden entrance to the caves in the house. Inspect the bust of his head, and the centrepiece of the room will transform into a staircase leading to the caves. |
||
| − | [[File:ASOA Barrel puzzle.png|250px|thumb|The water-barrel puzzle.]] |
||
| ⚫ | Collect the [[ |
||
| ⚫ | |||
| ⚫ | Go through the door and enter a chamber where you will find three more |
||
| ⚫ | Descend the stairs. You will now be in the large [[Ashdale Caves]] with another [[crassian scout]] and a dead smuggler. Search the body to find a [[smuggler's journal]], which explains that a band of smugglers had discovered the caves and planned to make it their hideout. They accidentally stirred up a nest of creatures, which abducted their captain and killed the rest of the crew. |
||
| − | [[File: |
+ | [[File:ASOA Barrel puzzle.png|thumb|Turning a valve to solve a water-barrel puzzle.]] |
| ⚫ | Advance down the cave, which contains another scout. Enter a cavern containing barrels, pipes and a large door which you must open by channelling water to it. Collect the [[valve outer wheel]], [[valve inner wheel]] and [[pitch]]. Repair the leak in the pipe using the pitch, combine the wheel parts into a [[Valve wheel (A Shadow over Ashdale)|valve wheel]] by using them on each other and then repair the socket on the central barrel. The barrel at the end of the pipe is already full of water, and you will need to turn the valve wheel on that barrel to move it to the other barrels in sequence, until you flush down the last barrel into the door, which opens it. |
||
| − | Enter the next tunnel, where a cutscene will show the approach of a [[Crassian warrior]]. If you approach the creature, you will immediately die, but respawn at the same place without losing any items. However if you pull the lever on the wall, the spike trap will activate, killing the warrior and opening the door to the next area. |
||
| ⚫ | Go through the door and enter a chamber where you will find three more crassian scouts. This chamber contains crassian pods, which appear to play some part in the crassian reproductive process. Kill the scouts and the barrier to the next area will disintegrate. Unless you have low life points, do not leave this room without killing all three scouts, otherwise your progress will be reset and you will have to kill another three scouts. Optionally search the chest in the northwest to find 125 coins and an [[uncut sapphire]]. |
||
| ⚫ | |||
| + | [[File:Killing a Crassian warrior.png|Pulling a lever impales a Crassian warrior.|left|thumb]] |
||
| − | Advance to the next area, where there are two separate warriors on two different traps. Dodge the first and find the lever on the wall at the second warrior and pull it to dispatch the two warriors. |
||
| + | Enter the next tunnel and approach the next area, where a cutscene will show the approach of a [[crassian warrior]] patrolling over a corridor with a spike trap beneath it. If you approach the creature, it will fire an unavoidable and unblockable ranged attack that deals damage equal to your current life points. However, being hit and killed by the attack does not count as dying - it simply places you at the start of the area with all of your items intact. To get past the warrior, go over and pull the lever on the opposite wall whilst its back is turned. This will activate the spike trap, killing the warrior and opening the barrier to the next area. |
||
| ⚫ | |||
| ⚫ | |||
| − | In the |
+ | In the third crassian warrior area, there are two separate warriors on two different traps. Avoid the first warrior and find the lever on the northern wall at the second warrior and pull it to dispatch both of them. |
| ⚫ | |||
| ⚫ | |||
| + | |||
| ⚫ | |||
===Release the Kraken=== |
===Release the Kraken=== |
||
| − | Climb on to the ship. Four [[Tentacle (A Shadow over Ashdale)|tentacles]] will appear from underneath |
+ | Climb on to the ship. Four [[Tentacle (A Shadow over Ashdale)|tentacles]] will appear from underneath and attack you. Kill each of the four in turn. They have 201 life points and have a damage received cap of 40 life points per hit. Though they are easy to kill, some food might be useful. They attack by slamming the area in front of them, and they shake before doing so, giving you ample time to move away to avoid it. |
| + | After they are defeated, a giant crassian known as [[Agoroth]] will then emerge from the ship, being revealed to be the true source of the tentacles. You will now need to defeat him in order to save the residents of Ashdale. |
||
| ⚫ | |||
| ⚫ | Standing close to Agoroth during the fight will result in being hit by |
||
| ⚫ | |||
| ⚫ | |||
| ⚫ | Standing close to Agoroth during the fight will result in being hit by a constant 100% hitting attack which deals a constant amount of damage. Standing further away will result in tentacles riding from your side of the ship, similar to the previously encountered ones but not attackable. From the moment you are at their range they will start whirling and then will hit the ground dealing a constant amount of damage if you did not get out of their range, which is wider than how it actually looks. |
||
| + | [[File:Fighting Agoroth.png|thumb|left|The battle with Agoroth.]] |
||
| ⚫ | If you find defeating Agoroth hard, you can use some kind of hit and run technique. |
||
| ⚫ | While above 50% health, Agoroth will frequently use a special attack, a flow of water that will knock you back if hit and damage you. This attack covers half of the ship's width and its range is bigger than Agoroth's normal attack. On Agoroth's health bar, there are marks at 3/4, 1/2 and 1/4. Once he is beneath 50% of his life points, Agoroth will start using another heavily damaging special attack in the form of green material falling in patterns on the floor. He will become shielded and invulnerable, and dark marks will appear on two opposite quarters of the floor. Run to an area where there aren't any marks, or you will be dealt heavy damage. When under 25% life points, his special attack will cover 5/9 of the floor, spread diagonally. |
||
| + | [[File:Agoroth dies.png|thumb|Agoroth is finally defeated.]] |
||
| − | '''You can exit the battle at any time, and return to the battle by going on the same ship again, with no need to play through the quest again!''' |
||
| ⚫ | If you find defeating Agoroth hard, you can use some kind of hit and run technique. If you run up either of the ship's staircases towards the stern of the ship, you will be protected from any kind of attack, and you could use a long-range weapon (range or magic) to attack. In order to attack you must get closer, but you can easily attack once or even twice and run back to the safe spot before being hit by the tentacles. Using this method will take some time but will help you win if you cannot manage to win easily. |
||
===Peace restored=== |
===Peace restored=== |
||
| − | [[File:A Shadow over Ashdale - Ashdale is safe.png|thumb |
+ | [[File:A Shadow over Ashdale - Ashdale is safe.png|thumb|The town is safe once more.]] |
| + | After Agoroth is dead, the townspeople will be freed and cheer for you. You will then be taken back to a much sunnier [[Ashdale]], and you may optionally talk to some of the extremely grateful villagers for them to thank you. When you are ready to leave, speak to Lucy, and you will return to [[Gudrik]] in [[Taverley]]. You will tell him of what has occurred, and he will congratulate you. Ask for your reward to complete the quest. |
||
| − | A final cutscene will show the townsfolk cheering their rescue. You will appear back in the town where Lucy will congratulate you. Speak to her to be transported back to [[Gudrik]] in Taverley. |
||
{{clear}} |
{{clear}} |
||
==Rewards== |
==Rewards== |
||
| + | {{Quest rewards |
||
| ⚫ | |||
| + | |name = A Shadow Over Ashdale |
||
| − | *1 [[Quest points|quest point]] |
||
| + | |qp = 1 |
||
| − | *Attack XP Lamp worth 300 XP |
||
| + | |rewards = |
||
| − | *Strength XP Lamp worth 300 XP |
||
| + | * {{Skill XP|Attack|300}} [[Attack XP lamp|lamp]] |
||
| − | *Defence XP Lamp worth 300 XP |
||
| + | * {{Skill XP|Strength|300}} [[Strength XP lamp|lamp]] |
||
| − | *Constitution XP Lamp worth 300 XP |
||
| + | * {{Skill XP|Defence|300}} [[Defence XP lamp|lamp]] |
||
| ⚫ | |||
| + | * {{Skill XP|Constitution|300}} [[Constitution XP lamp|lamp]] |
||
| ⚫ | |||
| ⚫ | |||
| − | *{{Universal quest reward}} |
||
| ⚫ | |||
| + | * Access to the dead man's chest in the [[Ashdale Caves]] to repeat the battle against Agoroth, giving a black pearl (or coins) with bonus experience in any skill equal to that of a [[medium fallen star]]. This can be done once per week for free players or twice a week for members. |
||
| + | * 757 [[coins]], four [[uncut sapphire]]s and an [[uncut emerald]], for searching the chests in the dungeon |
||
| + | |music = |
||
| + | * [[Scape Dark]] |
||
| + | }} |
||
| + | |||
| + | ==Achievement== |
||
| + | * {{Achievement|Shadow Hanging Over Me|5|Claim all treasure from the chests during (or from Gudrik after) the 'A Shadow over Ashdale' quest.}} |
||
| + | |||
| + | ==Transcript== |
||
| + | {{hasdialogue|quest}} |
||
==Trivia== |
==Trivia== |
||
| ⚫ | |||
| − | *This was the first new quest released to free players that did not replace an existing quest since [[The Blood Pact]], in 2010. |
+ | * This was the first new quest released to free players that did not replace an existing quest since [[The Blood Pact]], which was released in 2010. |
| − | *The quest's name is |
+ | * The quest's name is a reference to "''{{wp|The Shadow over Innsmouth}}''", a novella by {{wp|H. P. Lovecraft}}. The story's plot revolves around a seaside town in Massachusetts known as Innsmouth, which is inhabited by a race of beings known as the Deep Ones. |
| − | *The music heard while fighting Agoroth is the same music heard when fighting Vorago. |
+ | * The music heard while fighting Agoroth is the same music heard when fighting [[Vorago]]. |
| − | *Upon completion of the quest the Adventurer's Log states: ''I defeated Agoroth, the crassians' leader, and freed the people of Ashdale.'' |
+ | * Upon completion of the quest the Adventurer's Log states: ''I defeated Agoroth, the crassians' leader, and freed the people of Ashdale.'' |
| + | * There are references in the quest to multiple items of traditional pirate lore, some of which are also referenced in the ''Pirates of the Caribbean'' movie series: |
||
| + | ** The black pearls given as a reward from the quest. |
||
| + | ** The dead man's chest. |
||
| + | ** The tentacles that attack the ship, like tentacles of a {{WP|kraken}}. |
||
| + | ** The name of the ship you battle Agoroth on is the Empress, a possible reference to the Empress from ''Pirates of the Caribbean: At World's End''. |
||
| + | * If the player has a combat level that goes beyond Free-to-Play armour requirements, this quest can be one of the most difficult Free-to-Play quests to complete as the monsters scale into Members gear requirements. |
||
| + | * The Crassian warriors do around 30,000 damage with their ranged attack, as can be seen by getting lucky with a defender during the quest. |
||
| + | {{A Shadow Over Ashdale}} |
||
{{F2P Quests}} |
{{F2P Quests}} |
||
| ⚫ | |||
| − | |||
[[fi:A Shadow over Ashdale]] |
[[fi:A Shadow over Ashdale]] |
||
| − | + | {{DEFAULTSORT:Shadow over Ashdale, A}} |
|
Latest revision as of 20:22, 13 March 2019

| |||||||||||||||||||||||||
| Release date | 22 April 2014 (Update) | ||||||||||||||||||||||||
|---|---|---|---|---|---|---|---|---|---|---|---|---|---|---|---|---|---|---|---|---|---|---|---|---|---|
| Members | No | ||||||||||||||||||||||||
| Voice Over | No | ||||||||||||||||||||||||
| Official difficulty | Novice | ||||||||||||||||||||||||
| Quest series | None | ||||||||||||||||||||||||
| Age | Sixth Age | ||||||||||||||||||||||||
| |||||||||||||||||||||||||
A Shadow over Ashdale is a free-to-play quest featuring the island of Ashdale. The quest has no requirements but the combat is scaled like in The Death of Chivalry. The quest features puzzles, and unlike most other quests, it presents story by environment rather than by dialogues. It was first announced in Behind the Scenes for April 2014.
Official description
Recently, ships ferrying supplies to Ashdale have returned with their cargo still aboard, reporting that the island has apparently been deserted. Gudrik is eager to investigate the mystery, but he is too old to do so himself – he needs someone to travel the island and find out what is wrong.
Walkthrough
| Start point | |
|---|---|
| Member requirement | |
| Official difficulty | |
| Official length | Medium |
| Requirements | Skill requirements are not boostable unless marked with a [B] for boostable.
|
| Items required | Items from the tool belt are not listed unless they do not work or are not automatically added.
|
| Recommended | |
| Enemies to defeat |
|

Return to Ashdale
Speak to Gudrik just southwest of Taverley bank. He says that the supply ships that are regularly sent to Ashdale, an island located near the Feldip Hills, have started returning with their cargo still aboard. The island is apparently deserted and an evil aura hangs over it. He asks you to travel to Ashdale to investigate.

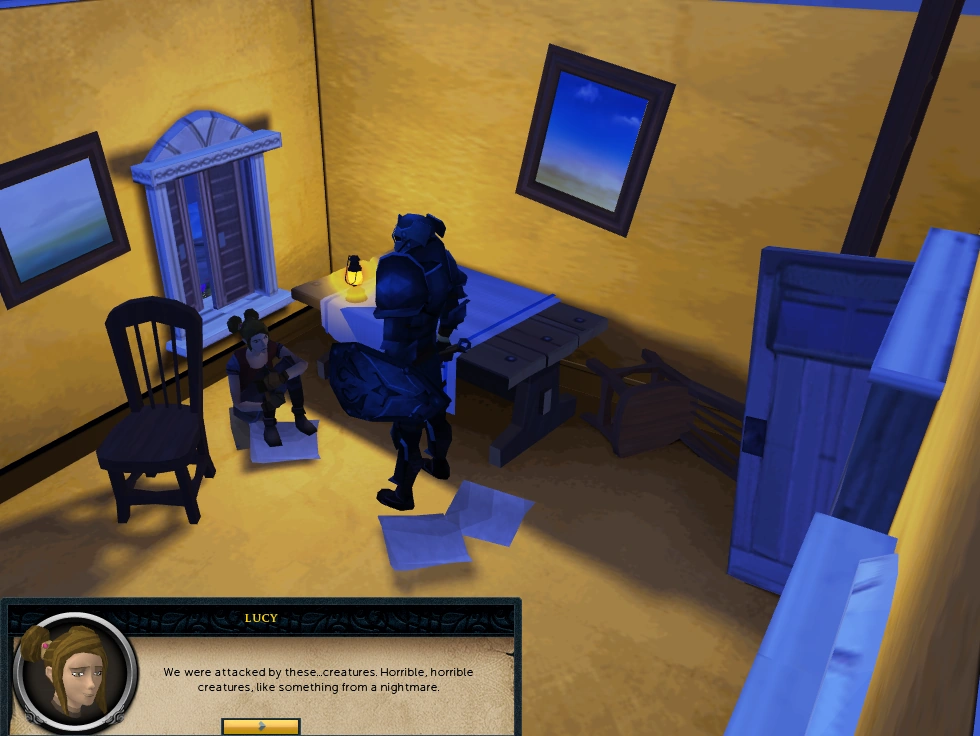
Lucy, one of the residents of Ashdale, too frightened to leave alone.
Board the ship docked to the west. When you arrive in Ashdale, walk through the town. You will encounter some slime and a claw on the way, inspect them if you wish, and then continue until you meet Lucy, who is cowering in her house. She tells you that the town was attacked by horrible creatures, and although she avoided them by hiding in her attic, the townspeople were taken away. She doesn't know where they are now, but guesses they may be under the island somewhere. You say that you need to get to the other side of the island and she suggests using the sewers, which can be entered through a pipe behind her house.
Sewer raider
Enter the sewer from the storm drain out the back door. The sewer is populated by a few non-aggressive level 2 sewer rats, and three coin spawns can be found along the way; pick these up if you wish (60, 50 and 40 coins, respectively).
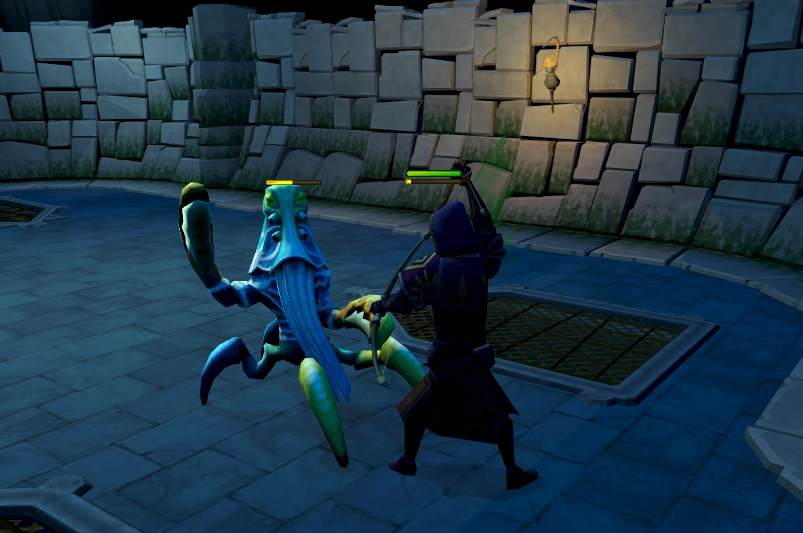
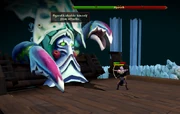
Fighting a Crassian scout.
When you reach a large chamber, you will step in some slime and a crassian scout will ambush you from above. It attacks with ranged and melee, and has the ability to stun you and then retreat to attack you from a distance. When its adrenaline bar reaches over 50%, it gains the ability to use an attack which will damage you heavily, depleting its adrenaline in the process. Alternately, you can run past the scout. On death, the crassian will drop a minnow. Although picking it up is not necessary for the quest, it can nevertheless be eaten to heal 200 life points.
Continue down the sewer and you will eventually reach the second chamber, with a second crassian scout. Either run past it or kill it and head up the ladder.
You will emerge from a storm drain in the Ashdale Farm, now devoid of cows. Head south up two sets of stairs (past the minnow pond), and after a short cutscene showing a house, you'll reach two more crassian scouts. Again, either dodge them or kill them.
Go through the gate to the south and enter the house at the top. Search the table to find a page from an old journal, which explains that the house was built by the Fourth Age architect Ogden Plainview, on top of a seastack that houses a vertical tunnel which leads to a large network of caverns. The page also reveals that he was thinking of making a hidden entrance to the caves in the house. Inspect the bust of his head, and the centrepiece of the room will transform into a staircase leading to the caves.
The smuggler's cavern
Descend the stairs. You will now be in the large Ashdale Caves with another crassian scout and a dead smuggler. Search the body to find a smuggler's journal, which explains that a band of smugglers had discovered the caves and planned to make it their hideout. They accidentally stirred up a nest of creatures, which abducted their captain and killed the rest of the crew.
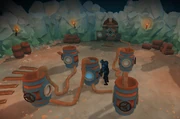
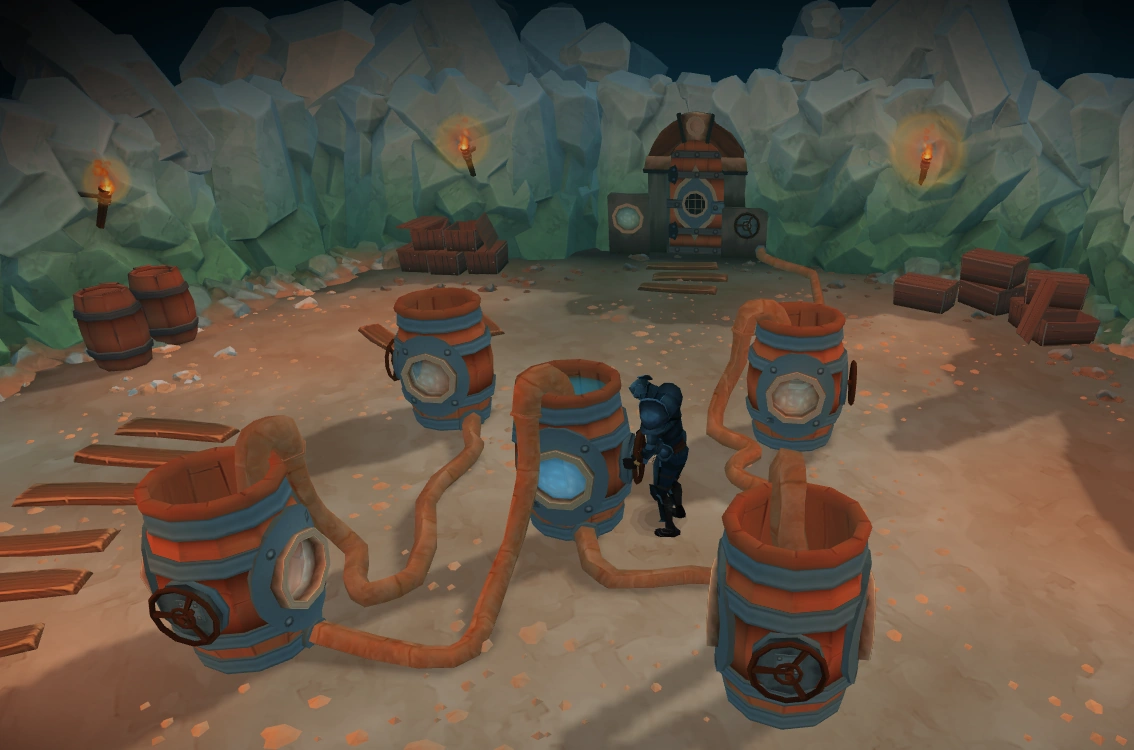
Turning a valve to solve a water-barrel puzzle.
Advance down the cave, which contains another scout. Enter a cavern containing barrels, pipes and a large door which you must open by channelling water to it. Collect the valve outer wheel, valve inner wheel and pitch. Repair the leak in the pipe using the pitch, combine the wheel parts into a valve wheel by using them on each other and then repair the socket on the central barrel. The barrel at the end of the pipe is already full of water, and you will need to turn the valve wheel on that barrel to move it to the other barrels in sequence, until you flush down the last barrel into the door, which opens it.
Go through the door and enter a chamber where you will find three more crassian scouts. This chamber contains crassian pods, which appear to play some part in the crassian reproductive process. Kill the scouts and the barrier to the next area will disintegrate. Unless you have low life points, do not leave this room without killing all three scouts, otherwise your progress will be reset and you will have to kill another three scouts. Optionally search the chest in the northwest to find 125 coins and an uncut sapphire.
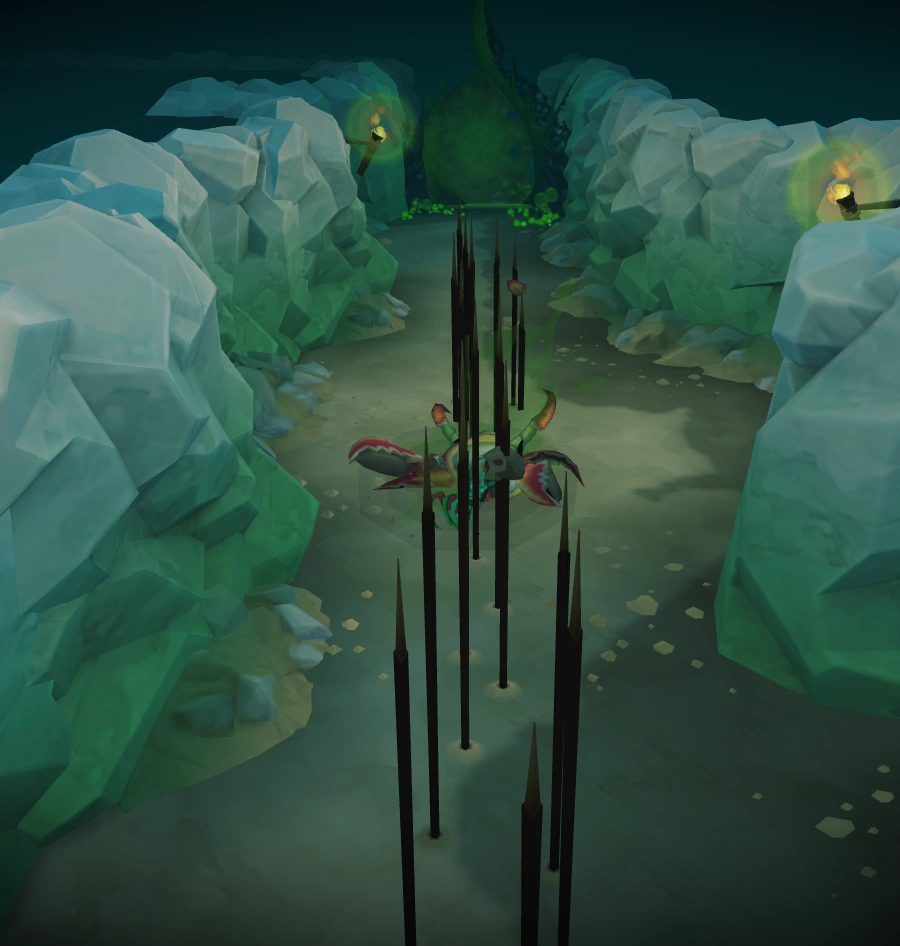

Pulling a lever impales a Crassian warrior.
Enter the next tunnel and approach the next area, where a cutscene will show the approach of a crassian warrior patrolling over a corridor with a spike trap beneath it. If you approach the creature, it will fire an unavoidable and unblockable ranged attack that deals damage equal to your current life points. However, being hit and killed by the attack does not count as dying - it simply places you at the start of the area with all of your items intact. To get past the warrior, go over and pull the lever on the opposite wall whilst its back is turned. This will activate the spike trap, killing the warrior and opening the barrier to the next area.
The next area has another crassian warrior moving around a circular trap. Dispatch it in the same way by pulling the lever on the opposite wall while avoiding contact with the creature, which will open the barrier to the next room.
In the third crassian warrior area, there are two separate warriors on two different traps. Avoid the first warrior and find the lever on the northern wall at the second warrior and pull it to dispatch both of them.
Through the next barrier, after the body of another dead smuggler, optionally search a chest to find 500 coins and three more uncut sapphires. In the next area, there are two traps, each with two warriors patrolling. The lever can be found on the northern wall at the second trap.
Continue onward towards a large ship and you will encounter two scouts after a short cutscene, which you can either run past or kill. Optionally search the chest to find 132 coins and an uncut emerald.
Release the Kraken
Climb on to the ship. Four tentacles will appear from underneath and attack you. Kill each of the four in turn. They have 201 life points and have a damage received cap of 40 life points per hit. Though they are easy to kill, some food might be useful. They attack by slamming the area in front of them, and they shake before doing so, giving you ample time to move away to avoid it.
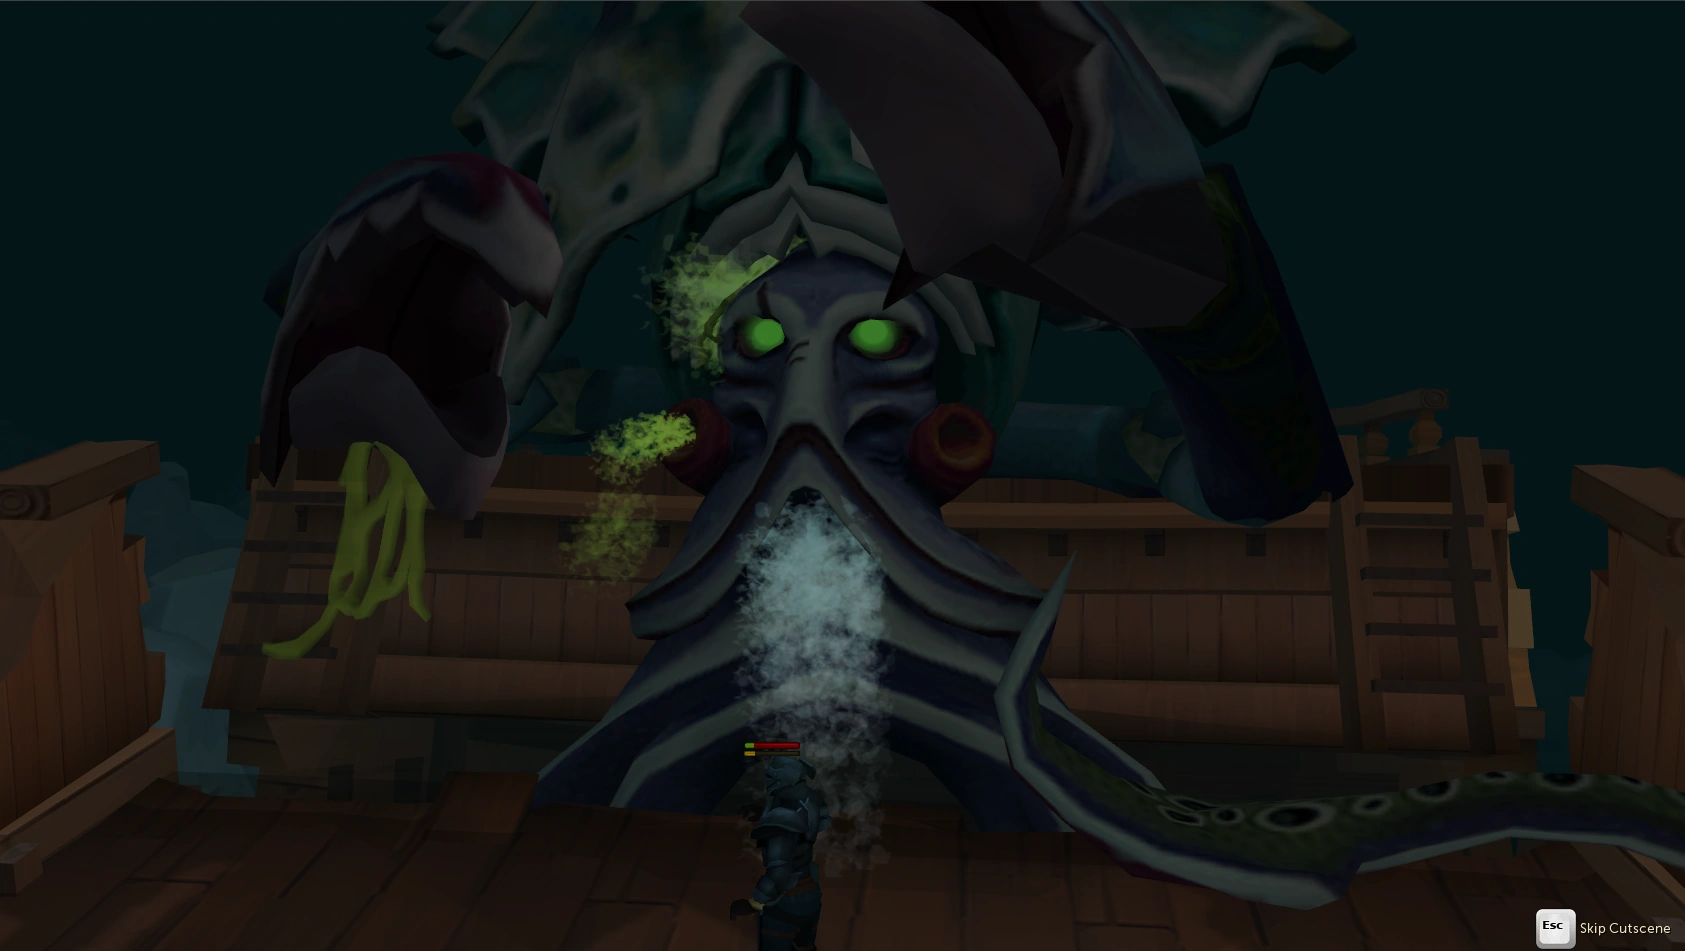
After they are defeated, a giant crassian known as Agoroth will then emerge from the ship, being revealed to be the true source of the tentacles. You will now need to defeat him in order to save the residents of Ashdale.
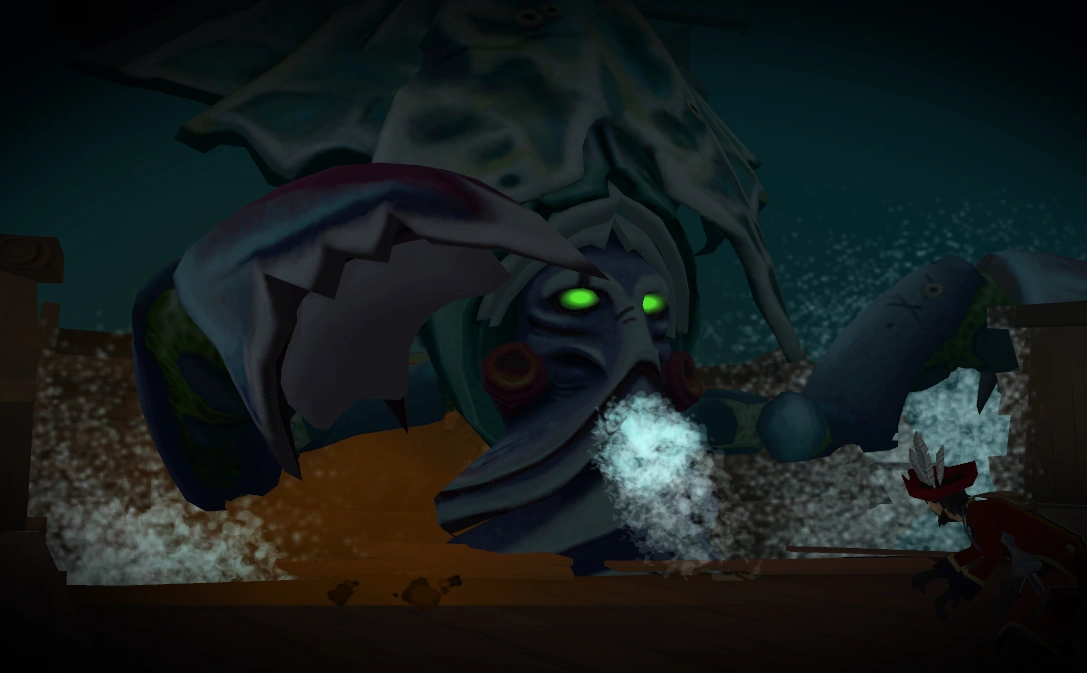

Agoroth bursts forth from the depths of the sea.
Standing close to Agoroth during the fight will result in being hit by a constant 100% hitting attack which deals a constant amount of damage. Standing further away will result in tentacles riding from your side of the ship, similar to the previously encountered ones but not attackable. From the moment you are at their range they will start whirling and then will hit the ground dealing a constant amount of damage if you did not get out of their range, which is wider than how it actually looks.
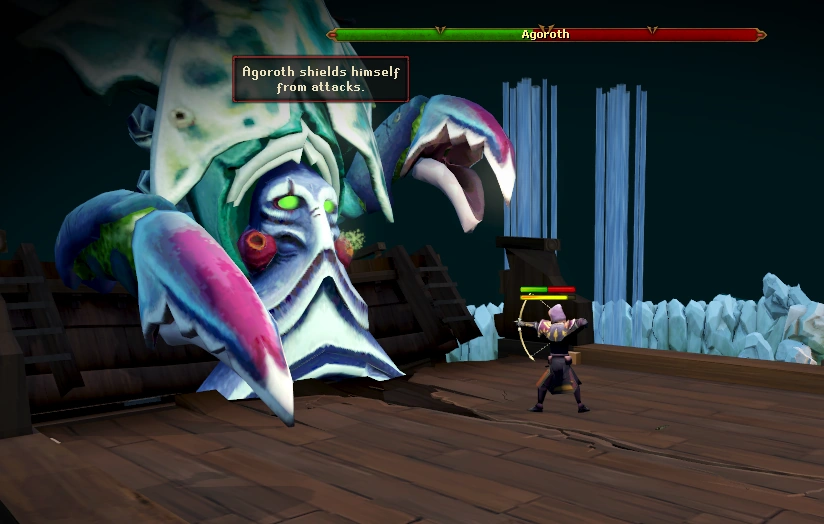
The battle with Agoroth.
While above 50% health, Agoroth will frequently use a special attack, a flow of water that will knock you back if hit and damage you. This attack covers half of the ship's width and its range is bigger than Agoroth's normal attack. On Agoroth's health bar, there are marks at 3/4, 1/2 and 1/4. Once he is beneath 50% of his life points, Agoroth will start using another heavily damaging special attack in the form of green material falling in patterns on the floor. He will become shielded and invulnerable, and dark marks will appear on two opposite quarters of the floor. Run to an area where there aren't any marks, or you will be dealt heavy damage. When under 25% life points, his special attack will cover 5/9 of the floor, spread diagonally.
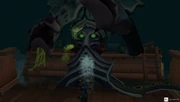
Agoroth is finally defeated.
If you find defeating Agoroth hard, you can use some kind of hit and run technique. If you run up either of the ship's staircases towards the stern of the ship, you will be protected from any kind of attack, and you could use a long-range weapon (range or magic) to attack. In order to attack you must get closer, but you can easily attack once or even twice and run back to the safe spot before being hit by the tentacles. Using this method will take some time but will help you win if you cannot manage to win easily.
Peace restored
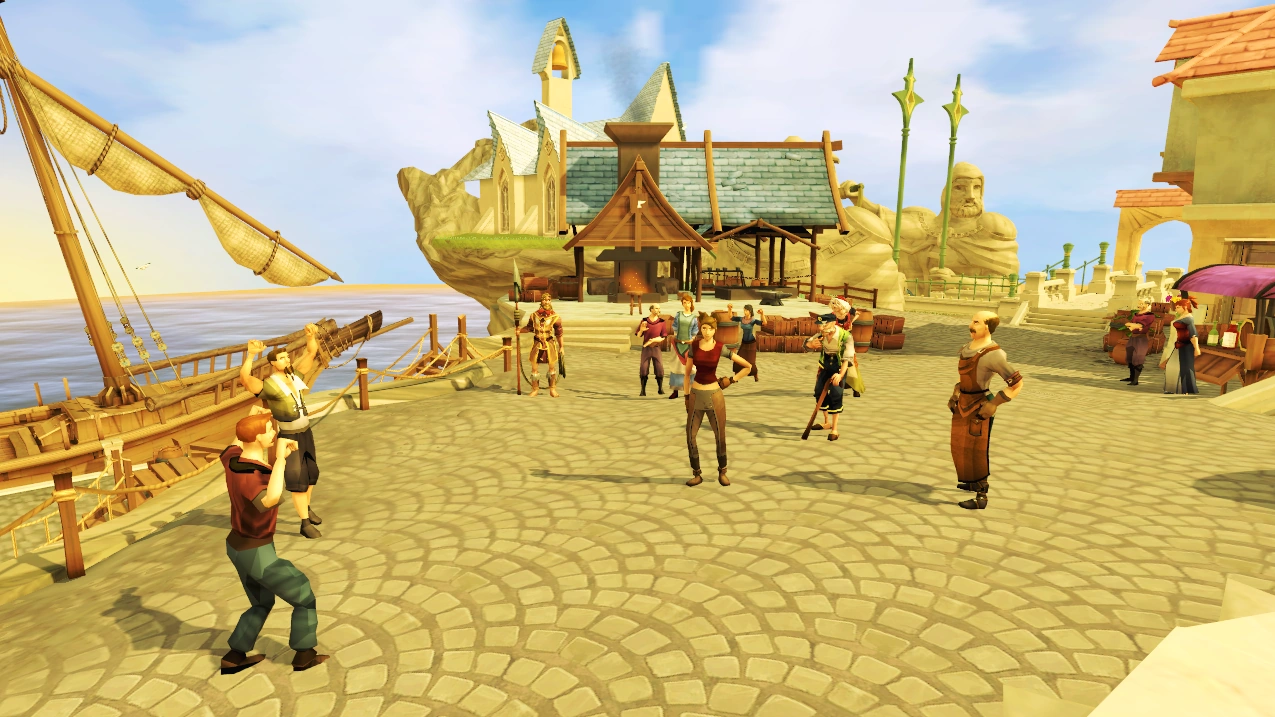

The town is safe once more.
After Agoroth is dead, the townspeople will be freed and cheer for you. You will then be taken back to a much sunnier Ashdale, and you may optionally talk to some of the extremely grateful villagers for them to thank you. When you are ready to leave, speak to Lucy, and you will return to Gudrik in Taverley. You will tell him of what has occurred, and he will congratulate you. Ask for your reward to complete the quest.
Rewards
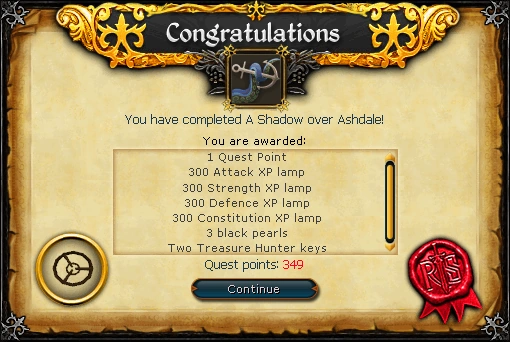
- 1 quest point
- 300
 experience lamp
 - 300 experience lamp
- 300 experience lamp
- 300 experience lamp
- 3 black pearls
- May break one per day to receive bonus experience in any skill equal to that of a large fallen star
- Access to the dead man's chest in the Ashdale Caves to repeat the battle against Agoroth, giving a black pearl (or coins) with bonus experience in any skill equal to that of a medium fallen star. This can be done once per week for free players or twice a week for members.
- 757 coins, four uncut sapphires and an uncut emerald, for searching the chests in the dungeon
- 2 Treasure Hunter keys and 2 Hearts of Ice
- Music unlocked
Achievement
- Shadow Hanging Over Me ( 5) - Claim all treasure from the chests during (or from Gudrik after) the 'A Shadow over Ashdale' quest.
Transcript
Trivia

- This was the first new quest released to free players that did not replace an existing quest since The Blood Pact, which was released in 2010.
- The quest's name is a reference to "The Shadow over Innsmouth", a novella by H. P. Lovecraft. The story's plot revolves around a seaside town in Massachusetts known as Innsmouth, which is inhabited by a race of beings known as the Deep Ones.
- The music heard while fighting Agoroth is the same music heard when fighting Vorago.
- Upon completion of the quest the Adventurer's Log states: I defeated Agoroth, the crassians' leader, and freed the people of Ashdale.
- There are references in the quest to multiple items of traditional pirate lore, some of which are also referenced in the Pirates of the Caribbean movie series:
- The black pearls given as a reward from the quest.
- The dead man's chest.
- The tentacles that attack the ship, like tentacles of a kraken.
- The name of the ship you battle Agoroth on is the Empress, a possible reference to the Empress from Pirates of the Caribbean: At World's End.
- If the player has a combat level that goes beyond Free-to-Play armour requirements, this quest can be one of the most difficult Free-to-Play quests to complete as the monsters scale into Members gear requirements.
- The Crassian warriors do around 30,000 damage with their ranged attack, as can be seen by getting lucky with a defender during the quest.
A Shadow over Ashdale | |||||||
|---|---|---|---|---|---|---|---|
| NPCs |
| ||||||
| Items |
| ||||||
| Rewards |
| ||||||
| Locations |
| ||||||
| Music |
| ||||||
| Miscellaneous |
| ||||||